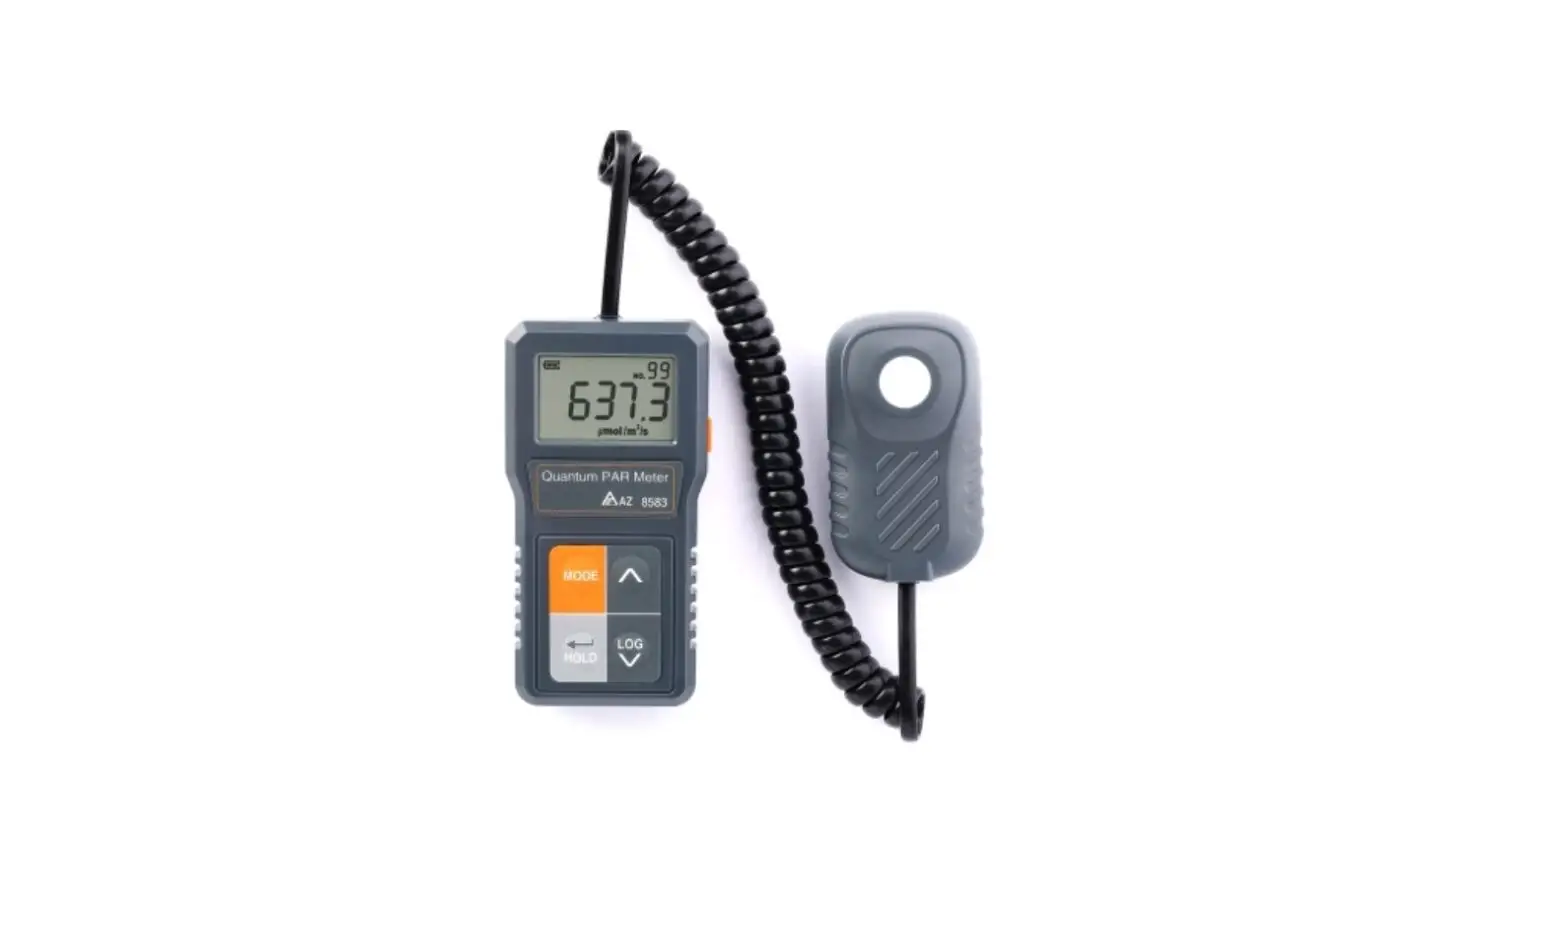
AZ Instrument 8583 Detachable Full Spectrum PAR Meter User Manual
PREPARATION
- Install 2pcs AAA batteries
- Using enclosed suitable RJ11 cable to connect PAR sensor with meter


POWER UP/OFF
- Press orange power key on the right side of meter to turn the meter on.
- Press orange power key more than 3 seconds to turn off
HOLD
Press HOLD key to freeze reading. Press again to release.
LOG
Press LOG key to memorize reading. Max. 99 points
MODE
Press MODE key to choose calibration or LOG recall or factory reset. Press Enter key to enter the mode you want.
INTRODUCTION
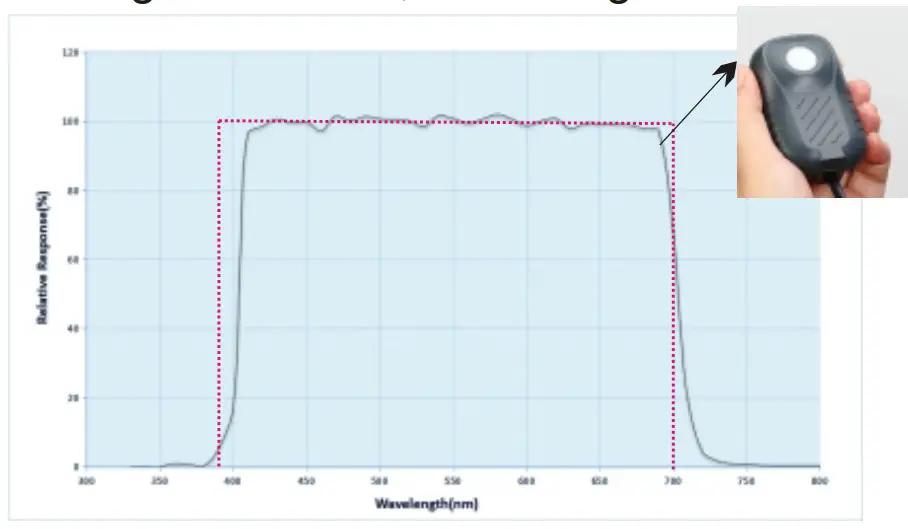
Thank you for purchasing this accurate full-spectrum PAR meter. It . is designed to measure Photo synthetically Active Radiation, PAR) flux in wavelengths ranging from 400 to 700nm. There is a proportional relationship between the number of photons absorbed in 400 to 700nm and the rate of photosynthesis in plants, which is important for horticultural studies and monitoring plant physiology
Features
- Stable measurement of PAR (PPDF
- Photosynthetic Photon Flux Density) 2 in unit of µmol/m /second.
- Provided with 2 high quality RJ11 ethernet cables. Probe is replaceable.
- Hold function to freeze data in dark place and then check later on.
- 99 points manual log and recall to skip note and pencil.
- Low power indicator for battery change
- Auto power off to save battery power.
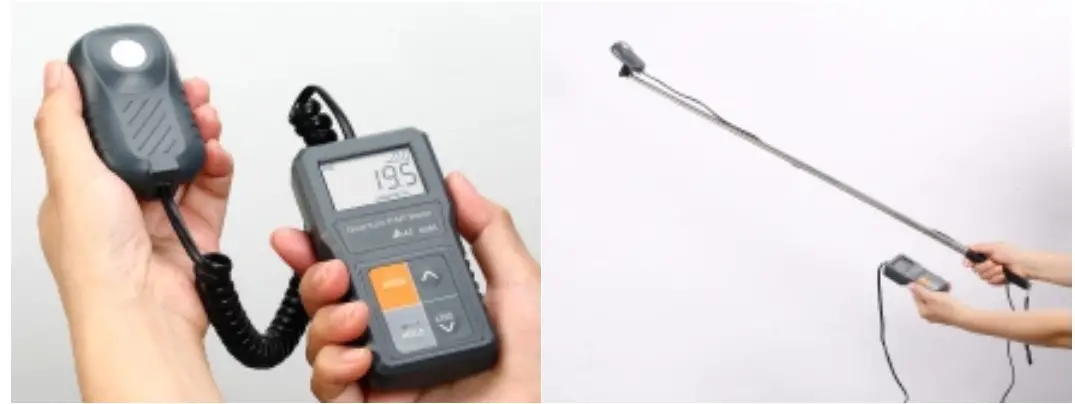
- Tripod mount hole is on the rear side of PAR sensor.
- Provided with selfie stick to extend the measurable range of sensor.
- High accuracy for 400 to 700nm under all light sources, including LEDs.

MATERIAL SUPPLIED
- The meter x 1
- PAR sensor x 1
- Straight RJ11 cable x 1
- Coiled RJ 11 cable x 1
- Selfie stick x 1
- Battery x 2 (AAA size )
- Operation manual x1
- Hard carry case x1
Optional accessory:
Spare PAR sensor with coil cable & straight cable.
LCD DISPLAY
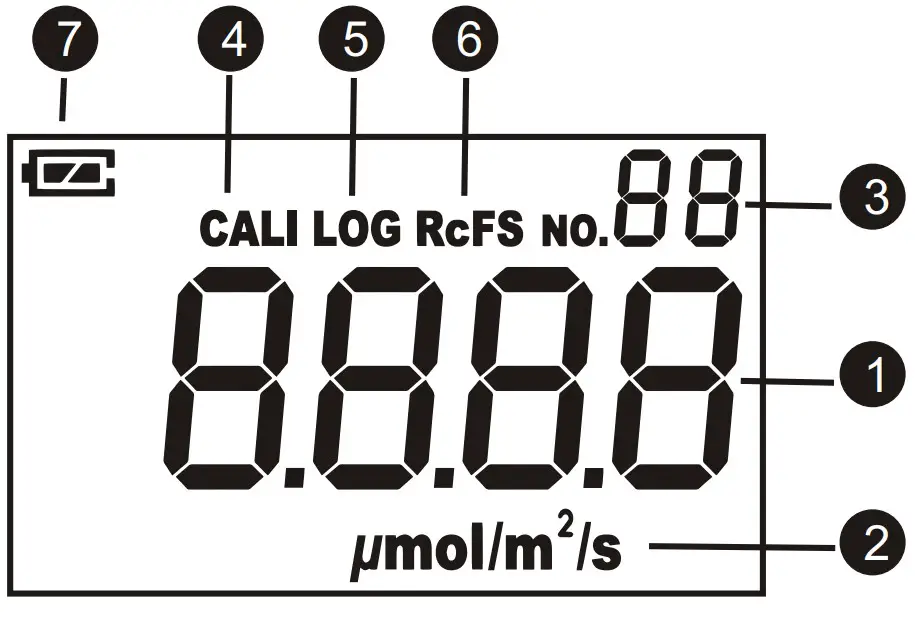
- PAR value
- PAR unit
- Memory points & Hold icon
- Zero calibration icon
- Log recall icon
- Restore to factory setting icon
- Battery low voltage indicator
KEYPAD
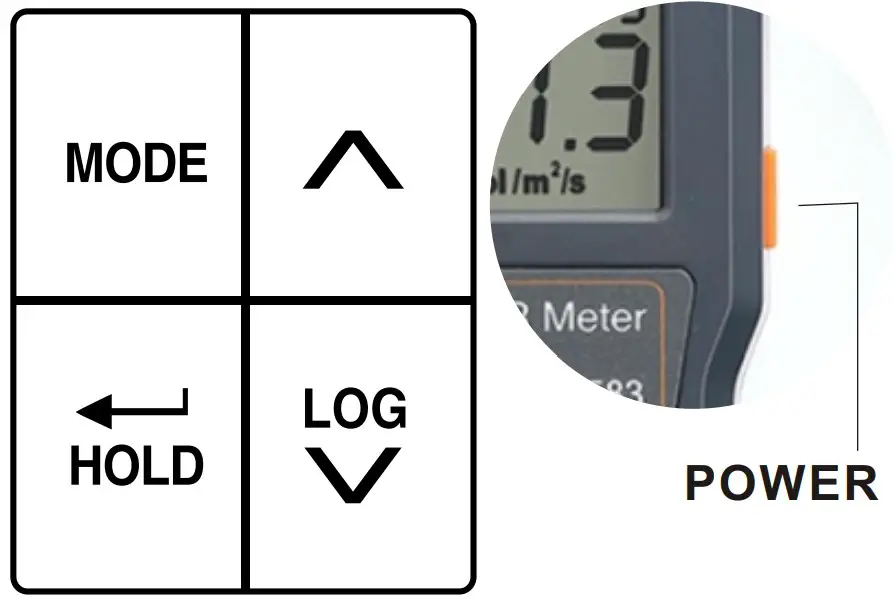
- Press to turn the meter on.
- Press >3 seconds to turn off.
- Auto power off while keypad is idle for 5 minutes.
- LOG: Press to memorize reading.
- HOLD: Maximum 99 points.
- Press to freeze reading.
- Press again to release.
- MODE: Press MODE key to choose calibration or LOG recall or factory reset.
 Scroll up or down to check the logged record while in log recall mode.
- Change setting YES or NO while in reset mode.
 Press to enter the mode you want.
- Long press > 3 seconds in zero calibration and factory reset mode to confirm the execution.
MEASUREMENT
- Using enclosed suitable RJ11 cable to connect PAR sensor with meter

- Face the white PAR sensor detection area to the light source that you want to measure.
- If the place you stand is too dim to check reading, press HOLD key to freeze reading and check in brighter place.
- If you have more than one space to measure, press LOG key to record and then review in recall mode later on. Free your hands from pencil and note.
- To review logged data one by one. First, press MODE key to find “LOG”. Press “ “ to get in. Then press “
 or “
or “  to review one by one. Press “ “ to quit review.
 - To delete all logged data, please see restore to factory setting section for the operation details.
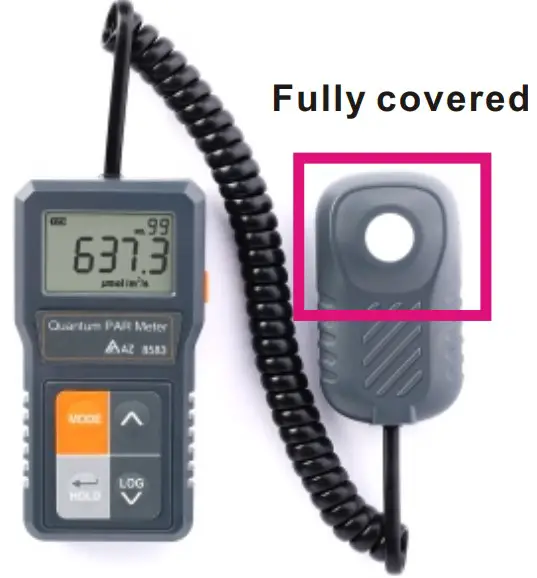
CALIBRATION (ZERO)
After certain time of usage, such as one year time, you can do zero function if the measured value is not zero while in completely dark place.
- Make sure the PAR sensor is fully covered while you plan to execute zero function.
FACTORY SETTING
- This allows you to erase all logged data and restore to factory setting if you do zero function improperly.
- Press MODE key to find “RcFS”. Press “ “ to get in. Then press “ or “ to choose Yes or No.
To confirm it, press “ “ more then 3 seconds to execute.
It will beep once while reset function is done and quit to normal status automatically.
LOW-BATTERY
The battery icon shows the battery power status in three levels: Good, Middle and Low.
When the battery icon starts to flash, it means the battery power status is low,please replace with 2 fresh batteries to ensure accurate measurements.
Before long term storage, please be sure to remove batteries to avoid liquid leakage risk.
TROUBLESHOOTING
- Power on but no display
- Make sure the time of pressing power key is more than 0.2 second.
- Check the batteries are in good contact with correct polarity.
- Replace new batteries and try again.
- Display shows “ – – – “ PAR sensor isn’t connected. Please re-connect and also check the cable and connector. Should be no object attached to RJ11 connector.
SPECIFICATION
| Model | 8583 |
| Spectral Range | 400±10nm ~ 700±10nm |
| Measurement Range | 0~4000μmol/m /sec |
| Display resolution | 0.1μmol/m /sec for 0~999 , 2 1μmol/m /sec for 1000~4000 |
| Accuracy | ±5 or ± 5% of reading, whichever is greater |
| Repeatability & Non-linearity | ±1 μmol/m /sec Less than 3 % (up to 4000 μmol/m /sec) |
| Long-term Drift per Year | Less than 2 % per year |
| LCD update time | 0.5 second |
| Field of View | 180° |
| Directional (Cosine) Response | ± 5 % at 75° zenith angle |
| Calibration Uncertainty | ±5% |
| Temperature Response | ±0.02%per C |
| ZERO function | YES |
| RESET function | YES |
| LCD size | 25(H)x40(W)mm |
| Operating temp. | 0~50 C |
| Operating RH% | Humidity < 80% |
| Storage temp. | -10~50 C |
| Storage RH% | Humidity < 90%, no condensation |
| Dimension | Meter:115(L)x60(W)x24(H)mm PAR sensor:80(L)x45.6(W)x26(H) mm |
| Cable | 12 ft straight RJ11 cable , 4.9 ft coiled Rj11cable |
| Selfie stick | 22 cm storage , 100cm extended |
| Weight | ~115g ( w/o battery and cable) |
| Power Supply/Consumption | AAA battery x 2pcs, less than 10mA |
| Standard Package | Meter/PAR sensor/Straight cable/Coiled cable/ Selfie stick/Battery/Manual/Hard carry case |
WARRANTY
The meter is warranted to be free from defects in material and workmanship for a period of one year from the date of purchase. This warranty covers normal operation and does not cover battery, misuse, abuse, alteration, tampering, neglect, improper maintenance or damage resulting from leaking batteries.
Proof of purchase is required for warranty repairs. Warranty is void if the meter has been opened .
RETURN AUTHORIZATION
Authorization must be obtained from the supplier before returning items for any reason. When requiring a RA (Return Authorization) , please include data regarding the defective reason, the meters are returned along with good packing to prevent any damage in shipment and insured against possible damage or loss
Accuracy, the Zenith of
Measuring / Testing Instruments !
- Hygrometer/Psychrometer
- Thermometer
- Anemometer
- Sound Level Meter
- Air Flow meter
- Infrared Thermometer
- K type Thermometer
- K.J.T. type Thermometer
- K.J.T.R.S.E. type Thermometer
- pH Meter
- Conductivity Meter
- T.D.S. Meter
- D.O. Meter
- Indoor Air Quality Meter
- Manometer
- Tacho Meter
- Data logger
- Temp./RH datalogger
- Wireless datalogger ……….


