![]()
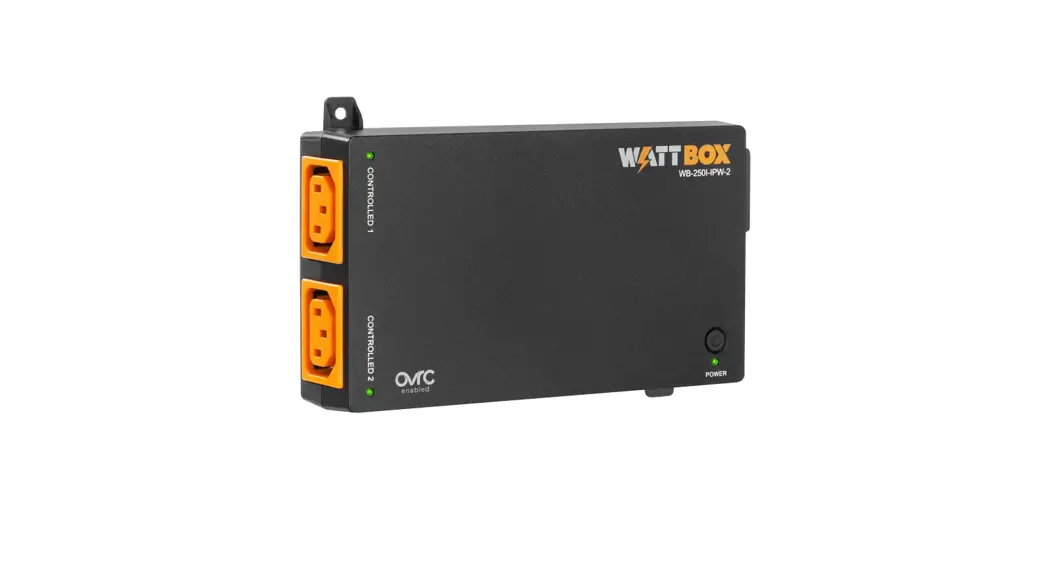
WB-250I-IPW-2
WattBox® 250-Series Wi-Fi Surge Protector 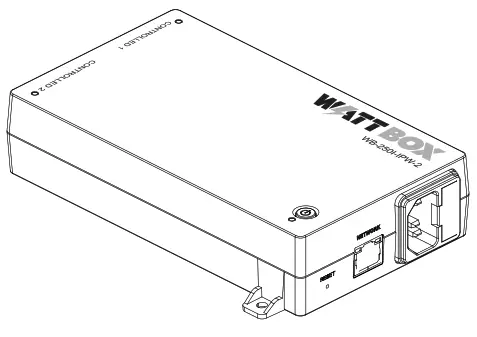 Quick Start Guide
Anatomy
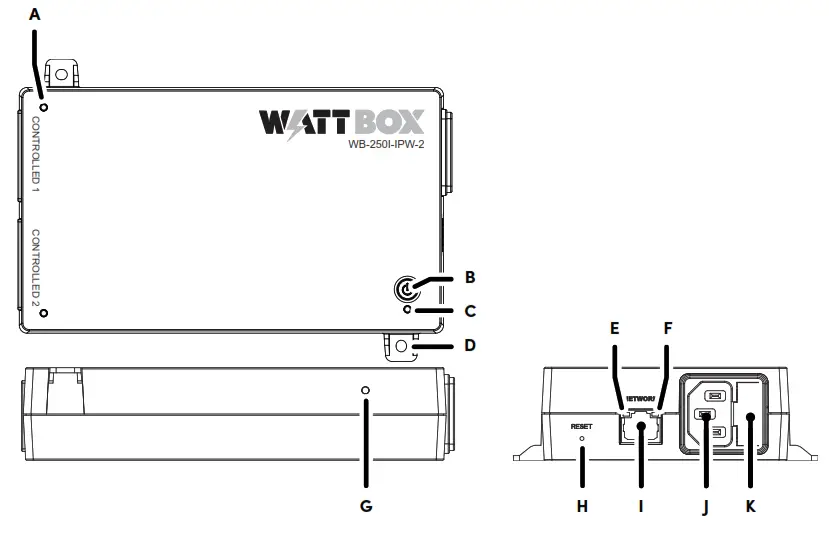
A. Outlet LEDs: These illuminate when power to the matching outlet is on.
The outlets are switchable (IP controlled).
B. AC Power Button: Press to manually toggle the outlets on or off.
C. Power/Network LED: See “Power/Network” on page 4.
D. Mounting Eyelets.
E. Internet LED: See “Internet LED” on page 4.
F. Link/Activity LED: See “Link/Activity LED” on page 4.
G. Surge Protection LED: See “Surge Protection LED” on page 4.
H. Reset Button: Use a thin tool (paper clip, toothpick) to press this to restart the network card (no settings are changed). Press and hold 5 seconds to set the power strip to DHCP. Press and hold 10 seconds to reset the power strip to factory default.
I. Network Connection: Connect to the Local Area Network (LAN) for IP setup, control, and monitoring.
J. Power Inlet: Connect a 3-prong IEC power cord.
K. External Fuse*: May need replacement after an overload.
*Caution: For inlet fuse rating: F10AH/250VAC. Failure to replace the fuse with the same size, type, and ratings will damage the device, connected, and nearby equipment, resulting in an electrical shock, fire, explosion, or injury.
LED Indicators
| Link/Activity LED | Blinking Green: Send/Receive Activity. Off: No data is passing on the wired connection. |
| Internet LED | Solid Green: All host pings successful. Blinking Green: At least one host ping is failing. Off: All host pings timed out. |
| Power/ Network | Solid Amber: Unit has AC power, and a wired network connection. Solid Green: Unit has AC power, and Wi-Fi is connected. Blinking Amber: Unit has AC power, and is searching for Wi-Fi. Off: No AC power. |
| Outlet LEDS | Solid Green: Outlet is on. Off: Outlets is off. Note: Each outlet is controllable. |
| Surge Protection LED | Solid Green: The WattBox is powered on and outlets are protected. Off: The WattBox is not powered on, or the MOVs have opened, removing power from the outlets. |
Package Contents
- The WattBox 250I series power strip
- Removable, region-specific power cord (in over-pack box, not the PDU carton)
- 2 wall anchors with M3 16mm screws
Mounting Instructions
This WattBox can be mounted on any flat surface, either vertically or horizontally.
Use the screws and anchors provided to install the unit on a wall as pictured to the right. Use double-sided tape, hook and loop closures, or cable ties (not provided) to attach the WattBox to a surface.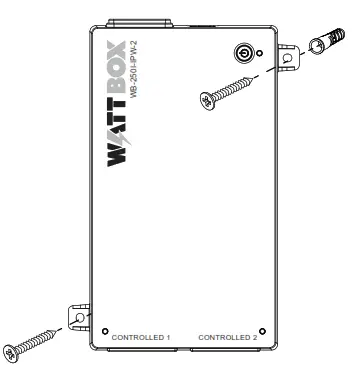
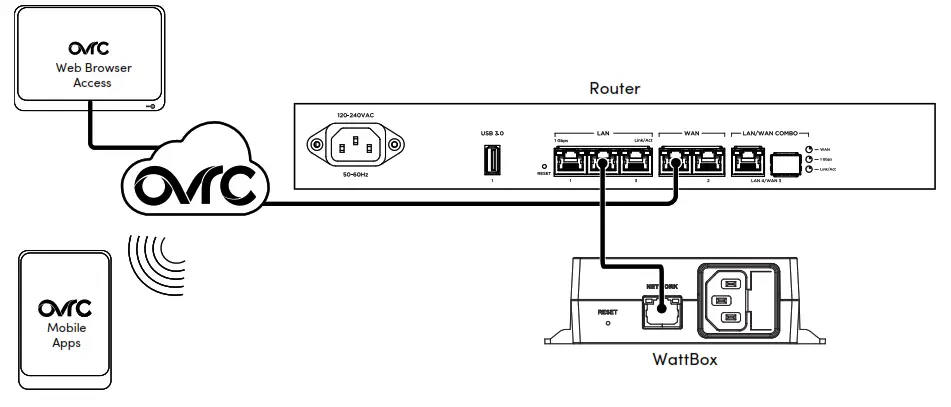
Connection Diagram
 Configuration
 Configuration
The WB-250I has many powerful features that are accessed through OvrC, our award-winning remote management tool.
If you are not familiar with OvrC, visit ctrl4.co/ovrc to learn more.
OvrC Setup
- Verify the WB-250I is connected to the internet via your router or network switch.
- Log in to your OvrC account.
- Add the WB-250I by entering its MAC address and service tag (ST) number.
You can now complete setup through OvrC. Ensure your firmware is up to date, schedule automatic reboots, set up power-on delays, etc.
Logging in to the Web Interface
You must enter the username and password to access the web interface. The default entries are below; change these to maintain proper security (and log them below).
| Default | Custom | |
| Username | wattbox | |
| Password | wattbox |
Note: The new password can be no longer than 15 characters.
Optional Steps for Wireless Operation
Note: This device only connects to Wi-Fi when it does not detect a wired connection.
- While still connected to the ethernet cable, open a web browser and navigate to the IP address of the WB-250I, then log in to its local interface.
- On the Configure page click Enable Wireless, then go to Wireless IP Settings and click the Scan button. Follow the on-screen prompts.
- When prompted, disconnect the ethernet cable (otherwise the WB-250I continues to operate in wired mode). The power LED turns from solid amber to blinking green, which means the device is connecting to Wi-Fi. Once the wireless connection is successful, the LED turns solid green.
Troubleshooting
| Symptom | Possible Cause | Remedy |
| A device won’t power up when the WattBox is powered on. | t The WattBox outlet is switched off. | Use OvrC, or the web UI, to turn the outlet on. |
| The device is not powered on. | Turn the device on. | |
| WattBox is not receiving power. | No power is being supplied. | Verify the AC power plug is plugged into a properly grounded 220 – 240V (nominal) wall outlet. Some outlets are controlled by a wall switch. Try flipping the switches in the room, especially those near the wall outlet. Also check the location’s circuit breakers. |
| Too many devices are connected. | Check the fuse on the AC inlet. If it’s blown, reduce the load and replace the fuse. | |
| Surge protection has been consumed during a surge event. | Replace the WattBox. | |
| Speakers emit a humming or buzzing noise. | WattBox is sharing power with gear that is not properly grounded. | Connect the WattBox to a dedicated outlet. Unplug components one at a time to see if the noise stops. |
Specifications
| Outlet Type | IEC 60320 C13 |
| Number of Outlets | 2 |
| Number of IP Controllable Outlets | 2 |
| Line Voltage | 220–240VAC, 50/60Hz |
| AC Input Connection | IEC 60320 C14 |
| Fuse Rating | 10A, 250VAC |
| Power Rating | 1440W |
| Current Rating | 6A |
| Voltage Protection Rating | L–N 1.2kV, L–E 2.3kV, N–E 1.9kV |
| Joule Rating | 1260J |
| Surge Component | Metal Oxide Varistor (MOV) |
| Protection Modes | L–N, L–E, N–E |
| Peak Impulse Current | 45kA |
| Disconnect Circuitry | Ye s |
| Thermal Fuse | Ye s |
| EMI/RFI Noise Filtration | N/A |
| Outlet Filter | N/A |
| Operating Temperature Range | −10 °C to 40 °C (−14 °F to 104 °F) |
| Certifications | CE Certified RCM Certified CB Safety Certified |
| Dimensions (WxHxD) | 169 mm (6.65″) × 36.1 mm (1.42″) × 117.52 mm (4.63″) |
Technical Support
For chat and telephone, visit ctrl4.co/techsupport • Email: [email protected]
Visit ctrl4.co/tc for discussions, instructional videos, news, and more.
Warranty and Legal Notices
Find details of the product’s Limited Warranty and other resources such as regulatory notices and patent and safety information, at snapone.com/legal or request a paper copy from Customer Service at 866.424.4489.
Copyright ©2022, Snap One, LLC. All rights reserved. Snap One and its respective logos are registered trademarks or trademarks of Snap One, LLC (formerly known as Wirepath Home Systems, LLC), in the United States and/or other countries. 4Store, 4Sight, Control4, Control4 My Home, SnapAV, OvrC, and WattBox are also registered trademarks or trademarks of Snap One, LLC. Other names and brands may be claimed as the property of their respective owners. Snap One makes no claim that the information contained herein covers all installation scenarios and contingencies, or product use risks. Information within this specification subject to change without notice.
220319 Part #200-WB-250I-IPW-2-001-A


