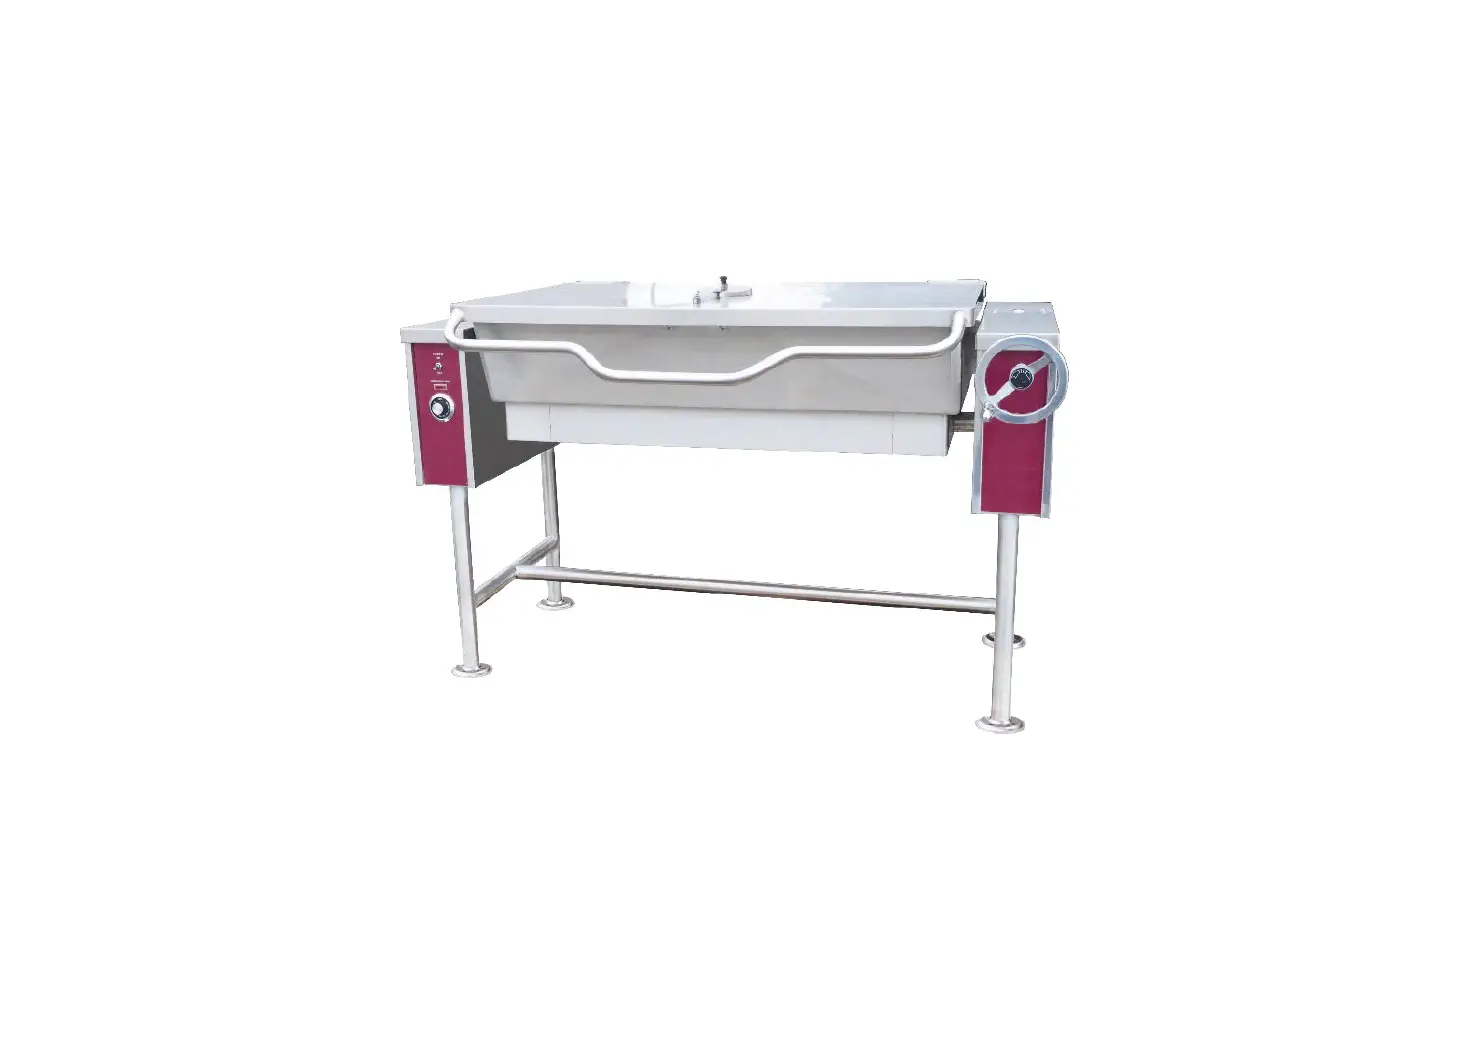
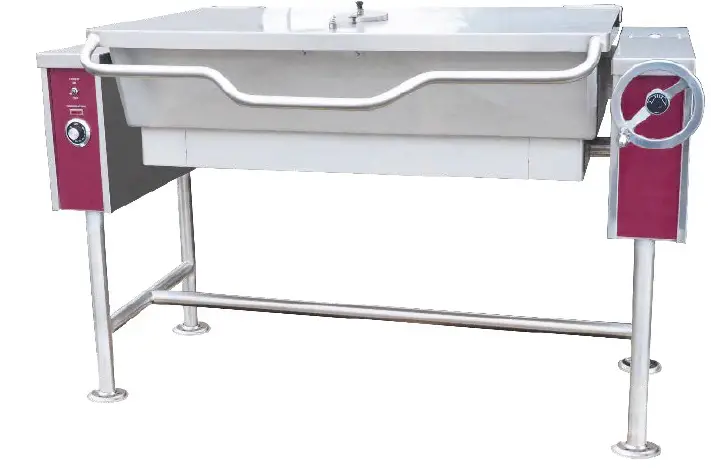
CROWN ETS-30 Electric Tilting Skillets
WARNING
Improper installation, adjustment, alteration, service or maintenance can cause property damage, injury or death. Read the installation, operating and maintenance instructions thoroughly before installing or servicing this equipment.
SAFETY PRECAUTIONS
Before installing and operating this equipment, be sure everyone involved in its operation is fully trained and aware of precautions. Accidents and problems can be caused by failure to follow fundamental rules and precautions.
The following symbols, found throughout this manual, alert you to potentially dangerous conditions to the operator, service personnel, or to the equipment.
![]() DANGER
DANGER
This symbol warns of immediate hazards that will result in severe injury or death.![]() WARNING
WARNING
This symbol refers to a potential hazard or unsafe practice that could result in injury or death.![]() CAUTION
CAUTION
This symbol refers to a potential hazard or unsafe practice that could result in injury, product damage, or property damage.
NOTICE
This symbol refers to information that needs special attention or must be fully understood, even though not dangerous.
IMPORTANT NOTES FOR INSTALLATION AND OPERATION
WARNING
This is the safety alert symbol. It is used to alert you to potential personal injury hazards. Obey all safety messages that follow this symbol to avoid possible injury or death.
FOR YOUR SAFETY:
Do not store or use gasoline or other flammable vapors or liquids in the vicinity of this or any other appliance.
Improper installation, operation, adjustment, alteration, service or maintenance can cause property damage, injury or death. Read the installation, operating and maintenance instructions thoroughly before installing, operating or servicing this equipment.
NOTICE
This product is intended for commercial use only. NOT FOR HOUSEHOLD USE.
- Contact the factory, the factory representative or local service company to perform maintenance and repairs.
- Adequate clearances must be maintained for safe and proper operation.
- This manual should be retained for future reference.
Service Connections
SERVICE CONNECTIONS![]() – ELECTRICAL CONNECTION: As specified on data plate.
– ELECTRICAL CONNECTION: As specified on data plate.
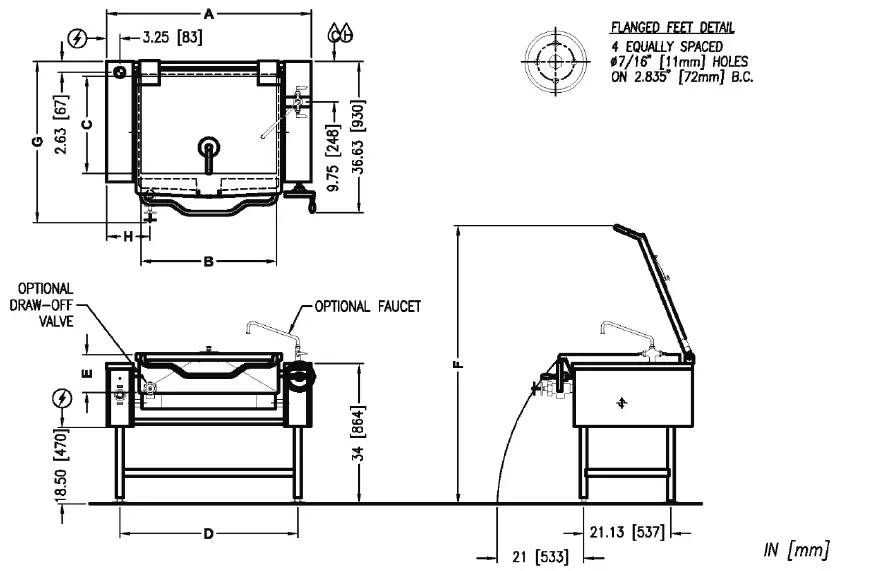
DIMENSIONS
| Model | Capacity | A | B | C | D | E | F | G | H | ||
| Ø2 | Ø3 | Ø2 | Ø3 | ||||||||
| ETS-30 | 30 Gallons (114 liters) | 49.75” (1264) | 32.88” (835) | 23.50” (597) | 43.13” (1095) | 9.25” (235) | 67.63” (1718) | 39” (991) | 43.5” (1105) | 10.63” (370) | 11.13” (283) |
| ETS-40 | 40 Gallons (152 liters) | 59” (1499) | 42.88” (1089) | 23” (584) | 52.50” (1334) | 9.25” (235) | 67.63” (1715) | 38.75” (984) | 43.25” (1099) | 10.25” (260) | 10.75” (273) |
ELECTRICAL CHARACTERISTIC
| Model | kW | |
| Standard | Optional | |
| ETS-30 | 18 | 12 |
| ETS-40 | 27 | 18 |
| kW | PHASE | Amps Per Line | |||||
| 208V | 220V | 240V | 380V | 415V | 480V | ||
| 12 | 1 | 57.7 | 54.5 | 50.0 | N/A | N/A | N/A |
| 3 | 33.3 | 31.5 | 28.9 | 18.2 | 16.7 | 14.4 | |
| 18 | 1 | 86.5 | 81.8 | 75.0 | N/A | N/A | N/A |
| 3 | 50.0 | 47.2 | 43.3 | 27.3 | 25.0 | 21.7 | |
| 27 | 3 | 75.0 | 70.9 | 65.0 | 41 | 37.6 | 32.5 |
SPECIFICATIONS
| Model | Capacity | |
| ETS-30 | 30 Gallon | 114 Liter |
| ETS-40 | 40 Gallon | 152 Liter |
| Model | Shipping Weight | Minimum Clearance * | |
| ETS-30 | 501 lbs. (228 kg) | SIDES | 6” (152) |
| ETS-40 | 547 lbs. (248 kg) | BACK | 6” (152) |
As continued product improvement is a policy of Crown, specifications are subject to change without notice.
Installation
UNPACKING
IMMEDIATELY INSPECT FOR SHIPPING DAMAGE
Immediately after unpacking the steamer, check for possible shipping damage. If the steamer is found to be damaged, save the packaging material and contact the carrier within 15 days of delivery.
Before installing, verify that the electrical service agrees with the specifications on the rating plate located on the left side panel as you face the front of the braising pan. If the supply and equipment requirements do not agree, contact your dealer or Crown Food Service Equipment Ltd.
Installation Instructions
Set skillet in place and level appliance using spirit level. Mark hole locations on floor through anchoring holes provided in flanged adjustable feet.
Remove appliance and drill holes in locations marked on floor and insert proper anchoring devices.
Re-level the appliance, leveling the unit left to right and front to back.
Bolt and anchor appliance securely to the floor. Seal bolts and flanged feet with Silastic or equivalent compound.
Service Connections
All internal wiring for the skillet is complete.
Make service connections as indicated on page 4.
This must be a waterproof connection from incoming lines.
Ground skillet to terminal provided in control housing. A wiring diagram is provided and is located inside the control cover panel.
If faucet is provided connect water supply and check for proper operation.
WARNING
If this appliance is equipped with casters, the installation shall be made with flexible power supply conduit and adequate means must be provided to limit the movement of the appliance without depending on, or transmitting stress, to the electrical conduit; restraining means may be attached to the bracket near the entry of the power supply connection on the appliance.
If the unit is also equipped with an optional water fill valve it too must be installed with a flexible water supply tube, a quick disconnect and strain relief.
Operation
Ensure the power supply is connected to unit and that circuit breakers are on.
Tilt skillet to ascertain that it moves easily. Turn handle as far as it will go and return to upright position.
Turn power switch “ON”. Set thermostat dial to desired temperature. Preheat skillet and allow it to cycle several times to equalize the heat across entire pan surface. Cooking will occur faster with the cover down.
At the end of cooking turn thermostat to “OFF”, turn power switch “OFF”, remove product.
NOTICE
The skillet is equipped with a safety switch that is activated when the pan is tilted. In the tilted position, power supply to the heating elements is interrupted. The unit can only be operated in the down position.
WARNING
Never tilt pan with cover down.
- When this appliance is installed with casters, a restraint to prevent damage to the power supply conduit should have been installed. If disconnection of the restraint is necessary, reconnect this restraint after the appliance has been returned to its originally installed position.
Cleaning
WARNING
- Disconnect the power supply to the appliance before cleaning or servicing.
- Never spray water into electric controls or components!
- The equipment and its parts are hot. Use care when operating, cleaning and servicing.
CAUTION
Do not use cleaning agents that are corrosive.
- The Electric Tilting Skillet should be cleaned after each use.
- Soak cooking surface with water and a mild soap to remove any food stuck to surface. Wash entire unit surface with mild detergent and water. Rinse entire unit and dry.
- Ensure that pour spout, strainer, cover and sides of unit are also cleaned.
COOKING GUIDELINES
The tilting skillet is one of the most versatile pieces of equipment to be found in any restaurant or institutional kitchen. It enables the cook to stew, simmer, pan fry, braise, grill or sauté and all with a very uniform heat pattern. The figures given below are suggested quantities and temperature settings and estimated numbers of orders per load and per hour. When two temperatures are given, first is to start the product, second to finish the product.
The following temperatures should be used:
| Cooking Method | Temperature (°F) | Thermostat Setting |
| Simmering | 200 Maximum | 1 – 4 |
| Sautéing | 225 – 275 | 5 – 6 |
| Searing | 300 – 350 | 7 – 8 |
| Frying | 325 – 375 | 8 – 9 |
| Grilling | 350 – 425 | 9 – 10 |
| Item | Portion Size | Thermostat Settings (°F) | Batches Per Hour | ETS-30 Per Load | ETS-40 Per Load | ||
| Qty. | Portions | Qty. | Portions | ||||
| BREAKFAST FOODS | |||||||
| Bacon | 3 slices | 350 | 12 | 2 lb | 10 | 3 lb | 15 |
| Eggs | |||||||
| – Boiled – Hard | 1 egg | 225 | 5 | 50 eggs | 50 | 75 eggs | 75 |
| – Boiled – Soft | 1 egg | 225 | 8 | 50 eggs | 50 | 75 eggs | 75 |
| – Fried | 1 egg | 400 | 4 | 30 eggs | 30 | 45 eggs | 45 |
| – Poached | 1 egg | 225 | 5 | 36 eggs | 36 | 60 eggs | 60 |
| – Scrambled | 1-1/2 eggs | 300-200 | 1 | 18 gal. | 720 | 28 gal. | 1100 |
| French Toast | 3 slices | 450 | 7 | 35 slices | 12 | 50 slices | 17 |
| Regular Oatmeal | 1/2 cup | 250 | 2 | 20 lb (100 cups) | 500 | 40 lb (200 cups) | 1000 |
| Pancakes | 2 each | 400 | 10 | 30 each | 15 | 50 each | 25 |
| FISH | |||||||
| Clams | 1 pint | 400 | 10 | 10 quarts | 20 | 15 quarts | 30 |
| Fish Cakes | 2 – 3 oz | 400 | 5 | 70 – 3 oz | 35 | 110 – 3 oz | 55 |
| Haddock Fillet | 4 oz | 400 | 4 | 60 – 4 oz | 60 | 90 – 4 oz | 90 |
| Halibut Steak | 5 oz | 450 | 3 | 60 – 4 oz | 60 | 90 – 4 oz | 90 |
| Lobster | 1 – 1 lb | 350 | 4 | 20 – 1 lb | 20 | 30 – 1 lb | 30 |
| Swordfish | 5 oz | 450 | 3 | 50 – 5 oz | 50 | 75 – 5 oz | 75 |
| SAUCES, GRAVIES, SOUPS | |||||||
| Brown Gravy | 1 oz | 350 – 200 | 2 | 18 gal. | 2300 | 35 gal. | 4500 |
| Cream Sauce | 2 oz | 250 – 175 | 1 | 18 gal. | 1150 | 35 gal. | 2250 |
| Cream Soup | 6 oz | 200 | 1 | 18 gal. | 375 | 35 gal. | 725 |
| French Onion Soup | 6 oz | 225 | 1 | 18 gal. | 350 | 35 gal. | 700 |
| Meat Sauce | 4 oz | 350 – 200 | 1 | 18 gal. | 575 | 35 gal. | 1100 |
| VEGETABLES | |||||||
| CANNED | 3 oz | 400 | 6 | 30 lb | 125 | 45 lb | 200 |
| FRESH | |||||||
| Beans, Wax,Green | 3 oz | 400 | 3 | 25 lb | 125 | 50 lb | 250 |
| Beets | 3 oz | 400 | 1 | 30 lb | 125 | 60 lb | 300 |
Electric Tilting Skillets
| Item | Portion Size | Thermostat Settings (°F) | Batches Per Hour | ETS-30 Per Load | ETS-40 Per Load | ||
| Qty. | Portions | Qty. | Portions | ||||
| VEGETABLES (continued) | |||||||
| FRESH (continued) | |||||||
| Broccoli | 3 oz | 400 | 3 | 25 lb | 125 | 40 lb | 200 |
| Cabbage | 3 oz | 400 | 5 | 20 lb | 80 | 30 lb | 125 |
| Carrots | 3 oz | 400 | 2 | 35 lb | 150 | 70 lb | 300 |
| Cauliflower | 3 oz | 250 | 5 | 15 lb | 75 | 25 lb | 125 |
| Corn | 1 ear | 400 | 8 | 50 ears | 50 | 75 ears | 75 |
| Potatoes | 3 oz | 400 | 2 | 40 lb | 200 | 60 lb | 300 |
| Spinach | 4 oz | 250 | 10 | 40 lb | 200 | 9 lb | 35 |
| Turnips | 4 oz | 400 | 2 | 20 lb | 100 | 30 lb | 150 |
| FROZEN | |||||||
| Beans, French Green | 3 oz | 400 | 6 | 15 lb | 60 | 22-1/2 lb | 90 |
| Lima Beans | 3 oz | 250 | 4 | 15 lb | 60 | 22-1/2 lb | 90 |
| Broccoli | 3 oz | 400 | 8 | 12 lb | 50 | 18 lb | 75 |
| Sliced Carrots | 3 oz | 250 | 6 | 15 lb | 60 | 22-1/2 lb | 90 |
| Small Whole Carrots | 3 oz | 250 | 3 | 15 lb | 50 | 22-1/2 lb | 90 |
| Corn | 3 oz | 250 | 18 | 15 lb | 50 | 22-1/2 lb | 90 |
| Small Whole Onions | 3 oz | 250 | 7 | 15 lb | 50 | 22-1/2 lb | 90 |
| Peas | 3 oz | 400 | 10 | 15 lb | 75 | 22-1/2 lb | 110 |
| Spinach | 3 oz | 400 | 3 | 15 lb | 75 | 22-1/2 lb | 110 |
| DESSERTS, PUDDINGS, SWEET SAUCES | |||||||
| Butterscotch Sauce | 1 oz | 200 | 1 | 18 gal. | 2300 | 35 gal. | 4500 |
| Cherry Cobbler | 3 oz | 200 | 1 | 18 gal. | 750 | 35 gal. | 1500 |
| Chocolate Sauce | 1 oz | 200 | 1 | 18 gal. | 2300 | 35 gal. | 4500 |
| Cornstarch Pudding | 4 oz | 200 | 1 | 18 gal. | 575 | 35 gal. | 1100 |
| Fruit Gelatin | 3 oz | 250 | 2 | 18 gal. | 750 | 35 gal. | 1500 |
| MEAT-POULTRY | |||||||
| BEEF | |||||||
| American Chop Suey | 6 oz | 400 – 225 | 2 | 18 gal. | 350 | 35 gal. | 700 |
| Beef Stew | 8 oz | 300 | – | 18 gal. | 280 | 35 gal. | 560 |
| Corned Beef Hash | 5 oz | 400 | 5 | 16 lb | 50 | 25 lb | 75 |
| Cheeseburger | 3 oz | 300 | 12 | 7 lb | 35 | 10 lb | 50 |
| Hamburger | 3 oz | 300 | 15 | 7 lb | 35 | 10 lb | 50 |
| Meatballs | 1 oz | 400 – 225 | 3 | 12-1/2 lb | 65 | 18 lb | 100 |
| Pot Roast | 2 oz | 350 – 200 | 120 lb | 500 | 180 lb | 750 | |
| Salisbury Steak | 5 oz | 400 | 3 | 16 lb | 50 | 24 lb | 75 |
| Sirloin Steak | 6 oz | 400 | 5 | 15 lb | 40 | 22-1/2 lb | 60 |
| Swiss Steak | 4 oz | 300 – 200 | 1 | 25 lb | 110 | 40 lb | 160 |
| CHICKEN | |||||||
| Pan Fried | 2-1/4’s | 350 | 3 | 50 pieces | 25 | 80 pieces | 40 |
| Whole | 2 oz | 350 – 200 | 16 – 5 lb | 200 | 24-5 lb | 265 | |
| ITEM | PORTION SIZE | TEMP.(°F) | BATCHES PER HOUR | GLTS-30 PER LOAD | GLTS-40 PER LOAD | ||
| QTY. | PORTIONS | QTY. | PORTIONS | ||||
| MEAT-POULTRY (continued) | |||||||
| FRANKFURTERS | |||||||
| Grilled | 2 oz | 300 | 8 | 22 lb | 176 | 33 lb | 264 |
| Boiled | 2 oz | 250 | 12 | 16 lb | 128 | 25 lb | 200 |
| PORK | |||||||
| Ham Steak | 3 oz | 400 | 8 | 10 lb | 50 | 15 lb | 75 |
| Pork Chops | 5 oz | 350 | 4 | 15 lb | 50 | 25 lb | 75 |
| Sausage Links | 3 links | 350 | 7 | 30 lb | 120 | 45 lb | 180 |
| TURKEY | |||||||
| Off Carcass | 2 oz | 400 – 200 | – | 3 – 26-30 lb | 200 | 4 – 26-30 lb | 275 |
| On Carcass | 2 oz | 400 – 200 | – | 4 – 16-20 lb | 175 | 6 – 16-20 lb | 265 |
| MISCELLANEOUS | |||||||
| Grilled Cheese Sandwich | 1 sandwich | 400 | 8 | 35 sandwiches | 35 | 50 sandwiches | 50 |
| Macaroni & Cheese | 8 oz | 200 | 2 | 18 gal. | 300 | 35 gal. | 525 |
| Rice | 4 oz | 350 – 225 | 1 | 20 lb raw | 320 | 40 lb raw | 650 |
| Spaghetti | 4 oz | 350 – 225 | 2 | 8 lb raw | 200 | 12 lb raw | 300 |
Maintenance
NOTICE
Contact the factory, the factory representative or a local service company to perform maintenance and repairs.
WARNING
The tilting braising pan and its parts are hot. Use care when operating, cleaning and servicing the tilting braising pan.
- Disconnect electrical power supply and place a tag at the disconnect switch to indicate that you are working on the circuit before performing any maintenance.
Periodic Maintenance
- Grease pivot bearings via lubricating nipple as required. Use Petro-Canada type 0G-2 or equivalent.
- Check that screws in element terminals are not loose. Loose connections may cause arcing and burn off connection causing element failure.
Troubleshooting
Unit Will Not Operate
- Power supply not “ON”.
- Pan not in down position.
- Defective thermostat or elements.
Pan Difficult to Operate
- Unit not level.
- Thrust bearings worn out.
- Dirt in bearings causing it to bind.
- Shaft bent.
ETS-30 & ETS-40
Electric Power Tilt Skillets
A product with the Crown name incorporates the best in durability and low maintenance. We all recognize, however, that replacement parts and occasional professional service may be necessary to extend the useful life of this appliance.
When service is needed, contact a Crown Authorized Service Agency, or your dealer. To avoid confusion, always refer to the model number, serial number, and type of your appliance.
Copyright © 2022 by Crown. All rights reserved. Published in the United States of America.
CROWN FOOD SERVICE EQUIPMENT
A Middleby Company
70 Oakdale Road, Downsview (Toronto) Ontario, Canada, M3N 1V9
Telephone: 919-762-1000 www.crownsteamgroup.com
INSTALLATION & OPERATION MANUAL 10089 REV 4 (09/22)


