DOMETIC FreshJet Series 7 Roof Air Conditioner
Copyright
© 2023 Dometic Group. The visual appearance of the contents of this manual is protected by copyright and design law. The underlying technical design and the products contained herein may be protected by design, patent or be patent pending. The trademarks mentioned in this manual belong to Dometic Sweden AB. All rights are reserved.
Important notes
Please read these instructions carefully and follow all instructions, guidelines, and warnings included in this product manual in order to ensure that you install, use, and maintain
the product properly at all times. These instructions MUST stay with this product.
By using the product, you hereby confirm that you have read all instructions, guidelines, and warnings carefully and that you understand and agree to abide by the terms and conditions as set forth herein. You agree to use this product only for the intended purpose and application and in accordance with the instructions, guidelines, and warnings as set forth in this product manual as well as in accordance with all applicable laws and regulations. A failure to read and follow the instructions and warnings set forth herein may result in an injury to yourself and others, damage to your product or damage to other property in the vicinity. This product manual, including the instructions, guidelines, and warnings, and related documentation, may be subject to changes and updates. For up-to-date product information, please visit documents.dometic.com.
Explanation of symbols
![]() DANGER!
DANGER!
Indicates a hazardous situation that, if not avoided, will result in death or serious injury.![]() WARNING!
WARNING!
Indicates a hazardous situation that, if not avoided, will result in death or serious injury.![]() CAUTION!
CAUTION!
Indicates a hazardous situation that, if not avoided, could result in minor or moderate injury.![]() NOTICE!
NOTICE!
Indicates a hazardous situation that, if not avoided, could result in minor or moderate injury
 Note Supplementary information for operating the product.
Safety instructions
![]() WARNING! Failure to obey these warnings could result in death or serious injury.
WARNING! Failure to obey these warnings could result in death or serious injury.
- Electrical appliances are not toys. The appliance is not to be used by persons (including children) with reduced physical, sensory or mental capabilities, or lack of experience and knowledge, unless they are under supervision or have been given instruction.
- Children should be supervised to ensure that they do not play with the appliance.
- Cleaning shall not be performed by children without supervision.
- Any person who is involved with working on or breaking into a refrigerant circuit should hold a current valid certificate from an industry-accredited assessment authority, which authorises their competence to handle refrigerants safely in accordance with an industry recognised assessment specification.
- Maintenance shall only be performed as recommended by the equipment manufacturer. Maintenance and repair requiring the assistance of other qualified personnel shall be carried out under the supervision of the person competent in the use of flammable refrigerants.
- Repair of the appliance may only be carried out by qualified personnel who are familiar with the risks involved and the relevant regulations. Inadequate repairs may cause serious hazards. For repair service, contact the service center in your country (see dometic.com/dealer).
- Always disconnect the power supply when working on the appliance.
- The appliance shall be stored in a room without continuously operating ignition sources such as open flames, an operating gas appliance or an operating electric heater.
- Do not pierce or burn the appliance.
- Be aware that refrigerants may not contain an odor.
- Do not use the appliance near flammable fluids or in closed rooms.
- Ensure that no combustible objects are stored or installed near the air outlet. A distance of at least 50 cm must be kept.
- Keep the ventilation openings clear of obstruction.
- Do not damage the refrigerant circuit.
- Under no circumstances shall potential sources of ignition be used in the searching for or detection of refrigerant leaks. A halide torch (or any other detector using a naked flame) shall not be used.
- The roof air conditioner shall be installed in a vehicle with a floor area larger than 4 m².
![]() CAUTION! Failure to obey these cautions could result in minor or moderate injury.
CAUTION! Failure to obey these cautions could result in minor or moderate injury.
- Do not reach into air outlets or insert any foreign objects in the appliance.
- Do not undo the upper cover of the appliance in the event of a fire. Use approved extinguishing agents instead. Do not use water to extinguish fires.
- If the supply cord is damaged, it must be replaced by the manufacturer, its service agent or similarly qualified personnel in order to avoid a hazard.
- In case that the appliance contains an ionizer, consult your physician if you have a medical condition. The ionizer can produce ozone (O3) in small quantities. If you suffer from lung disease, asthma, heart disease, respiratory disease, respiratory problems, or have an ozone sensitivity, consult your physician to determine whether the use of this device is safe for you.
NOTICE! Damage hazard
- Do not use means to accelerate the defrosting process or to clean, other than those recommended by the manufacturer.
- The appliance shall be stored so as to prevent mechanical damage from occurring.
- Do not make any alterations or conversions to the appliance.
- Never drive through automatic car washes when the appliance is mounted.
- If faults occur in the refrigerant circuit, the appliance must be checked and repaired by the manufacturer, its service agent or similarly qualified personnel in order to avoid a hazard.
![]() Intended use
Intended use
The roof air conditioner is only designed for installation on the roof of a caravan or recreational vehicle to provide cooling and heating.
The roof air conditioner is not suitable for trains, houses and apartments. The roof air conditioner is not suitable for installation in construction machines, agricultural machines or similar equipment.
This product is only suitable for the intended purpose and application in accordance with these instructions.
This manual provides information that is necessary for proper installation and/or operation of the product. Poor installation and/or improper operating or maintenance will result in unsatisfactory performance and a possible failure.
The manufacturer accepts no liability for any injury or damage to the product resulting from:
- Incorrect assembly or connection, including excess voltage
- Incorrect maintenance or use of spare parts other than original spare parts provided by the manufacturer
- Alterations to the product without express permission from the manufacturer
- Use for purposes other than those described in this manual
Dometic reserves the right to change product appearance and product specifications.
Explanations of symbols on the appliance
![]() Warning! Low burning velocity material.
Warning! Low burning velocity material.![]() Read operating manual.
Read operating manual.![]() Read service manual.
Read service manual.
Technical limits and conditions
The roof air conditioner is intended for vehicles with roofs with a thickness of 25 mm … 60 mm. The roof top air conditioner will operate ambient temperatures between -2 °C … 52 °C. The roof air conditioner is designed to be installed within ± 10 ° of the horizontal plane.
Technical description
The roof air conditioner supplies the vehicle’s interior with cool or warm air which is without dust and dirt and can be dehumidified.
The roof air conditioner can lower the temperature within the vehicle to a certain level that depends on the type of vehicle, the ambient temperature and the cooling capacity of the roof air conditioner. Below an outer temperature of 16 °C the roof air conditioner does not cool anymore.
The roof air conditioner is operated with the following operating elements:
- Control panel
- Remote control (only some models, see List of models on page 6)

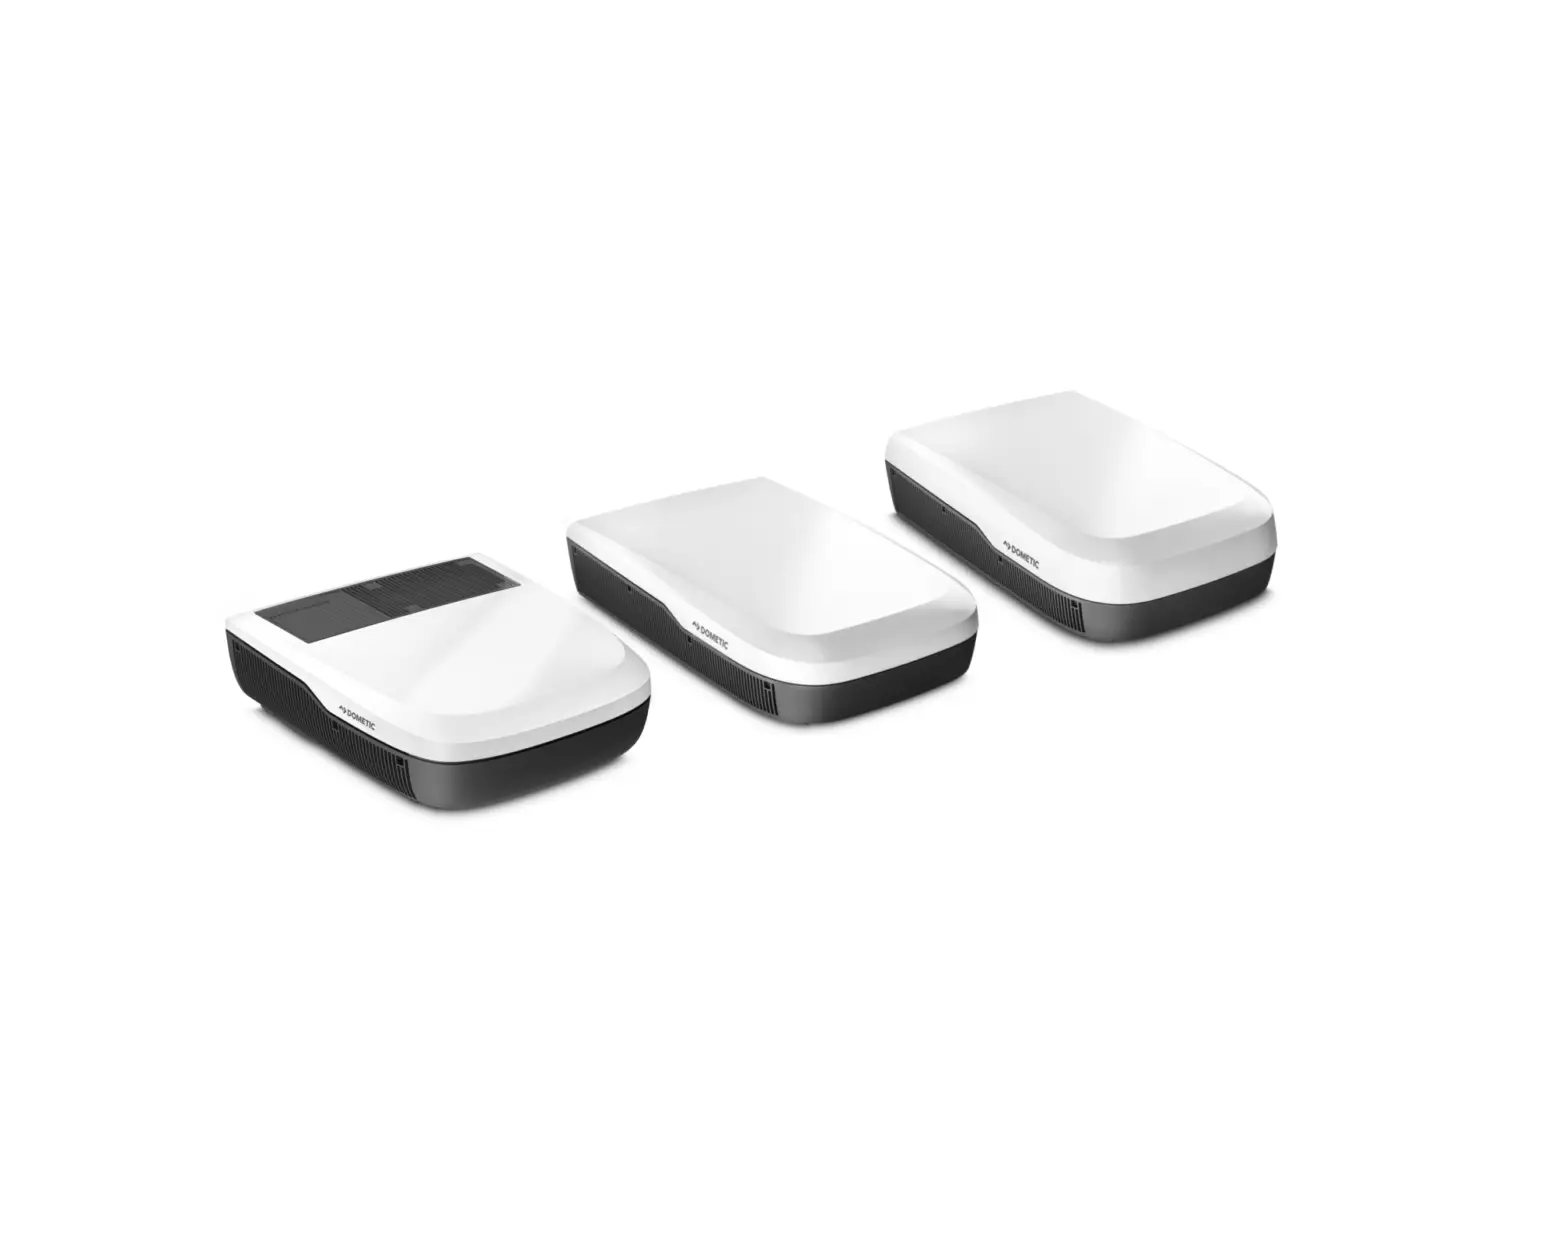
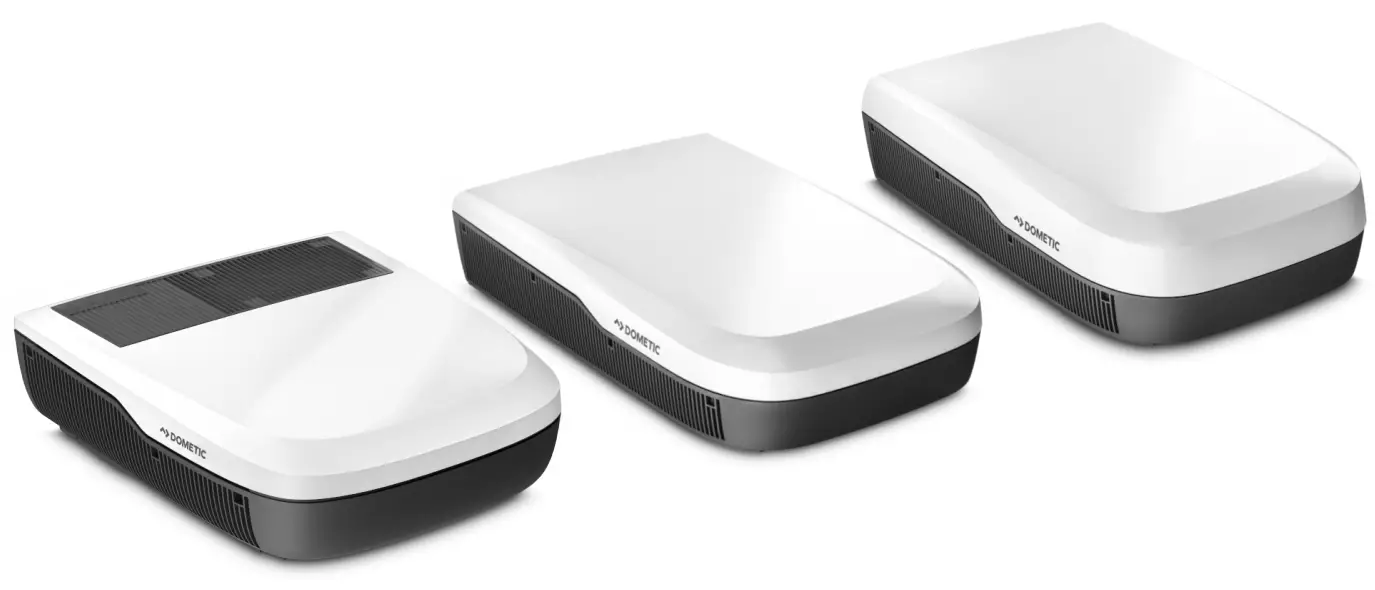
List of models
The models are differentiated between fixed-speed and inverter models.
- FreshJet 4-Series: Fixed-speed
- FreshJet 7-Series: Inverter
The following table shows which function applies to a specific model:
● Feature is available
○ Feature is upgradable
| FJX4333EEH | FJX7337IHP | FJX7457IHP | |
| Automatic | ● | ● | ● |
| Cooling | ● | ● | ● |
| Heating | ● | ● | ● |
| Ventilation | ● | ● | ● |
| Dehumification | ● | ● | ● |
| Air purifier | ● | ● | ● |
| FJX4333EEH | FJX7337IHP | FJX7457IHP | |
| ADB light | ● | ● | |
External light | ● | ○ | ○ |
| Timer | ● | ● | ● |
| Sleep | ● | ● | ● |
| Soft start | ● | ||
| Inverter | ● | ● |
Control panel

| Symbol | Description |
| Switches the roof air conditioner on or to standby mode. |
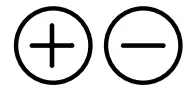
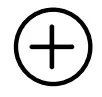
| Increases the currently displayed value. |
| Reduces the currently displayed value. |
| Pairs with Bluetooth/WLAN when both buttons are pressed simultaneously. |
| Switches the ambient lights in the roof top unit on or off. |
| Switches the ambient lights in the air distribution box on or off. |
| Activates the sleep function (only for models with sleep function). |
 | Displays the set temperature and indicates fan level when fan is adjusted. |
| Indicates the Air Purifier mode is active. |
| Indicates the temperature is displayed in degrees Celsius. |
| Indicates the timer is set. |
 | Enables/disables the automatic mode (only for models with automatic mode). |
| Enables/disables the cooling mode (only for models with cooling mode). |
| Enables/disables the heating mode (only for models with heating mode). |
| Adjusts the fan speed between Low, Med, High, Turbo or Auto (shown as 1, 2, 3, 4 or AA on the air distribution box display for a short time when changed). |
| Enables/disables ventilation mode (only for models with ventilation mode). Circulates air without heating or cooling. |
| Enables/disables dehumidification mode (only for models with dehumidification mode). |


Remote control
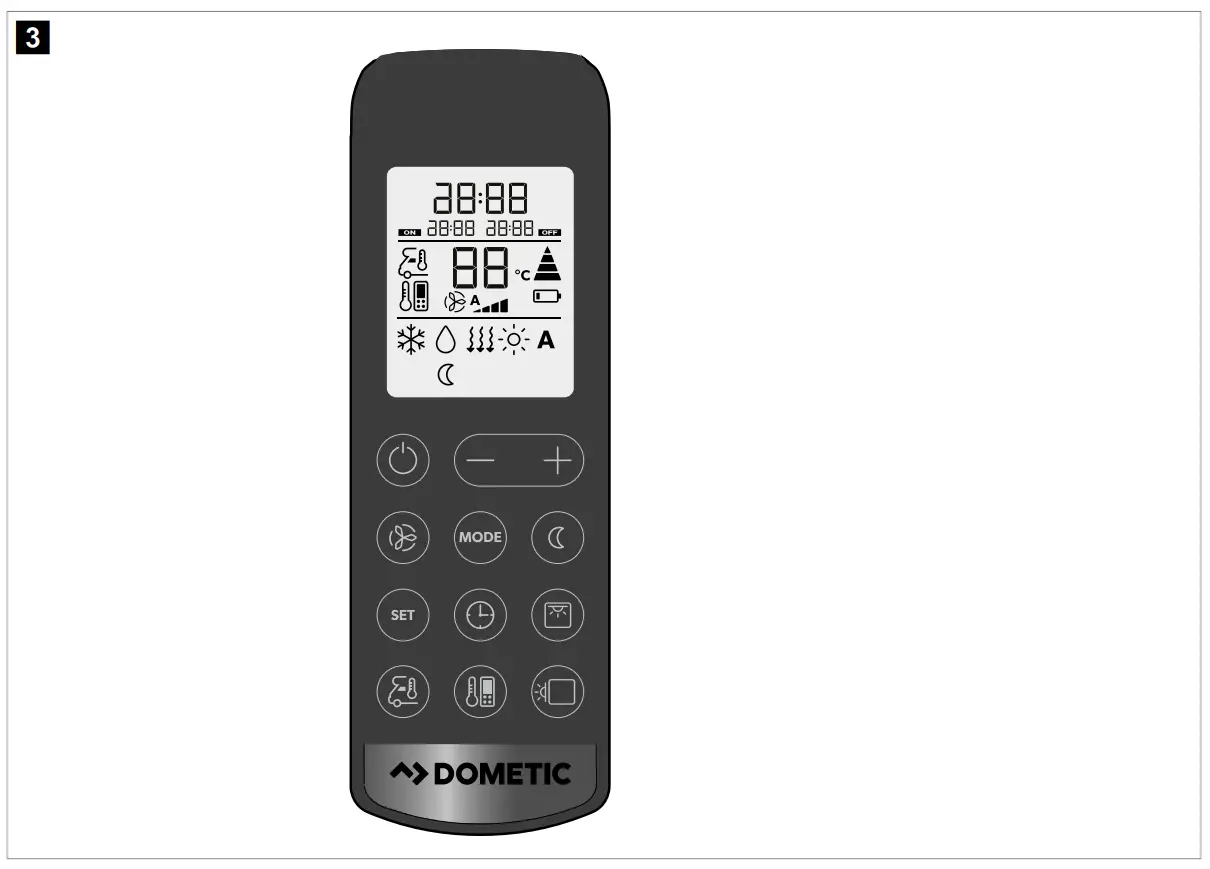
Control and display elements fig. 3 on page 8:
| Button | Description |
| — | Display Displays the following:
|
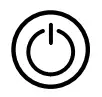 | Switches the roof air conditioner on or to stand-by mode. |
 | Increases the currently displayed value. |
 | Reduces the currently displayed value. |
 | Selects the fan speed (Selecting the fan speed manually on page 12). |
 | Selects the air conditioning mode (only for models with automatic mode). The corresponding symbol is dis- played. |
 | Activates the sleep function (only for models with sleep mode). The |
 | Confirms and saves settings. |
 | Sets the timer and the clock. |
 | Switches the ambient lights in the air distribution box on or off. |
 | Press once to display the current interior temperature. The |
 | Activates the I feel function. The Every 10 min the I feel function adjusts the target temperature to the actual temperature measured by the re- mote control. |
 | Switches the ambient lights in the roof top unit on or off. |
| Displays that the remote control’s batteries are empty. Replace the batteries (Replacing the remote control bat teries on page 15). | |
 | Displays that the remote control is transmitting values to the roof air conditioner. |
Air conditioning modes
| Air conditioning mode | Displayed symbol | Description |
| Automatic | A | You specify the temperature, and the roof air conditioner brings the interior to this temperature by heating or cooling and by controlling the necessary fan speed. |
| Cooling |  | You specify the temperature and fan settings, and the roof air conditioner cools the interior to this temperature. |
| Heating |  | You specify the temperature and fan settings, and the roof air conditioner heats the interior to this temperature. The fan will only start after 2 min (on Low speed) and then after around 5 min will go to the set fan speed (after the evaporator reaches temperature). |
| Ventilation |
| You specify the fan settings, and the roof air conditioner circulates air without heat- ing or cooling. |
| Dehumidifying |  | The roof air conditioner removes moisture from the air without heating or cooling the interior thus decreasing the relative air humidity. |
| Air purifier |  | The roof air conditioner ionizes the air, thus collecting dust and particles including to viruses and bacteria out of the air. |

Additional functions
| Additional function | Display message | Description |
| Timer | 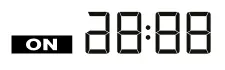 | The roof air conditioner is switched on at the specified time. |
 | The roof air conditioner is switched off at the specified time. | |
 | The roof air conditioner is switched on and off at the specified times. | |
| Sleep |  | The sleep function reduces the fan speed and the compressor speed to reduce the noise levels for comfortable sleeping. |
| I Feel | | The remote control measures the room temperature and transmits this measurement to the roof air conditioner every 10 min. The roof air conditioner adapts the target value to this measurement. |
| Soft start | The peak current that the compressor start produces is reduced by the soft start function. If a generator is used as power supply, the generator will not be overloaded. |
Before initial use
Inspection before starting up
Before switching on the roof air conditioner, observe the following:
- Check whether the supply voltage and frequency correspond to the values specified in Technical data on page 23.
- Ensure that both the air intake openings and the air nozzles are free. All ventilation grilles must always be kept free to ensure that the roof air conditioner is able to operate at maximum capacity.
Prepare the remote control - Insert the batteries (Replacing the remote control batteries on page 15).
Set the time - Set the current time (Setting the current time on page 13).
Operation
Hints for improved use
The following hints will optimize the performance of your roof air conditioner:
- Improve the heat insulation of your vehicle by sealing gaps and hanging reflective blinds or curtains on your windows.
- Select an appropriate temperature and fan speed.
- Align the air nozzles sensibly.
- Ensure that the air nozzles and air intake openings are not covered by cloths, paper or other objects.
- If the vehicle has been subjected to direct sunlight for a long time: Operate the roof air conditioner in the Ventilation (
 ) mode with the windows open for a while before switching on the Cooling ( ) mode.
 - Avoid opening doors and windows as far as possible in the Cooling ( ) mode.
Basic notes on operation
The FreshJet FJX4333EEH/FJX7337IHP/FJX7457IHP roof air conditioner has two operating modes:
| Operating mode | Description |
| Standby | The roof air conditioner is ready for operation and can be switched on with the remote control. The ambient lights are available. The remote control is also in standby, but you can switch the remote control on independently from the roof air conditioner. |
| On | The roof air conditioner is conditioning the air in the interior. |
Fixed-speed and inverter models
The given information in this chapter applies to fixed-speed and inverter models.
Using the remote control
Consider the following hints when using the remote control:
- Point the remote control at the IR receiver of the control panel.
The corresponding settings and values are directly transmitted to the roof air conditioner when you press a button. - The roof air conditioner confirms the receipt of data with a beep sound.
- Values increase or decrease faster when you press and hold the + or – button.
- In the standby mode, the remote control display is inactive too. You can switch the remote control on to standby independently from the roof air conditioner.
To switch only the remote control to or from standby, press ![]() the button while not pointing to the control panel’s IR receiver.
the button while not pointing to the control panel’s IR receiver.
Switching the roof air conditioner on and to standby
Note When the roof air conditioner is switched on, it operates with the values that were set before switching to standby. The roof air conditioner can be switched off only by cutting the power supply.
Press the ![]() button on the remote control or the
button on the remote control or the ![]() button on the control panel to switch the roof air conditioner on or to standby.
button on the control panel to switch the roof air conditioner on or to standby.
Selecting the air conditioning mode
Select the desired air conditioning mode using the MODE button (Air conditioning modes on page 10).
The roof air conditioner confirms the receipt of the values with a beep sound. The roof air conditioner is switched to the selected air conditioning mode.
Selecting the fan speed manually
In all modes, except for the Automatic( A ) and Dehumidifying ( ![]() ) modes, the fan speed can be selected manually.
) modes, the fan speed can be selected manually.
| Display message | Description |
 | Low fan level |
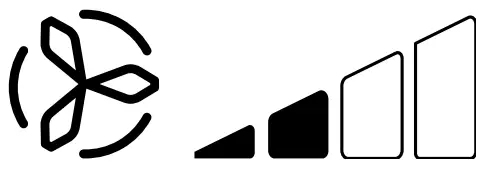 | Medium fan level |
 | High fan level. |
 | Turbo fan level. |
 | Automatic mode (the fan speed is adjusted based on the ambient temperature). |
Press the button of the remote control or the button of the control panel to select the desired fan speed.
The roof air conditioner confirms the receipt of the values with a beep sound.
The new fan speed is set.
Setting the temperature
In the Automatic ( A ), Cooling ( ![]() ), Heating (
), Heating ( ![]() ) and Dehumidifying (
) and Dehumidifying ( ![]() ) modes, you can specify a temperature between 16 °C and 31 °C.
) modes, you can specify a temperature between 16 °C and 31 °C.
Use the + or – button on the remote control to set the desired temperature.
The roof air conditioner confirms the receipt of the values with a high note. The temperature is set on the roof air conditioner.
Setting the current time
The remote control needs the current time in order to program the timer. The time is shown on the remote control display.
- Press and hold the
 button in order to get into the mode for setting the time.
The time flashes on the remote control display. - Use the + or – button to set the current time. Press and hold the + or – button longer than 2 s to increase or decrease the time quicker.
- Press the SET button to confirm the time.
Setting the timer
The timer function allows you to set a specific time period for air conditioning. You can specify the switch-on time, the switch-to-standby time or both values.
The timer function is set via remote control.
Note The remote control returns to its initial mode if no button is pressed on the remote control for 15 s while programming the timer.
Set the switch-on timer as follows:
a) Select the desired air conditioning mode and all required values (for example the temperature).
b) If necessary, switch the roof air conditioner to standby.
The switch-on timer can only be set when the roof air conditioner is in standby.
c) Press the ![]() button one time.
button one time.
The ![]() symbol flashes on the remote control display.
symbol flashes on the remote control display.
d) Use the + or – button to set the time when the roof air conditioner shall be switched on.
e) Press the ![]() button.
button.
The switch-on timer is set. The roof air conditioner will be switched on with the selected air conditioning mode at the specified time.
Set the switch-to-standby timer as follows:
a) If necessary, switch the roof air conditioner on.
The switch-to-standby timer can only be set when the roof air conditioner is switched on.
b) Press the ![]() button twice.
button twice.
The symbol flashes on the remote control display.
c) Use the + or – button to set the time when the roof air conditioner shall be switched to standby.
d) Press the ![]() button.
button.
The switch-to-standby timer is set. The roof air conditioner will be switched to standby at the specified time.
Set the switch-on timer and the switch-to-standby timer as follows:
a) Select the desired air conditioning mode and all required values (for example the temperature).
b) Press the ![]() button three times.
button three times.
The ![]() symbol is shown on the remote control display. The ON symbol flashes.
symbol is shown on the remote control display. The ON symbol flashes.
c) Use the + or – button to set the time when the roof air conditioner shall be switched on.
d) Press the ![]() button.
button.
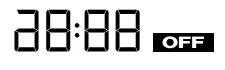
The OFF symbol flashes.
e) Use the + or – button to set the time when the roof air conditioner shall be switched to standby.
f) Press the ![]() button.
button.
The switch-on and switch-to-standby times are set. The roof air conditioner will be switched on for the specified time period.
To cancel preset timer, press the ![]() button once.
button once.
The ![]() symbols disappear. Preset values are discarded.
symbols disappear. Preset values are discarded.
Setting the sleep function
The sleep function is only available in Cooling ( ![]() ) or Heating (
) or Heating (![]() ) modes.
) modes.
The sleep function limits the fan speed to a lower level to reduce the noise levels for easier sleeping.
Only for inverter models: The sleep function additionally limits the compressor speed.
To activate the sleep function proceed as follows:
a) Set the required temperature (Setting the temperature on page 13).
b) Press the ![]() button on the remote control or the button on the
button on the remote control or the button on the  control panel.
The symbol ![]() appears in the remote control display. The sleep function is activated.
appears in the remote control display. The sleep function is activated.
To deactivate the sleep function, press the or the ![]() button on the remote control or the button on the control panel.
button on the remote control or the button on the control panel.
The symbol ![]() disappears in the remote control display. The sleep function is deactivated.
disappears in the remote control display. The sleep function is deactivated.
Activating the I feel function
When this function is active, the remote control measures the room temperature and transmits this measurement to the roof air conditioner every 10 minutes. The roof air conditioner adapts the target value to this measurement. The I feel function is only active when the temperature range is between +18 °C and +29 °C.
The remote control should not be kept in a part of the room that is considerably warmer or colder than the average room temperature. It may not, for example, be left in the sun or in front of the roof air conditioner.
When the temperature rises above +29 °C or falls below +18 °C, the I feel function is deactivated. The ![]() symbol flashes three times in the display and then turns off.
symbol flashes three times in the display and then turns off.
- Press the button.
The I feel function is activated.
The symbol appears in the display.
 - Position the remote control so that it points at the IR receiver on the control panel. Otherwise, the values cannot be transmitted to the roof air conditioner.
Operating the ambient lights
![]() WARNING! Risk of injury
WARNING! Risk of injury
By law it is forbidden to use the external lights when driving the vehicle
The  button on the remote control is active even if the remote control is switched off.
Only for models with ADB light:
To switch the internal lights on or off press the ![]() button on the remote control or on the control panel.
button on the remote control or on the control panel.
The ![]() symbol flashes once in the display of the remote control when the internal lights are switched on.
symbol flashes once in the display of the remote control when the internal lights are switched on.
To dim the internal lights proceed as follows:
a) Press the ![]() button on the remote control or on the control panel for 3 s.
button on the remote control or on the control panel for 3 s.
b) When pressing the ![]() button on the remote control: Press the
button on the remote control: Press the ![]() button to dim the internal light between 50 % and 100 %.
button to dim the internal light between 50 % and 100 %.
c) When pressing the ![]() button on the control panel: The internal light’s brightness cycles between 50 % and 100 %. Release the
button on the control panel: The internal light’s brightness cycles between 50 % and 100 %. Release the ![]() button when the the desired brightness is reached.
button when the the desired brightness is reached.
Only for inverter models:
To switch the external lights on or off press the ![]() button on the control panel
button on the control panel
Replacing the remote control batteries
Note The remote control display may still be bright even if the batteries are running low. Replace the batteries when the remote control indicates low batteries.
Replace the batteries as shown.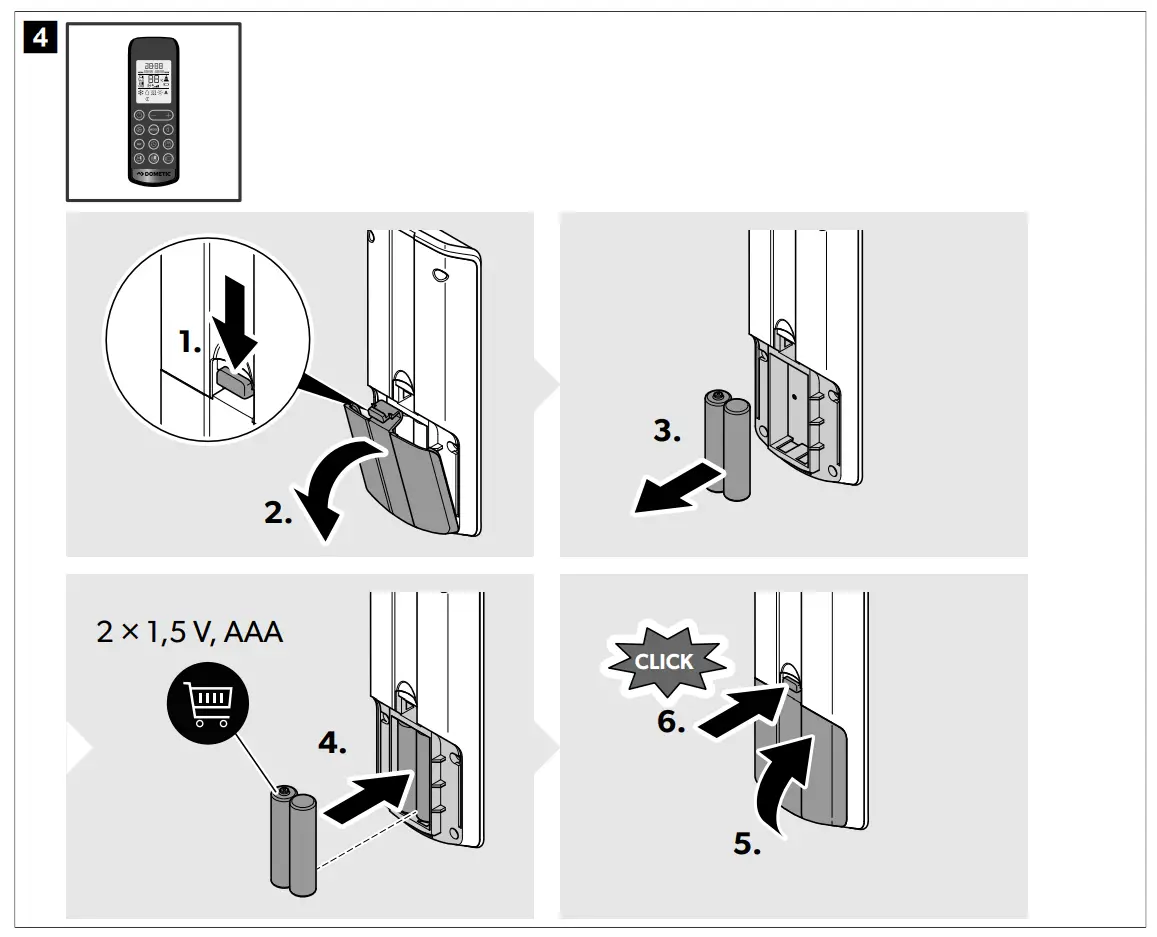
The display shows all symbols for 5 s
 Protect the environment! Do not dispose of any batteries with general household waste. Return defective or used batteries to your retailer or dispose of them at collection points.
Regulating air supply within the vehicle
The air flow can be adjusted along the ceiling or towards the floor
Turn the slats in the air nozzles independently in the required directions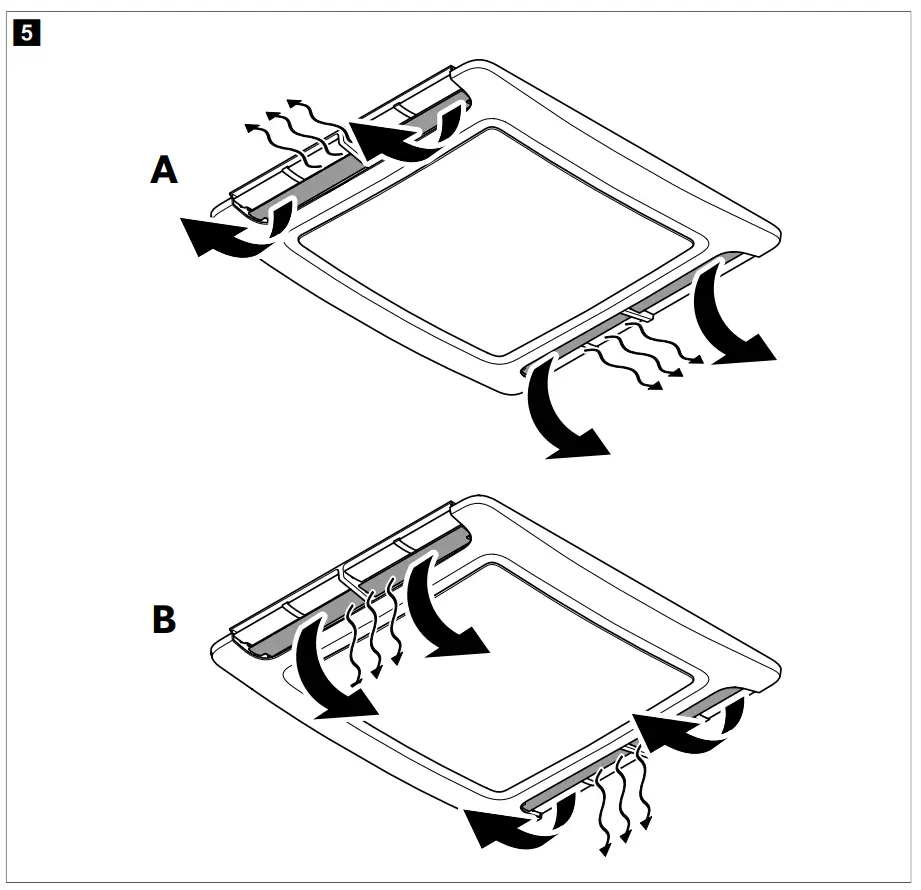
Cleaning the roof air conditioner
![]() NOTICE! Damage hazard
NOTICE! Damage hazard
- Do not use means to accelerate the defrosting process or to clean, other than those recommended by the manfacturer.
- Do not clean the roof air conditioner with a high-pressure cleaner. Exposure to water can damage the roof air conditioner.
- Do not use sharp or hard objects or cleaning agents for cleaning as these may damage the roof air conditioner.
- Do not use petrol, diesel or solvents.
- Regularly remove leaves and other dirt from the air intake and the ventilation grilles of the roof air conditioner. Do not damage the ventilation grilles in the process.

- Occasionally clean the housings of the roof top unit and the air distribution box with a damp cloth. Use only water with a gentle cleaning agent.
- Only for models with remote control: Occasionally clean the remote control with a slightly damp cloth. Clean the display with a cleaning cloth for glasses.
- Only for models with air distribution box: Occasionally clean the air distribution box display with a mild solution of warm soapy water. The display screen is acrylic and can be damaged by some common household chemicals such as chemical cleaners, window cleaners, alcohol, certain ten sides, organic solvents, and softeners.
Maintenance
![]() WARNING! Risk of injury
WARNING! Risk of injury
Any other maintenance work in addition to the described subjects here may only be carried out by qualified personnel who are familiar with the risks involved when handling refrigerant and air conditioning systems as well as the relevant regulations.
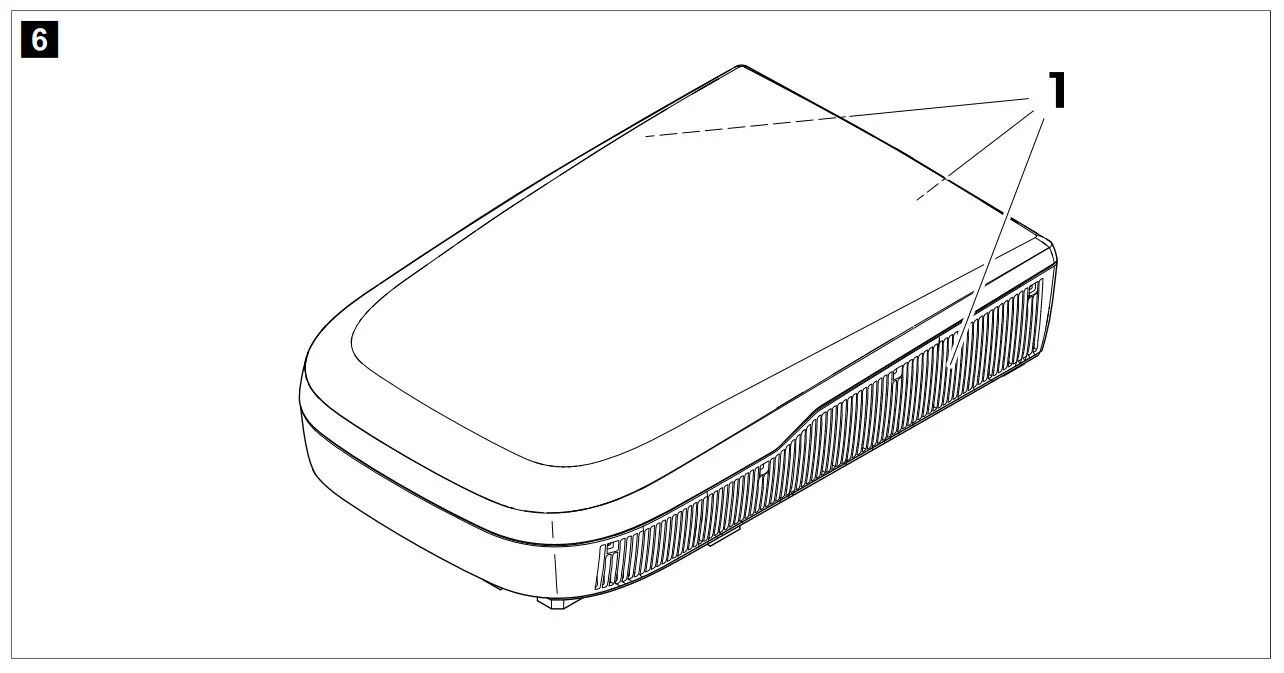
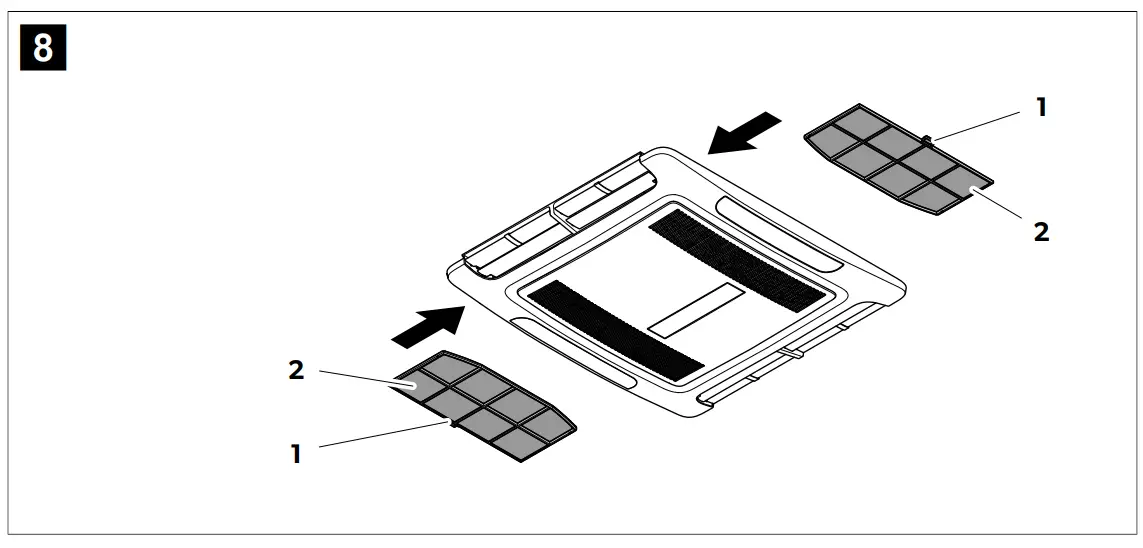
| Interval | Inspection/maintenance |
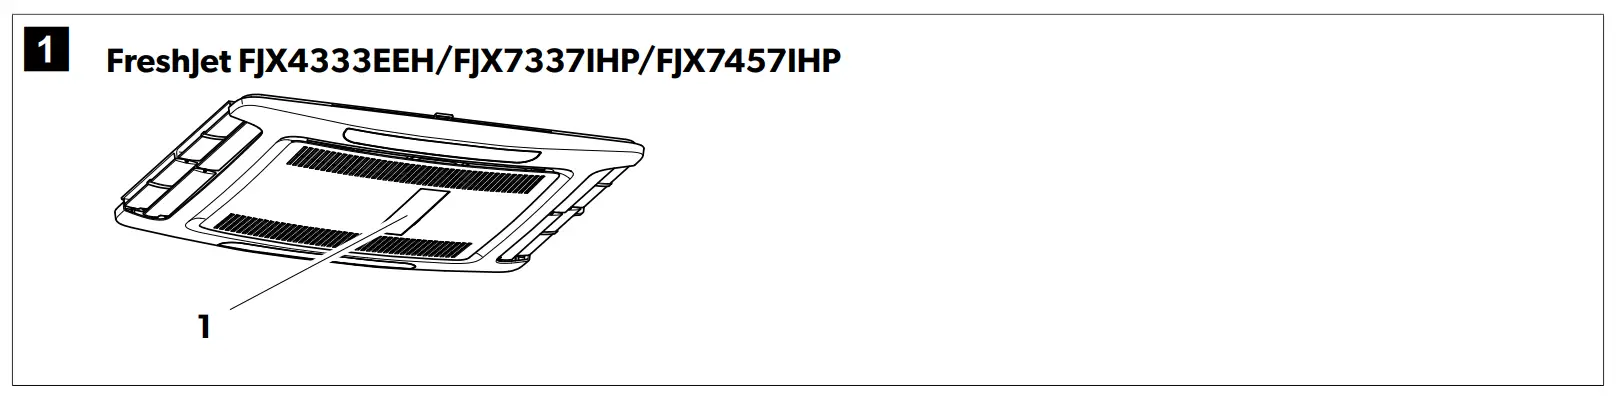
| Regulary | Check whether the condensation water drainage channels (1) at the sides of the roof air conditioner are clear and the condensation water is able to escape.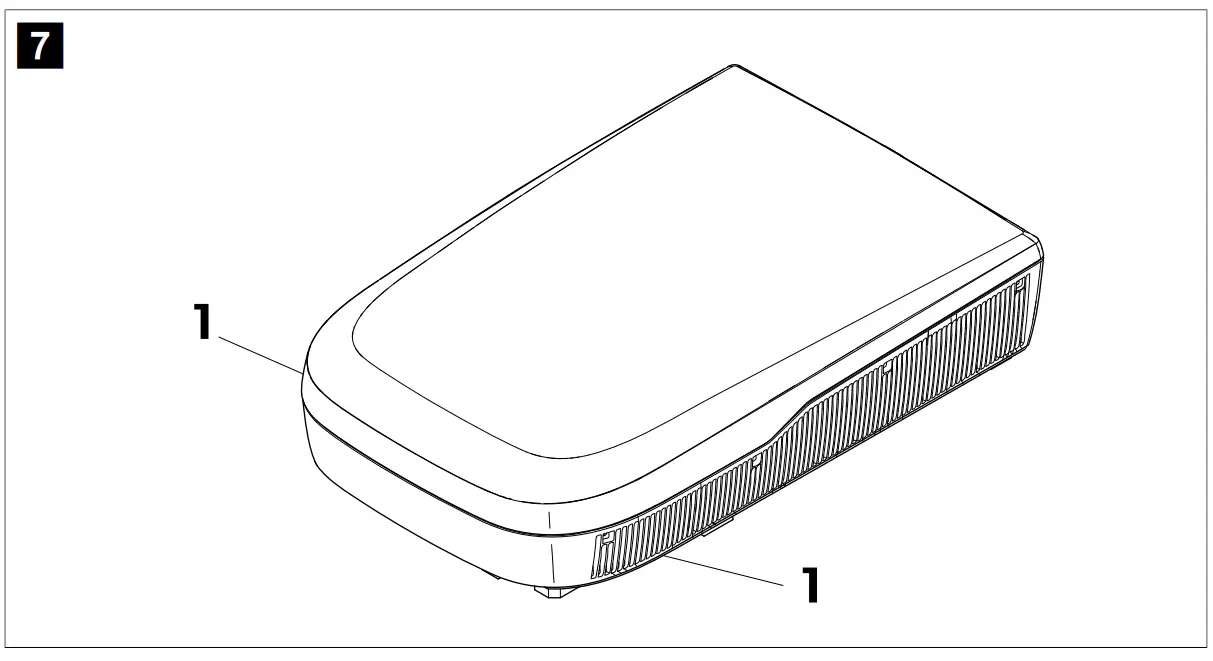 |
| Regulary |
|
| Once per year |
|
Troubleshooting
| Problem | Possible cause | Suggested remedy |
| Not cooling well | The roof air conditioner is not set to cooling. | Set the roof air conditioner to cooling. |
| The ambient temperature is above 52 °C. | The roof air conditioner is only de- signed for ambient temperatures of up to 52 °C. | |
| The temperature set is higher than the room temperature. | Select a lower temperature. | |
| The ambient temperature is below 16 °C. | The roof air conditioner is designed for cooling only at ambient temperatures above 16 °C. | |
| One of the temperature sensors is de- fective. | Contact an authorized service agent or Dometic. | |
| The evaporator fan is damaged. | Contact an authorized service agent or Dometic. | |
| The condenser fan is damaged. | Contact an authorized service agent or Dometic. | |
| Only for models with heating mode: Not heating well | The roof air conditioner is not set to heating. | Set the roof air conditioner to heating. |
| The ambient temperature is below -2 °C. | The roof air conditioner is designed for ambient temperatures above -2 °C. | |
| The temperature set is lower than the room temperature. | Select a higher temperature. | |
| One of the temperature sensors is de- fective. | Contact an authorized service agent or Dometic. | |
| The evaporator fan is damaged. | Contact an authorized service agent or Dometic. | |
| Low Air output | The air intake openings are blocked or obstructed. | Remove any leaves and other dirt from the ventilation grilles of the roof air conditioner. |
| The fan is defective. | Contact an authorized service agent or Dometic. | |
| Water enters the vehicle. | The condensation water drainage openings are clogged up. | Clean the water drainage openings from condensation water. |
| The seals are damaged. | Contact an authorized service agent or Dometic. | |
| The roof air conditioner does not switch on. | No power supply connected. | Check the power supply. |
| The voltage is too low (< 200 V). | Contact an authorized service agent or Dometic. | |
| The voltage converter is defective. | Contact an authorized service agent or Dometic. | |
| One of the temperature sensors is defective. | Contact an authorized service agent or Dometic. | |
| The electrical fuse of the power supply is too low. | Contact an authorized service agent or Dometic. | |
| The roof air conditioner does not switch off. | One of the temperature sensors is defective. | Contact an authorized service agent or Dometic. |
| The electrical fuse of the power supply is too low. | Contact an authorized service agent or Dometic. | |
| Only for fixed-speed and inverter models: The roof air conditioner constantly switches itself off. | The icing sensor has tripped. | The outer temperature is too low or all air nozzles are closed. |
| The display shows: P0 | Over temperature or over current on IPM module | Contact an authorized service agent or Dometic. |
| The display shows: P1 | Under voltage protection | Contact an authorized service agent or Dometic. |
| The display shows: P2 | Unit AC over-current protection | Contact an authorized service agent or Dometic. |
| The display shows: P4 | Discharge tube overheat protection | Contact an authorized service agent or Dometic. |
| The display shows: P5 | Evaporator coil protection (cooling mode) | Contact an authorized service agent or Dometic. |
| The display shows: P6 | Condenser coil protection (cooling mode) | Contact an authorized service agent or Dometic. |
| The display shows: P7 | Evaporator coil protection (heating mode) | Contact an authorized service agent or Dometic. |
| The display shows: P9 | Compressor drive abnormal or com- pressor does not start | Contact an authorized service agent or Dometic. |
| The display shows: E0 | Communication failure | Contact an authorized service agent or Dometic. |
| The display shows: E1 | Room temperature sensor fault | Contact an authorized service agent or Dometic. |
| The display shows: E2 | Evaporator coil temperature sensor fault | Contact an authorized service agent or Dometic. |
| The display shows: E3 | Condenser coil temperature sensor fault | Contact an authorized service agent or Dometic. |
| The display shows: E7 | Outdoor temperature sensor failure | Contact an authorized service agent or Dometic. |
| The display shows: E8 | Discharge tube temperature sensor failure | Contact an authorized service agent or Dometic. |
| The display shows: E9 | Compressor drive or IPM module fault | Contact an authorized service agent or Dometic. |
| The display shows: EA | Current sensor fault | Contact an authorized service agent or Dometic. |
| The display shows: EE | Outdoor EEPROM fault | Contact an authorized service agent or Dometic. |
| The display shows: EL | LIN-BUS/CI-BUS communication failure | Contact an authorized service agent or Dometic. |
Disposal
 Place the packaging material in the appropriate recycling waste bins, wherever possible. Consult a local recycling center or specialist dealer for details about how to dispose of the product in accordance with the applicable disposal regulations.
![]() Protect the environment! Do not dispose of any batteries with general household waste. Return defective or used batteries to your retailer or dispose of them at collection points.
Protect the environment! Do not dispose of any batteries with general household waste. Return defective or used batteries to your retailer or dispose of them at collection points.
Warranty
If the product does not work as it should, please contact your retailer or the manufacturer’s branch in your country (see dometic.com/dealer). The warranty applicable to your product is 1 year(s).
For repair and warranty processing, please include the following documents when you send in the device:
- A copy of the receipt with purchasing date
- A reason for the claim or description of the fault
Note that self-repair or nonprofessional repair can have safety consequences and might void the warranty.
Our goods come with guarantees that cannot be excluded under the Australian Consumer Law. You are entitled to a replacement or refund for a major failure and for compensation for any other reasonably foreseeable loss or damage.
You are also entitled to have the goods repaired or replaced if the goods fail to be of acceptable quality and the failure does not amount to a major failure.
New Zealand only
This warranty policy is subject to the conditions and guarantees which are mandatory as implied by the Consumer Guarantees Act 1993(NZ).
Technical data
Contains fluorinated greenhouse gases. Hermetically sealed equipment
| FreshJet FJX4333EEH | FreshJet FJX7337IHP | FreshJet FJX7457IHP | ||
| Cooling capacity based on ISO 5151: | 2200 W | 2910 W | 3400 W | |
| Heating capacity based on ISO 5151: | 1000 W | 2692 W | 2903 W | |
| AC Input voltage: | 220 V … 240 V / 50 Hz | 220 V … 240 V / 50 Hz … 60 Hz | ||
| Rated cooling current: | < 6 A | < 7.3 A | < 7.8 A | |
| Rated heating current: | < 4.8 A | < 5.9 A | < 6.5 A | |
| Required fuse: | 10 A | |||
| Operating temperature range: | -2 °C … 52 °C | |||
| Refrigerant: | R32 | |||
| Refrigerant quantity: | 360 g | 480 g | 520 g | |
| CO2 equivalent: | 0.24 t | 0.32 t | 0.44 t | |
| Global warming potential (GWP): | 675 | |||
| Protection class (roof top unit): | IPX4 | |||
| Noise level (highest fan set- ting) | < 70 dB(A) | |||
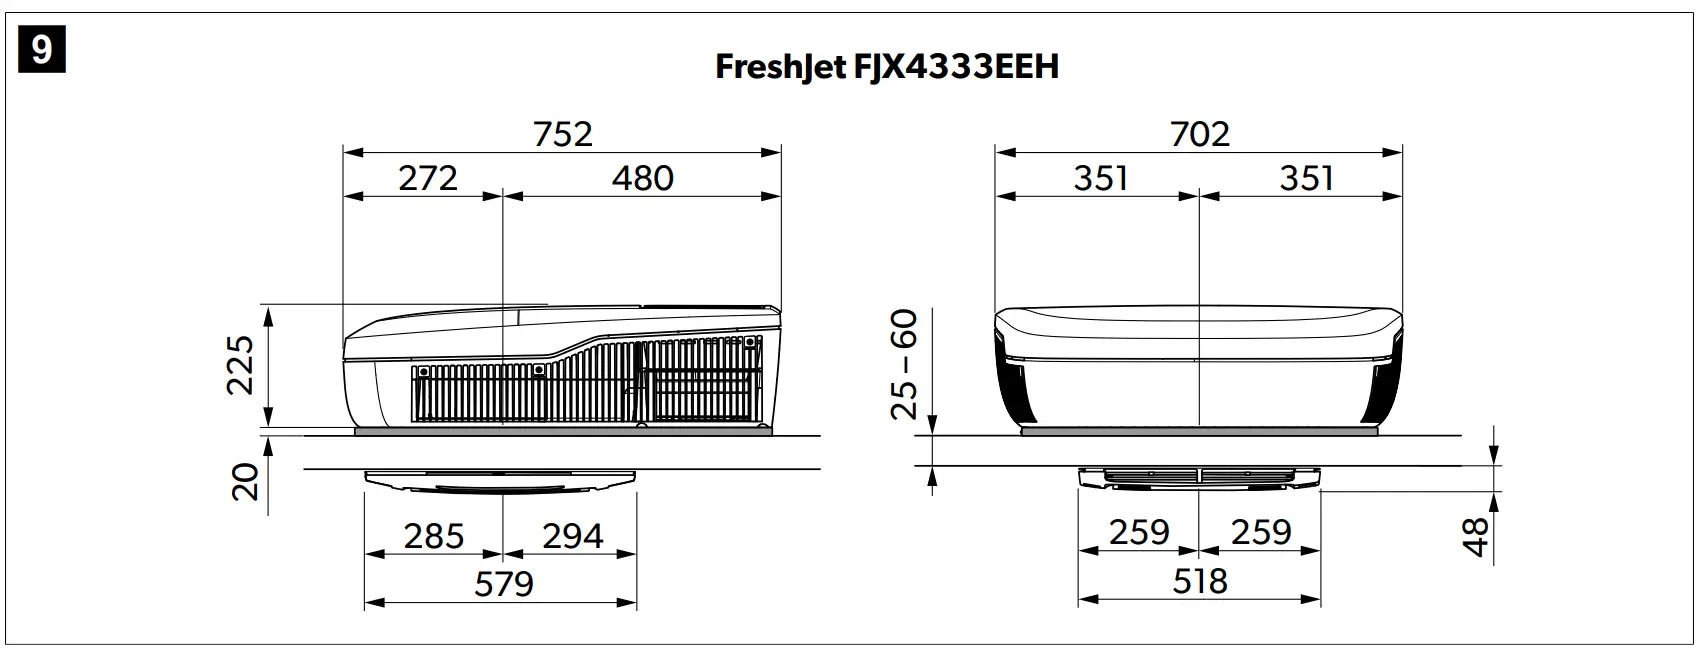
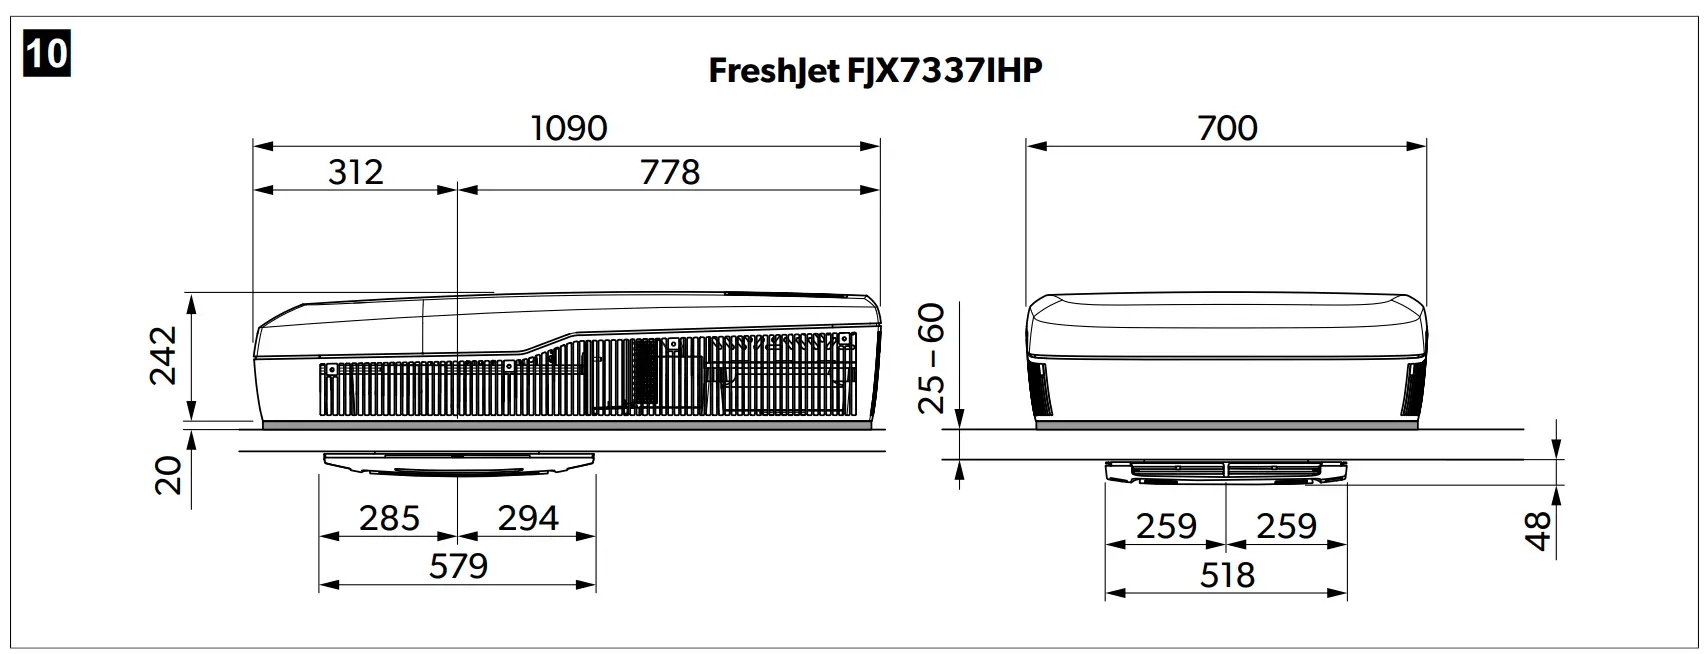
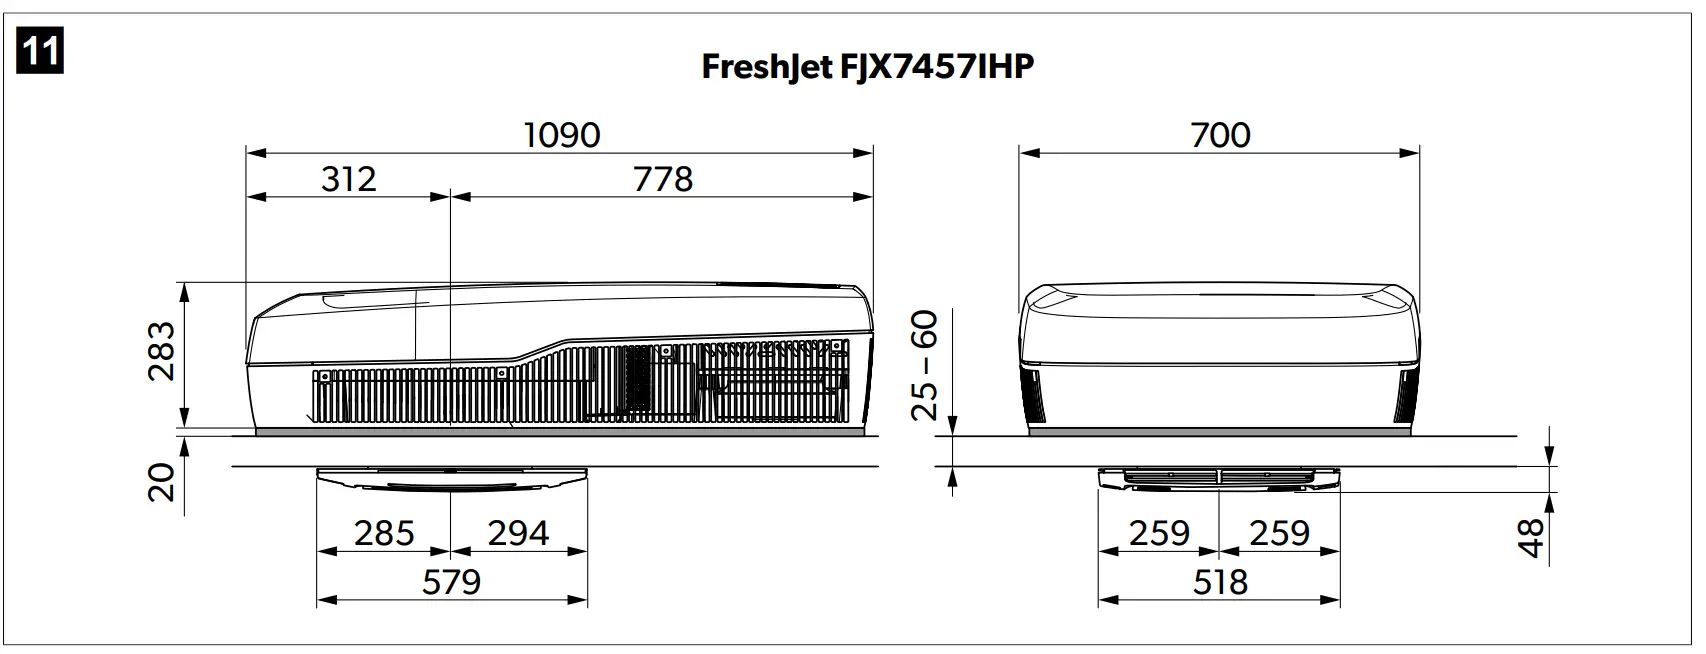
| Dimensions L x W x H: | fig. 9 on page 23 | fig. 10 on page 23 | fig. 11 on page 23 | |
| Weight (roof top unit with air distribution box) | < 34 kg | < 41 kg | < 43 kg | |
| Inspection/certification: |  | |||
YOUR LOCAL SUPPORT
dometic.com/contact
YOUR LOCAL SUPPORT
dometic.com/contact
YOUR LOCAL SALES OFFICE
dometic.com/sales-offices


