OLIMPIA SPLENDID Smart 12000 BTU 8000 DOE Dolceclima WiFi Portable Air Conditioner User Manual
SAFETY PRECAUTION
![]() WARNING
WARNING
- Do not install the Kit in environments with the presence of flammable gases, explosive gases, in very moist environments (laundries, greenhouses, etc.), or in premises where there is other equipment generating a strong source of heat, next to a source of salt or sulphureous water.
- Before proceeding with installation, read the warn- ings indicated on the attached manual for use of the Kit B1020 with care.
INSTALLATION ACCESSORY
Preparation before installation
- Please confirm that all the following parts you have been supply.
| No. | Name | Qty. | Remarks |
| 1 | Wire controller | 1 | – – |
| 2 | Manual for use of the Kit B1020 | 1 | – – |
| 3 | Screws | 3 | M4X20 (For Mounting on the Wall) |
| 4 | Wall plugs | 3 | For Mounting on the Wall |
| 5 | Kit B1020 | 1 | – – |
| 6 | Cables for connection (group 1) | 1 | Page 5 |
| 7 | Extension cord | 1 | – – |
- Prepare the following assemblies on the site.
| No. | Name | Qty. | Remarks |
| 1 | Wiring Tube (Insulating Sleeve and Tightening Screw) | 1 | – – |
INSTALLATION METHOD
Dimensions

Wiring Principle Sketch
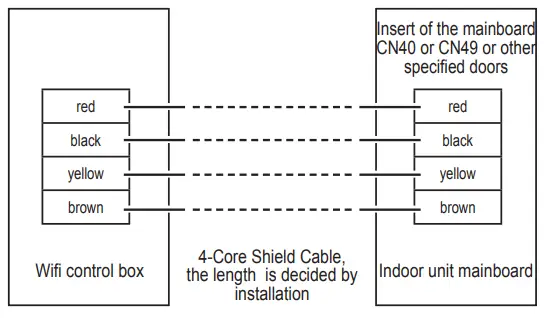
Wiring figure
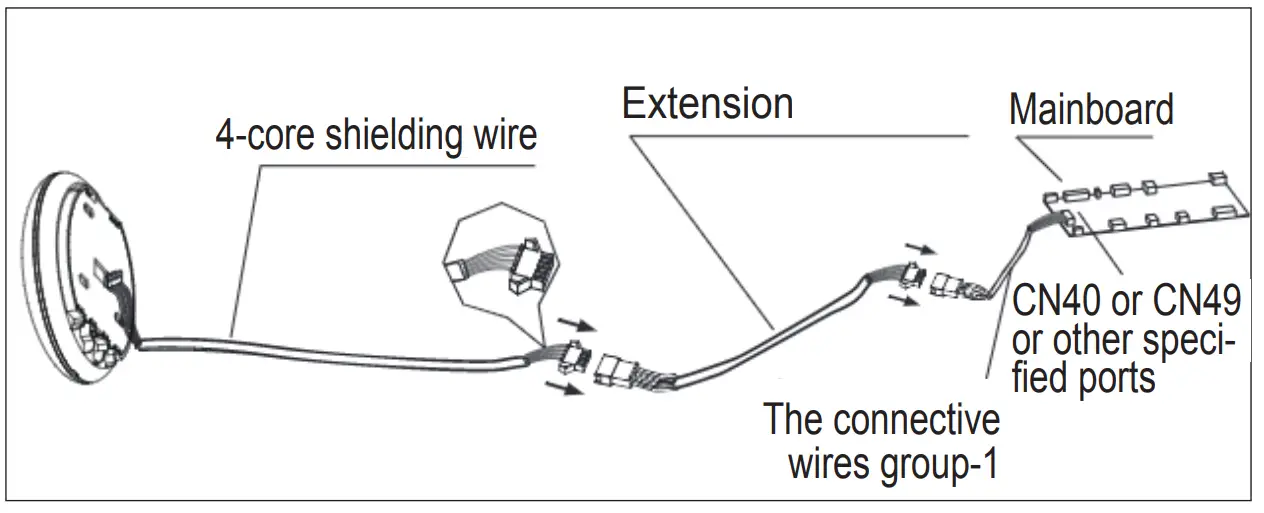
- Connect the male joint of the connection cables group-1 to the mainboard, then connect the other side of the connection cables group-1 to the 4-pole screened cable of the smart port.
- If it is desired to extent the wire, please use an extension cord (purchased separately).

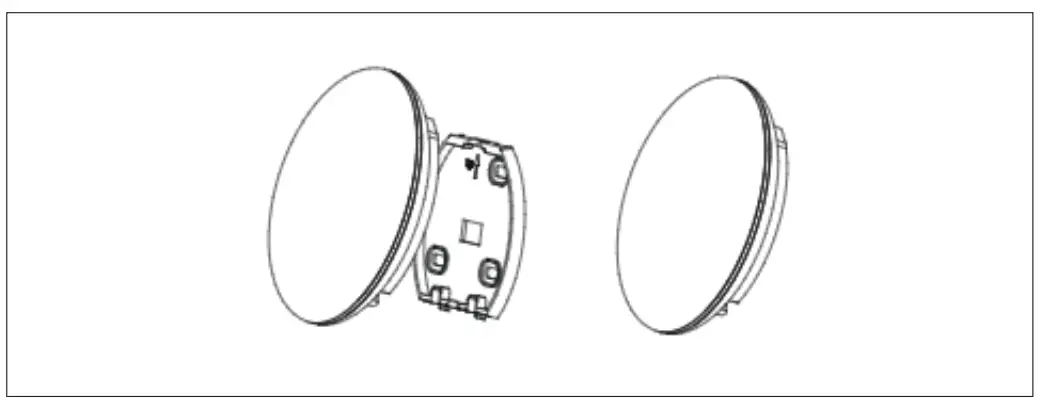
Remove the upper part of wire controller Remove the upper part of wire controller
- Insert a flat bladed screwdriver inside the slots in the lower part of the smart port (2 slots) and remove the upper part.
![]() NOTICE
NOTICE
Pay attention not to damage the Smart port with the flat bladed screwdriver.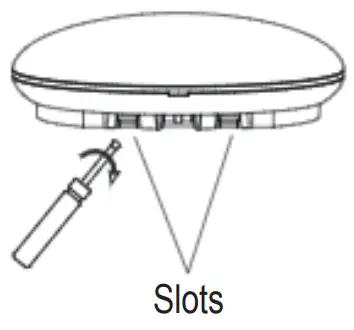
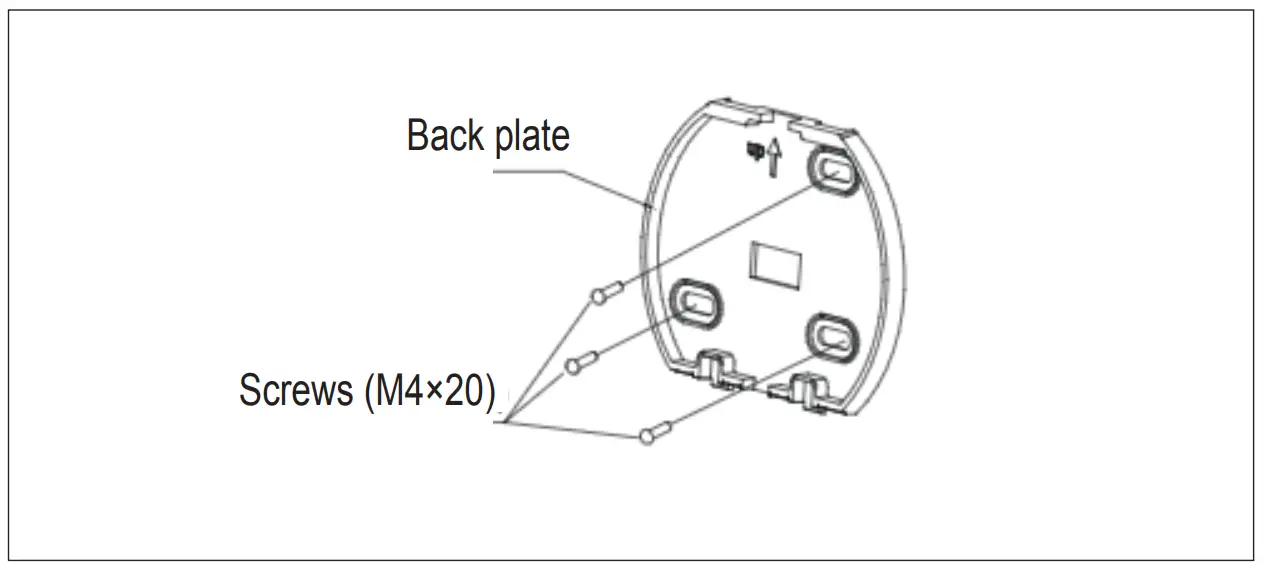
Fasten the back plate of the wire controller
- For exposed mounting, fasten the back plate on the wall with the 3 screws (M4×20) and plugs.

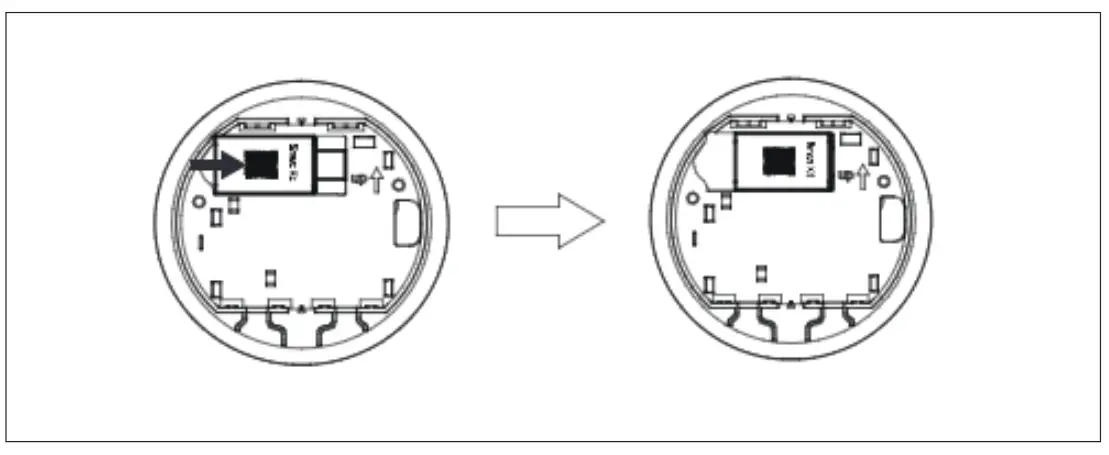
- Insert the smart kit with slightly strength into the main PCB of the smart port.

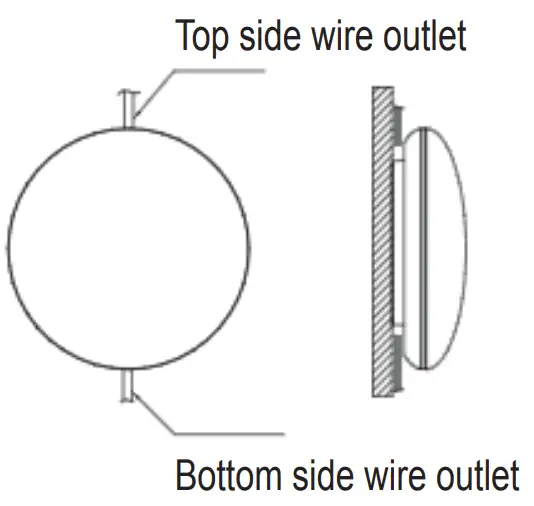
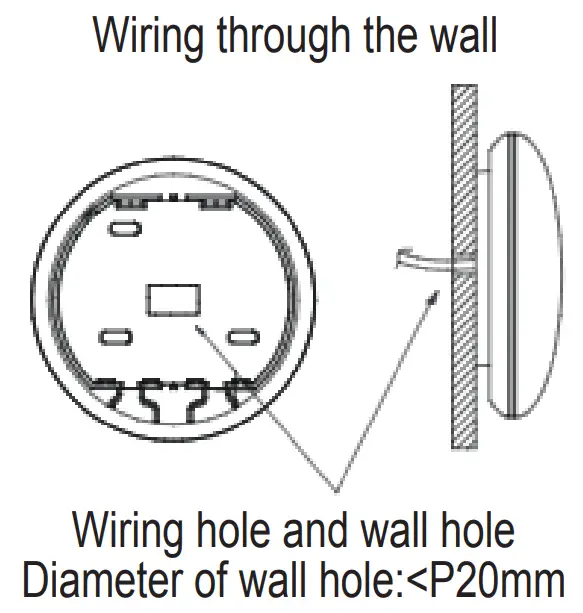
Connection
- For exposed mounting, two out letting positions.
- Shielded wiring.


![]() CAUTION
CAUTION
Avoid the water enter into the wired remote controller, use trap and putty to seal the connectors of wires during wiring installation. During installation, leave a certain length of the connection wire to ease the maintenance operations of the Smart port.
Reconnect the upper part of the Smart port
- After adjusting the upper case and then buckle the upper case; avoid clamping the wiring during installation.

SPECIFICATION
| Input voltage | DC 12V/300mA |
| Operating temperature | 0 °C-45°C/32°F-1 13°F |
| Operating humidity | 10%-85% |
| Maximum Transmitted Power | 19.BdBm Max |
| Frequency | WIFl:2.4G |
| Antenna Type | External omnidirectional Antenna |
OPERATION
For the correct use of the Kit, follow the indications described in the attached B1020 manual.
Costumer Support
OLIMPIA SPLENDID spa
via Industriale 1/3
25060 Cellatica (BS)
www.olimpiasplendid.it
[email protected]


