
coolinbo C140 Transfer Panas Pencetakan Film Self-Adhesive Karton PVC Vinyl Sticker Cutting Mesin Plotter Ganti Cricut Joy
Included
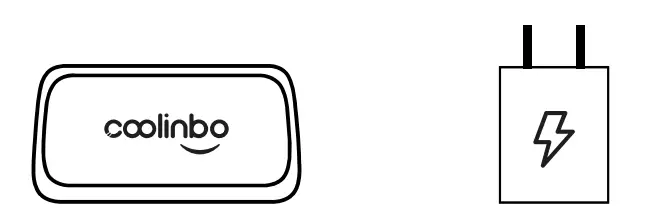
- Coolinbo Cuti machine
- Power adapter

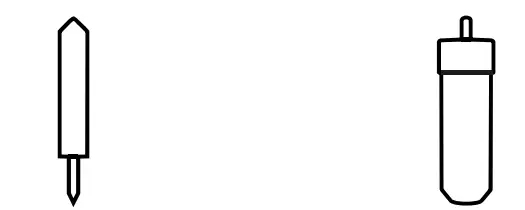
- Coolinbo Cuti Replacement Blade *2
- Coolinbo Cuti Blade Housing

- Material for a practice cut ( 1 2pcs)
- Transfer tape (12pcs)

- User guide


Get start with Coolinbo Cuti
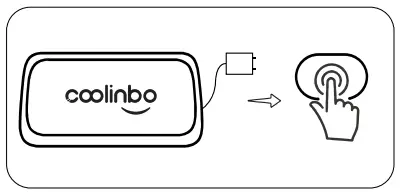
- 1. Plug in the power adapter and turn on your machine

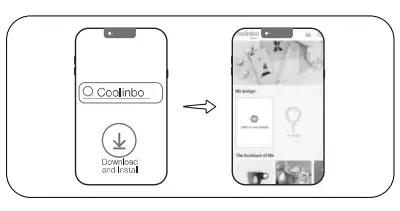
- 2. Search and install “Coolinbo Design” in Google Play (Android) or Apple Store (iPhone/iPad), then launch it

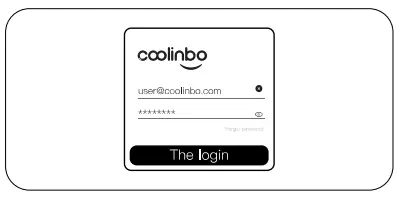
- Sign in with your Coolinbo ID
 (Please create a new Coolinbo ID first if you have not signed up)
 - Navigate to ‘Mine➔ My machines’, and click ‘Connect to a new machine’ to search and connect your machine with your Coolinbo ID

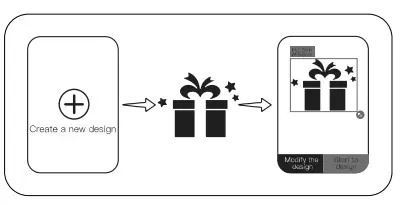
- Now you can create a new design or search a design, and send the data of design to the machine

 (Please create a new Coolinbo ID first if you have not signed up)
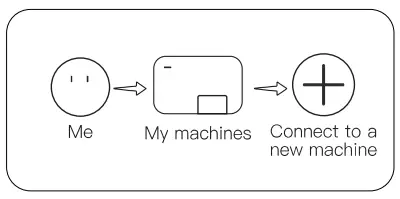
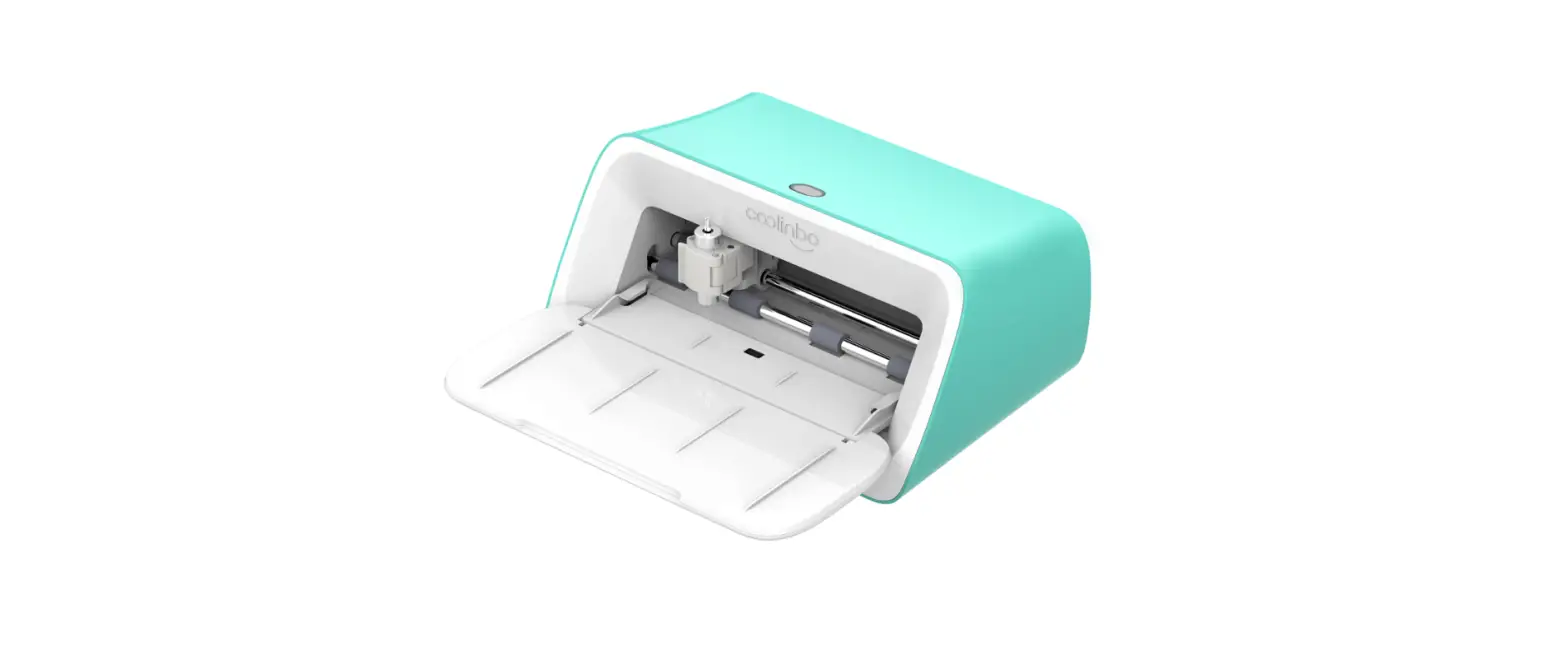
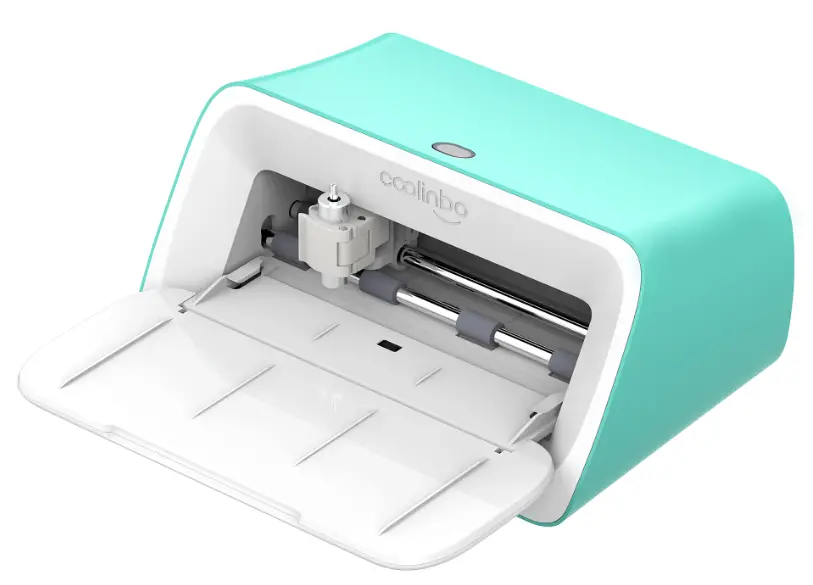
Machine overview
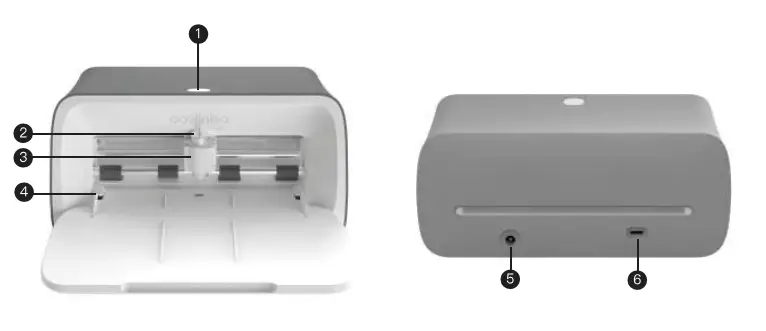
- Power button
- Blade housing
- Clamp
- Material guides
- DC in
- USB-C
Power on and power off
Power on: Press the power button and the light will on with white color
Power off: Long press the power button. when the light flashes rapidly with red color, release it.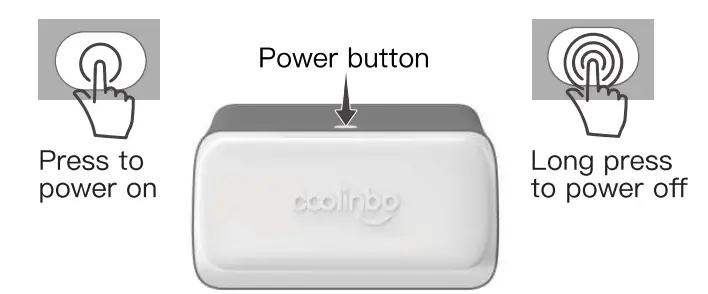
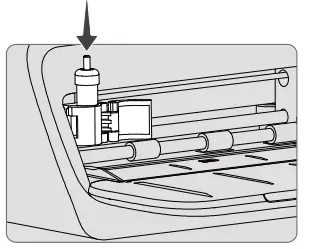
Blade replacement
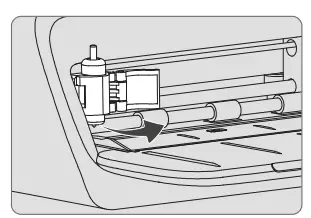
- Open the clamp

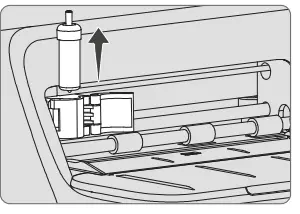
- Pull the blade housing up to remove

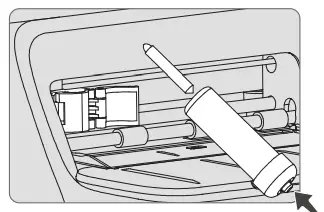
- Depress the plunger and carefully pull out the blade

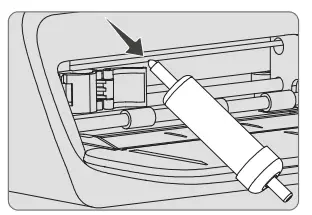
- Drop new blade into the housing

- Hold the clamp and drop in blade housing

- Close the clamp

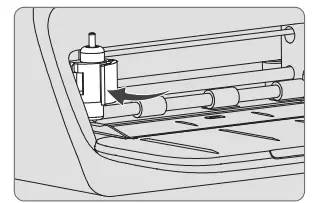
Load and unload materials 
- Load material: Position mterial under material guides, and press the power button
- Unload material: When the material is loaded, press the power button, and the material will be unloaded automatically
Indicator light
| Color | State | Description |
| White | Steady | Standby |
| Blink | Working | |
| Blue | Steady | Network not connected |
| Blink | Connecting network | |
| Red | Blink | Error occurred |
| Rapid Blink | Shutting down | |
| Green | Blink | Finding device |
Specification
| Description | Parameter |
| Max. paper width | 140mm |
| Max. cutting width | 125mm |
| Cutting precision | 0.1mm |
| Repeat precision | 0.1mm |
| Cutting speed | 18mm/s |
| Cutting pressure | 300g |
| Connection | Bluetooth/WIFI/USB-C |
| Input | 100-240V~50-60HZ |
| Output | 24V=2.0A |
| Power | -5,48W |
| Size | 200×1 37x95mm |
| Net weight | 1500g |
| Packing size | 256x192x160mm |
FCC Warnning
This equipment has been tested and found to comply with the limits for a Class B digital device, pursuan t to part 15 of the FCC Rules. These limits are designed to provide reasonable protection againstharmful interference in a residential installation. This equipment generates, uses and can radiateradio frequency energy and, if not installed and used in accordance with the instructions, maycause harmful interference to radio communications. However, there is no guarantee thatinterference will not occur in a particular installation. If this equipment does cause harmfulinterferenc e to radio or television reception, which can be determined by turning the equipmentoff and on, the user is encouraged to try to correct the interference by one or more of thefollowing measures:
- Reorient or reloca te the receiving antenna.
- Increase the separation between the equip ment and receiver.
- Connect the equipment into an outlet on a circuit different from that to which the receiver is could void your authority to operate this equipment.
This device complies with part 15 of the FCC Rules. Operation is subject to the following two conditions:
- This device may not cause harmful interference, and
- this device must accept any interferenc e received, including interference that may cause undesired operation.
This equipment complies with FCC radiation exposure limits set forth for an uncontrolled environment. This equipment should be installed and operated with minimum distance 20cm between the radiator and your body.


 Non Adhesive Frosted Privacy Decorative Window Film Installation Guide")

