KRAMER K-POD303 Desk and Table Mounting Enclosure
SAFETY WARNING
Disconnect the unit from the power supply before opening and servicing
For the latest information on our products and a list of Kramer distributors, visit our Web site where updates to these installation instructions may be found.
We welcome your questions, comments, and feedback.
K-POD303 Mounting Enclosure for Kramer Decora Size Products and Inserts
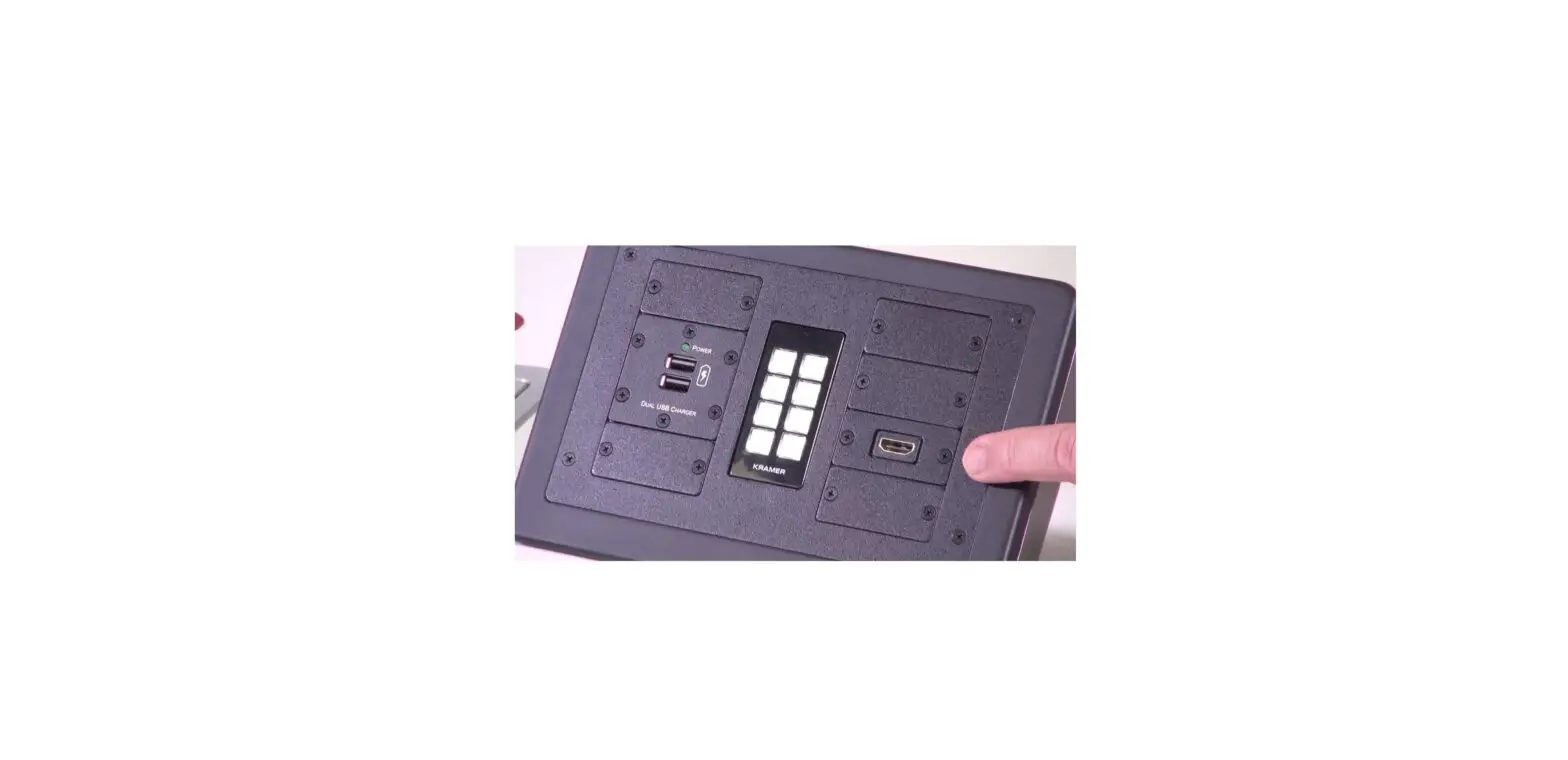
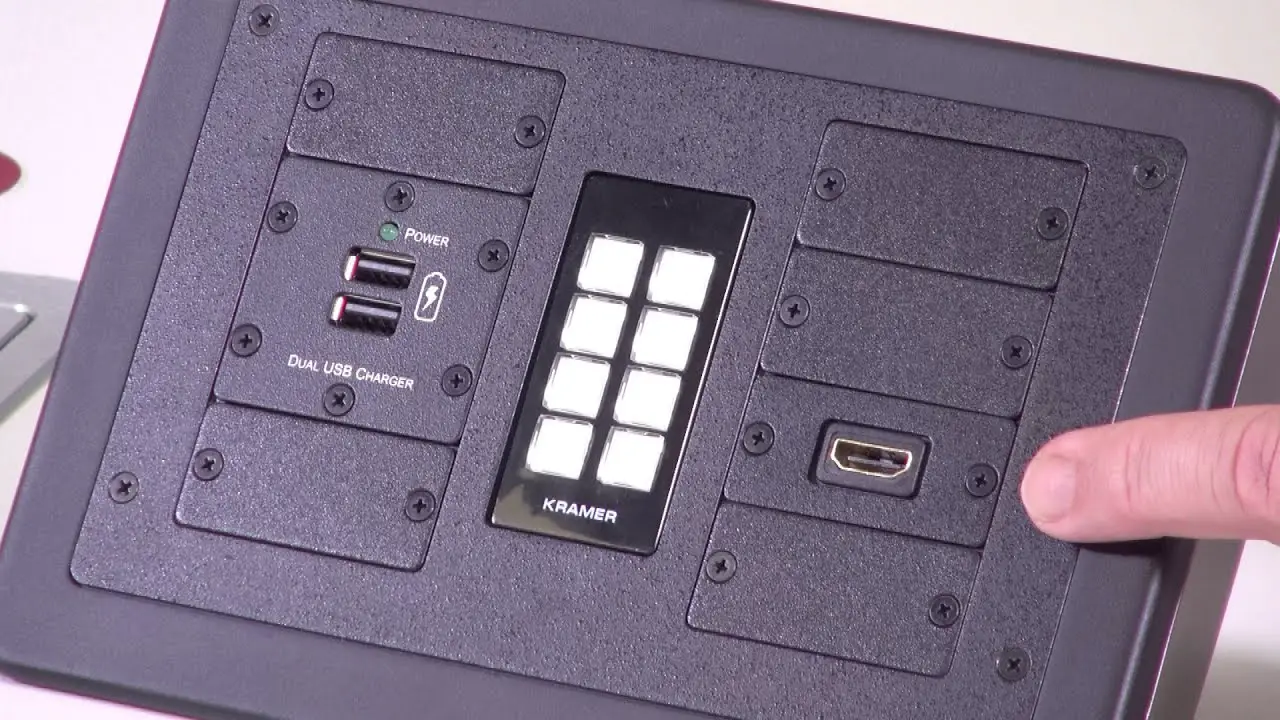
Congratulations on purchasing your Kramer K-POD303 a Mounting Enclosure for Kramer Decora Size Products and Inserts. K-POD303 features a modular design that allows you to custom-configure the insert layout based on your specific needs. In addition, for an elegant look, K-POD303 fits a variety of American Decora™ faceplates.
Note: K-POD303 Decora Size Products, power socket, and power cord are purchased separately.
Installation Instructions
Step1:
Get to know your K-POD303
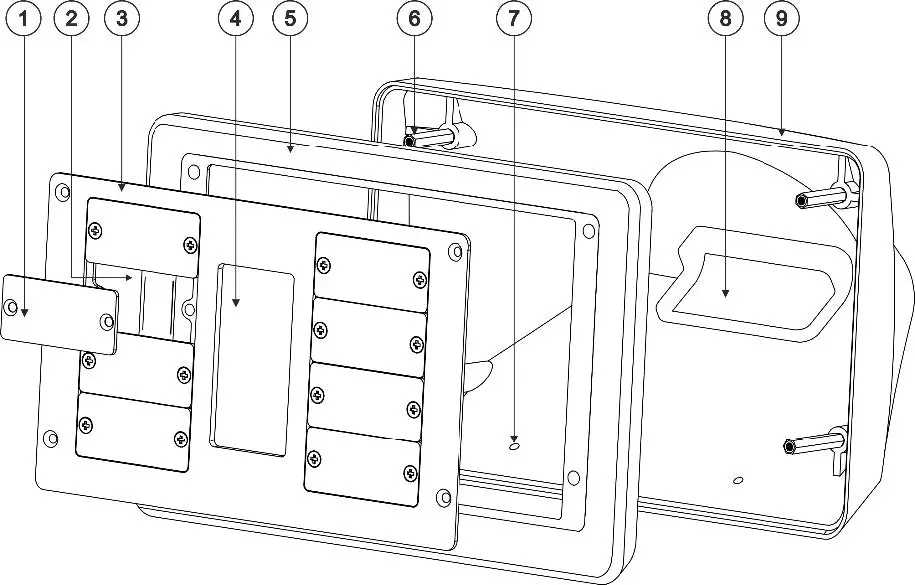
Feature | Function | |
| 1 | Blank Inserts (x8) | Place holder for modular inserts. |
| 2 | Insert Openings (x2) | For single or dual inserts. |
| 3 | Frame | A modular frame for Decora size products and an extensive choice of inserts such as: HDMI, LAN, Control, USB, and more. |
| 4 | Decora Opening | To install a Decora™ size faceplate. For example, RC-306. |
| 5 | Front Panel | To mount the Frame on the Enclosure. |
| 6 | Attachment Screw Openings (x4) | To attach the Frame and Front Panel to the Enclosure. |
| 7 | Table Screw Openings (x2) | To install K-POD303 onto a table surface. |
| 8 | Cable Opening | To pass the cables either through the rear side of K-POD303 or under the table/podium (if the surface has a cut-out opening). |
| 9 | Enclosure | To install the Frame and Enclosure Frame to a table. |
Step 2:
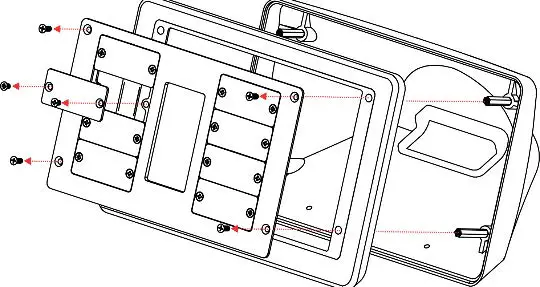
Disassemble K-POD303
Do these steps to disassemble K-POD303:
- Remove the four attachment screws.
- Remove the Frame and Enclosure Frame.
- As necessary, remove the Blank Inserts from the Frame.

Step 3:
Install K-POD303
If you plan to pass the cables below the table, it is necessary to drill a hole in the table before you install K-POD303 onto the table’s surface. If you plan to pass the cables through another opening, skip the first part of this section.
To drill a hole in the table:
- Place the K-POD303 on the surface and carefully mark the opening area so it fits the opening in the K-POD303.
- Using any standard cup bit drill, with a diameter of 30mm (1.2”), drill a hole in the table in the marked location.

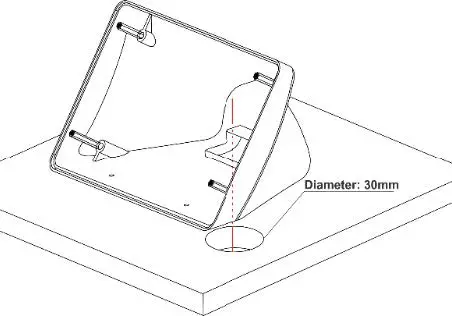
Take care not to damage the table. Kramer Electronics is not responsible for any damage caused to the table.
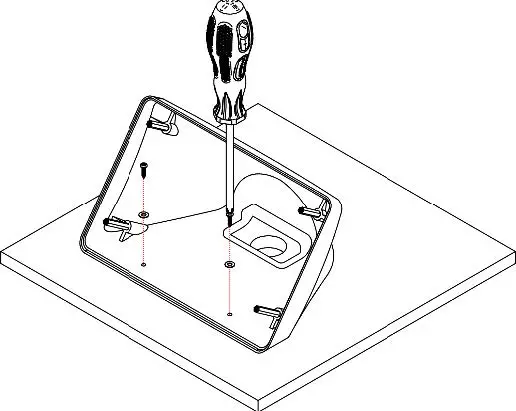
To attach K-POD303 to the table surface:
- Place the K-POD303 on the table in the planned location (if you drilled a hole in the table for the wires to pass through, then fit the underside opening to that hole).
- Pass the 2 4×1/2” screws (supplied) through the table screw openings and tighten them to the table’s surface.

Step 4:
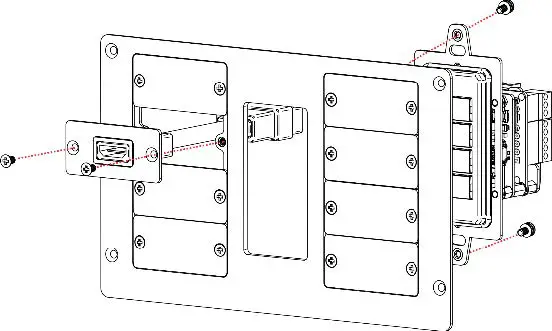
Attach the Kramer Decora Product and Inserts to the Frame
- Connect the Product to the rear of the Frame (use the screws provided by the Decora product manufacturer).
- Remove the Blank Insert(s) and install the necessary inserts(s).

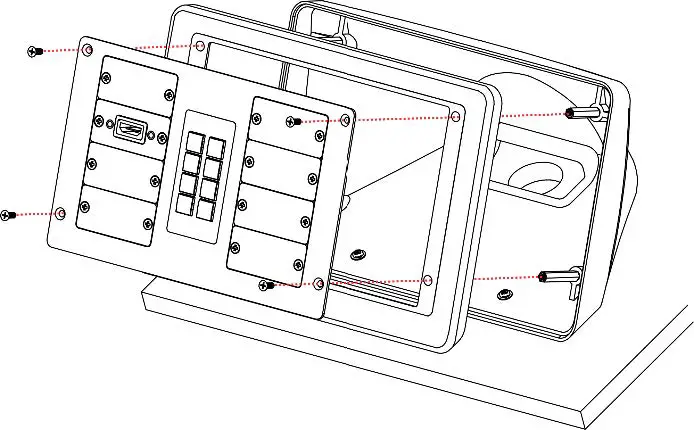
Step 5:
Attach the Frame and Front Panel to K-POD303
- Pass the cables through the Enclosure’s cable opening.
- Align the Enclosure Frame holes with the Enclosure screw openings.
- Position the Frame over the Front Panel and secure them together to the Enclosure Attachment Screw Openings with screws (supplied).

Specifications
| Environmental Conditions | Operating Temperature | 0° to +40°C (32° to 104°F) |
| Storage Temperature | -40° to +70°C (-40° to 158°F) | |
| Humidity | 10% to 90%, RHL non-condensing | |
| Regulatory Compliance | Safety | CE |
| Environmental | RoHs, WEEE | |
| Enclosure | Type | Gray ABS enclosure; Black ABS front frame; Blank Insert |
| General | Net Dimensions (W, D, H) | 22cm x 14.3cm x 13.3cm (8.66″ x 5.62″ x 5.23″) |
| Shipping Dimensions (W, D, H) | 26.7cm x 19cm x 11cm (10.51″ x 7.48″ x4.33″) | |
| Net Weight | 0.38kg (0.83lbs) approx. | |
| Shipping Weight | 0.64kg (1.41 lbs) approx. | |
| Accessories | Included | Installation screws and washers |
| Specifications are subject to change without notice at www.kramerav.com | ||
K-POD303 Mounting Enclosure for Kramer Decora Size Products and Inserts.
www.kramerAV.com. [email protected].


