
make it real 1403 Insint Dreamcatcher

WHAT’S INSIDE
- ring

- silver cord 3 m (3.3 yrd)

- decorative butterfly

- bead threader

- colors of ribbon 23 m (25 yrd)

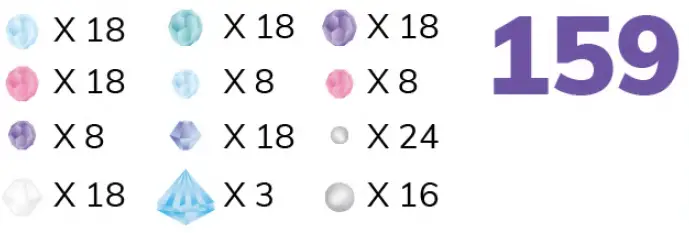
- assorted beads

- nylon cord 1 m (1.09 yrd)

- sheet of adhesive gems

- clips

- bead trays


You will need

LEGEND
![]()
- Scissors
- Rule
- Adhesive tape
- Craft glue
![]()
- Clear nail polish
- Let dry
- Kno
![]()
- Double knot
- Repeat
INSTALLATION INSTRUCTIONS
- Keeping the ribbon at an angle, tape the end of the wide purple ribbon attaching it to the metal ring.
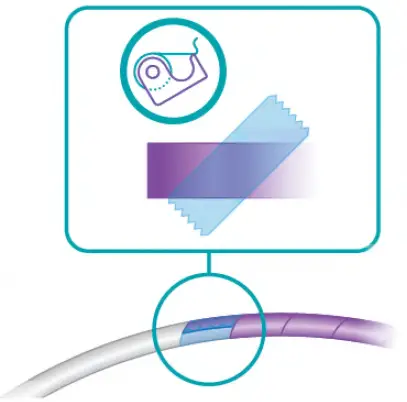
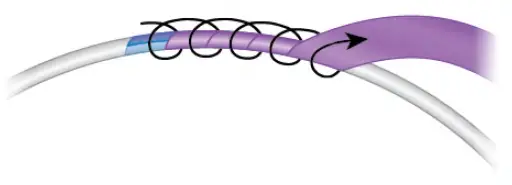
- Wrap the ribbon tightly all around the metal ring.
- Make a double knot.
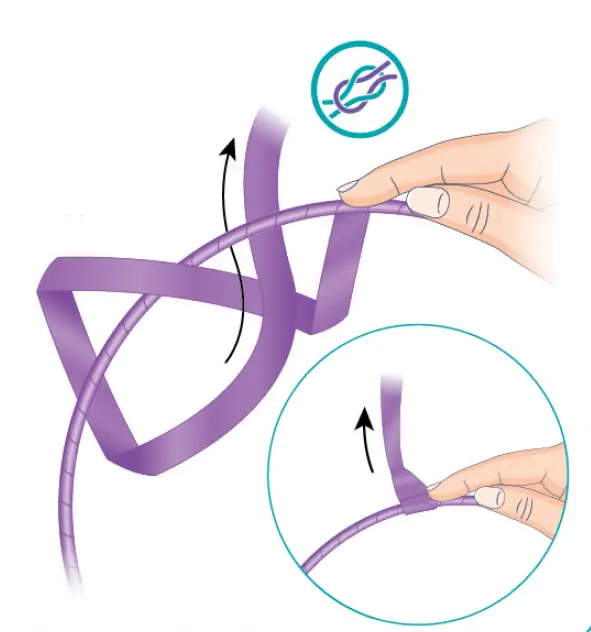
- Add a drop of craft glue or clear nail polish. Wait 5 minutes for it to dry.
- Cut the excess ribbon.

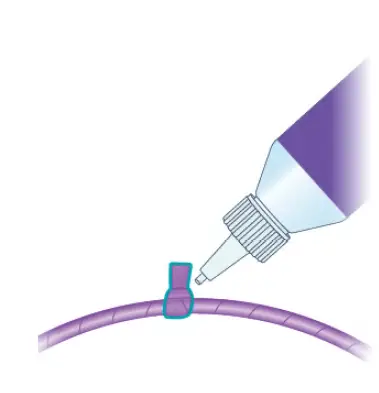
- With one end of the silver cord make a double knot onto the ring.

- Add a drop of glue to the other end. Let dry for 5 minutes.

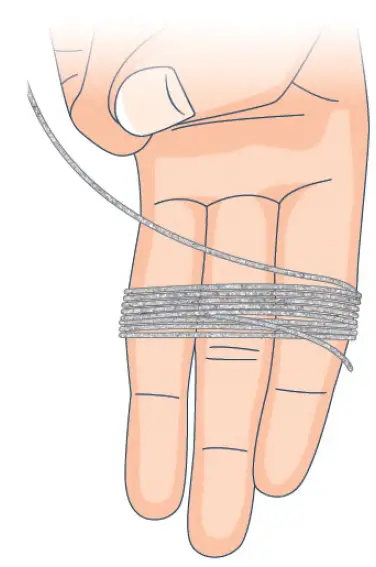
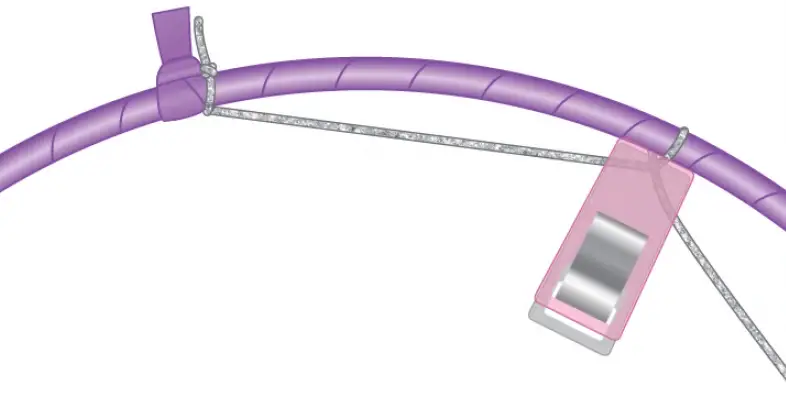
- At 30 cm (12 in) from the knot on the ring, wrap the remaining length of the silver cord loosely around your fingers.
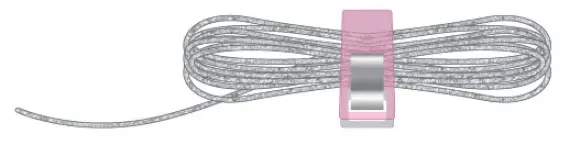
- Use the clip to hold the cord together. This will help you to weave the web pattern.
- With a ruler and a pen, mark the ring at 6 cm (2 ¼ in) from the first knot.
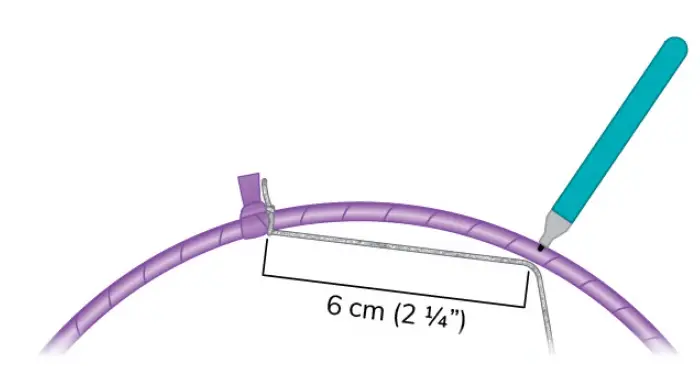
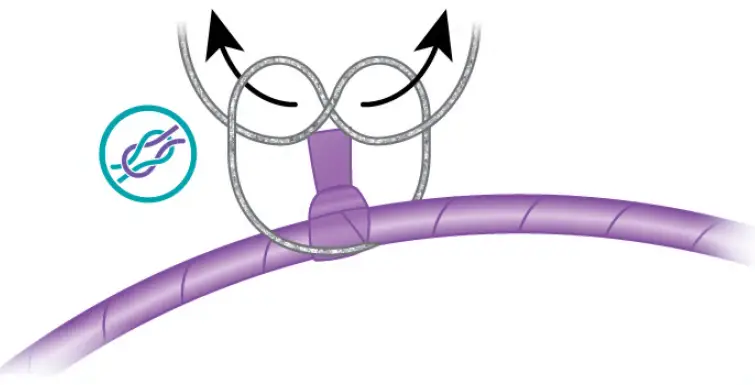
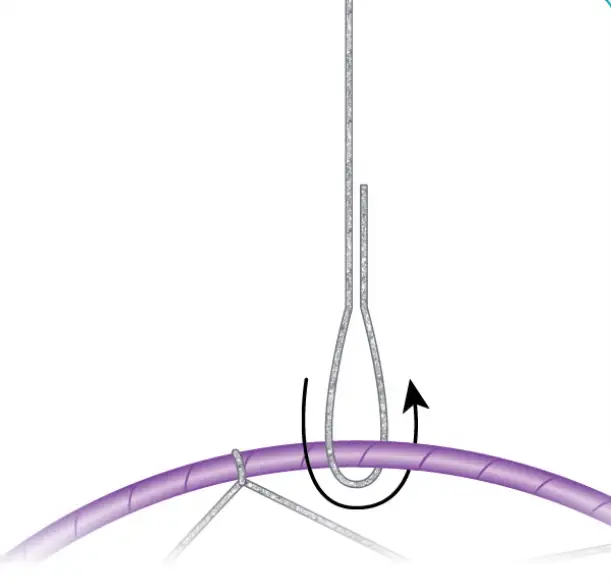
- Pass the cord over the ring.
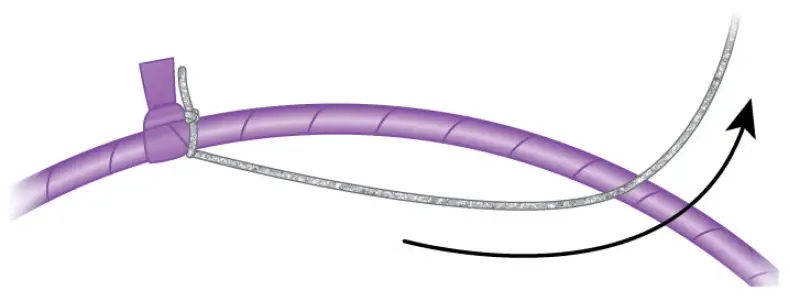
- Slide the cord through the loop from the back.
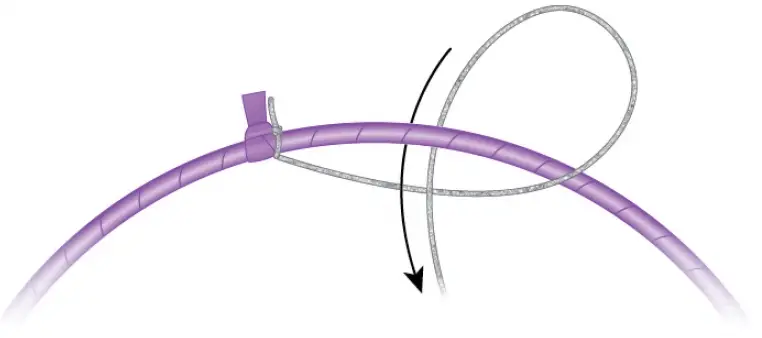
- Place the cord on the mark and pull gently on the cord to tighten it.
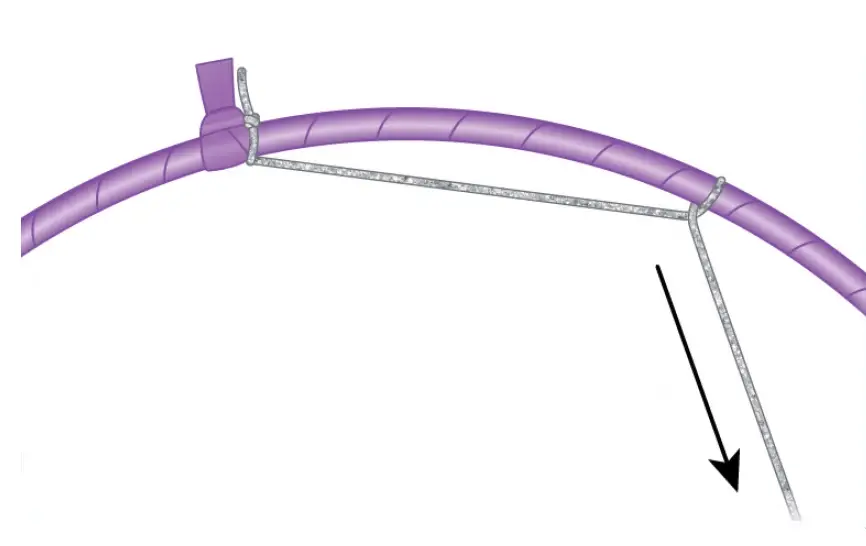
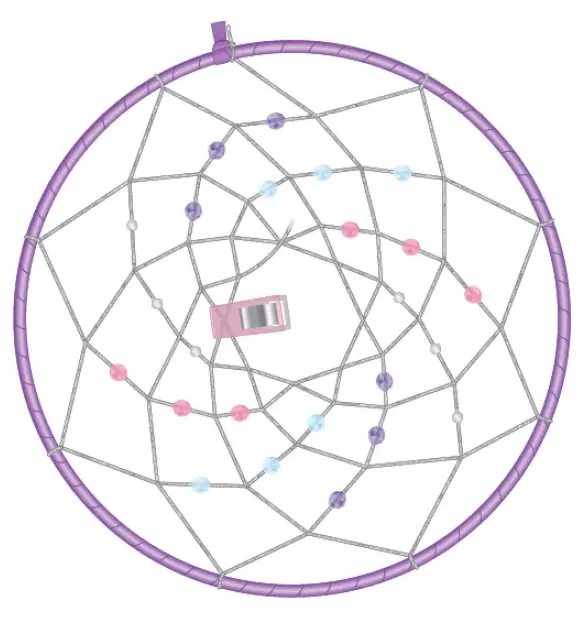
- Clamp the second clip onto the cord intersection to hold it in place.
- Repeat steps 10 to 14 until you have 8 loops on the ring.

- Unclamp the silver cord. Following the pattern, thread 12 beads onto the cord.
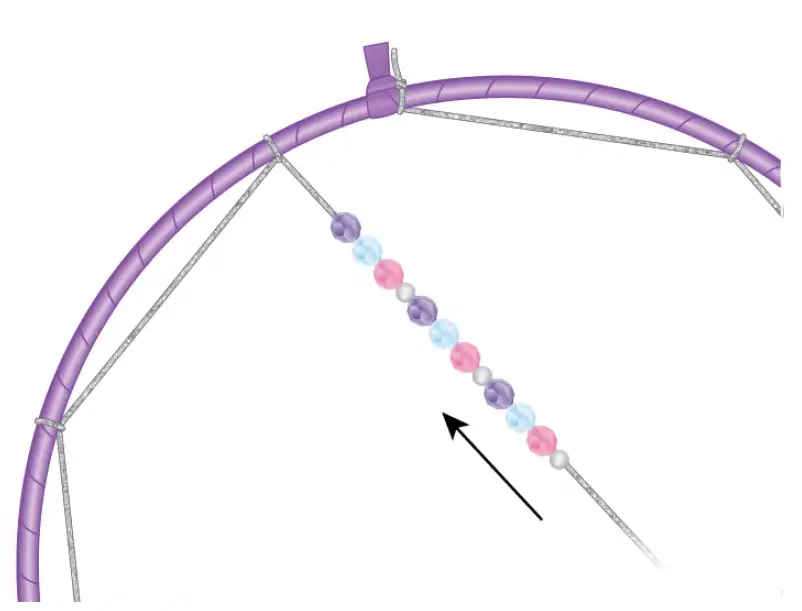
- Wrap the silver cord as in step 8 and 9.
- Slide the first bead to the left.
- Using the same technique as step 11 and 12, pass the cord and the beads over the cord.
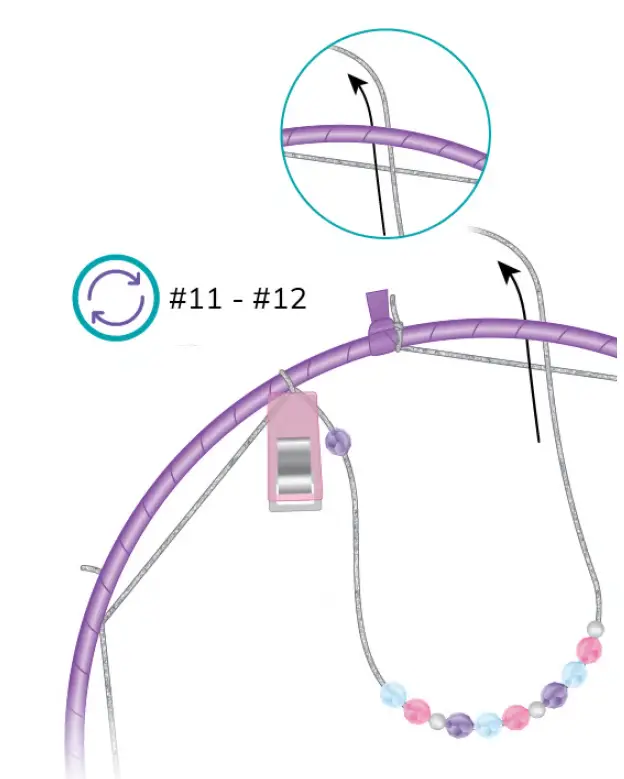
- Slide the cord through from the back.
- Make sure the beads are following.
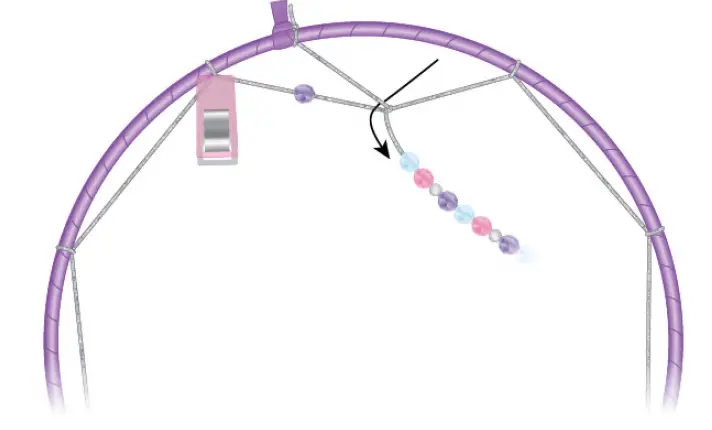
- Move the holding clip to secure loop.
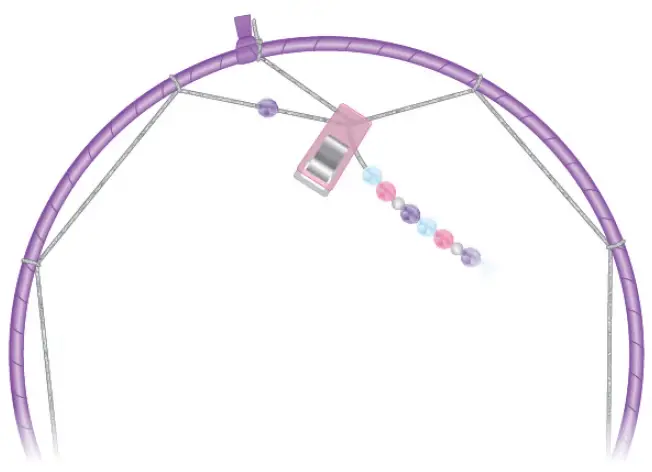
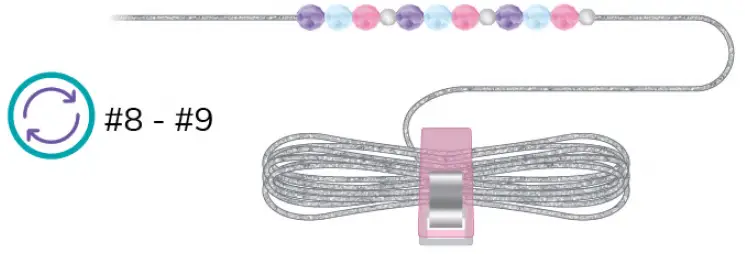
- Repeat steps 17 to 21 until no more beads are left on the cord.
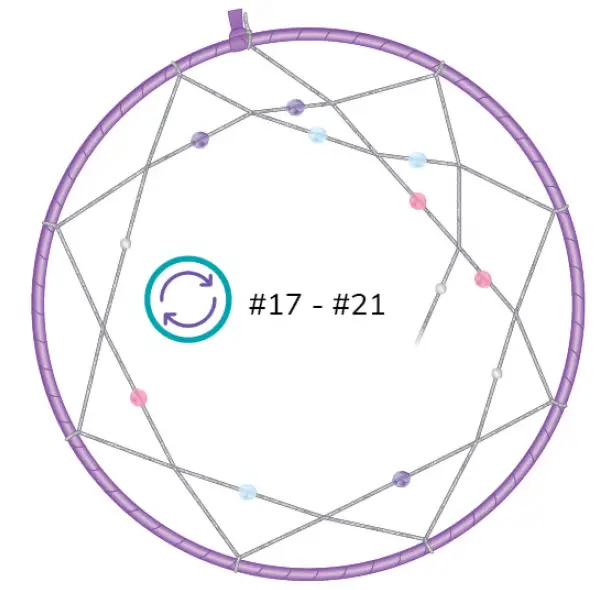
- Unclip the cord and thread the 12 remaining beads.

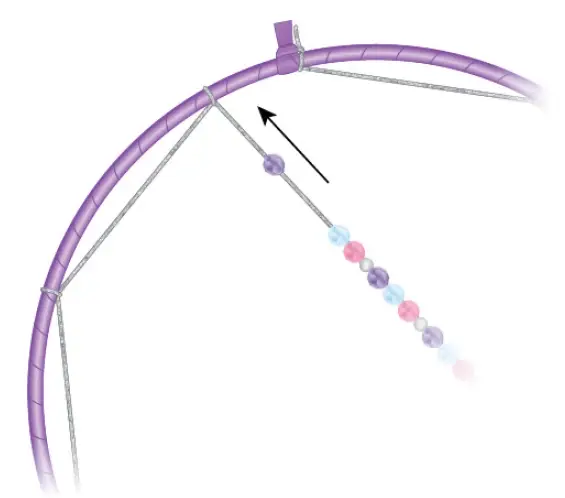
- Continue to weave the web pattern as in steps 18 to 21 until no beads are left on the cord.
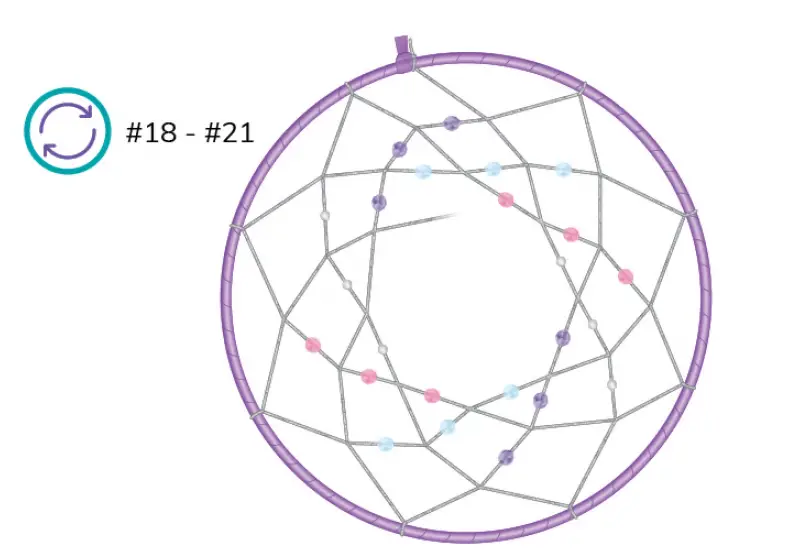
- Continue weaving for 1 last row.
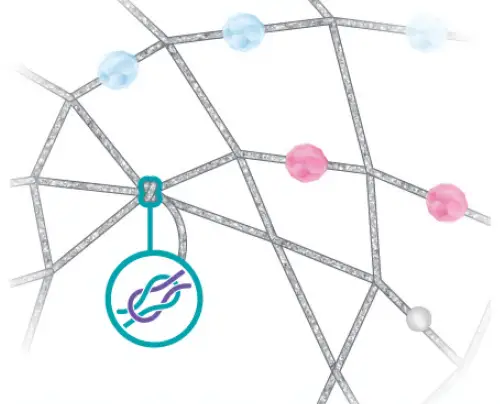
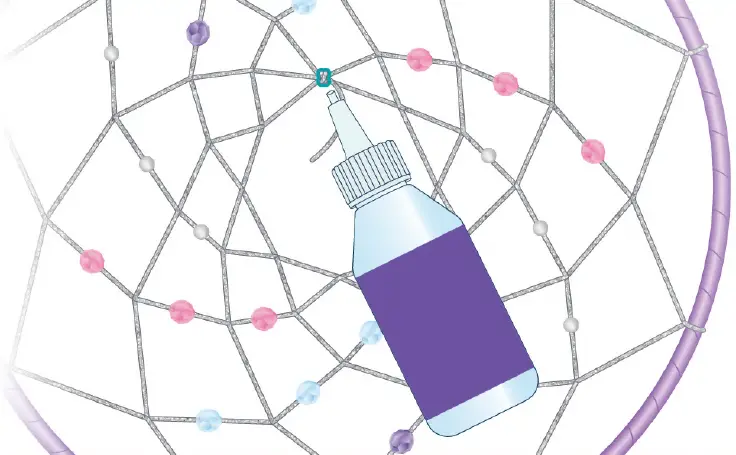
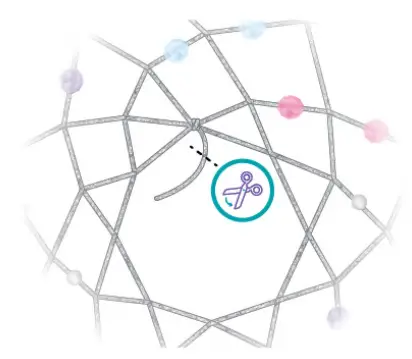
- To secure the weaving, tie a double knot on a junction, as shown.
- Add a drop of glue or clear nail polish on the knot, let dry for 5 minutes.
- Cut the excess cord.
- Use the remaining piece of cord to create a loop to hang the dreamcatcher.
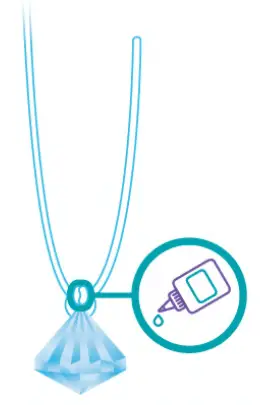
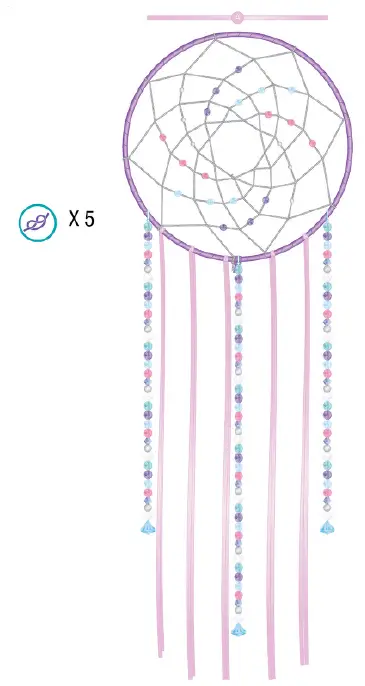
- Thread one sequence of beads and secure them by making a knot on top of them.
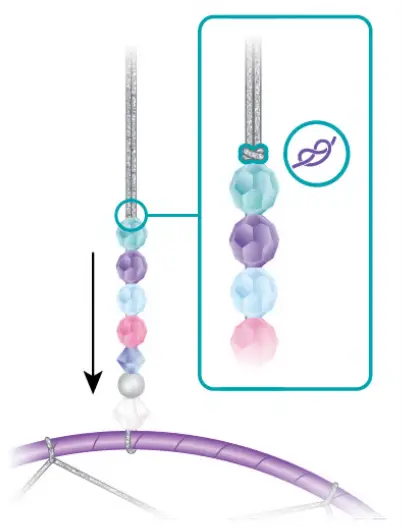
- Make a knot at 10 cm (4 in) and cut the excess cord.

- Hang the dreamcatcher to help you complete the following steps.
- Put a drop of glue on the ends of the 3 nylon cords and wait 5 minutes for it to dry.

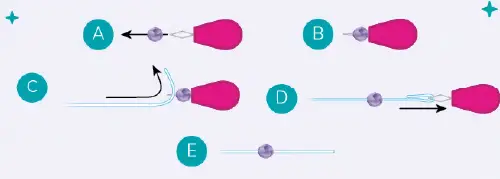
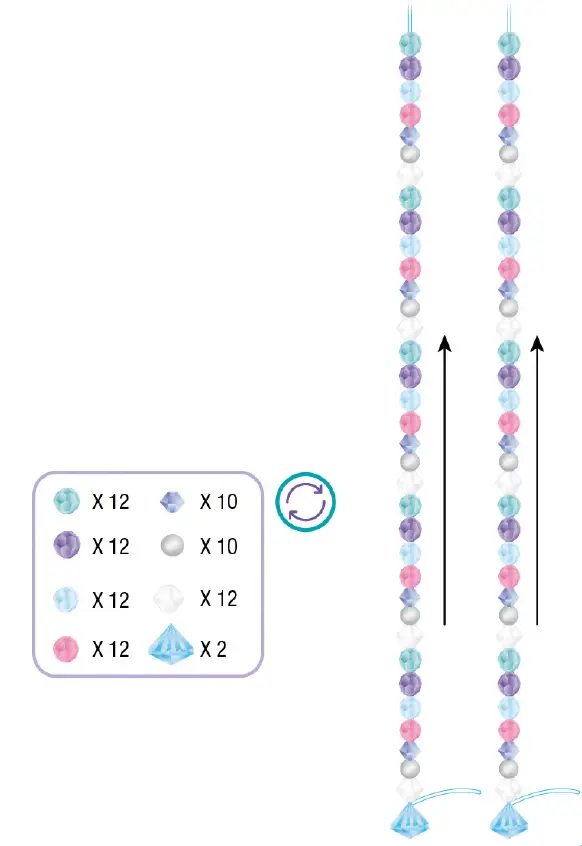
- Thread a pendant bead onto the end of a nylon cord.

- Make a double knot to hold the bead in place.
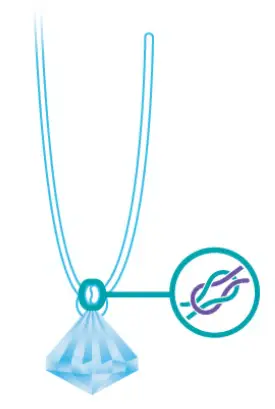
- Add a drop of glue on the knot.
- Don’t cut the excess now! Cut them only on step 42 when all the bead strands are attached to the dreamcatcher.

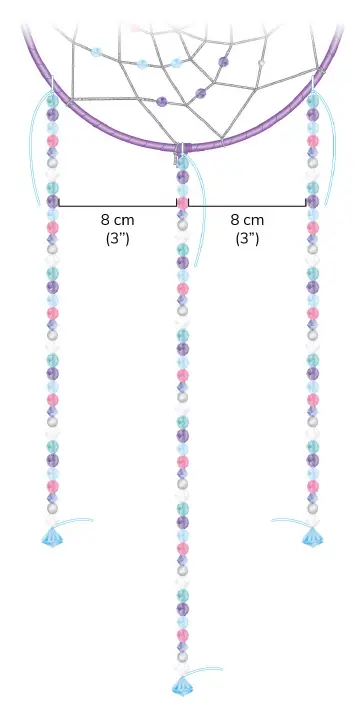
- Thread the beads following the pattern until you have 43 beads on the thread, including the pendant. This is the middle strand and the longest.
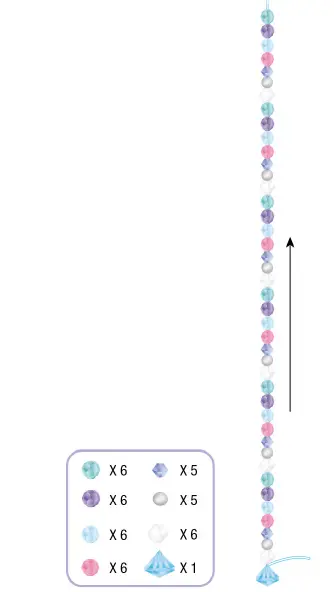
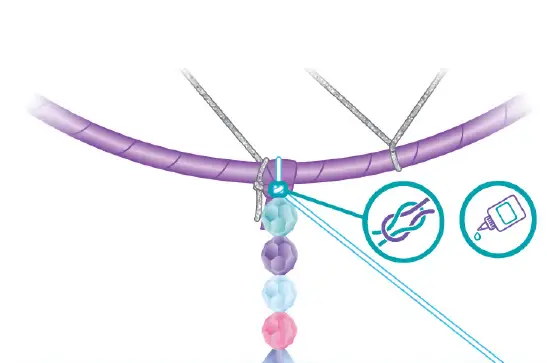
- Attach this strand onto the middle of the ring with a double knot. Add a drop of glue.
Tip: Use the threader to thread the beads if needed.
- Repeat steps 33 to 37 for the 2 other strands, but this time using 36 beads on each strand.
- Attach the strands at 8 cm (3 in) from the middle strand with a double knot.
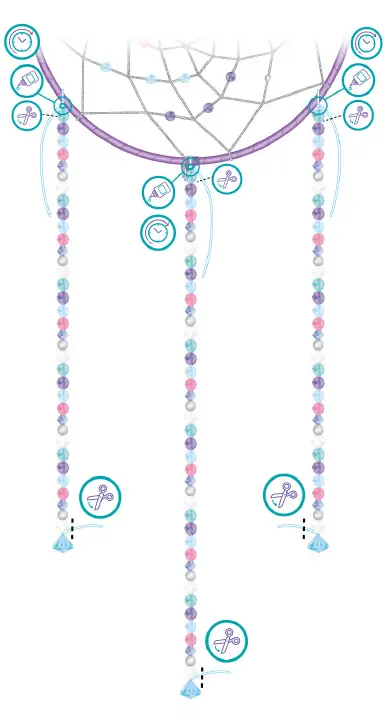
- Add a drop of glue on all the knots. Wait 5 minutes for the glue to dry. Cut the excess cords.
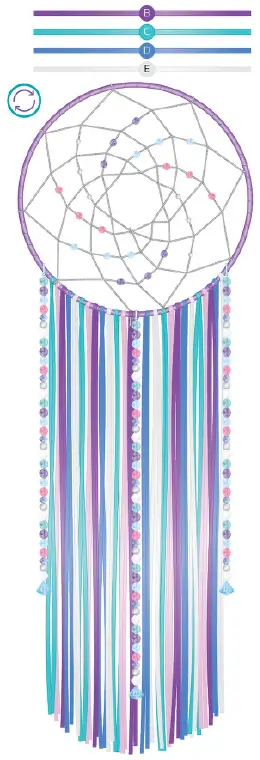
- One color at the time, cut pieces of 70 cm (27 ½ in) long.
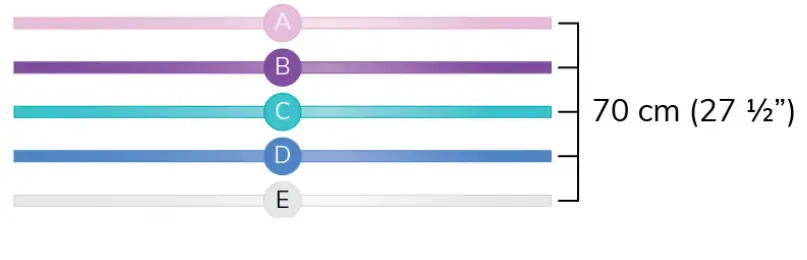
- Attach the ribbons by making a double knot onto the bottom of the ring distributing them evenly.
- Put a small drop of glue on the ribbons ends to prevent them from unraveling.
- Repeat for the other ribbons.
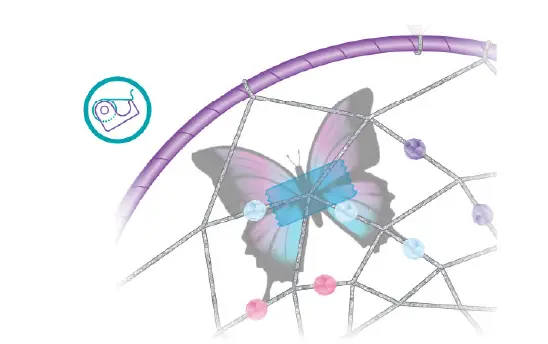
- Add gems to the butterfly.

- Gently fold the wings to make the butterfly more realistic.

- Use a small piece of adhesive tape to fix the butterfly in place.

WARNING
CHOKING HAZARD – small parts. Not suitable for children under 3 years. This toy contains functional sharp points .
MAKE IT REAL
1700 Reisterstown Rd Ste 211 Pikesville MD 21208 USA 410-995-8685 © 2020 MAKE IT REAL, LLC G.08 Flint Glass Works, 64 Jersey Street Ancoats Urban Village, Manchester, M4 6JW UK +44 (0) 161 302 4100 makeitrealplay.com


