![]()
 Colorbration Plus 24 Inches Professional Monitor
User Guide
Introduction
What is Colorbration⁺?
Color accuracy is one of the most important aspects of the creative workflow and ensuring that your monitor’s color accurately represents the color of your original
image or digital file is essential. The software allows you to:
- Calibrate and profile your monitor quickly and easily.
- Control white point, luminance, contrast ratio, gamma, and more.
- Save time, money, guesswork, and frustration that generally comes with monitor calibration.
- Focus on your work with complete confidence.
Monitor Support
Colorbration⁺ supports the following models:
| • VP2458 • VP2771 • VP3481 • VP2768 • VP2785-4K | • VP2468 • VP2785-2K • VP3881 • VP2768-4K • VP3268 |
Measurement Device Support
Currently, Colorbration⁺ supports:
• X-Rite:
i1 Display Pro
1 Pro 2
ColorMunki Photo
ColorMunki Design
1Studio
• Datacolor
Spyder X series
Initial Setup
This section provides important instructions for getting started with Colorbration⁺.
Where to Get Colorbration⁺?
The Colorbration⁺ software can be downloaded at: https://color.viewsonic.com/support/software
After the download completes, launch the Setup file and follow the on-screen directions to install the software.  Connection Methods
In addition to downloading the software, ensure that your monitor and measurement device are properly connected. There are two methods of connection for your monitor:
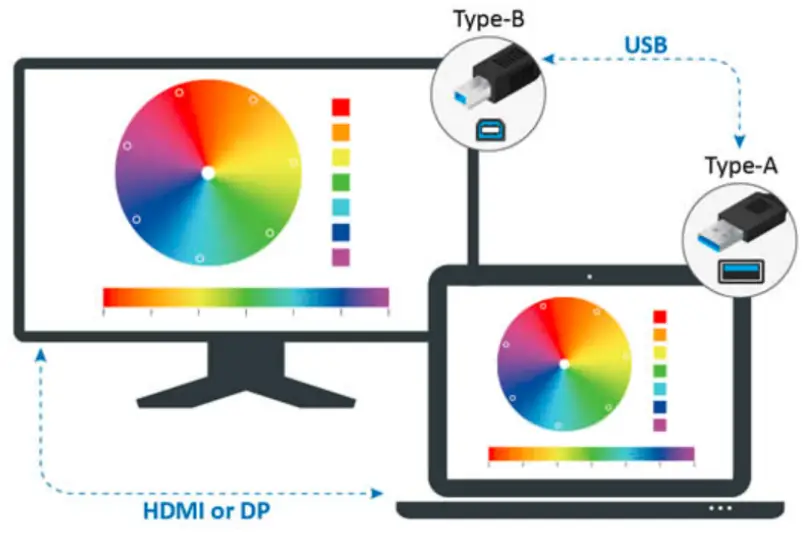
Users with HDMI or DisplayPort
Users with an HDMI or DisplayPort connection should also connect their monitor and computer via a USB Type-B to USB Type-A cable.
 Users with USB Type-C
Users with a USB Type-C connection can connect their monitor and computer in one of two ways:
• USB Type-C cable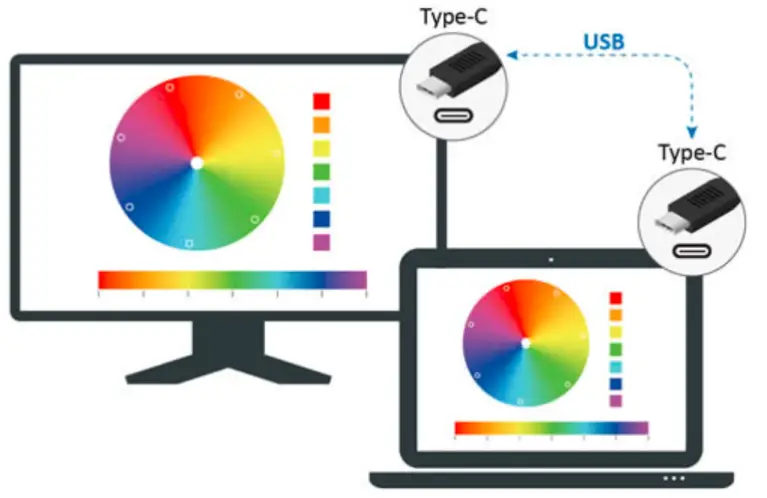 • Or, connect via HDMI/DisplayPort and USB Type-A to the monitor through a USB Type-C adapter.
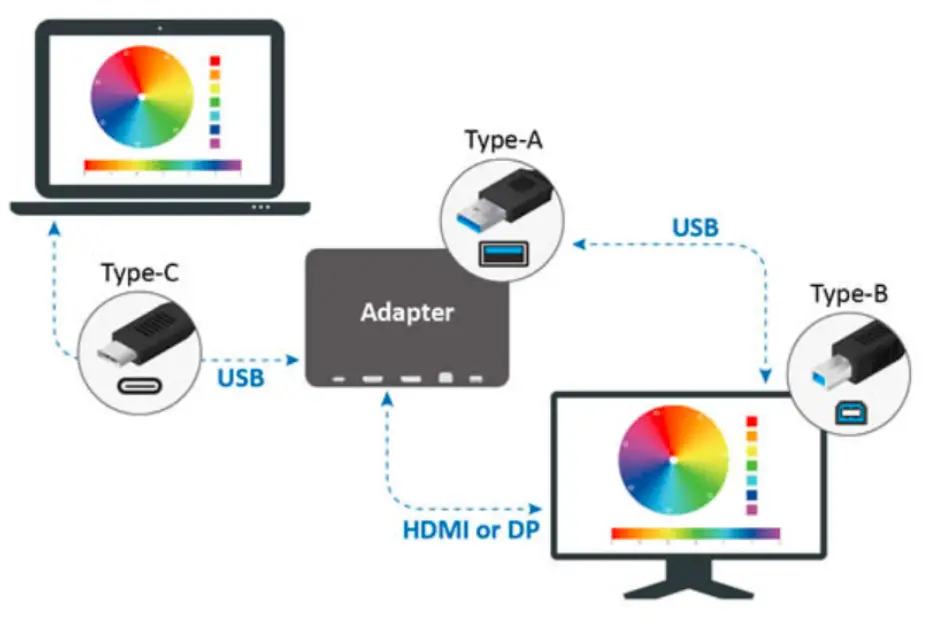 Measurement Device Connection
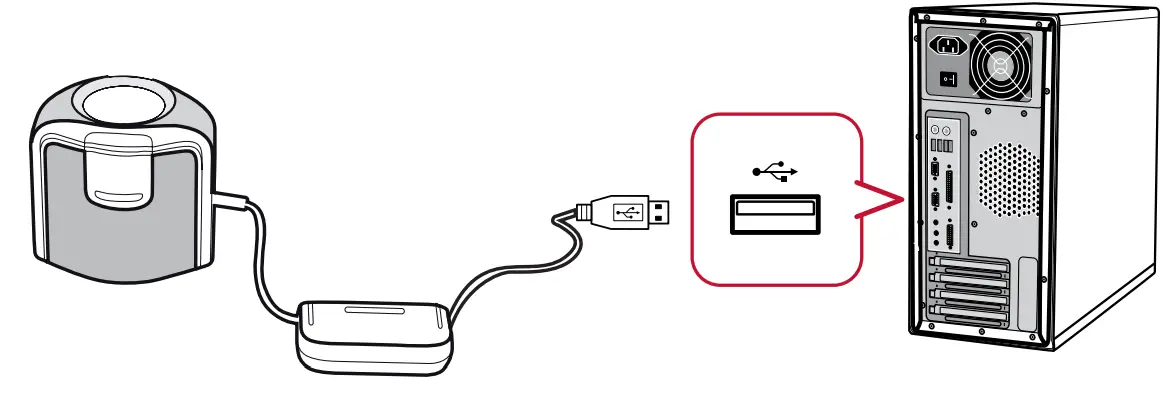
NOTE:
The follow images are for reference only. The installation method will vary by the measurement device used. Please refer to the user manual of the respective measurement device for details.
- Ensure your measurement device is connected properly.

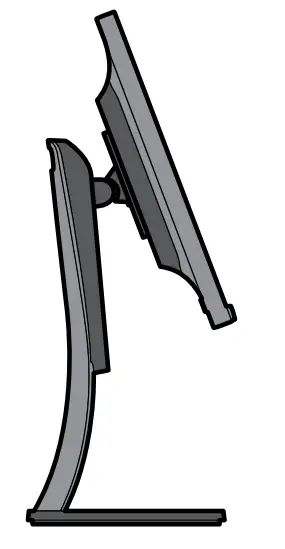
- Tilt your monitor slightly upwards.

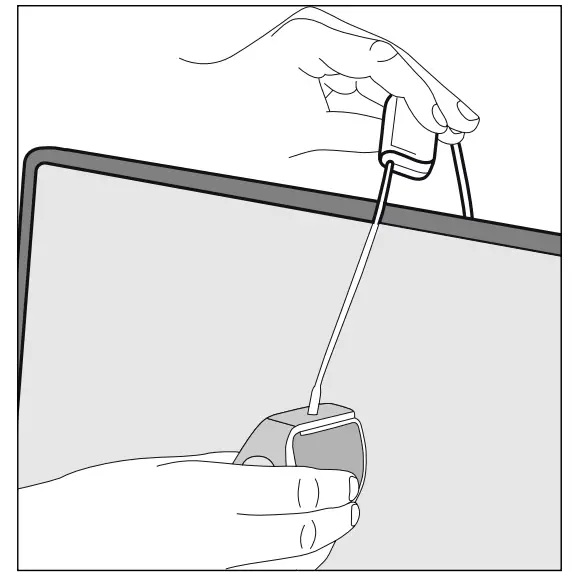
- Carefully place the measurement device in contact with the monitor’s display.

Using Colorbration⁺
This section will describe use and operation of Colorbration⁺.
Introduction
Upon initially launching Colorbration⁺ the user will have two modes to choose from:
- Basic Mode
- Advanced Mode

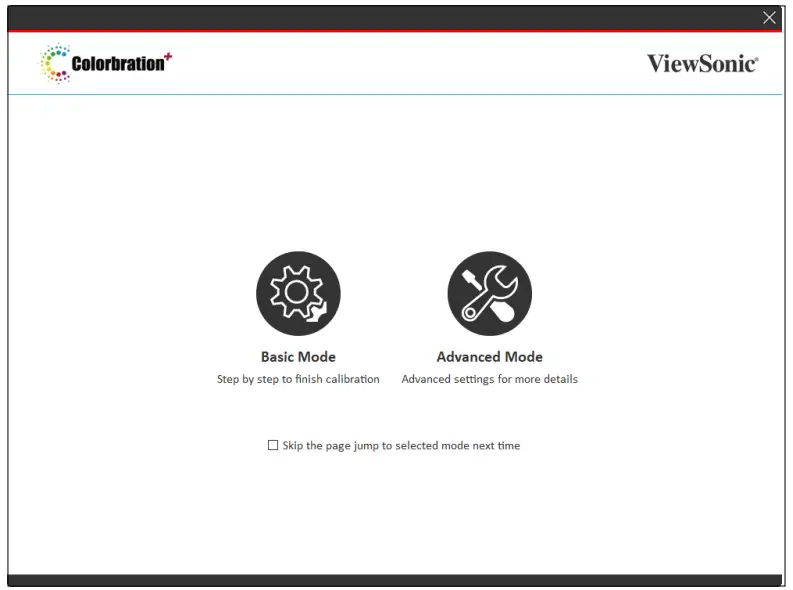
NOTE:
The user can choose to skip the welcome page by checking the box under the two modes.![]() Basic Mode
Basic Mode
This mode simplifies the calibration process. The user simply selects their monitor, measurement device, and calibration settings before starting calibration. 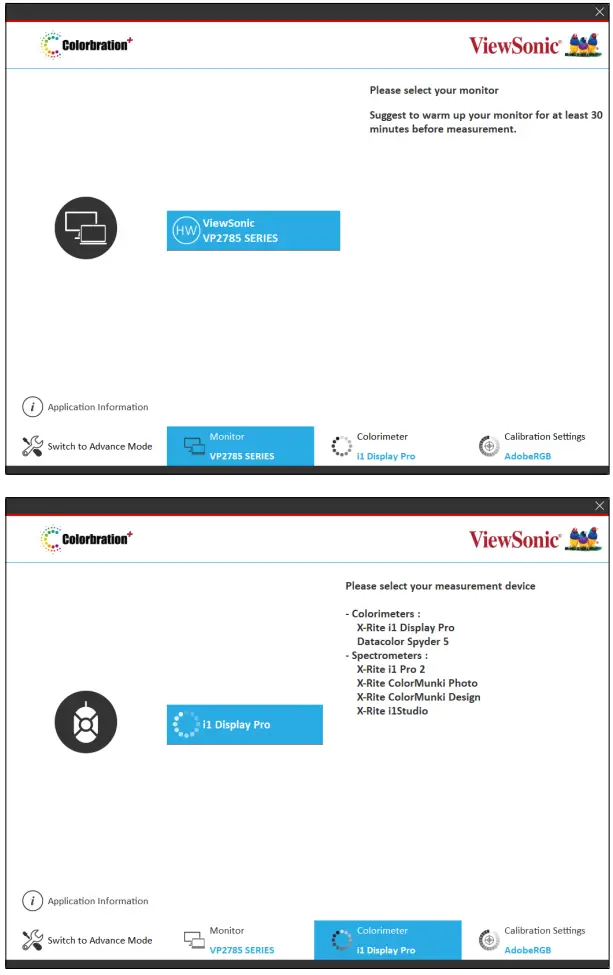
NOTE:
Calibration settings can be further customized by adjusting “Luminance” and selecting which user profile (e.g., Cal 1/Cal 2/Cal 3) the calibration result will be saved to.![]() Advanced Mode
Advanced Mode
This mode provides the user with more detailed options, via the Sidebar Menu, in addition to the basic ones found in Basic Mode. 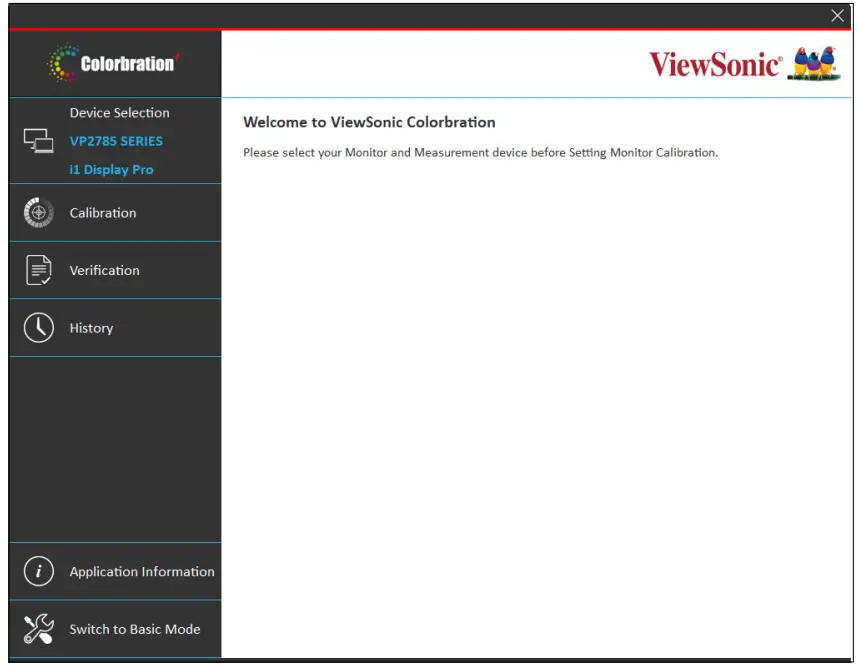 Sidebar Menu
On the left side of Advanced Mode is the Sidebar Menu.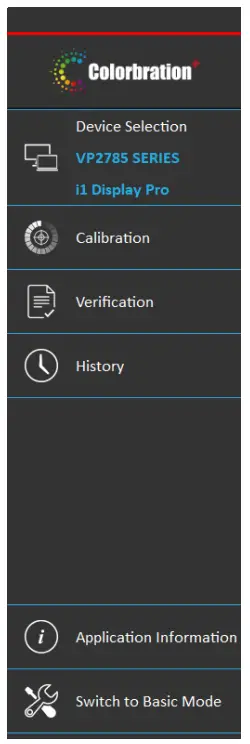
| Menu Option | Description |
| Device Selection | Select your monitor and measurement device. |
| Calibration | Choose your calibration settings and start calibration. |
| Verification | Choose your verification settings and start verification. |
| History | Review previous calibrations. |
NOTE:
For more information, see “Sidebar Menu” on page 14.
General Operation
To begin the Advanced Mode calibration process:
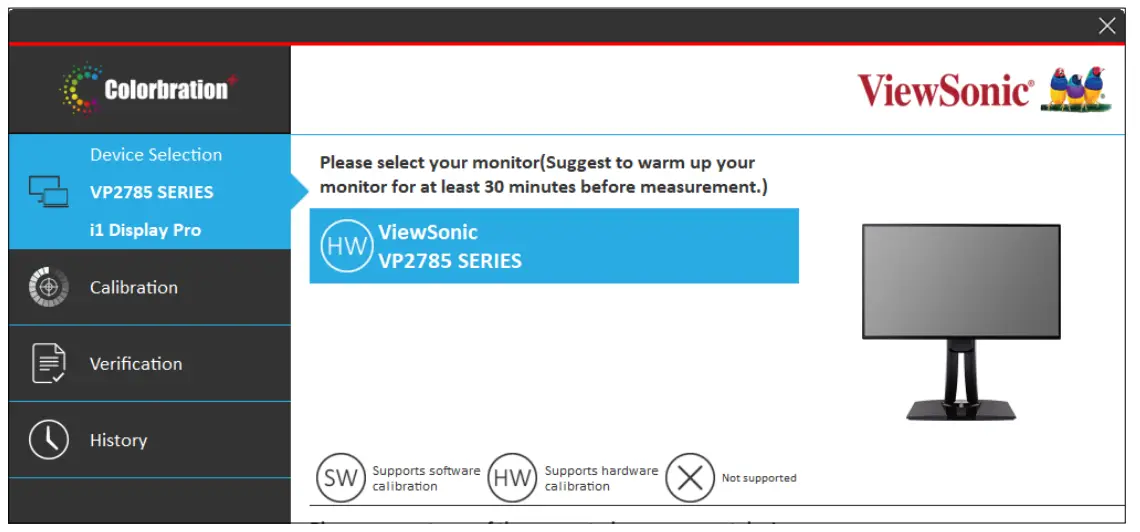
- Select Device Selection, then the monitor you wish to calibrate from the available options.

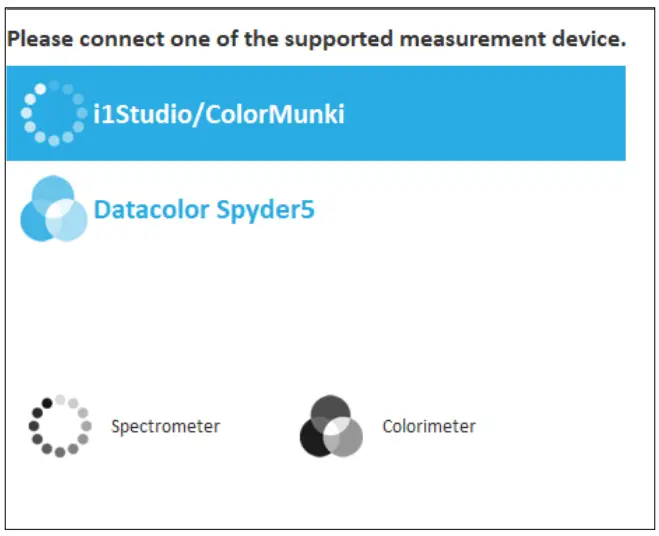
- Connect and select the measurement device you wish to use from the available options.

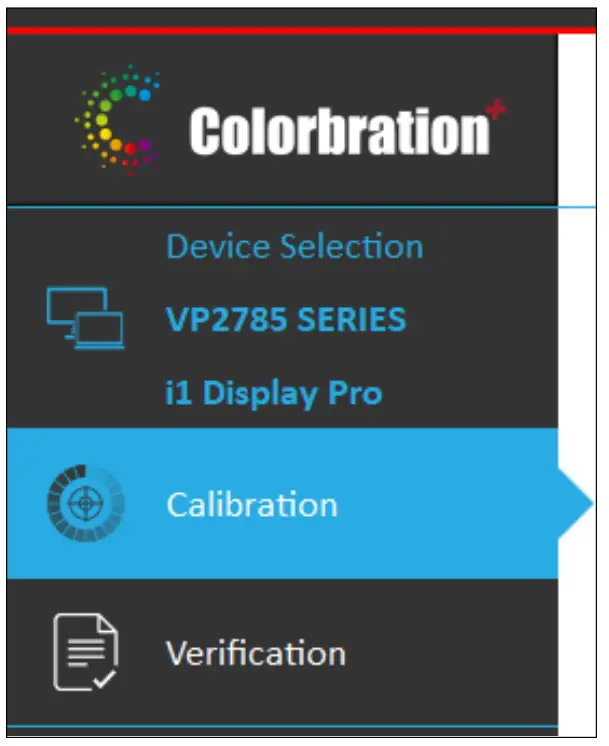
- Select Calibration on the Sidebar Menu.

- Choose your desired calibration settings from the drop-down menu, or create a custom profile (for more information, see “Custom Calibration Profile” on page 18).

- Once the calibration settings have been chosen, select
 to begin the calibrating process.
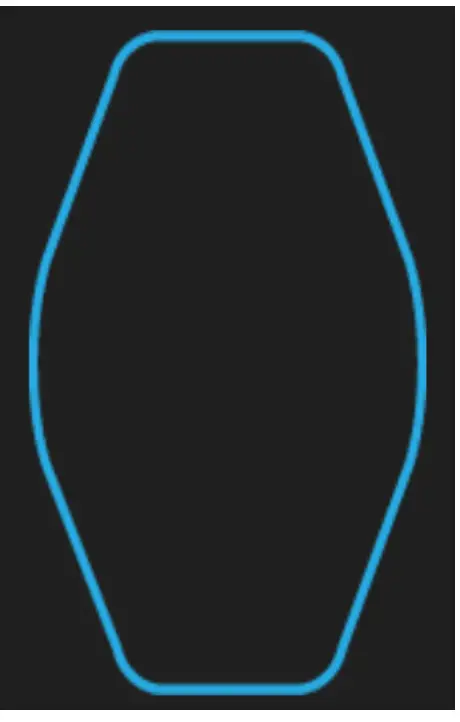
 - Line up your measuring device with the outline indicated on screen.

- Select Next to begin calibration.
NOTE:
During calibration the screen will rapidly flash between several color patterns. - After the calibration is completed, the Calibration Result will appear (for more information, see “Calibration Result” on page 19). The report can also be saved if desired.

The Sidebar Menu includes: Device Selection, Calibration, Verification, and History.
Device Selection Menu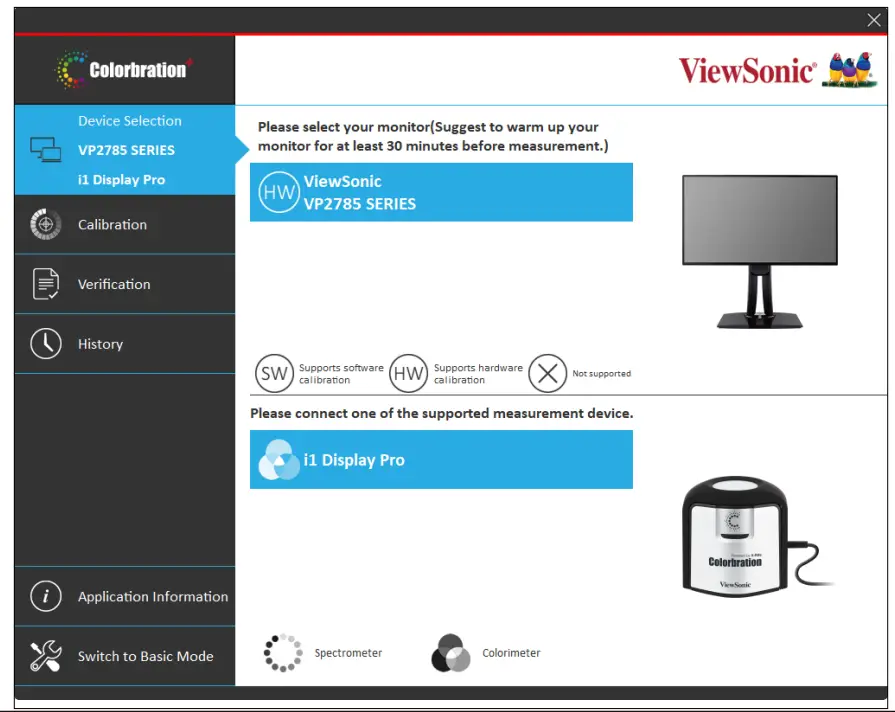
| Menu Option | Description |
| Monitor Selection | Choose the target monitor for calibration. |
| Measurement Device Selection | Choose the measurement device to be used for calibration. |
NOTE:
• Please note in Monitor Selection:
| Status | Description |
| Supports Software Calibration | |
| Supports Hardware Calibration | |
| Not Supported |
• Please note in Measurement Device Selection:
| Device | Description |
| Spectrometer | |
| Colorimeter |
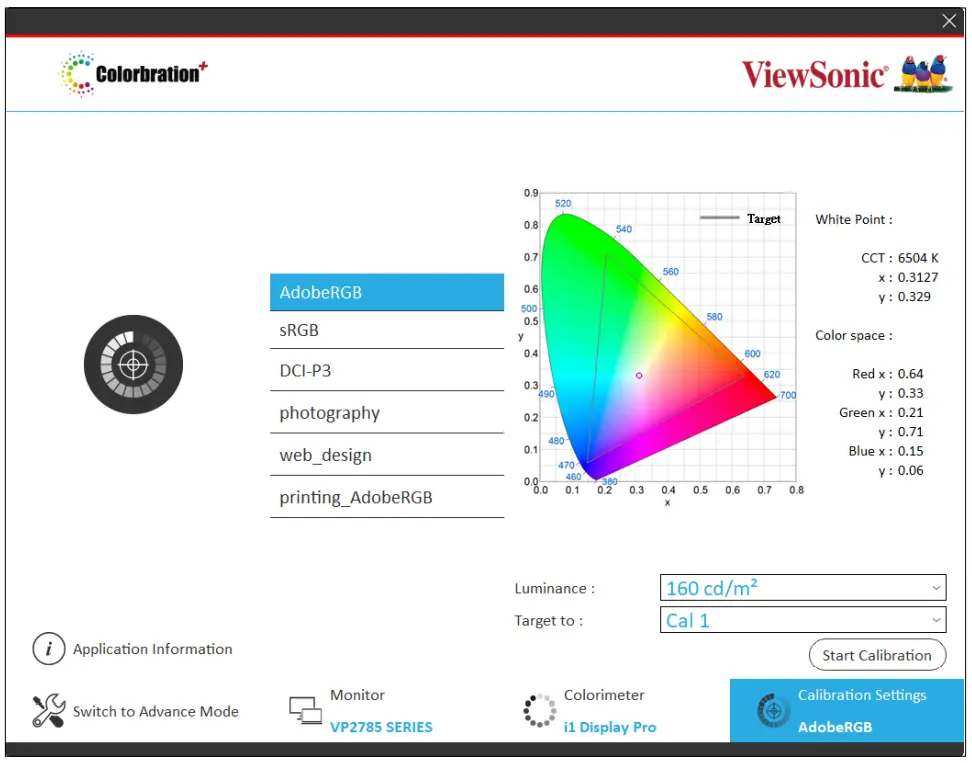
Calibration Menu 
| Menu Option | Description |
| Calibration Settings | Choose from several predefined settings: Adobe RGB Precise color gamut and gamma of Adobe RGB standard. sRGB Precise color gamut and gamma of sRGB standard. DCI-P3 Precise color gamut and gamma of DCI-P3 standard. Photography Color gamut ideal for photos and photography work. Web Design Color gamut ideal for internet usage. Printing Pre-press printing quality color checking. |
| Luminance | Adjustable rate at which a source emits light in a specific direction. |
| White Point | The color and intensity of a device’s brightest white. |
| Color Space | Allows users to choose which color space they would like to use for monitor color output. |
| Gamma | A measure of the amount of contrast found in an image according to the slope of a gradation curve. |
| Uniformity Correction | Compensates any luminance and color uniformity imbalances on the screen, such as dark spots, uneven brightness, or illegible images on the screen. None Calibration without uniformity correction. 3×3 Uniformity correction using a 3×3 grid. 5×5 Uniformity correction using a 5×5 grid. 7×3 Uniformity correction using a 7×3 grid. |
| Save To | After calibration, save and set the personalized settings. Cal 1 / Cal 2 / Cal 3 Select Cal 1, Cal 2, or Cal 3 to save the calibration result into the monitor. |
| Last Calibration | Indicates date and time of last calibration. |
| More Settings | Pop-up window to select more ICC Profile related options and Test Pattern patches.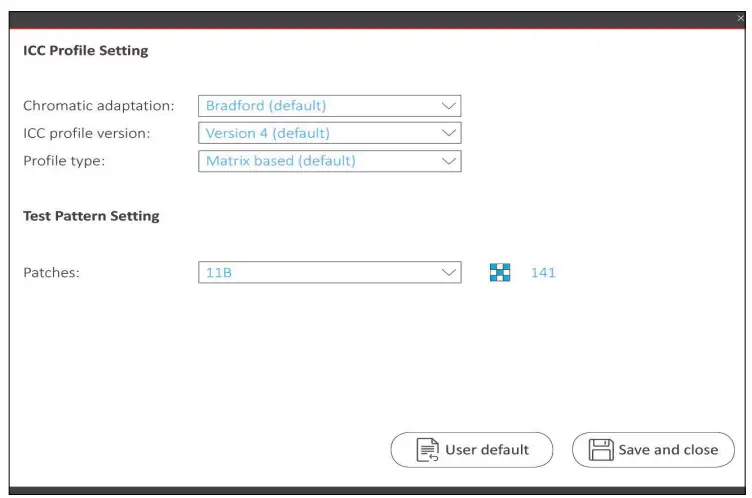 |
| Start Calibration | Begin the calibration process. |
Custom Calibration Profile
In addition to the predefined settings, users can also create a custom calibration profile to fit their specific needs. Users can adjust: Luminance, White Point, Color Space, and Gamma.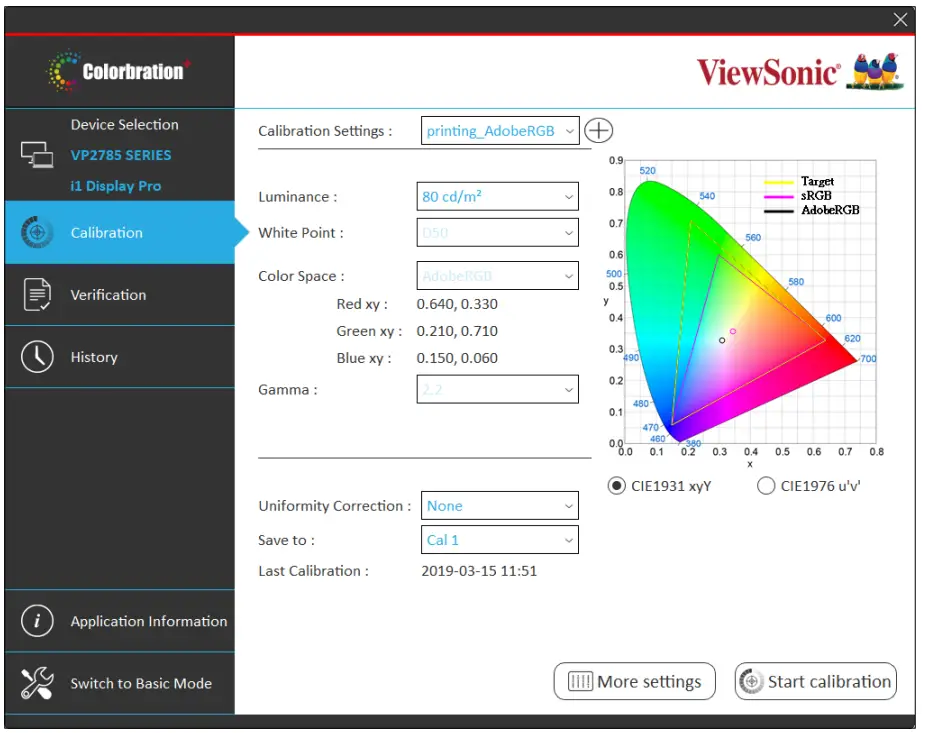 To setup a new custom profile:
- Select Calibration on the Sidebar Menu.
- Next to Calibration Settings select the
 icon.
icon.
- Choose the preferred settings for: Luminance, White Point, Color Space, and Gamma.
- Name the custom profile and select Save.


Calibration Result
Upon completion of the calibration, the calibration result will appear. The user can review the results from four tabs: Summary, Gamma, Delta E, and Uniformity.  Summary
The Summary tab will display the Target and Achieved values for: Color Space, White Point, Gamma, Luminance, Color Coverage, and Delta E. 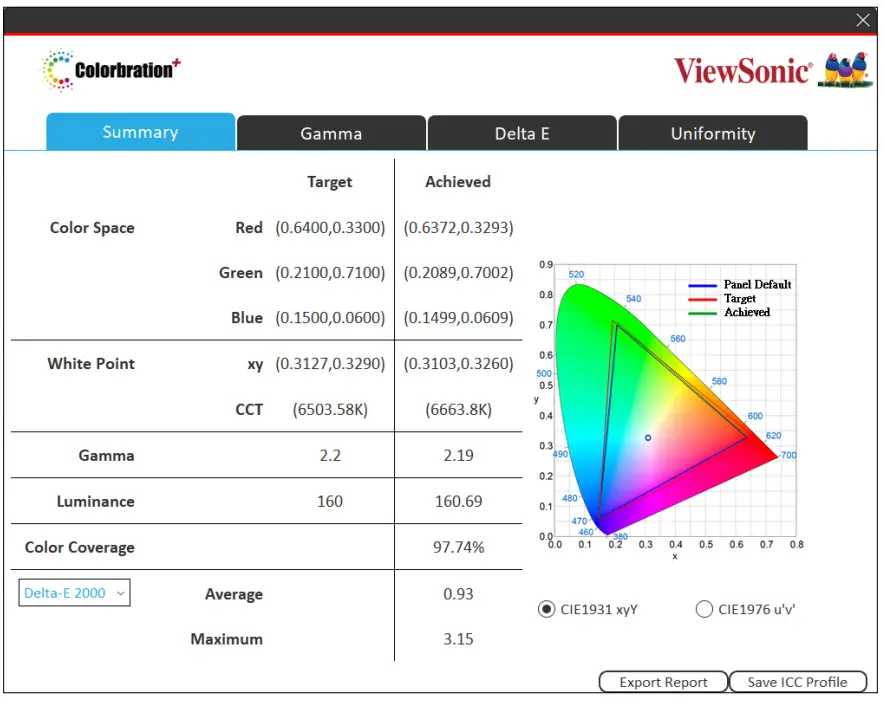 Gamma
Gamma
The Gamma tab will display various values for reference. 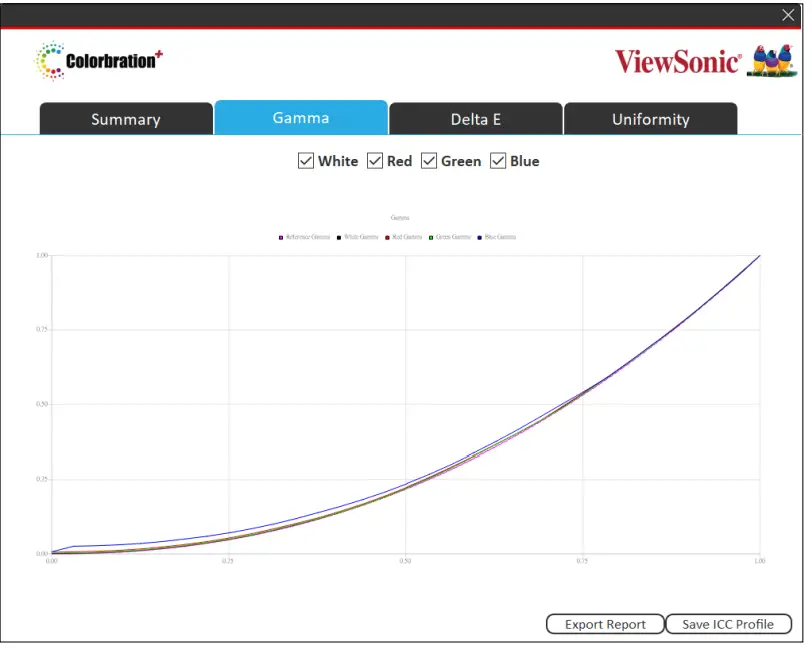 Delta E
The Delta E tab will display the Target and Achieved values for: Delta E Maximum and Average.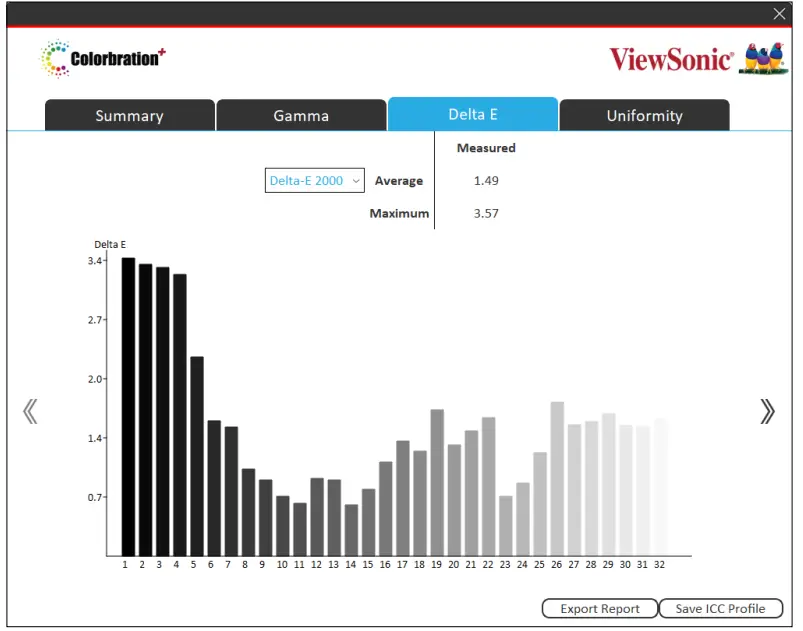 Uniformity
The Uniformity tab will display the Luminance values of the monitor.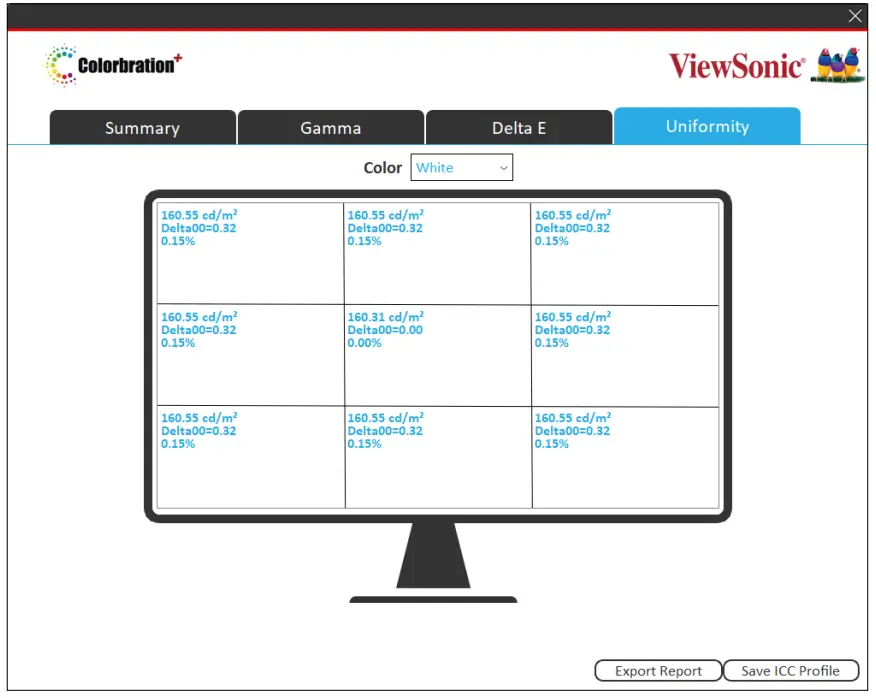
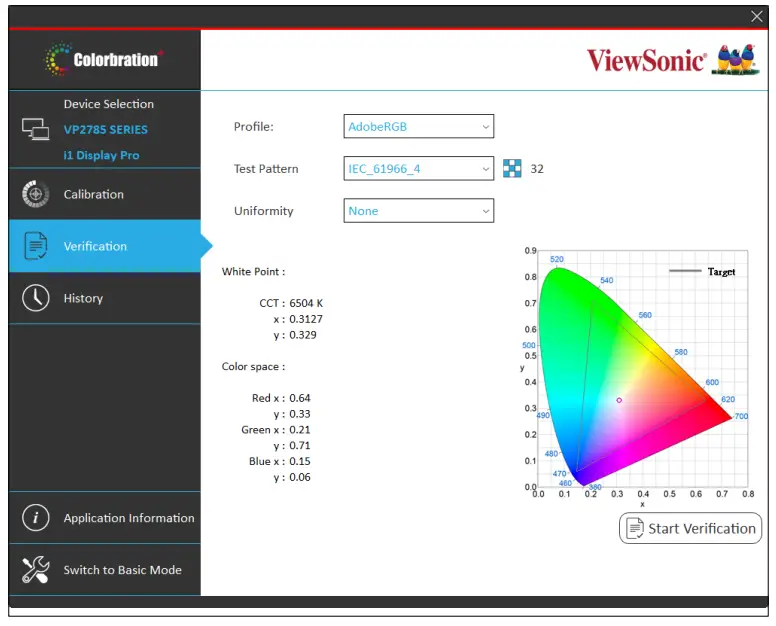
| Menu Option | Description |
| Profile | Select from various color space profiles. |
| Test Pattern | Choose the desired test pattern for calibration. |
| Uniformity | Adjust the uniformity correction grid. |
| Start Verification | Start the verification process. |
History Menu
View previously saved calibration results. 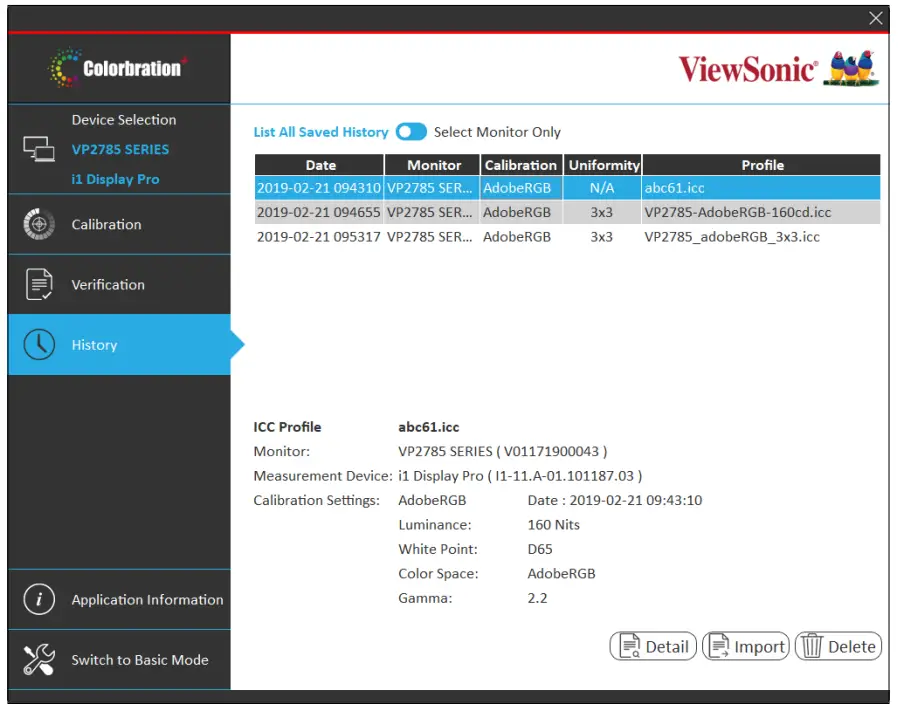
Appendix
Software Update
If a new software version is available, a pop up message will appear at the launch of Colorbration⁺ as shown below: 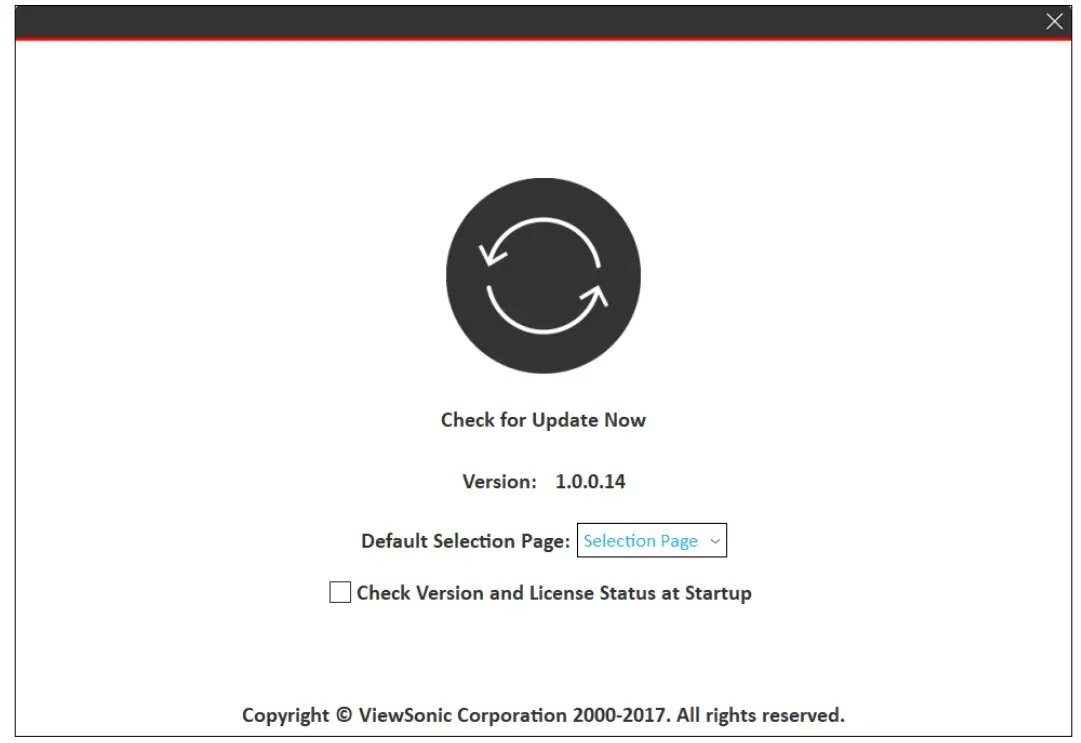 Additionally, the user can check for updates by selecting Application Information in Basic Mode or Advanced Mode.
Basic Mode,………………………….![]()
Advanced Mode……………………..![]()
NOTE:
It is suggested that the user always updates to the latest software version available.![]()


