OVO-K2 Smart Projector User Manual
www.ovotv.com
Safety Instructions
Read all instructions before you use this device and follow all instructions. If physical injury, loss of data or damage is caused by failure to follow instructions, the warranty does not apply.
- Do not look straight at the operation beam. The bright light may damage your eyes.
- Do not block the projection lens with any objects when the device is under operation as this could cause objects to become heated and deformed or even cause a fire.
- Do not block or clog the air ventilation. Always leave at least 20″ clearance around this device for ventilation.
- Protect this device from overexposure to direct sunlight, heat, large temperature fluctuations, and moisture.
- Forbid the fan to blow directly to the ventilation.
- Avoid extreme vibrations and always handle this device with care.
- Disconnect the power cord from the AC outlet if the projector is not being used for a long period of time.
- Do not make any repairs to this device yourself. Only have your device repaired by an authorized service center.
This equipment complies with FCC radiation exposure limits set forth for an uncontrolled environment. This equipment should be installed and operated with minimum distance 20cm between the radiator & your body.
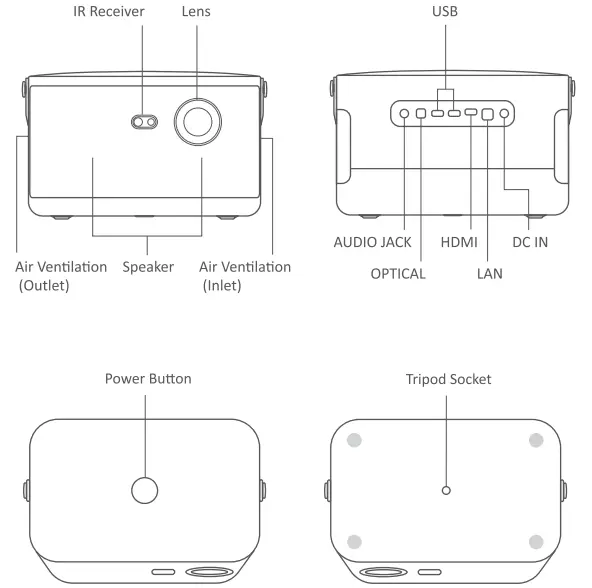
Overview
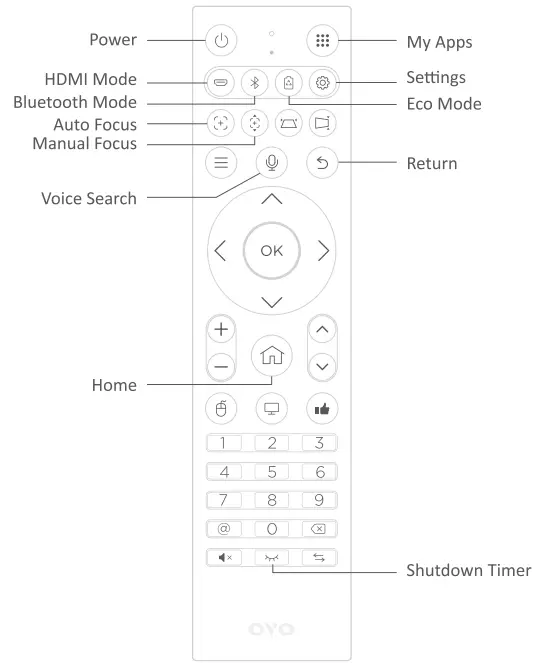
Remote Control
Initial Setup
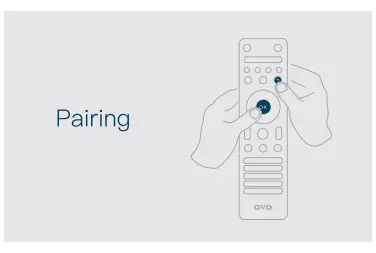
- Pairing the Remote
The remote control has been paired before leaving the factory. If it cannot be performed even after the battery is installed, please perform the pairing again. Place the remote control close to the projector. Press and buttons for about 3~5 seconds until the remote control indicator flashes quickly. After the pairing is complete, the remote control indicator will go out.
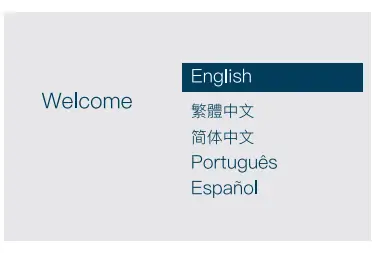
- Select Language
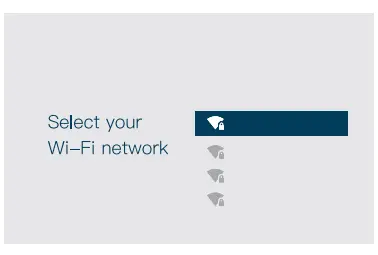
Select the preferred language and press button to confirm. - Set Up Network
- It will connect the internet automatically with ethernet.
- Or you can select the preferred Wi-Fi. Enter the Wi-Fi password.
Move to the virtual keyboard and then press button to connect.
User Interface
1. Home
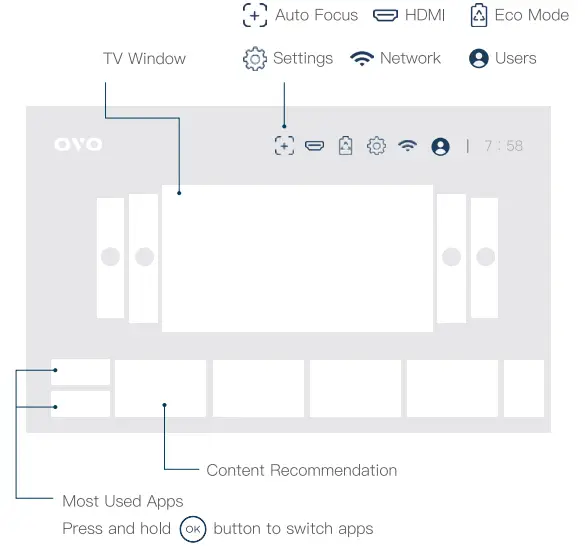
Auto Focus
Use the remote control to move the select border to ![]() , and press
, and press ![]() button. The image will be clear.
button. The image will be clear.
HDMI
Connect the external audio/visual signals with HDMI cable. Move the select border to ![]() and press
and press ![]() button to switch the signal source.
button to switch the signal source.
Eco Mode
When the product is equipped with a AC portable power station or the environment does not require high brightness, you can select ![]() and press
and press ![]() button to increase the use time of the portable power station or reduce the brightness
button to increase the use time of the portable power station or reduce the brightness
Settings
Select ![]() and press
and press ![]() button to enter the setting page and adjust the functions.
button to enter the setting page and adjust the functions.
Network
Select ![]() and press
and press ![]() button to select preferred network or check the network connection status.
button to select preferred network or check the network connection status.
Users
Select ![]() and press
and press ![]() button to check the users basic information. You can add new users or modify their basic information here.
button to check the users basic information. You can add new users or modify their basic information here.
TV Window
- Select TV Window and press
 and button to switch the screens of different users.
 - Select TV Window and press button to show the full screen.
- On full screen, you can press button to show the channel list. Use and button to switch channels.
2. Settings ![]()
![]() Network
Network
![]() Accounts & Users
Accounts & Users
![]() Display Settings
Display Settings
Full screen, Sources of TV window, Font size
![]() Device Preferences
Device Preferences
About, Installation of apps from unknown sources, Third-party apps launch automatically at startup, Shutdown timer, Date and Time, Language, Keyboard, Storage, System update, Reset
![]() Projection Settings
Projection Settings
Projection mode, Image adjustment, Power mode, Keystone correction, Auto keystone correction, Level calibration, Auto focus, Manual focus, HDMI mode
![]() Bluetooth Settings
Bluetooth Settings
![]() HDMI
HDMI
![]() One-click Acceleration
One-click Acceleration
Popular Features
1. Marketplace
You can find more apps from third-party marketplace.

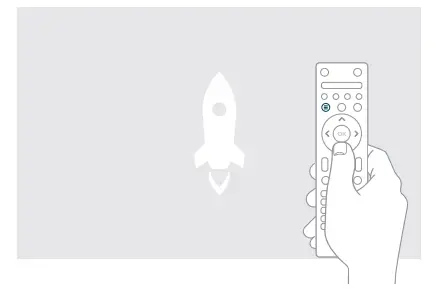
2. One-click Acceleration
Press and hold ![]() button to reduce lag and latency.
button to reduce lag and latency.
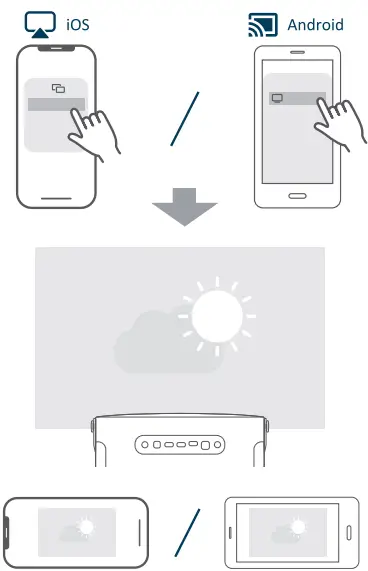
Phone Projection
- Go to the bottom of the homepage and click
 or to download the recommended projection software.
- Connect the mobile phone to the same network as the projector.

- Tap or to on the phone and select the device to start the projection function.


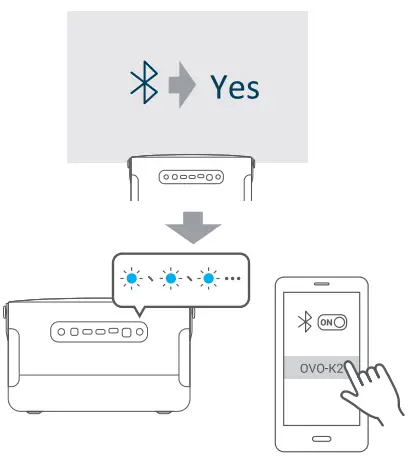
Bluetooth Mode
- Press
 button on the remote control to switch the bluetooth mode.
 - Go to the bluetooth settings on your phone and select your projector name to pair your phone and projector.

- You can enjoy phone’s music on your projector.
Level Calibration
After positioning the projector, go to “Settings” > “Projection Settings” > “Level Calibration” to calibrate the level.
FAQ
- There is no picture.
Please check whether the light is flashing red. If it is flashing, please turn off the device, and check whether the air ventilation is too dirty or the air inlet and outlet are blocked. After troubleshooting, restart the device after about 10-15 minutes. - The remote control does not work.
- Please unplug the battery before reinserting or replace with a new battery.
- Press any button on the remote control. If the remote control light flashes slowly, please pair again.
Remote control pairing method:
Place the remote control close to the projector. Press the and buttons at the same time for about 3-5 seconds until the remote control indicator flashes quickly. After the pairing is completed, the remote control indicator will go out.
- The projector does not turn on using the remote control.
Please check whether the I receiver is shielded. Remove the shielding and press the power of the remote control again. The power button sends IR and RF signal. Please make the remote control aim at the IR receiver of device or let the signal reflect from the wall to the receiver. - The image is blurred.
Please position the projector again. Press the button to perform focus. - The hanging installation screen is upside down.
Go to “Settings” > “Projection Settings” > “Projection Mode” to check whether the projection mode is correct. - The device can only be placed on the side and the display screen is trapezoidal.
Go to “Settings” > “Projection Settings” > “Auto keystone correction” and turn off the function. Go to “Manual keystone correction” to adjust the horizontal and vertical. - The device cannot connect to the Ethernet.
Please check whether the ethernet at home is DHCP and pass through the router to the device. If your internet is DHCP without router, please use Wi-Fi connection.
FCC Compliance Statement
This device complies with part 15 of FCC Rules. Operation is subject to the following two conditions: (1) this device may not cause harmful interference, and (2) this device must accept any interference received, including interference that may cause undesired operation. This equipment has been tested and found to comply with the limits for a Class B digital device, pursuant to part 15 of the FCC Rules.
These limits are designed to provide reasonable protection against harmful interference in a residential installation. This equipment generates, uses, and&can radiate radio frequency energy, and if not installed and used in accordance with the instructions, may cause harmful interference to radio communications. However, there is no guarantee that interference will not occur in a particular installation. If this equipment does cause harmful interference to radio or television reception, which can be determined by turning the equipment off and on, the user is encouraged to try to correct the interference by one or more of the following measures:
- Reorient or relocate the receiving antenna.
- Increase the separation between the equipment and receiver.
- Connect the equipment into an outlet on a circuit different from that to which the receiver is connected.
- Consult the dealer or an experienced radio/TV technician for help.
The antenna(s) used for this transmitter must not be collocated or operating in conjunction with any other antenna or transmitter.
The device was tested and complies to measurement standards and procedures specified in FCC CFR Tile 47 Part 15 Subpart C.
Warning
You are cautioned that changes or modifications not expressly approved by the party responsible for compliance could void your authority to operate the equipment.
Specification
Display technology: TI DLP
Brightness: 3000 LED Lumens
Resolution: 1920×1080 (support 3840×2160 4K decode)
Throw ratio: 1.2: 1
Focus mode: Auto focus
Keystone correction: Vertical +40~-40 (auto/manual), Horizontal +40~-40 (manual)
Speaker: 5W*2
Limited Warranty
12-Month Warranty for Quality-Related Issues
OVO warrants its products to be free from defects in material and workmanship, under normal use, for 12 months from the date of purchase. If a product proves to be defective in material or workmanship during the warranty period, OVO will, at its sole option, repair or replace the product with a like product. Replacement product or parts may include remanufactured or refurbished parts or components. This warranty is valid only for the first consumer purchaser. For information about receiving service under warranty, please refer to the Customer Service page. You will need to provide your product’s serial number.
What the warranty does not cover:
- Any product on which the serial number has been defaced, modified, or removed.
- Damage, deterioration, or malfunction resulting from:
- Accident, misuse, neglect, fire, water, lightning, or other acts of nature, unauthorized product modification, or failure to follow instructions supplied with the product.
- Operation outside of product specifications.
- Operation of the product for other than the normal intended use or not under normal conditions.
- Repair or attempted repair by anyone not authorized by OVO.
- Any damage of the product due to shipment.
- Removal or installation of the product.
- Causes external to the product, such as electric power fluctuations or failure.
- Use of supplies or parts not meeting OVO’s specifications.
- Normal wear and tear.
- Any other cause which does not relate to a product defect.
- Removal, installation, and set-up service charges.
* Information in this document may change without notice.
Customer Service
For technical support or product service, please visit:
Service Center
 ovotv.com/support
For technical support, you can visit the service center to get FAQs and more information.
Contact Us
 ovotv.com/contact
Fill out the form to get more help.


