
![]()
Dalmo Bidet Attachment User Manual
DDB02S1/DDB02S2
INTRODUCTION
Thank you for purchasing DALMO bidet attachment. Please read these manual carefully and keep it for future reference
Warning! Please place this bidet attachment at room temperature and do not storage it and its accessories in the freezing temperature environment under 0 degree Celsius.
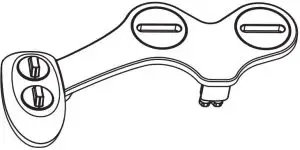
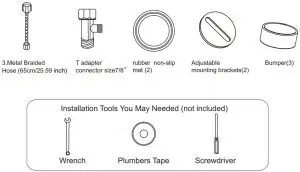
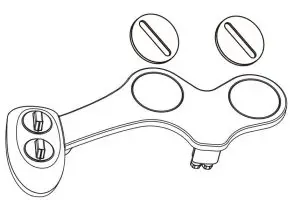
INCLUDED PARTS
- Bidet
INSTALLATION
1. Shut off water supply to toilet. Flush toilet to drain all water inside the tank.

2. Remove existing seat and lid .
3. Release the bolts on both side of the existing toilet seat.

4. Install the rubber non-slip mats to the bottom of the the bidet
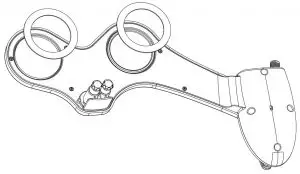
5. place the adjustable mounting brackets into the bidet seat coupling holes
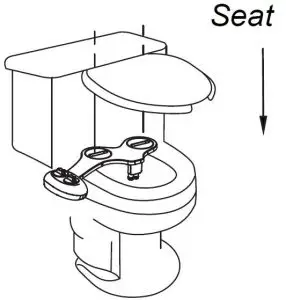
6. Install bidet on toilet
Place bidet on toilet, and adjust its position, ensure the nozzles on the middle and won’t stucked when spraying. And then adjust the mounting brackets angle, make them fit for the toilet seat installation holes on the toilet, and then mount toilet seat back and tighten
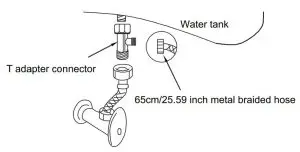
7. Cold Water Installation
Connect supplied T adapter to fill valve underneath of toilet water tank and connect 65cm/25.59 inch metal braided hose between T adapter and cold water inlet of bidet
Complete Installation

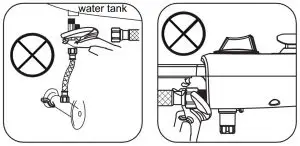
 HELPFUL TIP:
Over tightening can cause damage to the threads and result in water leakage.
Use only hand pressure first and check for any leakage.
Turn only less than quarter turn at a time making sure there is no leakage.
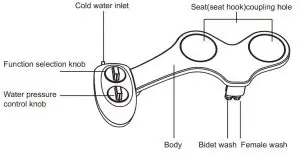
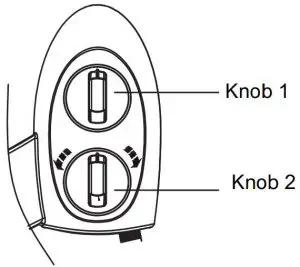
HOW TO USE
- Knob 1: turn left to adjust water pressure, the more we turn it, the bigger the water flow
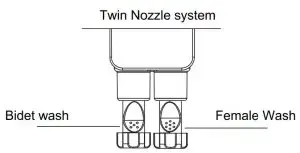
- knob 2: rotate according to indicator on the knob for function selection
Trouble Shooting
If the nozzles are clogged for some reason, please simply try to move them up and down manually for few times.
Users Guide of Bumper
After the installation. If there’s gap between toilet seat and bowl like shows, let me help you!

Company: Shenzhen Woyi Trading Co., Ltd.
Web: www.dalmo.com
Facebook: www.facebook.com/dalmo.us
E-mail: [email protected]
ADD: 6ceng 603, Gongye Dasha, Xinwu Cun, Zhuguang Lu,
Taoyuan Jiedao, Nanshan Qu,Shen Zhen, CHINA
Made in China

Read More About This Manual & Download PDF:


