levenhuk Wezzer Plus LP60 Weather Station User Manual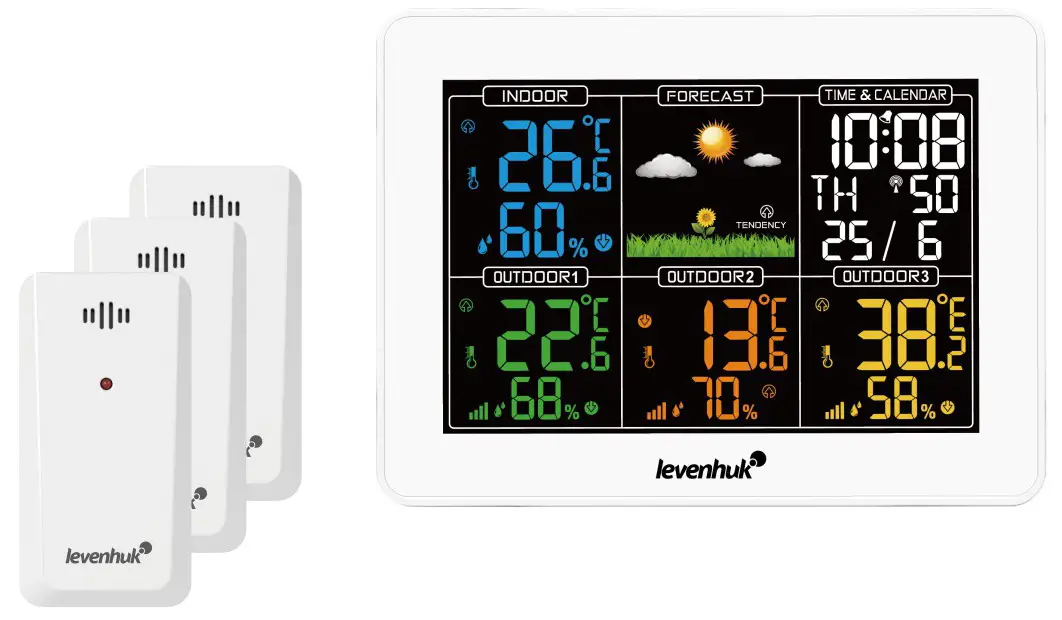
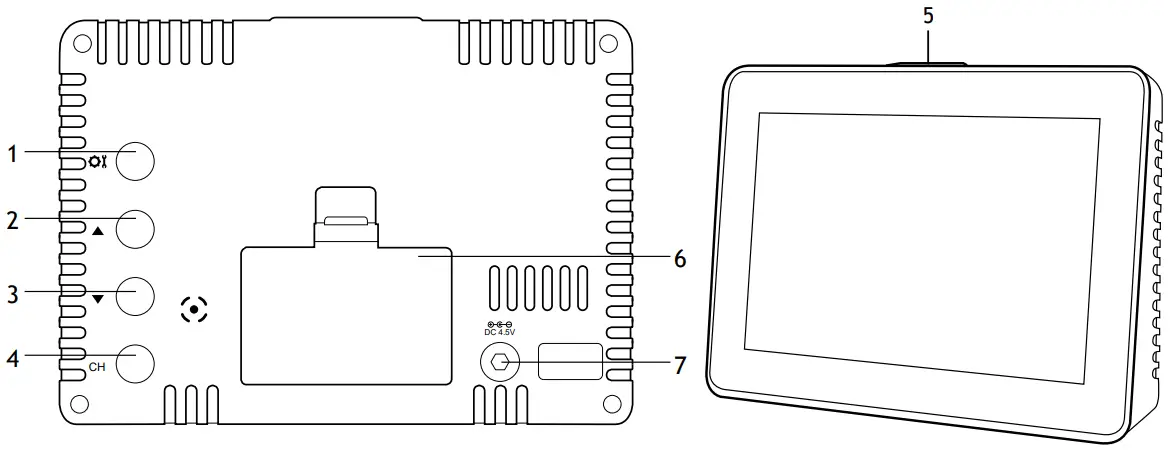
Base station
- MODE button
- UP button
- DOWN button
- CH button
- SNZ/LIGHT button
- Battery compartment
- Power input

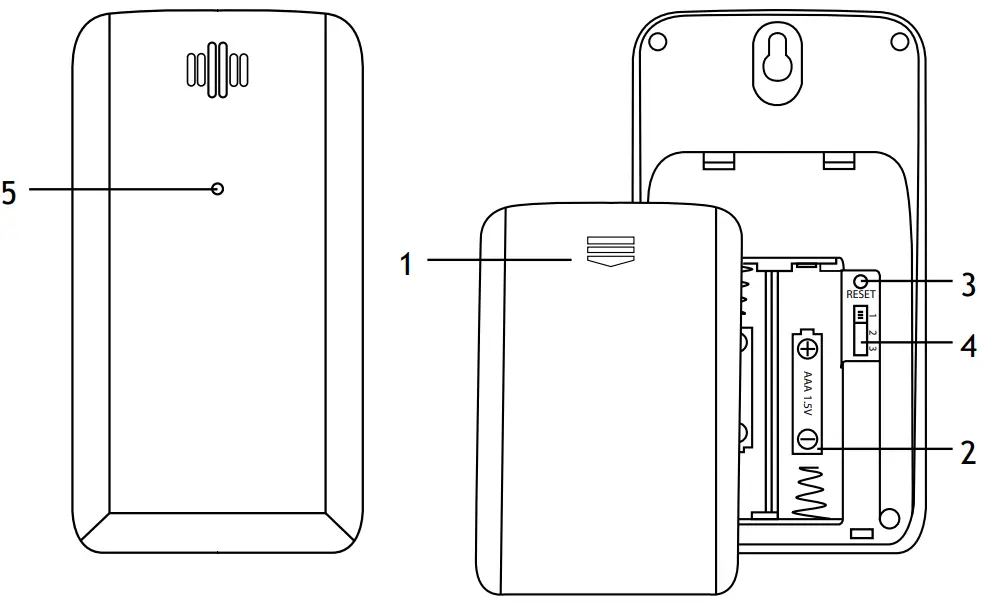
Sensor
- Battery compartment cover
- Battery compartment
- RESET button
- Channel switch (1—3)
- LED indicator

Interface icons
- Time display
- Alarm
- Seconds/Alarm time
- Calendar and week display
- Indoor temperature
- Indoor humidity
- Outdoor temperature (sensor 1)
- Sensor connection status
- Outdoor humidity (sensor 1)
- Outdoor temperature (sensor 2)
- Outdoor humidity (sensor 2)
- Outdoor temperature (sensor 3)
- Outdoor humidity (sensor 3)
- Weather forecast


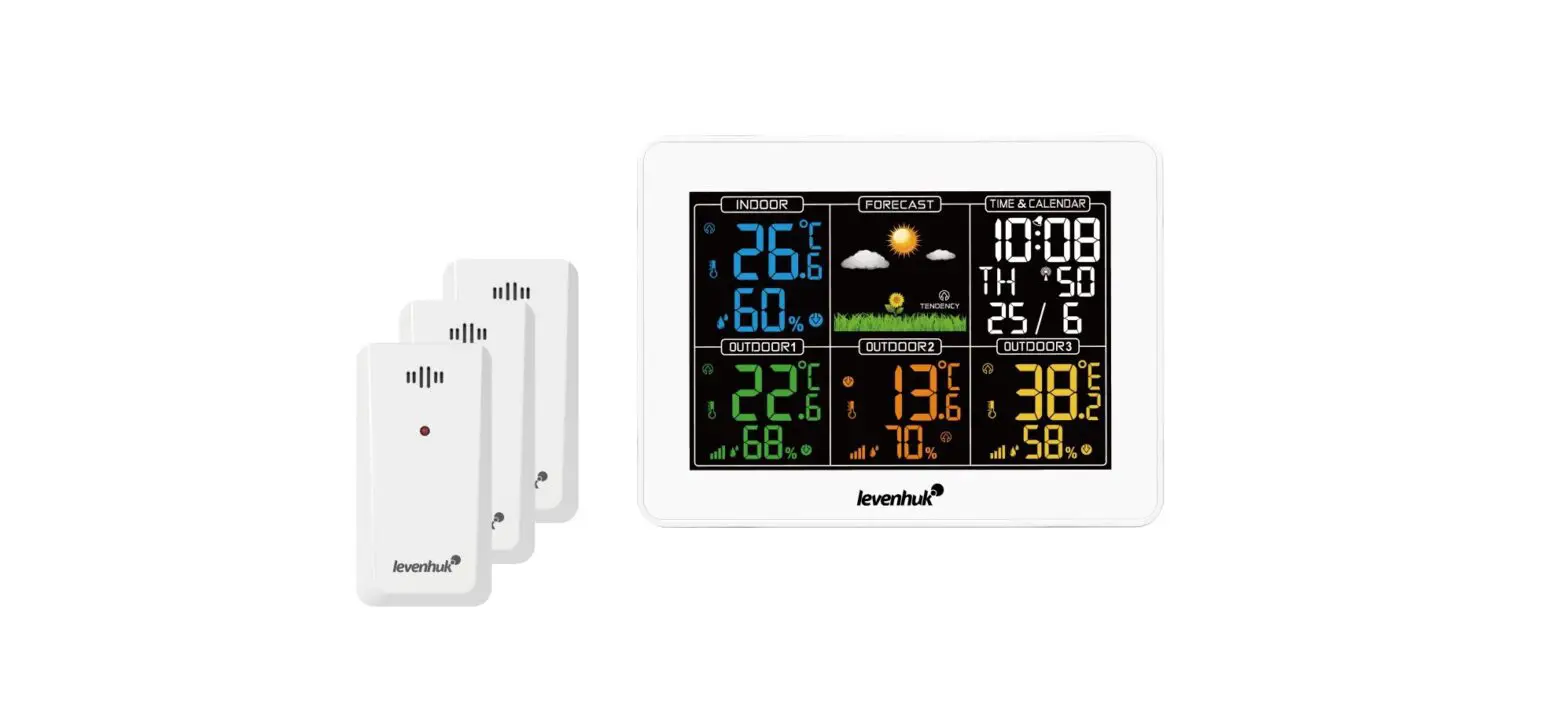
Levenhuk Wezzer PLUS LP60 Weather Station
The kit includes: base station, 3 sensors, USB cable, user manual, and warranty.
Also required (not included):
2 AAA batteries for each sensor
3 AAA batteries for the base station
![]() Caution! Please remember that mains voltage in most European countries is 220—240V. If you want to use your device in a country with a different mains voltage standard, remember that use of a converter is absolutely necessary.
Caution! Please remember that mains voltage in most European countries is 220—240V. If you want to use your device in a country with a different mains voltage standard, remember that use of a converter is absolutely necessary.
Getting started
Base station
- Connect the power cable to the device and the DC adapter (not included) via a USB plug and connect to the AC power supply; or
- Open the battery compartment cover (6) and insert 3 batteries according to the correct polarity. Close the cover.
![]() NOTE! It is recommended to use an adapter for the continuous operation of the base station, although battery power is also possible.
NOTE! It is recommended to use an adapter for the continuous operation of the base station, although battery power is also possible.
- Wait until the indoor temperature is displayed on the base station.
Sensor
- Open the battery compartment cover (1). Set the desired channel with the switch.
![]() NOTE! This weather station can be operated with up to 3 remote sensors. Each remote sensor that is to be connected must be operated on a different channel. If only one remote sensor is connected, it should be operated on channel 1.
NOTE! This weather station can be operated with up to 3 remote sensors. Each remote sensor that is to be connected must be operated on a different channel. If only one remote sensor is connected, it should be operated on channel 1.
- Insert 2 batteries according to the correct polarity. Close the cover.
- To re-establish the sensor connection manually, press RESET using a pin.
Sensor connection
- Place the base station and the remote sensor within the effective transmission range. Ensure that the channels are assigned after you set up the power supply for the base station and all the sensors.
- If the reception is successful, the display will show the temperature and humidity of the respective outdoor sensor. If the values are not received from a channel, “—” appears on the display. Check the batteries and try it again. Check if there is any source of interference.
- When changing batteries, replace the batteries first in the base unit, and then in all the sensors, to re-establish the connection. If an adapter supplies power to any of the devices, briefly disconnect the power to that device when replacing the batteries. If you change the batteries only in one of the devices (for example, in the sensor), the signal may not be received correctly.
- The effective range may differ depending on the unit’s position. Due to interference (various remote control devices, etc.), the maximum distance between the base unit and the sensor may be significantly reduced. In such cases, we suggest moving the base unit and sensor a little. Sometimes it is enough to move one of these units a few inches!
![]() NOTE! Although the sensor is weather resistant, never place it in direct sunlight or in the rain or snow.
NOTE! Although the sensor is weather resistant, never place it in direct sunlight or in the rain or snow.
Time setting
Press the MODE button and hold it for 3 seconds. The digits that are to be set are flashing. Press
UP or DOWN to change the value, and then press MODE to continue.
The setting order: Hours > Minutes > Year > Month > Date > 12/24h.
Finally, press the MODE button to save the settings and exit.
The language and the selected abbreviations for each day of the week are shown in the following table.
| Language | Monday | Tuesday | Wednesday | Thursday | Friday | Saturday | Sunday |
| English, EN | MO | TU | WE | TH | FR | SA | SU |
Alarm setting
Press the MODE button, and then press it again and hold it for 3 seconds. The digits that are to be set are flashing. Press UP or DOWN to change the value, and then press the MODE button to continue.
The setting order: Hours > Minutes.
Press UP or DOWN to turn the alarm on or off.
Snooze/light function
- When the alarm rings, press SNZ/LIGHT to activate the snooze function. The alarm will sound again in 5 minutes.
- Press any button to silence the alarm until the set alarm time is reached again.
![]() NOTE! In battery mode, display dimming is disabled.
NOTE! In battery mode, display dimming is disabled.
Weather
Temperature
Press the UP button to switch between °C and °F.
Weather forecast
- Sunny

- Partly cloudy

- Cloudy

- Rainy

- Snowy


The temperature and humidity trend indicator shows the trends for the next 12 hours.
- The value is rising:

- The value is falling:

Specifications
| Base station | |
| Air humidity, units of measurement | % (RH) |
| Operating humidity range | 20… 95% |
| Temperature, units of measurement | °F, °C |
| Operating temperature range (indoors) | 0… +50°C (+32… +122°F) |
| Time format | 24 hours, 12 hours |
| Weekday display language | English |
| Screen | color, with an LED backlight |
| Power supply | AC/DC adapter 5V 500mA (not included), З ААА batteries (not included) |
| USB cable | 1.5m (4.9ft.), included |
| Dimensions | 152x41x112mm (5.9×1.6×4.4in.) |
| Wireless sensor | 3 pcs. (included) |
| Sensor | |
| Radio signal frequency | 433.92MHz |
| Radio signal radius | 100m (328ft.) (in an open area) |
| Operating temperature range (outdoors) | –40… +70°C (–40… +158°F) |
| Power supply | 2 AAA batteries (not included) |
| Dimensions | 50×25.2x95mm (1.9×0.9×3.7in.) |
The manufacturer reserves the right to make changes to the product range and specifications without prior notice.
Care and maintenance
- Take the necessary precautions when using the device with children or others who have not read or who do not fully understand these instructions.
- Do not try to disassemble the device on your own for any reason. For repairs and cleaning of any kind, please contact your local specialized service center.
- Protect the device from sudden impact and excessive mechanical force.
- Store the device in a dry, cool place away from hazardous acids and other chemicals, away from heaters, open fire, and other sources of high temperatures.
- Operate the device only in a completely dry environment and do not touch the device with wet or damp body parts.
- Only use accessories and spare parts for this device that comply with the technical specifications.
- Check this device and its cables and connections for any possible damage before use.
- Never attempt to operate a damaged device or a device with damaged electrical parts!
Damaged parts must be replaced immediately by an authorized service agent. - If a part of the device or battery is swallowed, seek medical attention immediately.
- Children should use the device under adult supervision only.
Battery safety instructions
Always purchase the correct size and grade of battery most suitable for the intended use.
Always replace the whole set of batteries at one time; taking care not to mix old and new ones, or batteries of different types. Clean the battery contacts and also those of the device prior to battery installation. Make sure the batteries are installed correctly with regard to polarity (+ and –). Remove batteries from equipment that is not to be used for an extended period of time. Remove used batteries promptly. Never short-circuit batteries as this may lead to high temperatures, leakage, or explosion. Never heat batteries in order to revive them. Do not disassemble batteries. Remember to switch off devices after use. Keep batteries out of the reach of children, to avoid risk of ingestion, suffocation, or poisoning. Utilize used batteries as prescribed by your country’s laws.
Levenhuk International Lifetime Warranty
All Levenhuk telescopes, microscopes, binoculars, and other optical products, except for their accessories, carry a lifetime warranty against defects in materials and workmanship. A lifetime warranty is a guarantee on the lifetime of the product on the market. All Levenhuk accessories are warranted to be free of defects in materials and workmanship for six months from the purchase date. The warranty entitles you to the free repair or replacement of the Levenhuk product in any country where a Levenhuk office is located if all the warranty conditions are met.
For further details, please visit: www.levenhuk.com/warranty
If warranty problems arise, or if you need assistance in using your product, contact the local Levenhuk branch.
Accessories
The original Levenhuk cleaning accessories
Levenhuk Cleaning Pen LP10
- Removes dust with a brush
- The soft tip is treated with a special cleaning fluid that removes greasy stains
- Does not damage optical coatings of the lenses
- Leaves no smudges or stains
Contact Us
Levenhuk Inc. (USA): 928 E 124th Ave. Ste D, Tampa, FL 33612, USA,
+1-813-468-3001, [email protected]
Levenhuk Optics s.r.o. (Europe): V Chotejně 700/7, 102 00 Prague 102,
Czech Republic, +420 737-004-919, [email protected]
Levenhuk® is a registered trademark of Levenhuk, Inc.
© 2006—2022 Levenhuk, Inc. All rights reserved.
www.levenhuk.com
20220421
References
 Доживотна гаранция на Levenhuk – Официален уебсайт на Levenhuk в България
 Levenhuk optical instruments store | Levenhuk - best optical equipment
-
Levenhuk lifetime warranty details | Levenhuk - best optical equipment
-
Doživotní záruka společnosti Levenhuk – Oficiální webové stránky Levenhuk pro Českou republiku
-
Levenhuk Lebenslange Garantie – Die offizielle Website von Levenhuk in Deutschland
-
| Levenhuk, los mejores equipos ópticos
-
Levenhuk Lifetime Warranty – Levenhuk’s official website in Europe
-
A Levenhuk élettartamra szóló szavatossága – A Levenhuk hivatalos magyarországi weboldala
-
Gwarancja bezterminowa Levenhuk – Oficjalna witryna internetowa Levenhuk w Polsce
-
Поддержка - Гарантийное обслуживание Левенгук - Levenhuk Russia


