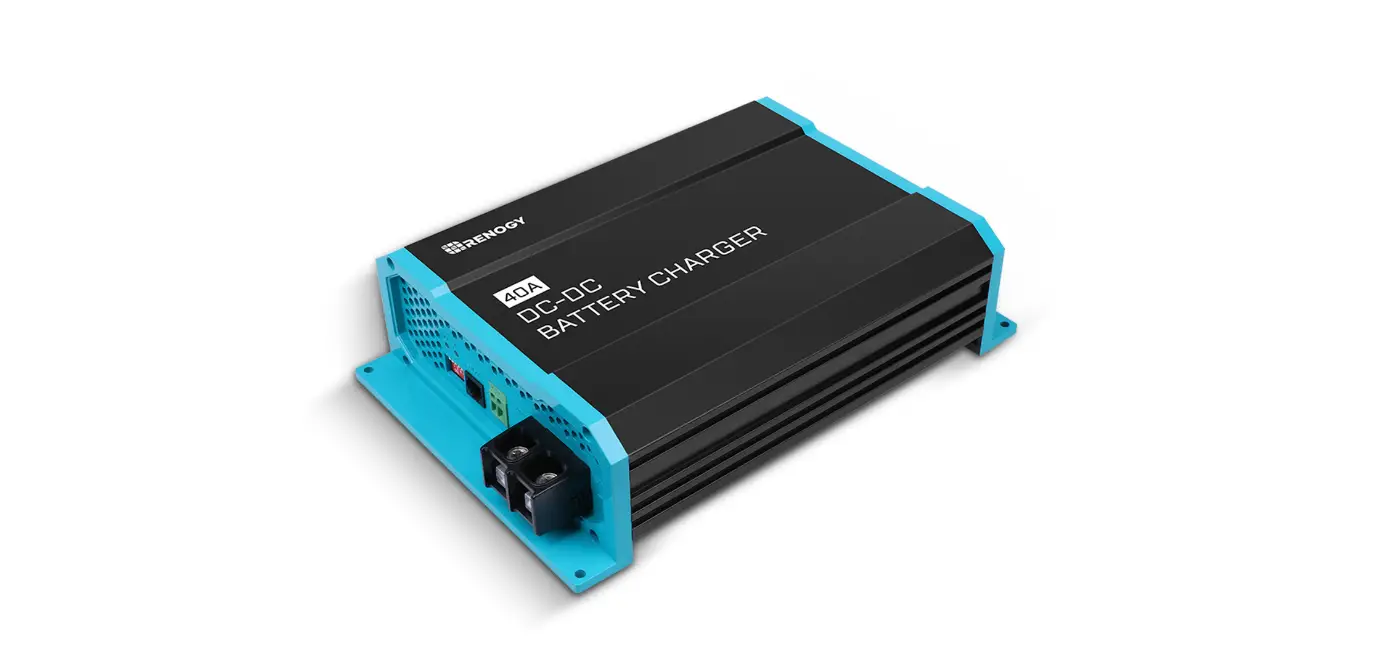
Marineshop Pro Series 12V 40A Battery to Battery Charger
IMPORTANT INFORMATION
Thank you for purchasing our DC to DC charger. Please read this instruction manual carefully before operating the device. Keep this manual in a safe place for future reference. This instruction manual is part of the product. It must be handed over along with the device if it is passed on to a third party.
WARNINGS:
Explosive gases may escape from the battery during charging.
Prevent flames and sparks and provide adequate ventilation.
- Before charging, read the instructions
- In door use only
- Do not attempt to charge non-rechargeable batteries
- Never charge a frozen battery
- Corrosive substances may escape from the battery during charging and damage surfaces. Store and charge in suitable area.
- This appliance is not intended for use by young children or infirm persons unless they have been adequately supervised to ensure that they can use the appliance safely.
- Risk of electric shock! Do not open the device if it has been connected to the AC power source.
FERATURES
The DC to DC charger is purposely designed for charging auxiliary batteries. It includes all the features needed to maintain the auxiliary battery to its optimum condition and to prolong the battery life.
This product will offer you reliable service for providing a multistage, dual-input battery charger to charge the different types of batteries you have installed in either your home, boat, caravan, 4WD or commercial vehicle. It also supports solar charger from solar panels. this manual will explain how to use this unit safely and effectively.
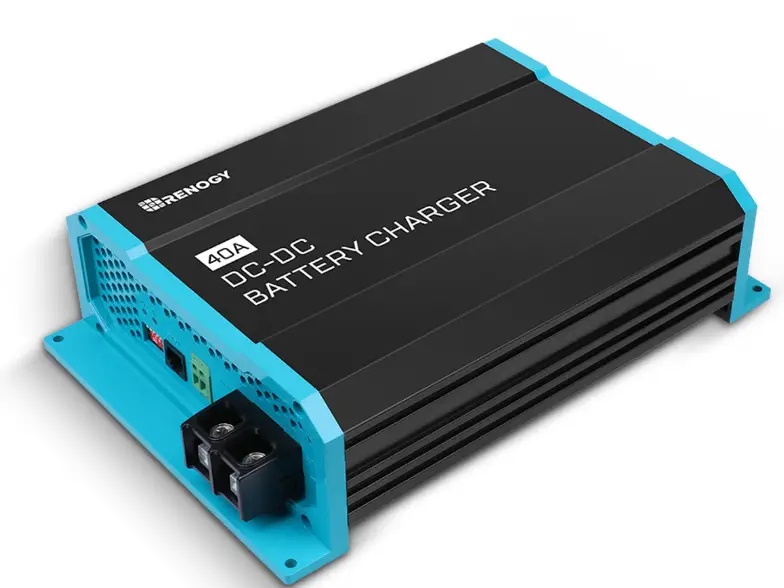
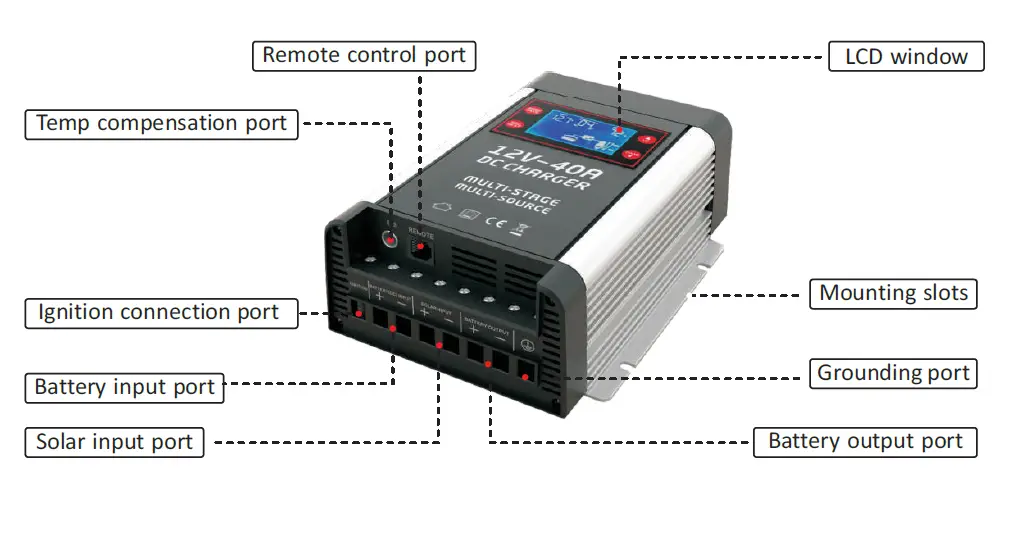
PRODUCT OVERVIEW
DIMENSION

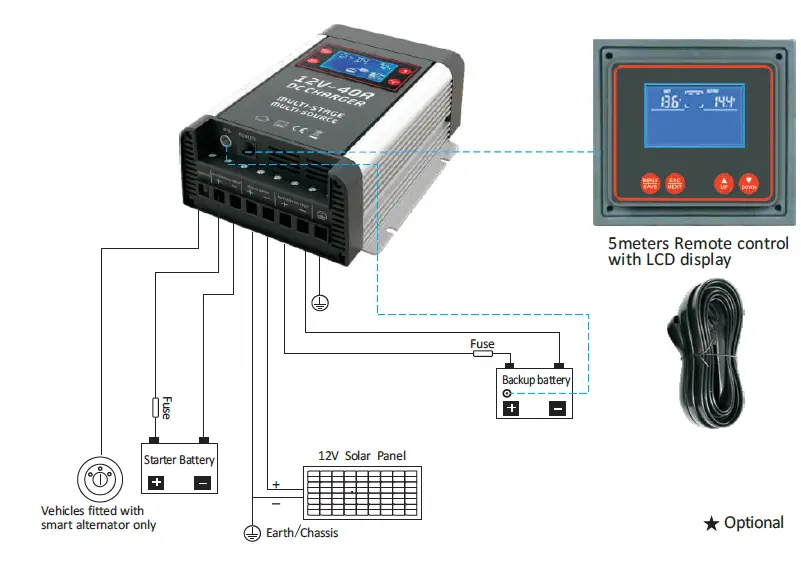
WIRING INSTALLATION
INTRODUCTION
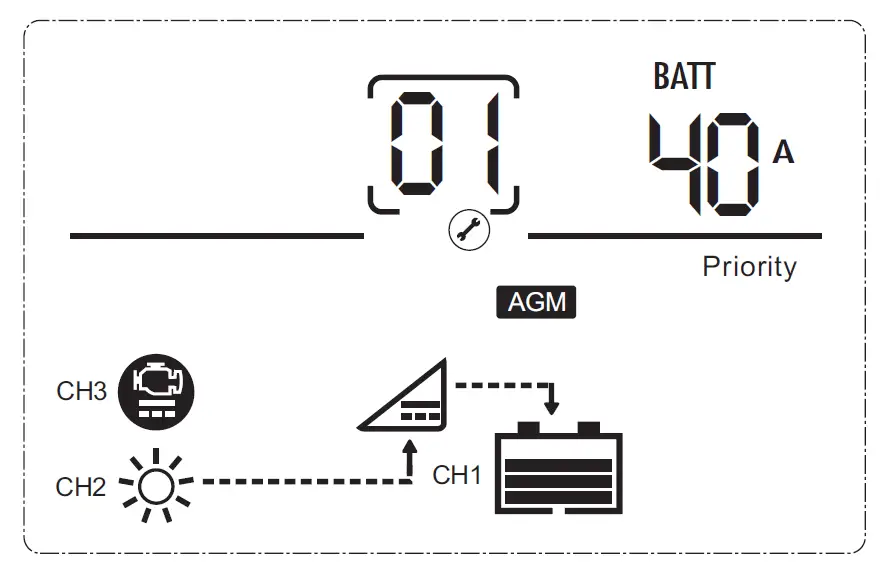
- DISPLAY INTERFACE:
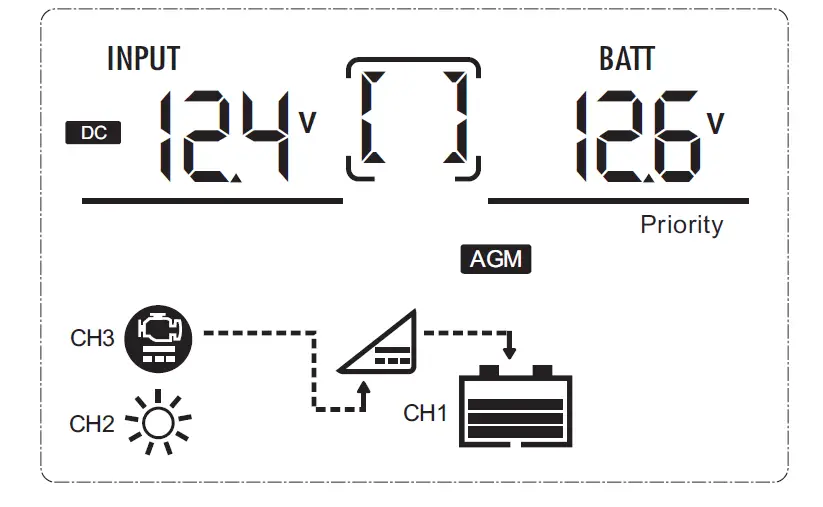
| No. | Icon | Function description |
| 1 | 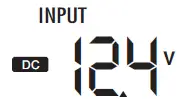 | Indicate PV/DC input voltage |
|
2 |  | Indicate the setting programs or warning and fault codes (When the product runs normally: This icon rotates clockwise and parameters display one by one through manually pressing “UP” and “Down” button; when the product fails, display the fault codes.) |
| 3 | 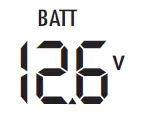 | Indicate battery voltage, charging current, charging stage (Bulk charge-BUL, Constant voltage-ABS, Floating-FUL, No charging-NO) |
| 4 |
| Indicate battery capacity bar, it is displayed only when the battery is connected. It is dynamically displayed when charging. |
| 5 | 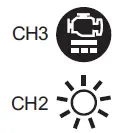 | Indicate the input status. When PV / DC is connected, it’s corresponding icons are displayed. |
| 6 | AGM | Battery type: AGM,WET, GEL, Lithium, Custom Program. The corresponding icon will flash when setup battery type. |
| 7 | Priority | Ignition enable (Priority): The word is only displayed when the ignition terminal available |

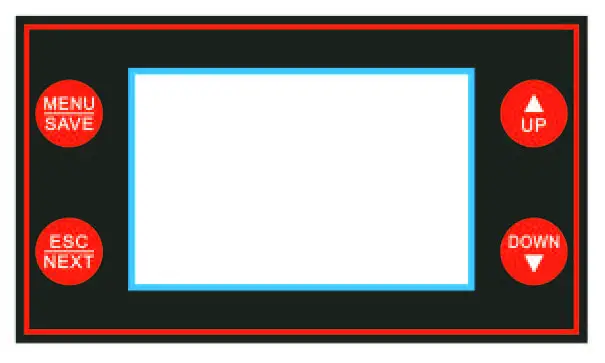
- MENU/SAVE: Setting, enter and save button
- ESC/NEXT: Set and exit the menu interface, fixed display / circular display switching
- UP: Adjust the parameter (increase), view and restore fixed display data, force output on
- DOWN: Adjust the parameter(decrease),view and restore fixed display data, force output off
Note: The external LCD display operation is same.
- Long press button ‘MENU/SAVE’ for 5s to enter the interface, ‘2’ and ‘3’ flash and display the data, ‘2’ display the setting code; Press ‘UP’, ‘DOWN’ to set parameters, then press ‘SET’ to save.
- Press ‘ESC/NEXT’ to cancel the data adjustment and enter into next setting surface.
- Long press the ESC/NEXT’ for 5S, exit the setting surface to main surface. More than 10s without any operation, the interface will automatically return to the main interface.
- When these is no fault, display backlight close automatically after 30s; when there is a fault or press the button, the display lights.
- When DC input is working, press “ESC/NEXT” to display by following data: input DC voltage/output charging voltage → input DC voltage/output charging current → input DC voltage/output charging status → input solar voltage/output charging voltage → input solar voltage/output charging current → input solar voltage/output charging status → back to step 1.
- When solar input is working, press”ESC/NEXT” to display by following data: input DC voltage/output charging voltage → input DC voltage/output charging current → input DC voltage/output charging status→ input solar voltage/output charging voltage→input solar voltage/output charging current → input solar voltage/output charging status→back to step 1.
- Press ‘UP’ and ‘DOWN’ for 5s, background flash three times, data will recover to factory set.
- The main LCD and the external LCD can both display (the external LCD supports hot swapping) and set the parameters, but only one can operate in the meantime(for example, when main one is setting, the external LCD will flashes to indicate that the main LCD is working )
Interface Setting Code
| Setting Interface | Code | Default | Range |
| Input battery LVS | 01 | 11.7V | 11.5V~12.5V, shut down with delay 5sec. and at fixed 11V than with delay 0 sec.(direct)shutdown |
| Input battery LVS recovery | 02 | 12.8V | 12.5V~13.5V, with delay 10sec. |
| Charge current | 03 | 40A | 10A/15A/20A/25A/30A/35A/40A |
| Battery type | 04 | Setting 1 | 1:AGM,CV14.6V/FV13.8V 2:WET, CV14.4V/FV13.5V 3:GEL, CV14.2V/FV13.8V 4:LifePO4, CV14.4V/Not activated 5:Custom program: CV14.2V/FV13.8V |
| Constant charge voltage | 05 | 4:LifePO4: 12.6V~14.8V 5:Custom Program:13.8V~14.8V | |
| Floating charge voltage | 06 | 4:LifePO4: 0V=OFF or 13.0V~14.8V 5:Custom Program:13.0-14.0V |
TROUBLE SHOOTING
When the product fails, there is corresponding code showed on the’2’part, the LCD backlight is always on and the failure icon flashes.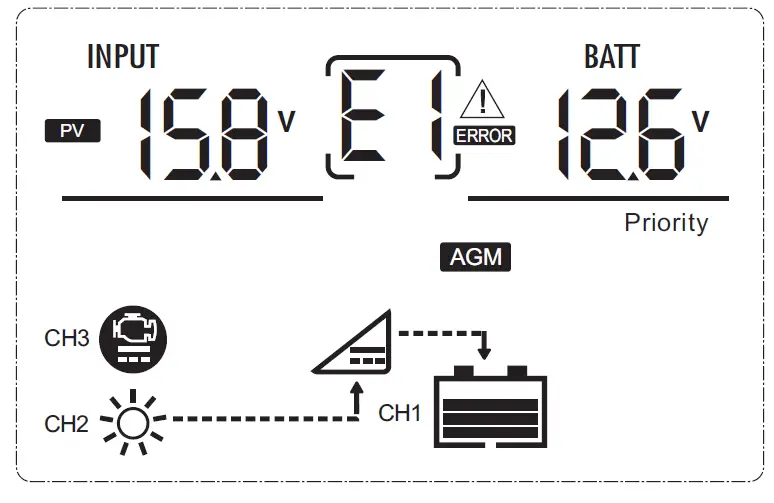
| Faulty | Code | Faulty | Code |
| DC low voltage | E1 | Internal over temperature warning | A1 |
| DC over voltage | E2 | external over temperature warning | A2 |
| PV low voltage | E3 | Internal &External over temperature warning | A3 |
| PV over voltage | E4 | ||
| Internal over temperature | E5 | ||
| external over temperature | E6 | ||
| Internal &External over temperature | E7 |
CHARGING TEST
- When the ignition terminal is not enabled (ignition terminal have no voltage), PV has priority. The battery is normally connected. Under normal PV conditions, the battery is charged through the PV (charging voltage and current are based on product settings). If PV fails, stop charging. After the PV is restored, the battery is automatically switched to PV, if it is not normal, stop charging.
When the ignition terminal is enabled (10V<Ignition port voltage <15VDC), DC has priority. The battery is connected normally. Under normal DC conditions, the battery is charged through DC (charging voltage and current are based on product settings). If the DC fails (PV is normal), the battery is automatically transferred to the PV to charge the battery. When the DC is restored, the battery is automatically switched back To DC, if it is not normal, stop charging.
Fan control:
- OPEN: Internal temperature >45℃ or Current>30% Setting charge current
- CLOSED: Internal temperature<35℃ and current< 20% setting charge current.
Internal or external temperature reach the protection value, stop charging; Auto. Recover when temperature is normal
Note:
- Internal temp. protection>65℃;External temp. protection <55℃
- External temp. protection >60℃;Internal temp. protection<50℃, External compensation -3mv.℃
- PV/DC protection and recover value find in below:
5.DATASHEET
| OTHERS | ||||||||
| Internal over- temperature protection | temperature>65℃, the charger shut down; temperature<55℃, the battery recover to charge again | |||||||
| BTS | Temperature of battery > 60℃ the charger shut down to protect the battery; temperature of battery <50℃,the battery recover to charger again | |||||||
| Temperature compensation coefficient-3mV/℃ | ||||||||
| Product size | L*W*H=221.7*164.2*74mm | |||||||
| INPUT | ||||||||
| Battery Input(Start battery / DC generator) | ||||||||
| Input voltage | 12.5-15.8 VDC | |||||||
| Input low voltage shutdown | factory default is 11.7V, adjustable range11.5V~12.5V (wait for 5sec, the product continues to work if the voltage is higher than 11.7V, if still lower than 11.7V, stop working. directly shutdown if lower than 11V) | |||||||
| Input low voltage recovery | ≥12.8VDC (adjustable range 12.5V~13.5V with 10sec delay) | |||||||
| Input overvoltage shutdown | ≥15.8VDC | |||||||
| Input overvoltage recovery | ≤15VDC | |||||||
| Solar Input | ||||||||
| Input voltage | 15-45V(open circuit voltage of solar panel) | |||||||
| Input low voltage shutdown | ≤15VDC | |||||||
| Input low voltage recovery | ≥15.5VDC | |||||||
| Input overvoltage shutdown | ≥45VDC | |||||||
| Input overvoltage recovery | ≤44VDC | |||||||
| Solar panel wattage | 600W Max | |||||||
| OUTPUT | ||||||||
| Output voltage | 12VDC(nominal voltage) | |||||||
| Output current | 40A Max (10A/15A/20A/25A/30A/35A/40A adjustable) | |||||||
| Battery type | GEL | AGM | WET | Lithium | Program (Custom settings) | |||
| Constant voltage range | 14.2VDC | 14.6VDC | 14.4VDC | 14.4VDC(12.6- 14.8V Manually adjustable) | 4: LiFePO4: 12.6V~14.8V, 5: Custom program: 13.8V~14.8V | |||
| Floating voltage range | 13.8VDC | 13.8VDC | 13.5VDC | N/A | 4: LiFePO4:0V=OFF or 13.0V~ 14.8V, 5: Custom program: 13.8VDC (13V~14V Manually adjustable) | |||
| Charging current | 10/15/20/25/30/35/40 (optional setup on LCD panel) | |||||||
| Charging mode | Three-stage type | |||||||
| standby loss | ≤50mA | |||||||
| Efficiency | Max.90% | |||||||
Warranty
Only covers the cost of parts and labor for the repair service within the warranty period. Warranty will not apply where the device has been misused, altered, neglected, improperly installed, or physically damaged, either internally or externally or damaged from improper use or use in an unsuitable environment. We shall not be liable for damages, whether direct, incidental, special or consequential, or economic loss even though caused by negligence, or other fault. if the device requires warranty service, please return it to the place of purchase along with a copy of the receipt with purchasing date.
Disposal
When the device has become unusable, dispose of it in accordance with the appliance disposal regulations.


