![]() 12V to 12V Battery to Battery Charger
12V to 12V Battery to Battery Charger
40A input BB1240
PRODUCT INFORMATION
SIMPLE WIRING DIAGRAM
Basic installation diagram
Here, we hope to provide a very basic installation diagram for the vast majority of installers to follow.
If a process is not mentioned here, the chances are that it is not a pre-requesite to get the BB1240 to function.
The default charging profile is a standard sealed lead acid charging profile of 14.4V and 13.3V float.
If you wish to charge a lithium battery, please see overleaf.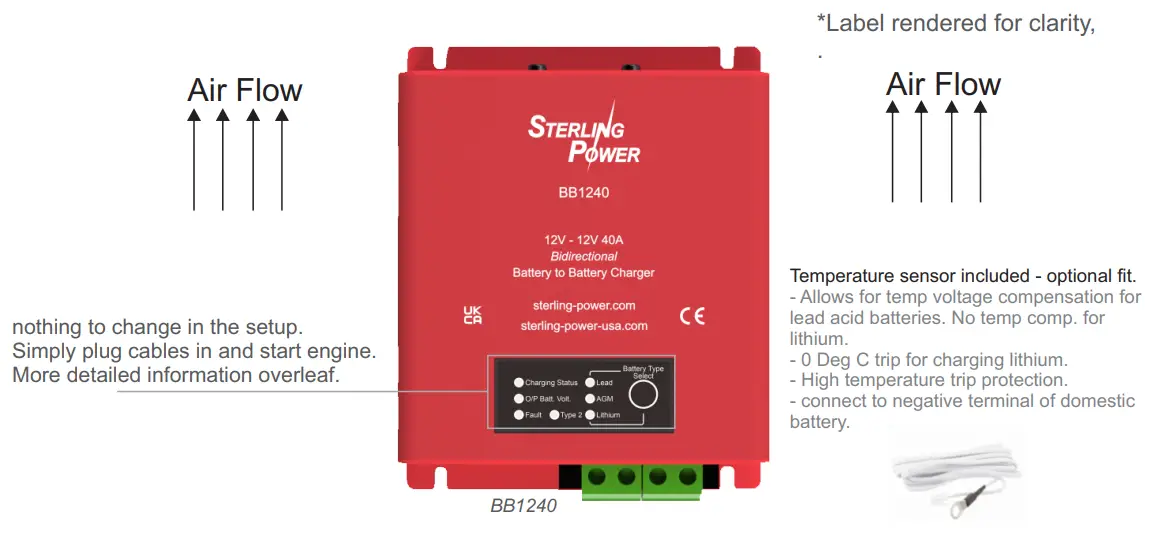
Charging modes
In default mode, the BB needs to see 13.5V on the input terminal to begin charging the output battery. When the input then drops below 12.8V the BB will stop charging.
12V ignition signal, required for Euro 6 / Smart alternator use. Ignition gives a binary on / off style signal to control the BB1240. Connect ignition cable to ‘ign’ connector If ignition.signal has been applied to the BB the BB shall remain dependent up a live ignition to operate. Do a factory reset to restore BB to default settings.
Vibration sensor mode. This requires you to switch the Vibration sensor switch on. If the unit detects a vibration event the BB shall turn on and begin charging.
Factory reset – hold Select button for 15 seconds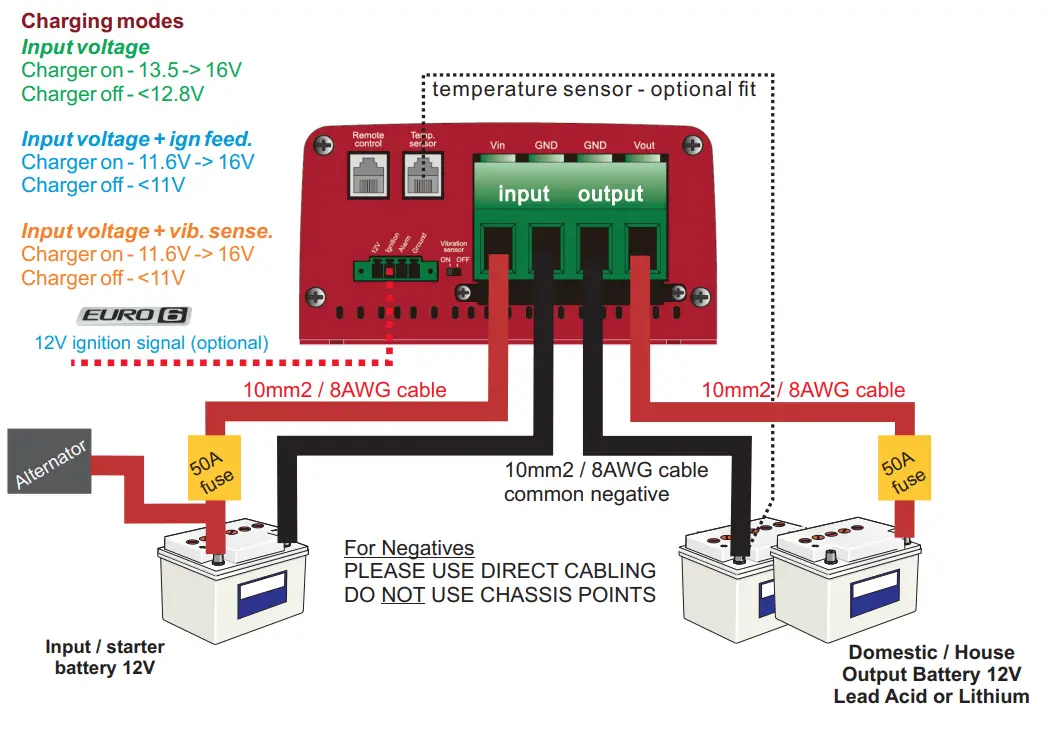
Recommended installation orientation
The BB1240 can be mounted in any orientation. However, if the area is prone to getting wet or damp, we recommend the first or second install.
Reverse Charging Feature –
There is nothing to setup with regards the reverse charging feature. Provided there is over 13.8V on the leisure battery and the starter battery is below 13V the BB shall allow approximately half current (~20A) to flow back to the starter battery up to about 13.6V (float voltage). It simply allows the starter battery to remain topped up when there is surplus energy in the domestic battery. This feature will NOT drain your domestic battery – it simply takes surplus. Once your alternator / engine turns on or you provide the BB with an ignition signal the BB revert to normal charging of the leisure battery. To disable this feature hold button down to 30 seconds and let go.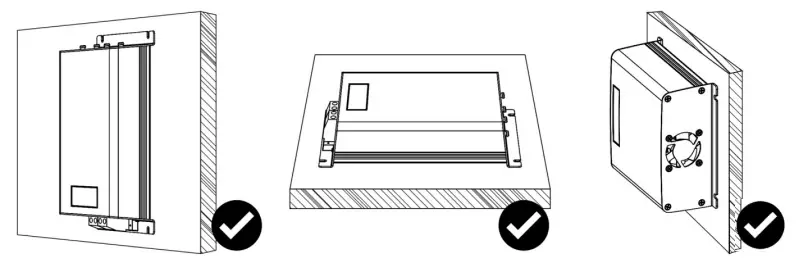
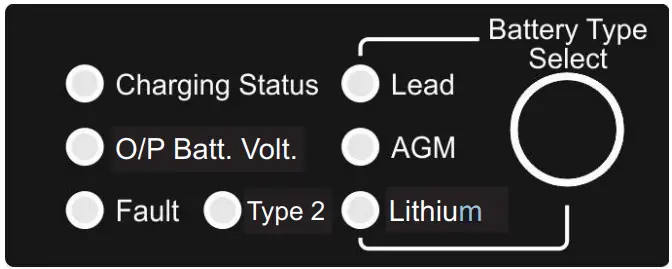
Front Panel, LEDs and Battery Type select
LED panel

Lead Acid Charging Profiles Orange LED status:
| Fast flashing | = Bulk / Fast Charge |
| Slow flashing | = Absorption |
| Solid | = Float |
Lithium Charging Profiles Orange LED status:
| Fast flashing | = Bulk / Fast Charge |
| Slow flashing | = Absorption |
Orange LED status:
| Fast flashing | = Low battery voltage, battery needs a good charge |
| Slow flashing | = Medium battery voltage, mid charge. |
| Solid | = Good battery voltage, nearer charge completion. |
Battery Type Select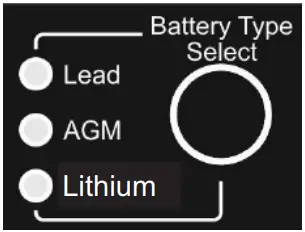
When charger is on, press and hold the Select button for 5 seconds until the LEDs flash. Then, press the Select button to toggle through the 6 different battery types – the flashing orange LED shall depict the battery type. Type 2 LED shall light up to display the second profiles of the battery types. Once you have the LED on the battery type you, want wait until the LED stops flashing – after a few seconds the flashing stops and the LED stays on solid – this confirms setting.
| LED sequence | Battery Type | Absorptions (V) | Float (V) |
| Lead | 14.4V | 13.3V | |
| Lead | 14.6V | 13.5V | |
| AGM | 14.2V | 13.1V | |
| AGM | 14.7V | 13.6V | |
| Lithium | 14.4V | 13.8V | |
| Lithium | 14.2V | 13.6V |
Lithium* = live output voltage, ideal for waking up BMSs on batteries. Please ensure your lithium battery has an internal or external BMS.
If temperature sensor connected, no voltage compensation on lithium profiles. If temperature sensor detects 0 Deg C – BB stops charging.
![]()
Description of faults in the instruction manual
 Online full instruction manual PDF
https://sterling-power.com/products/12v-to-12v-120a-dc-to-dc-charger-bb12120![]() sterling-power.com
sterling-power.com
sterling-power-usa.com


