![]()
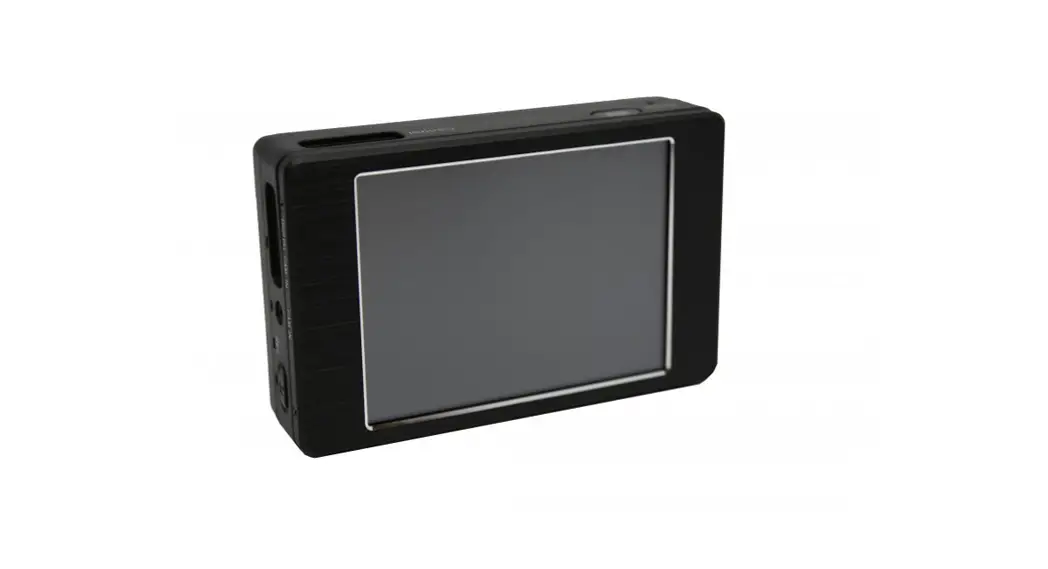
PV-NB10W
Notebook Digital Video Recorder
Quick Guide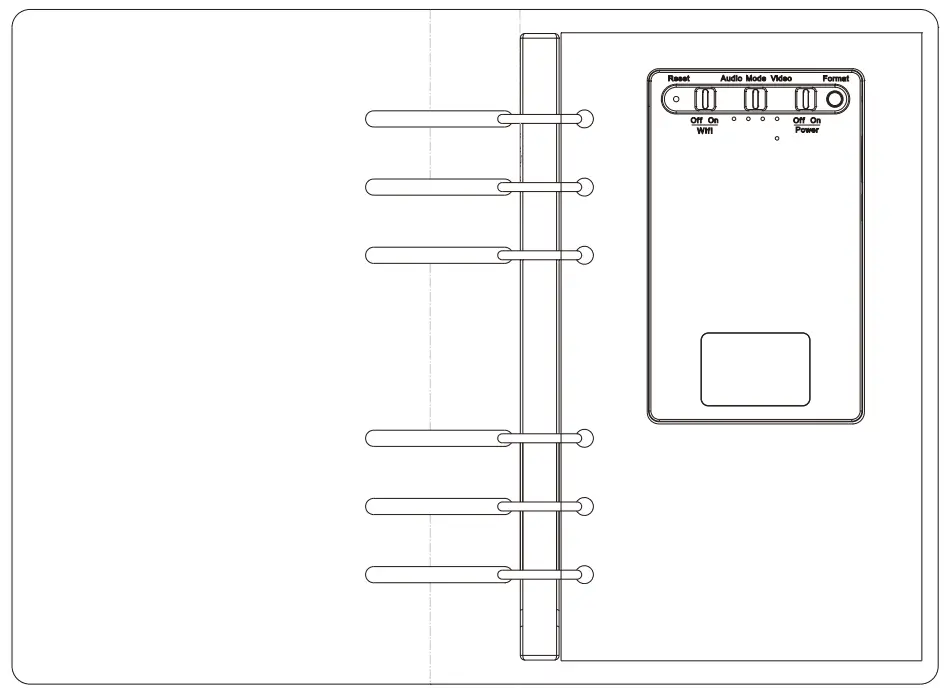
LawMate, innovation never stops
Names and Parts
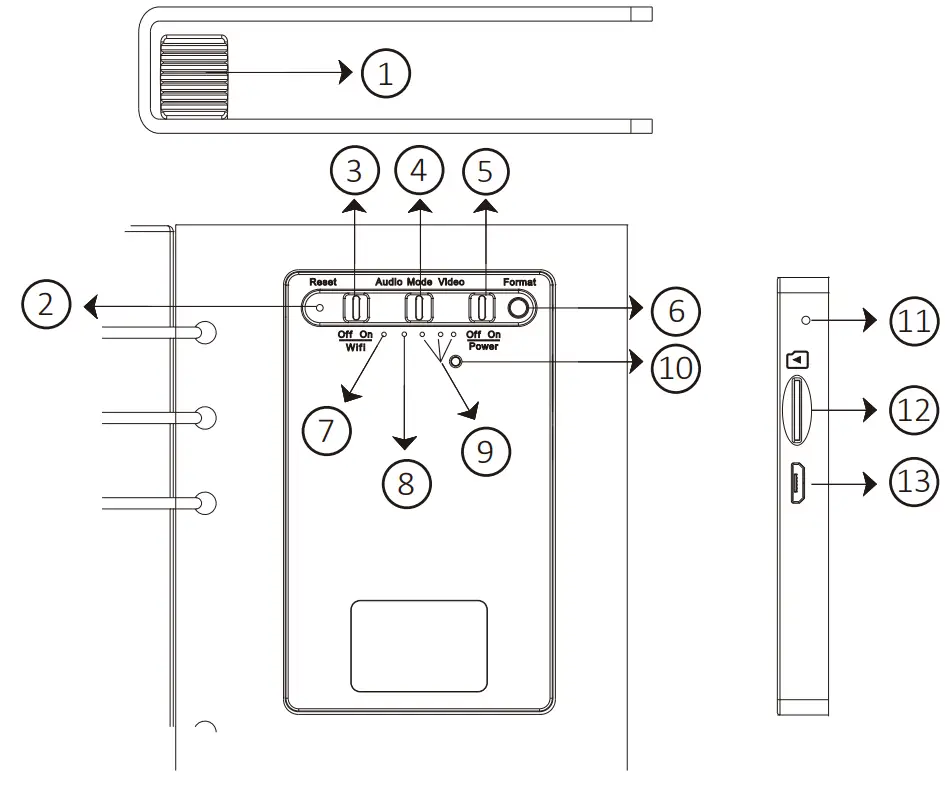
| 1. Lens 2. Reset Button 3. Wi-Fi On / Off 4. Recording Mode Video / Audio 5. Power On / Off 6. LED Display On / Off / Format Button | 7. Red LED – Recording 8. Orange LED – P2P 9. Blue LED – Power and Charging 10. Default Button 11. Microphone 12. Memory Card Slot 13. USB Port |
The microphone is not available in the USA market.
Package Content
| Main Device | |
| User Manual |  |
| Memory Card | 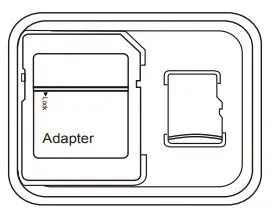 |
| Notebook Pages | 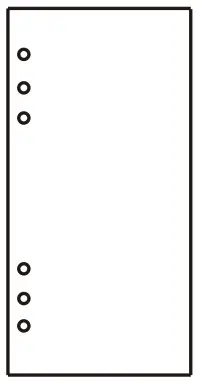 |
| USB Cable | 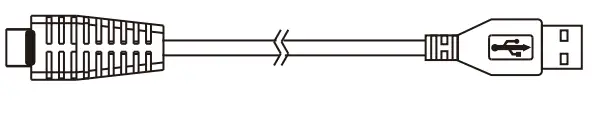 |
3. Add Pages to Notebook
3.1 Open the notebook to the angle as shown in the illustration (A).
3.2 Add the pages from the gap of the notebook binder as shown in illustration (B).
3.3 Tear down the used pages if you want to remove them.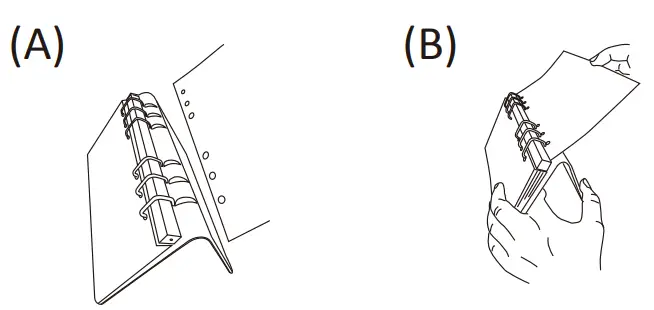
Charge the Battery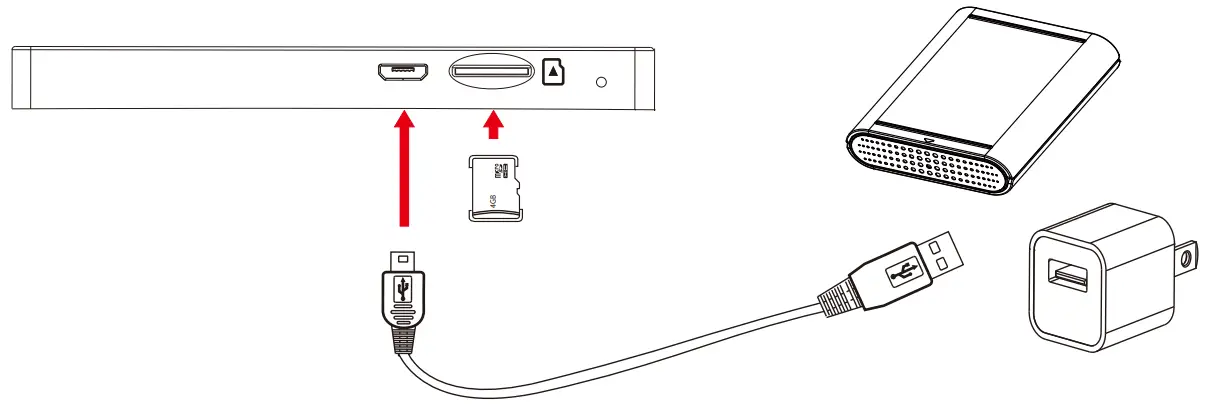
Connect the micro USB end of the cable to 13 and connect the other end to a USB power source, or plug it into a power bank of your own choice. The power bank then works as an extra battery. The three blue LEDs will be on and running during charging. When charging is complete, the three blue LEDs will all be on.
5. LED Indicators
| 3 blue LED all on | LED display On/Fully Charged |
| Blinking blue LED | Device Need Charge |
| Running blue LED | Charging |
| Solid red LED | Recording |
| Blinking red LED | Pause Recording / Stand-by |
| Blinking orange LED | Mode / Memory Card Full |
| Solid orange LED | Searching P2P |
| Solid orange LED | P2P Connected |
Warranty will be void if the serial number sticker tampers.
Operation
6.1 LED Display
To check the battery and device status, turn on the LED display by pressing 6 .
Press 6 again to turn it off.
6.2 Power On
To power on the device, insert the memory card and switch 5 to On. The red LED will blink in stand-by mode.
6.3 Recording Mode
6.3.1 Video Recording Switch 4 to Video and the red LED will be solid on.
6.3.2 Audio Recording Switch 4 to Audio and the red LED will be solid on.
6.4 Stop Recording
To stop recording and go back to standby mode, switch 4 to the middle and the red LED will flicker.
6.5 Wi-Fi Functions
6.5.1 To build a Wi-Fi connection, switch 3 to On and follow the instructions in PV Cam Viewer Quick Guide. The orange LED will be solid on when connected to Wi-Fi. 6.5.2 For more Wi-Fi functions, please refer to the PV Cam Viewer for Wi-Fi Cam Quick Guide.
6.6 Power Off
To power off the device, switch 5 to Off then press 6 to turn off the LED display.
6.7 Reset
If the device is working abnormally, press 2 to reset.
6.8 Default
6.8.1 To restore the Wi-Fi password and SSID, turn on the device, press and hold 10 for at least 3 seconds and then let go. The red and orange LED go on and then off.
6.8.2 To restore all default settings, turn on the device, press and hold 10 for at least 10 seconds and then let go. The red and orange LED go on and then off.
7. Format Memory Card
7.1 Format on Device
7.1.1 Press and hold 6 , and turn on the device.
7.1.2 You will see the blue LED all on and red LED flickering.
7.1.3 The device will power off when the format is complete.
7.2 Format on PV Cam Viewer APP
7.2.1 Go to program setting on PV Cam Viewer App
7.2.2 Press Format Card and confirm the command.
It is important to format the card when using it for the first time.
8. Date and Time Setting
8.1 On PC (Windows System)
8.1.1 Right-click on Windows desktop. Choose Notepad to create a *.txt file. Then double-click the text file.
8.1.2 Suppose the current time is April 11, 2018, at 15:00. Enter date and time information as 2018.04.11 15:00:00 Note: A space must be present in between date and hour, time must be in 24-hour format.
8.1.3 Save file name as settime.txt to the root directory of the memory card.
8.1.4 Insert the memory card to the slot then power on the device. The setting is now completed.
Note: When the date and time information is successfully set to the device, the settime.txt file should not be visible when you connect the device to the computer again.
8.2 On PV Cam Viewer APP
Please refer to the “Synchronize the Time” steps on the PV Cam Viewer for Wi-Fi Cam Quick Guide.
9. Download files to PC
9.1 Use the memory card reader to download video/photo files.
9.2 With the device powered on and memory card inserted, connect the device to PC by USB connection. It will be recognized by PC as an external drive for user to download the video recordings and photo files.
Specification
| Built-in Camera Module | |
| Built-in Image Sensor | 1/3″ progressive CMOS sensor |
| Sensor Resolution | 2304×1536 |
| Sensor Sensitivity | 3.3 Lux @ F 2.0 |
| Lens F/No. | F0,3. |
| Focal Length | 4mm |
| Angle of View | 66° |
| Video Spec. | |
| Algorithm | H.264, JPEG |
| File Format | MOV, JPG |
| Video Recording Mode | Manual |
| Recording Capability | 1920×1080 |
| Frame Rate | Up to 30 fps |
| Photo Capability | 5M (2952×1944) |
| Audio Spec. | |
| Algorithm | PCM |
| File Format | WAV |
| Storage & I/O | |
| Memory Type | Memory Card (Support up to 32GB) |
| Data Interface | Micro USB 2.0 |
| Wi-Fi Spec. | |
| Wi-Fi | Built-in Wi-Fi Module (IEEE 802.11b/g/n) |
| Wi-Fi Protocol | RTSP |
| Misc. | |
| Date/Time Table | YYYY.MM.DD HH:MM:SS |
| Snapshot | Recording and playback video ) via smartphone ) |
| Power | |
| Power Input | DC 5V |
| Power Consumption | (Video) 350mA-380mA (Wi-Fi+80mA) / (Voice) 90mA |
| Charging Time | 150min (680mA) |
| Battery Input | DC 3.7V/ 1400mA polymers battery (XK504355) |
| Battery Lifetime | Video recording 150-210min Audio recording 900min |
| Physical | |
| Dimension | 244x130x25 (mm) |
| Weight | 306g |


