
Artwork Body shop Inc VW GOLF GTI MK7-7.5 Front Splitter Instruction Manual
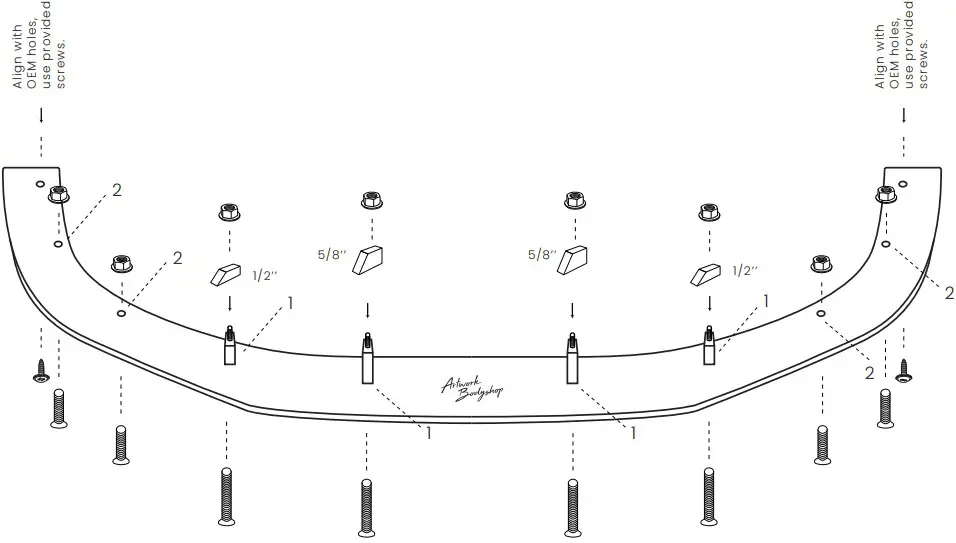
ASSEMBLY INSTRUCTIONS
- Long bolts / Spacers
- Medium bolts

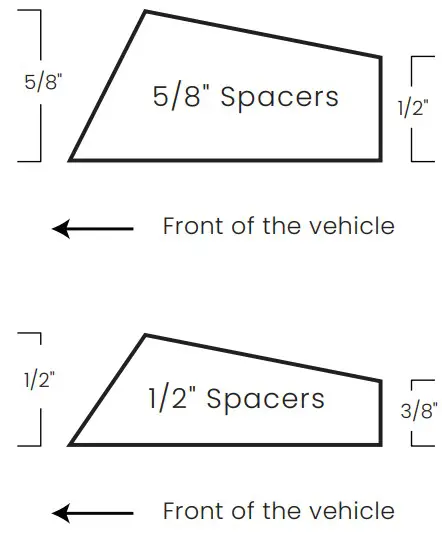
SPACERS SIDE VIEW
PARTS LIST
 | 1/2″ Spacers x 2 |
 | 5/8″ Spacers x 2 |
 | M8 Hex Key x 1 |
 | #10 x 1″ Black Phillips Screws x 2 |
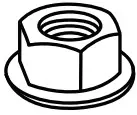 | M8 Lock Nuts x 8 |
 | 25mm M8 Bolts x 4 |
 | 40mm M8 Bolts x 4 |
INSTALLATION INSTRUCTIONS
***CAUTION***
PROFESSIONAL INSTALLATION IS STRONGLY RECOMMANDED
- Remove each exterior screws under your bumper towards the wheels.
- Align the splitter and install it with the screws (or the provided ones if the factory ones are not long enough) you just removed in the factory holes to hold the splitter in place. (You can use a car jack to hold the middle of the splitter up).
- Use a 5/16″ drill bit and through the remaining holes of the splitter, drill holes under your bumper. Make sure the drill bit stays straight as possible.
- Remove the screws under your bumper so you can access inside the bumper and assemble the splitter with spacers, bolts and nuts like the drawing shows. Screw the nuts inside by hand until it’s tight, and then use the hex key by the bottom of the splitter to tight the bolts.
- Reinstall all removed screws and make sure everything is tight, take pictures and send it to [email protected] and make sure to tag us on social media @artworkbodyshop!
YOUR LOYALTY AS A CUSTOMER IS GREATLY APPRECIATED – © 2022 ARTWORK BODYSHOP