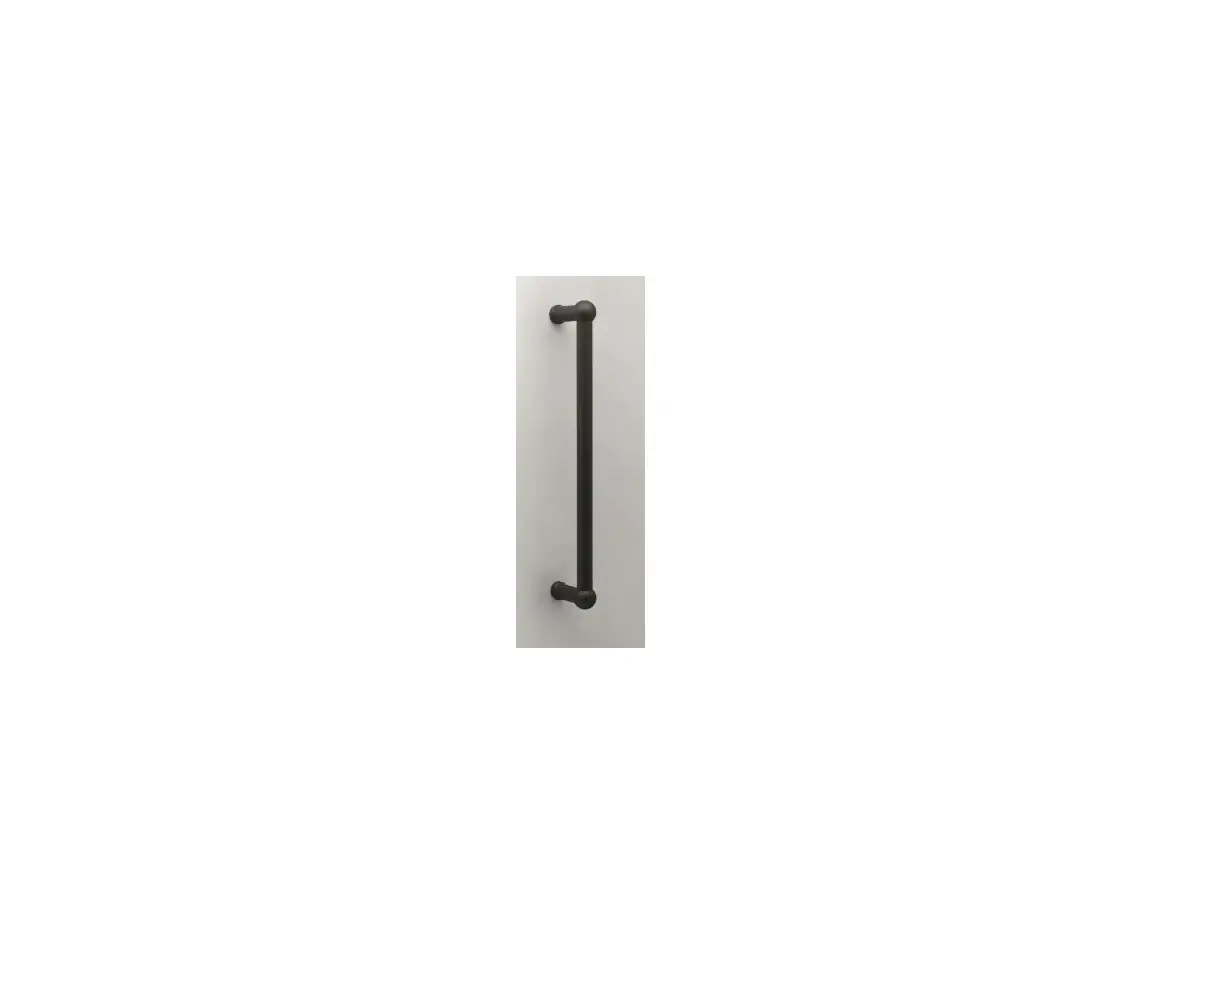
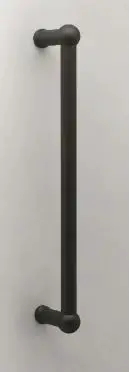
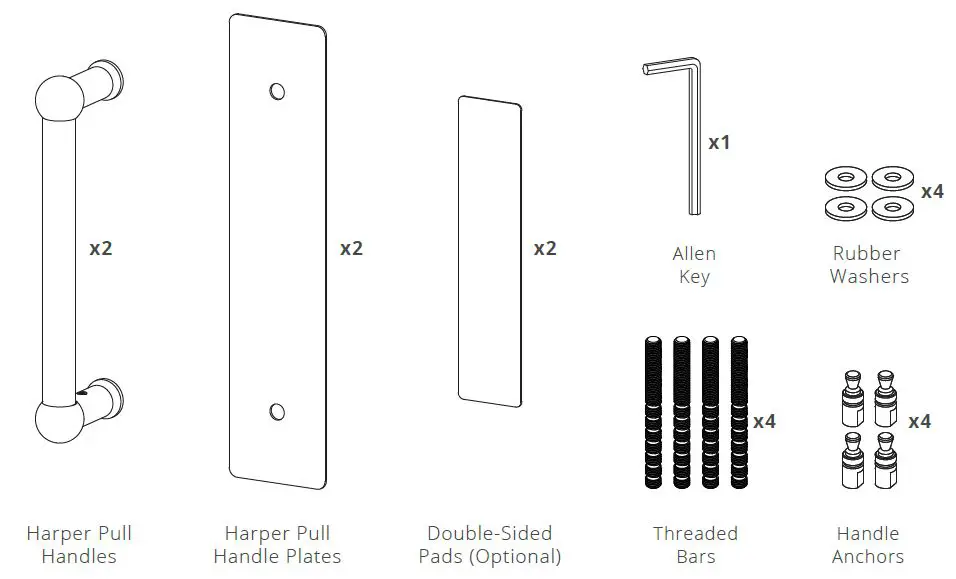
CORSTON Single Harper Pull Handle
Contents

ASSEMBLY
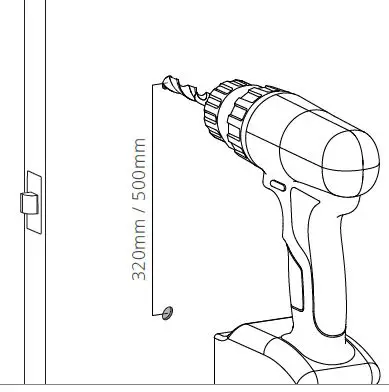
- Drill the holes

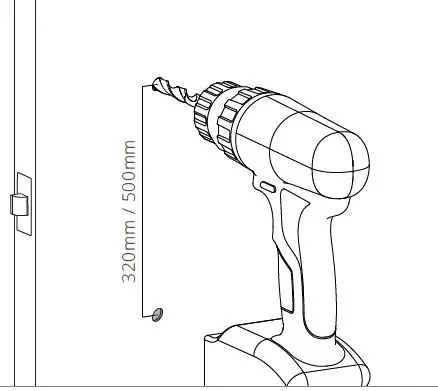
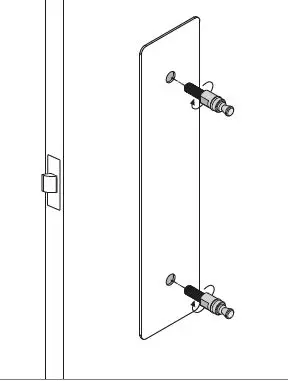
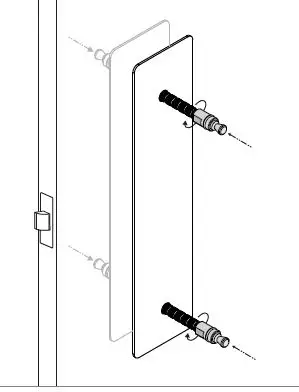
Mark and drill two holes in the timber door using a 10mm drill bit. Masking tape can be used to mark accurate holes and adjust positioning. - Insert the nuts

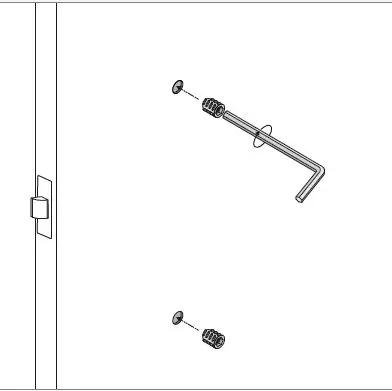
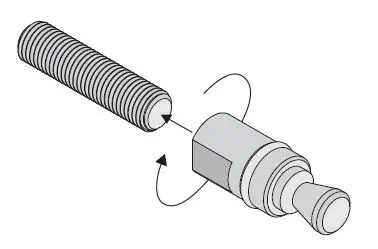
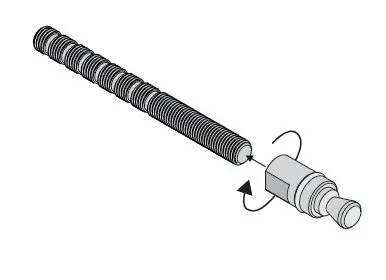
Use the allen key to drive the insert nuts into the holes. Ensure the insert nut is flush with surface. - Insert the threaded bars

Insert threaded bar all the way into handle anchor. - Attach handle anchors (and plate)

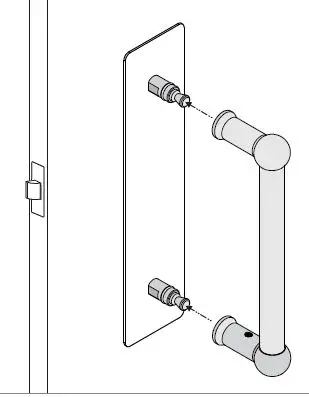
Screw anchors into door over plate and tighten by hand. Use a spanner for more robust doors. - Attach the handle

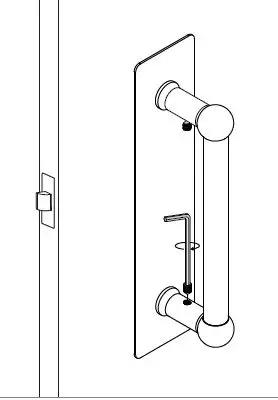
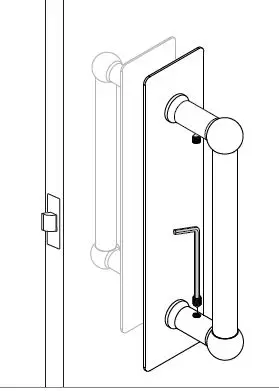
Attach handle to the anchors. Both ends of the handle should be flush with the plate/door - Tighten the grub screws

Using the allen key, tighten the two grub screws on the inside of the handle.
Please Note
The double-sided pad can be used to secure the plate to the door. This is to assist with uneven door surfaces. Once attached to the plate, it cannot be removed. Onl y use if the plate is not stable without it.
Rubber washers can be used to protect the door frame but will b e visible.
Double Harper Pull Handle
Contents
ASSEMBLY
- Drill the holes

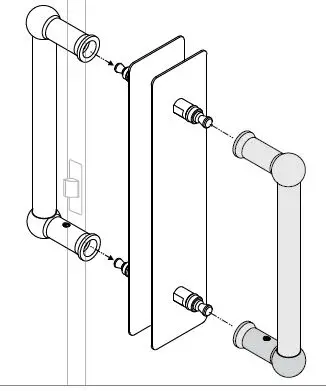
Mark and drill two holes in the timber door using a 10mm drill bit. Masking tape can be used to mark accurate holes and adjust positioning - Insert the threaded bars

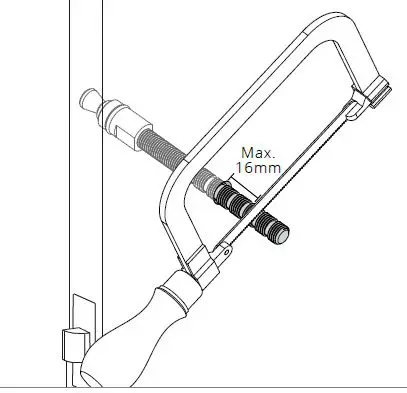
Insert threaded bar all the way into handle anchor. - Cut the threaded bars

Insert the threaded bar though the door and mark 16mm of thread through the other side. Cut the threaded bar on a thread clearance with a hacksaw. - Attach handle anchors (and plates)

Screw anchors into door over plate and tighten by hand. Use a spanner for more robust doors. - Attach the handles

The handle can be attached to the anchors. Both ends of the handle should be flush to the plate or the door - Tighten Grub Screws

Using the allen key, tighten the four grub screws on the inside of the handle.
Please Note
The double-sided pad can be used to secure the plate to the door. This is to assist with uneven door surfaces. Once attached to the plate, it cannot be removed. Onl y use if the plate is not stable without it.
Rubber washers can be used to protect the door frame but they will be visible. Rubber washers must be used when attaching to glass doors.
corston.com/support
[email protected]
01249 549332


