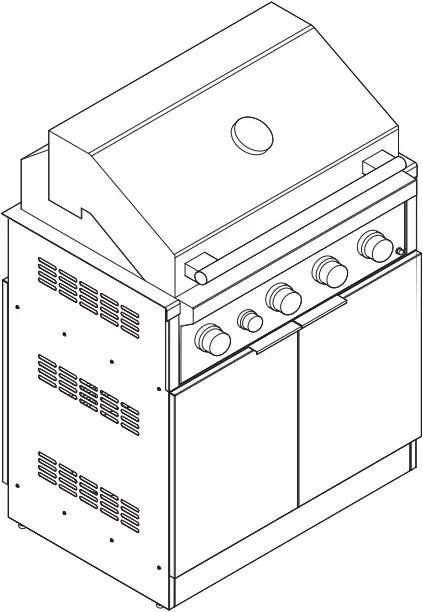
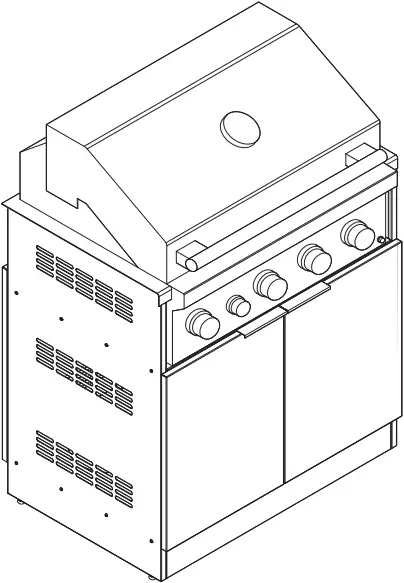
GRILL CABINET
![]()
4x Door Hinge 2x Door Magnet 1x Left Door 1x Right Door
![]()
![]()
![]()
54x Screw Short 14x Screw Long 1x Allen Key
![]()
![]()
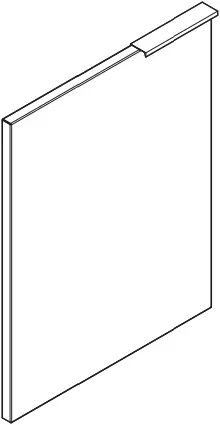
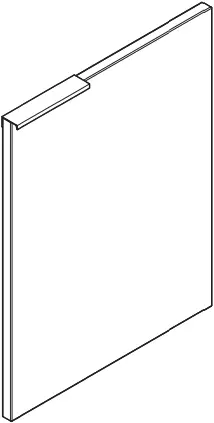
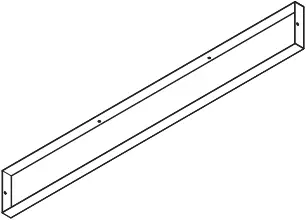
2x Side Piece 1x Front Bracket 1x Back Bracket
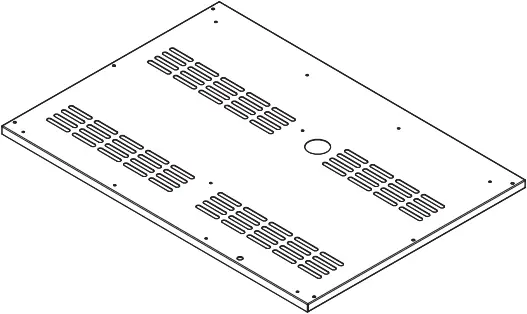
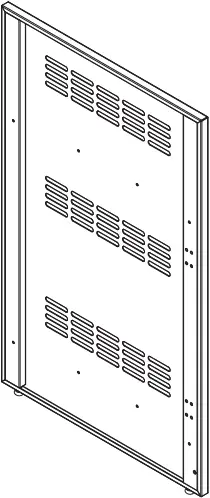
1x Back Piece 1x Top Piece
![]()
1x Propane Tank Screw
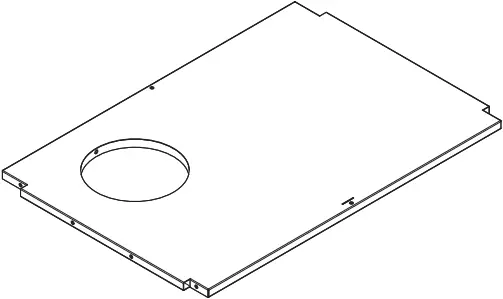
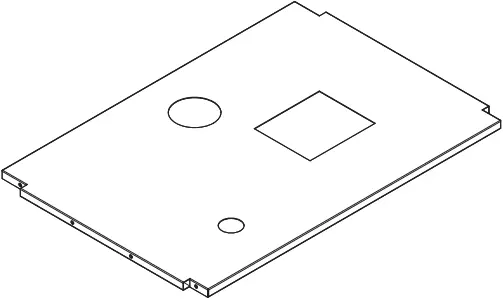
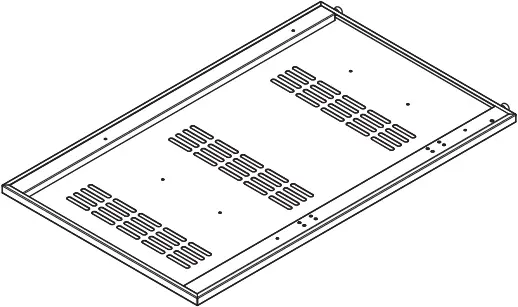
1x Kick Plate 1x Bottom Piece
![]()
2x BBQ Filler Plate
Not Included*
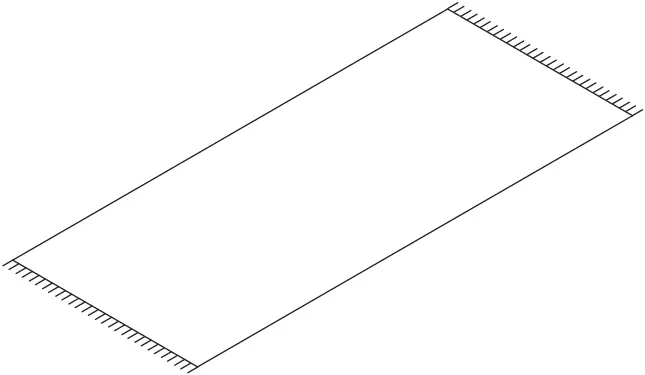
Phillips Screw Driver Soft Surface
![]()
![]()
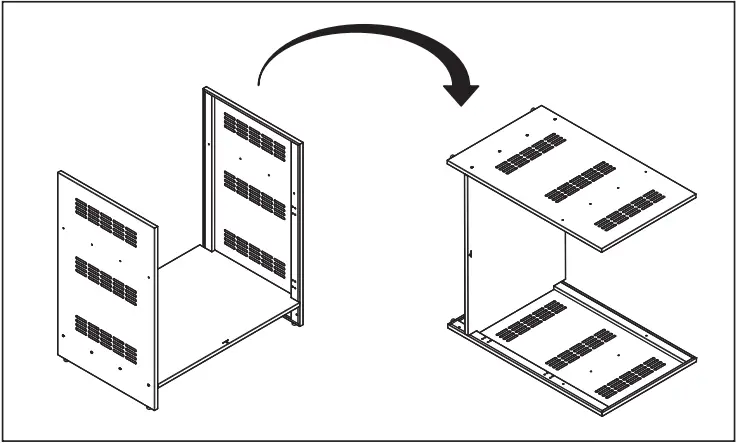
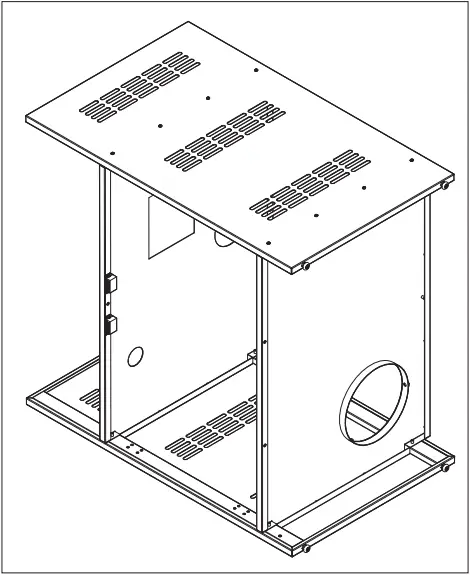
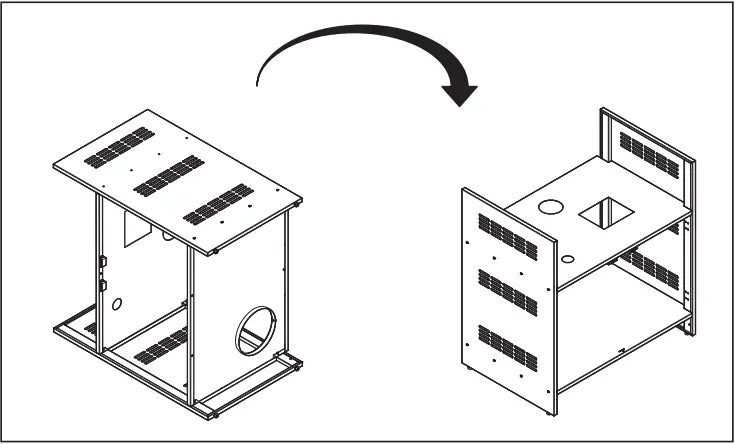
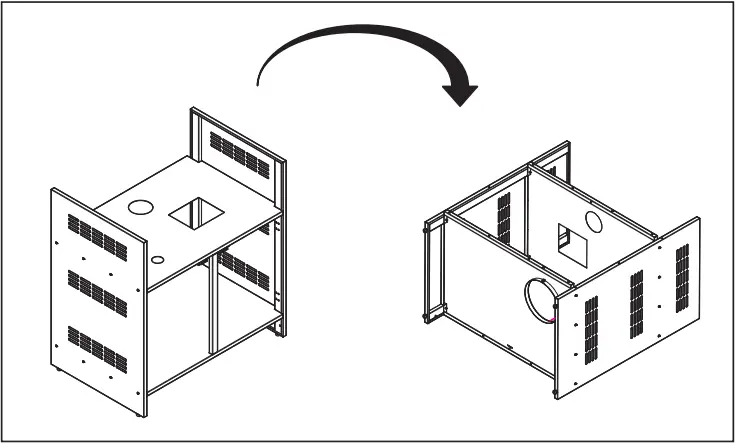
2x Side Piece 1x Bottom Piece 4x Screw Long 4x Screw Short
1 2
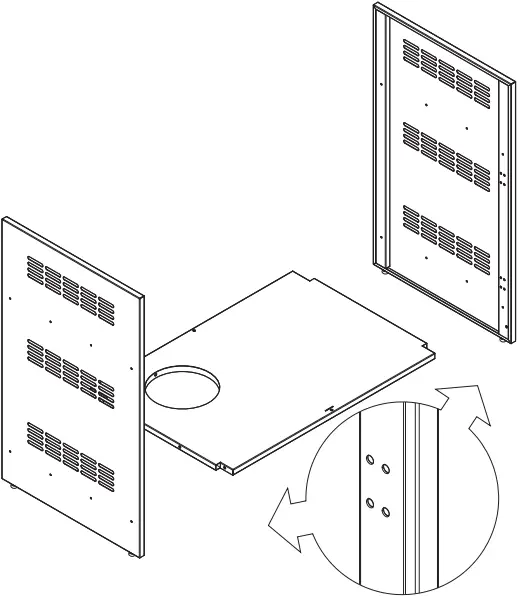
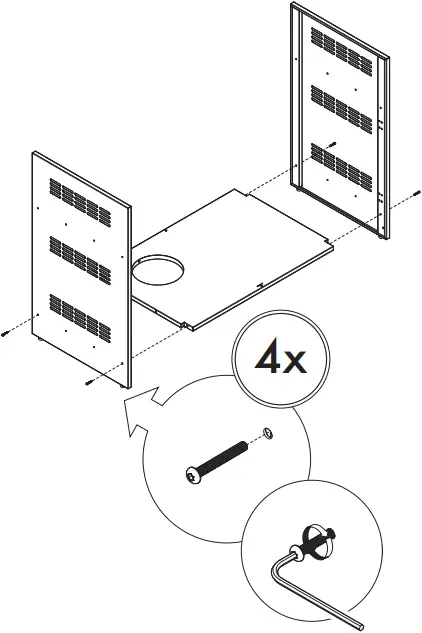
3 4
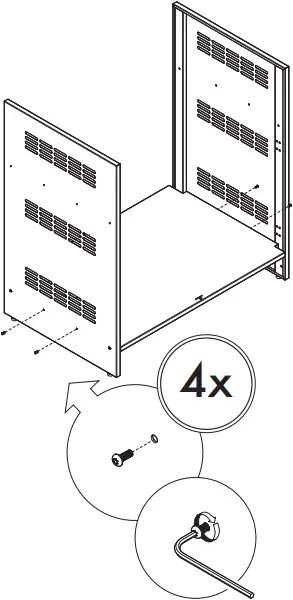
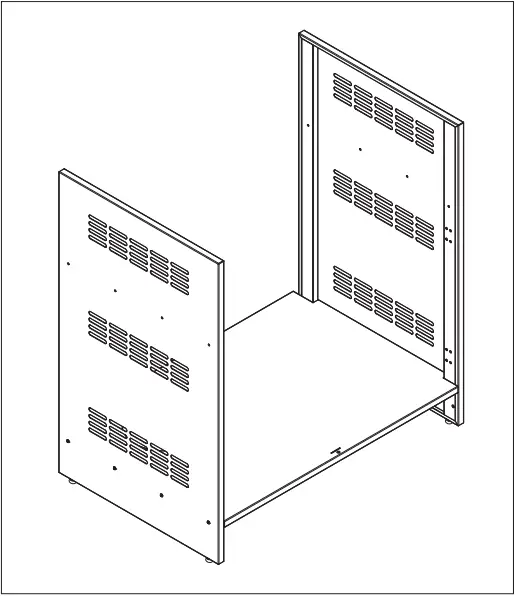
*Note: Do not over tighten screws
![]()
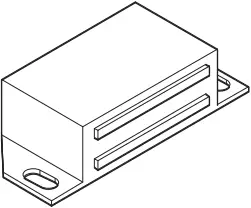
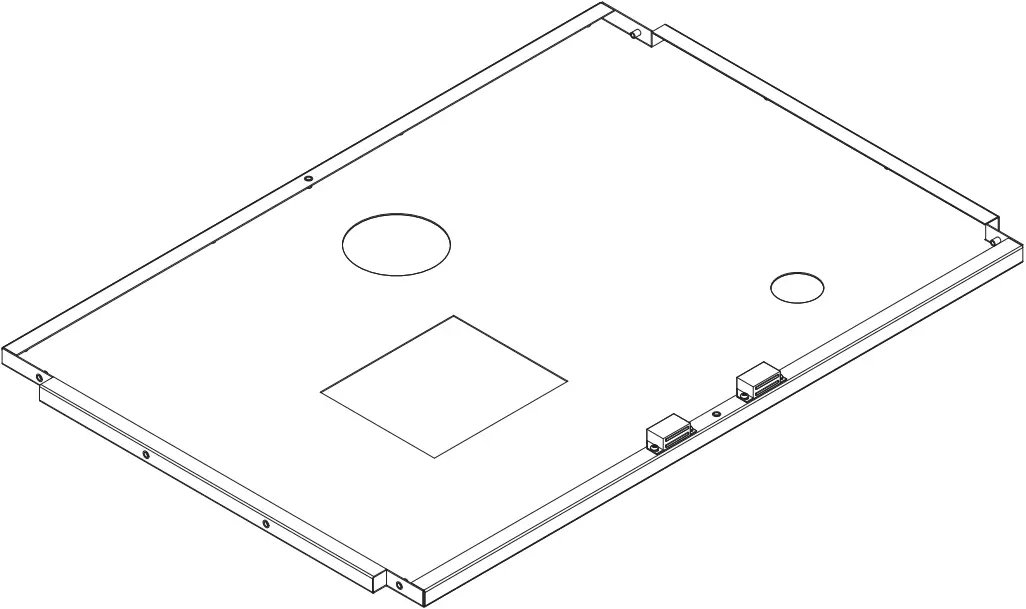
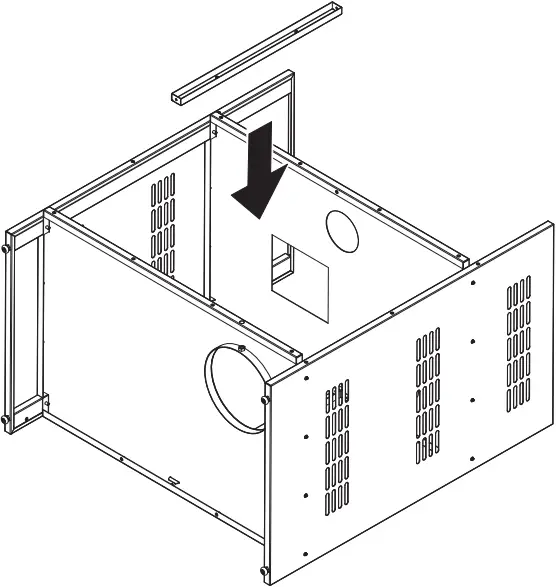
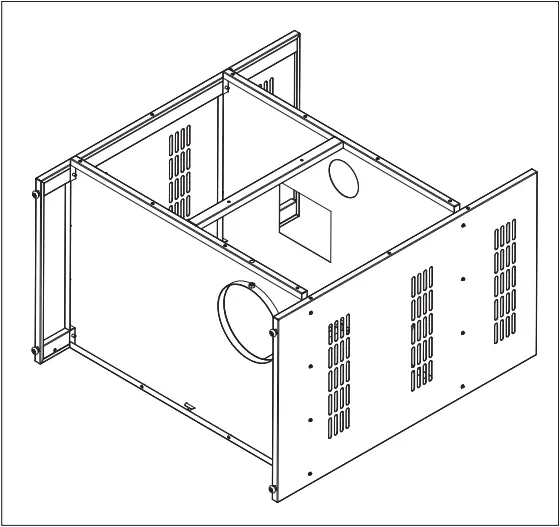
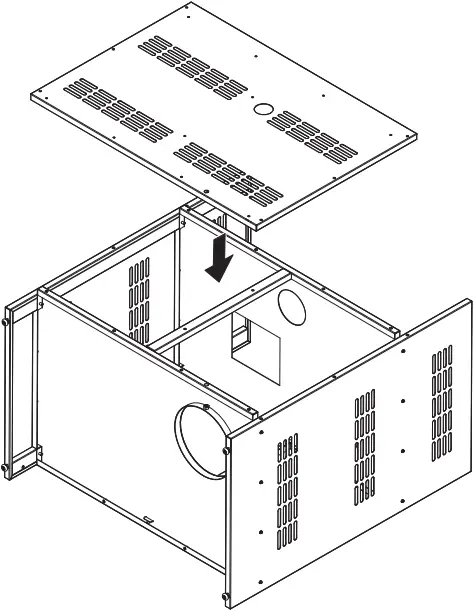
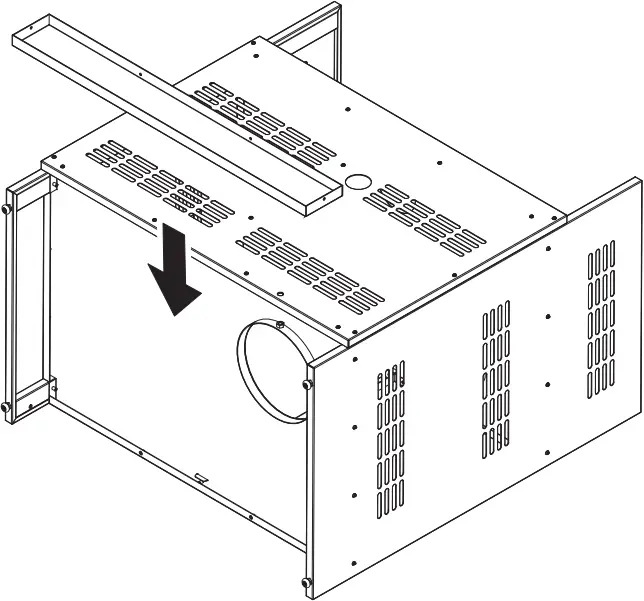
1x Top Piece 2x Door Magnet 4x Screw Short
1
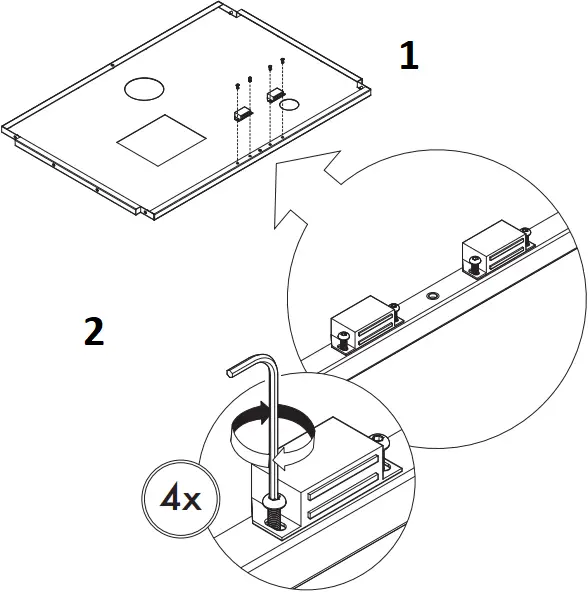
- * Door magnets come with extra silver screws for an alternate application. Please discard.
- *Line up Door Magnet to front of Top Piece
2
![]()
![]()
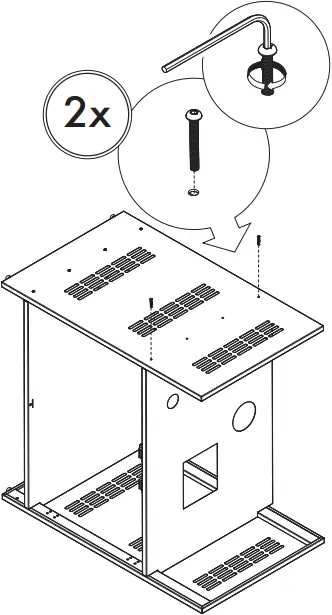
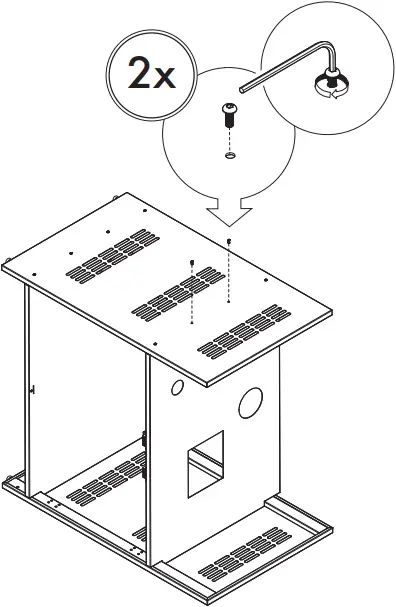
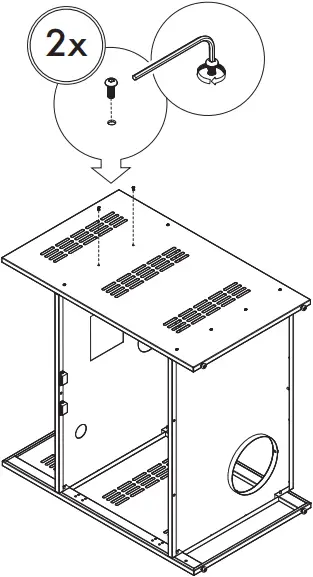
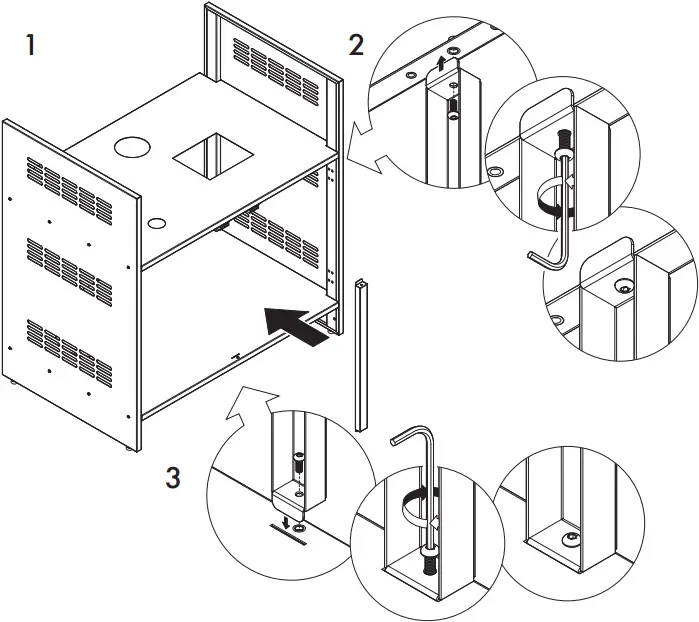
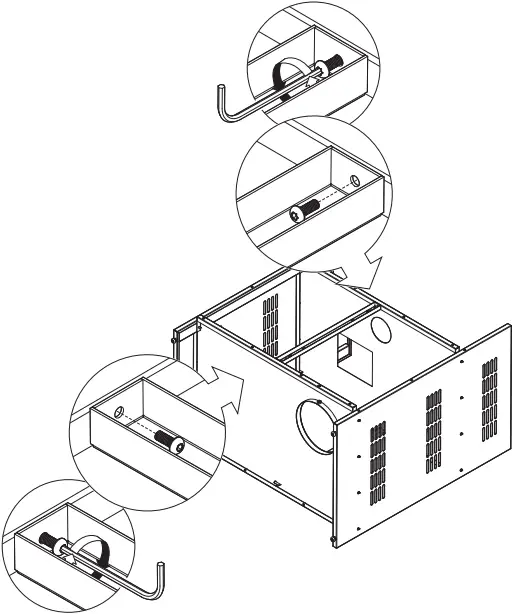
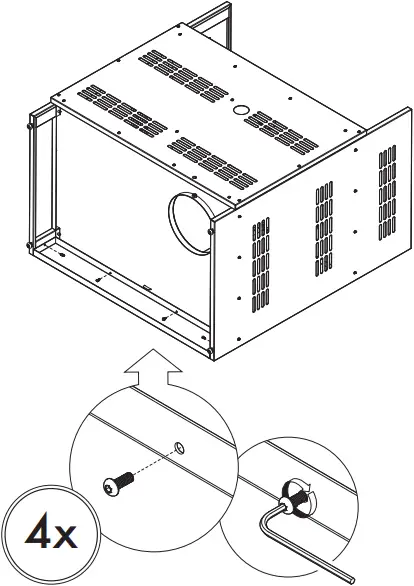
2x Screw Long 2x Screw Short
1 2
3 4

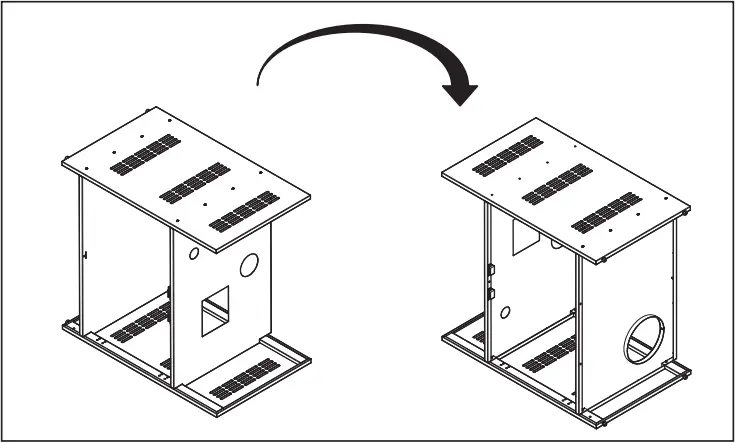
![]()
![]()
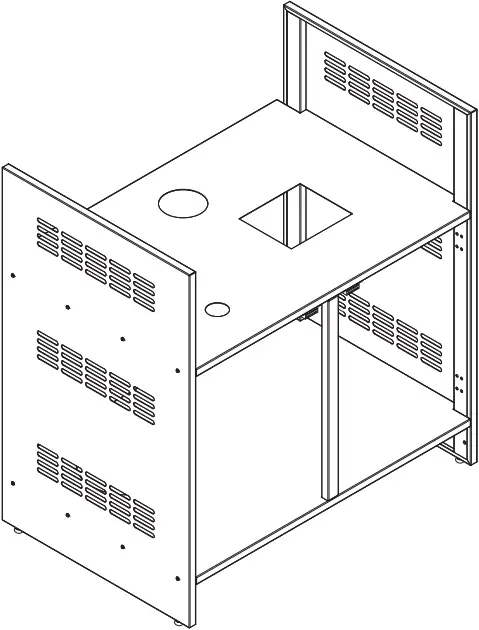
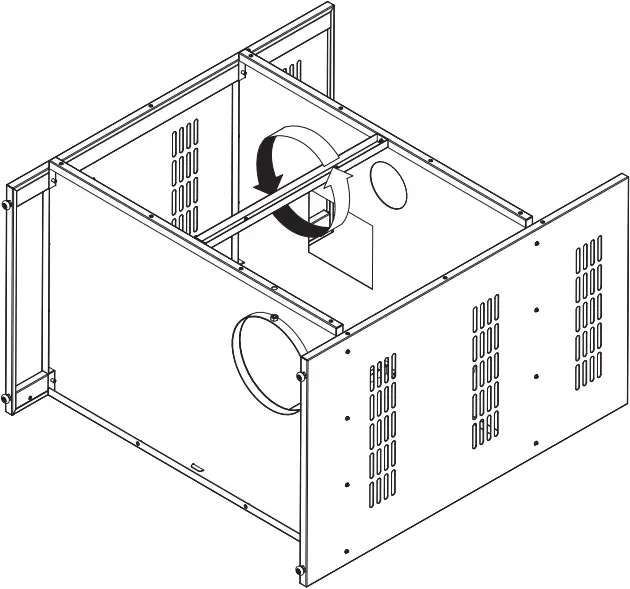
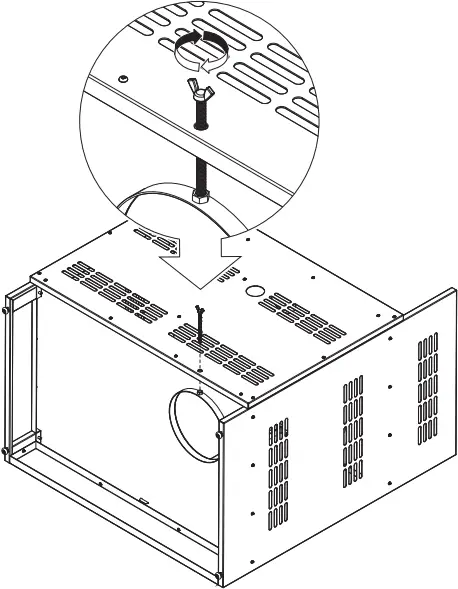
2x Screw Long 2x Screw Short
1
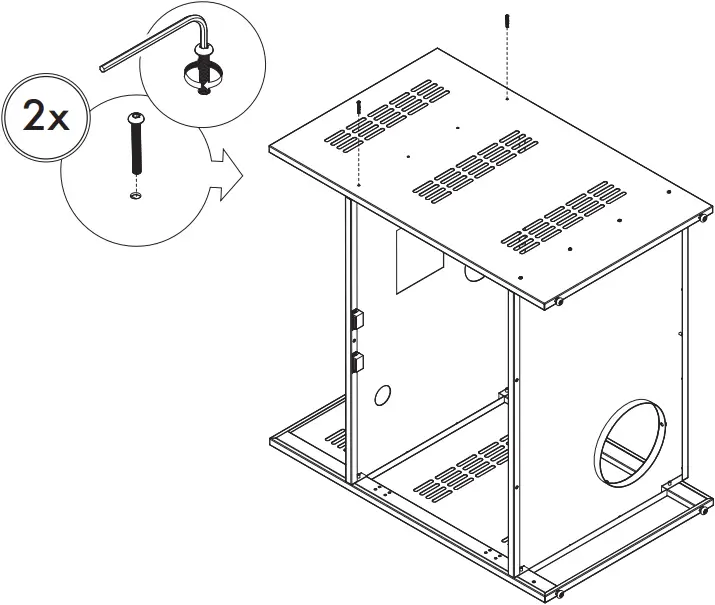
2 3
![]()
![]()
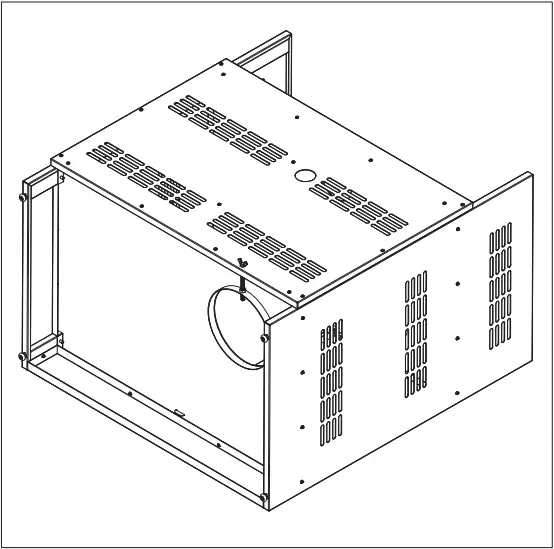
1x Front Bracket 2x Screw Short
4
![]()
![]()
1x Back Bracket 2x Screw Short
1 2
3 4
![]()
![]()
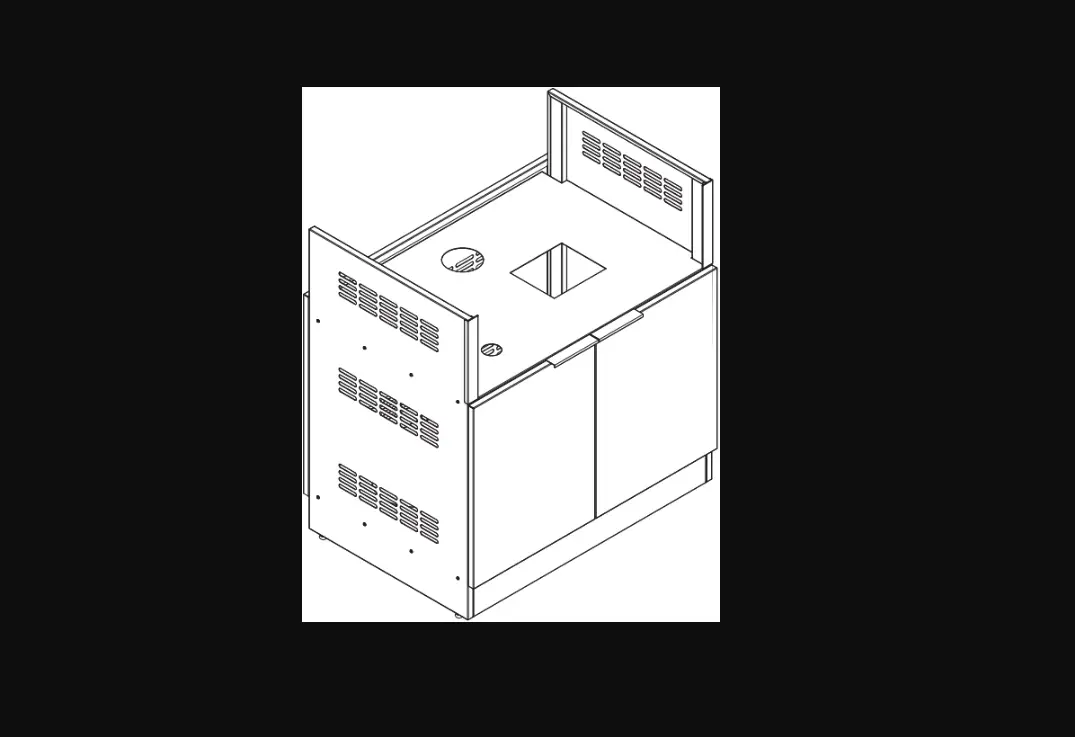
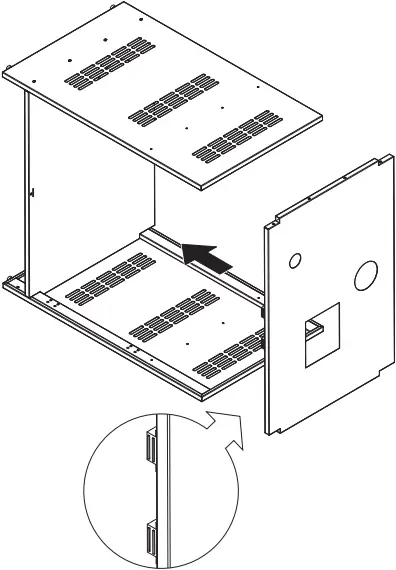
1x Back Piece 6x Screw Long 10x Screw Short
1 2
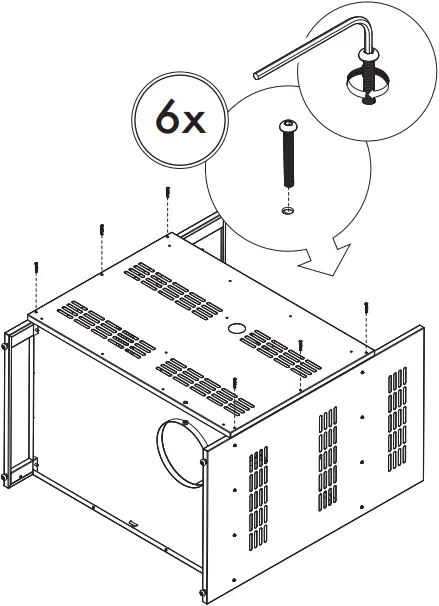
3 4

![]()
![]()
1x Kick Plate 4x Screw Short 1x Propane Tank Screw
1 2
3 4
![]()
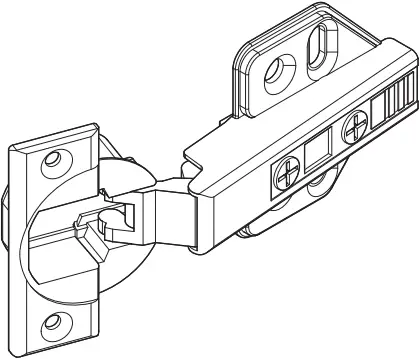
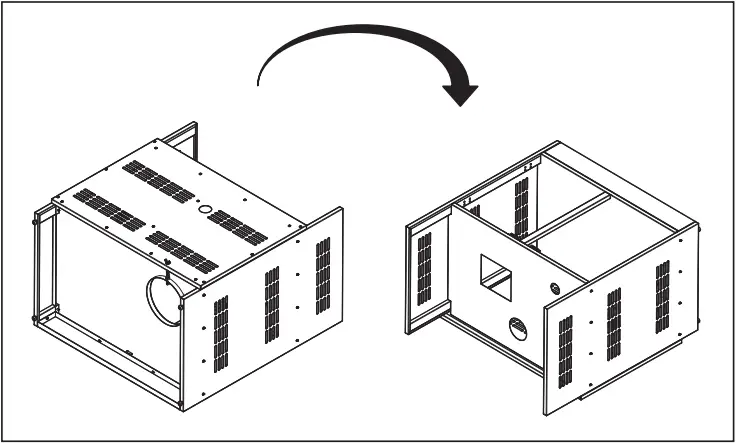
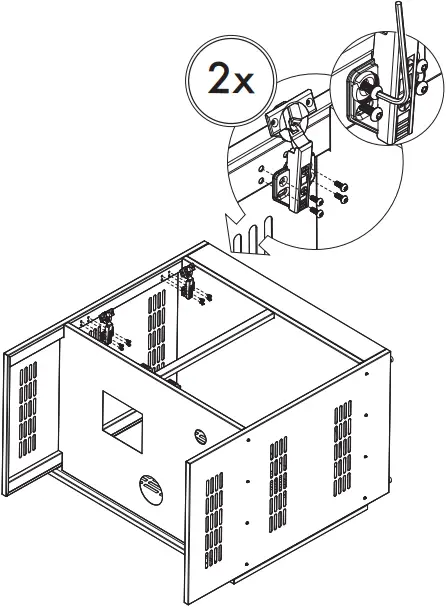
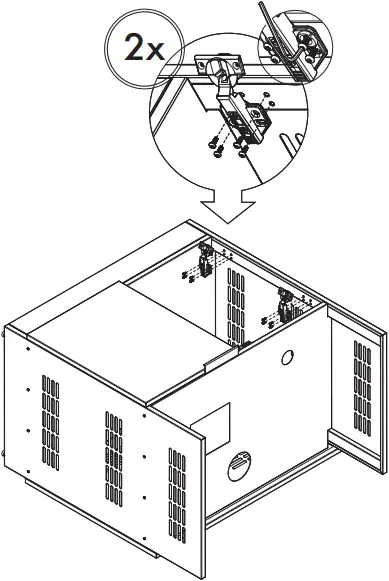
1x Right Door 2x Hinge 12x Screw Short
1 2
*Hinges come with extra
silver screws for an alternate
application. Please discard.
3 4
![]()
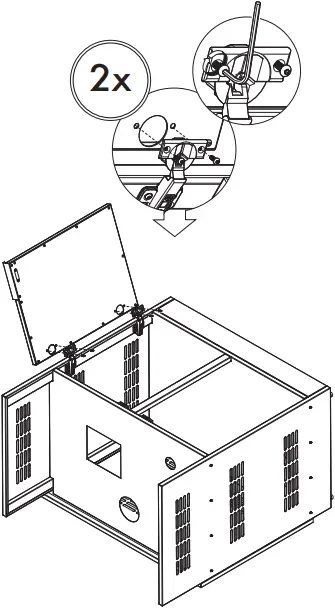
1x Left Door 2x Hinge 12x Screw Short
1 2
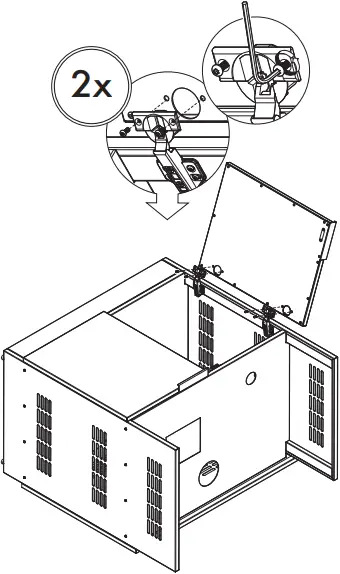
3 4
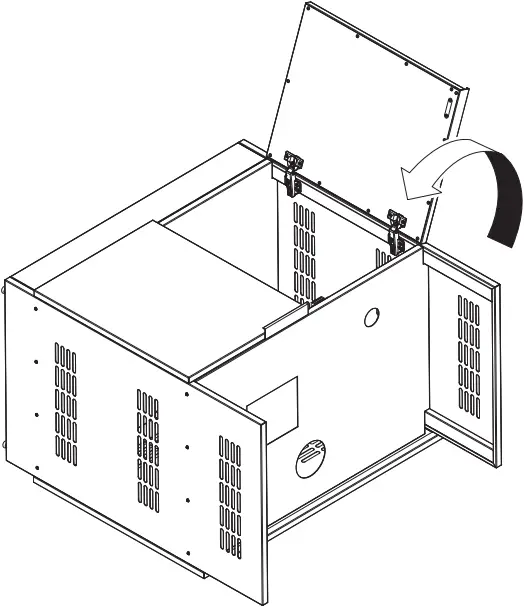
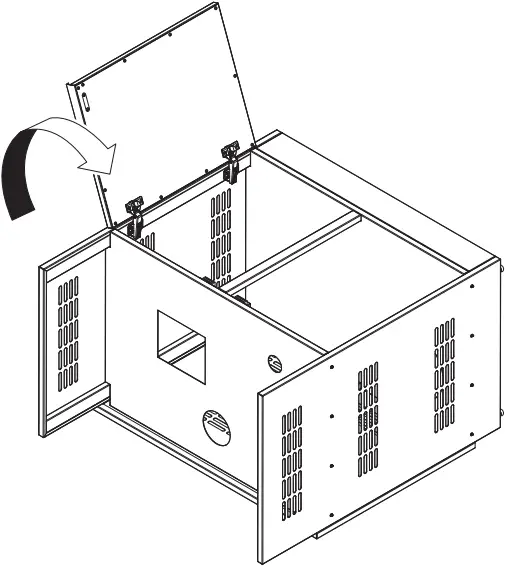
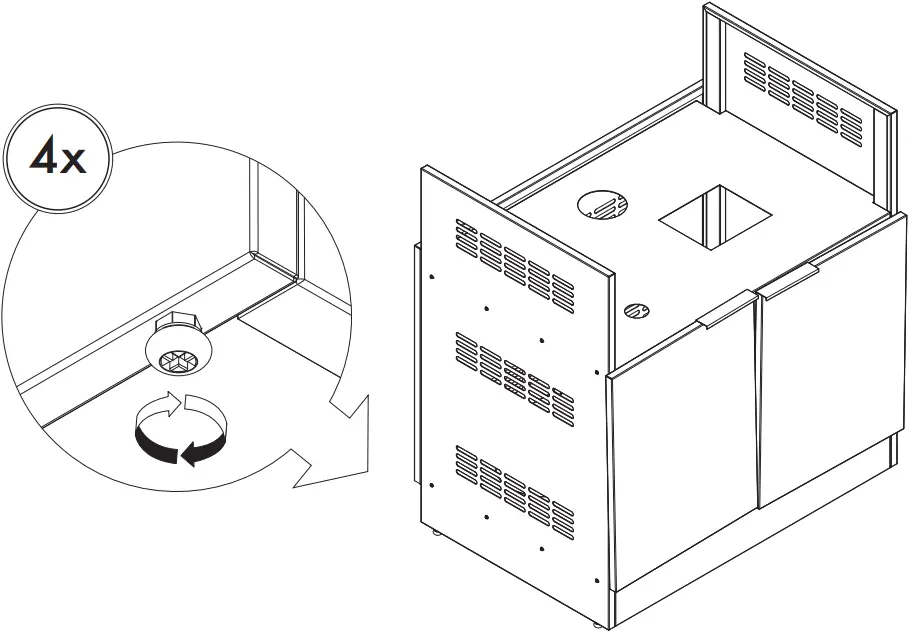
*Note: Before adjusting door hinges, it is essential to ensure that grill cabinet is levelled in final resting place by adjusting leveller feet. Placing grill cabinet on an unlevelled surface without adjusting leveller feet can cause doors to become misaligned.
Hinge Adjustment:

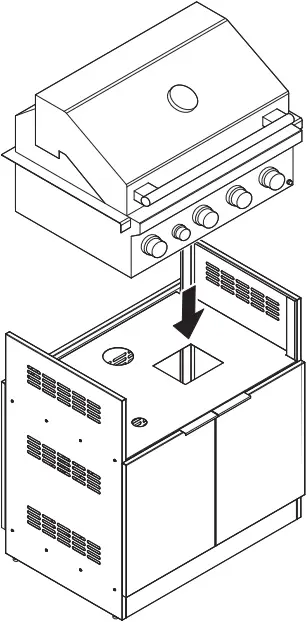
*Note: Refer to BBQ setupmanual for BBQ setup
1
2
![]()
2x BBQ Filler Plate
1
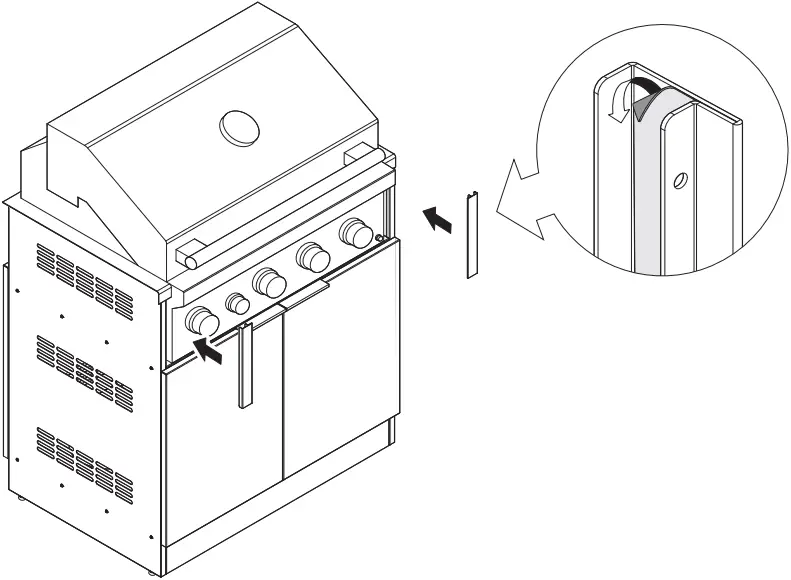
*Remove strip to reveal adheasive backing
2