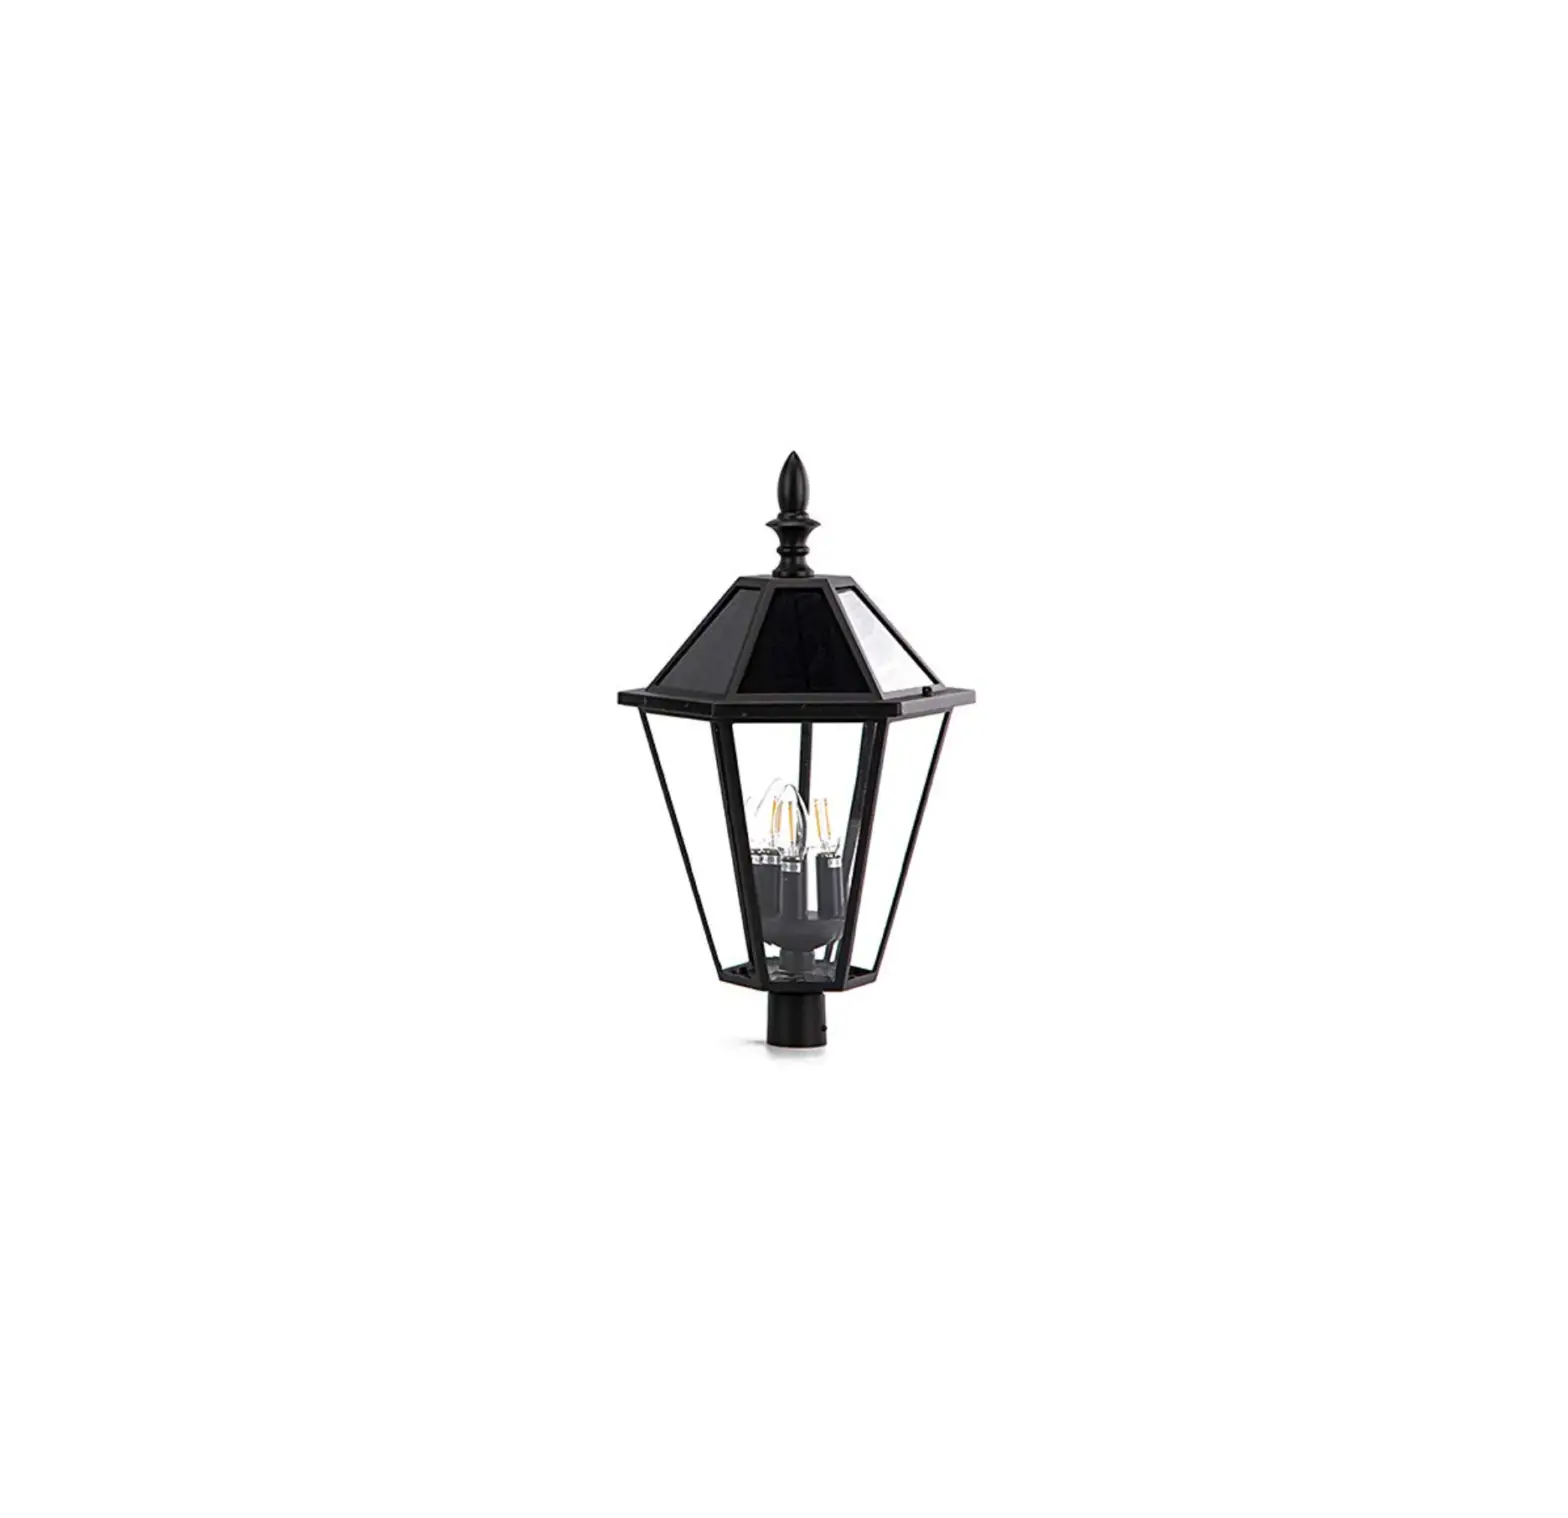
LUTEC 12513LE4-SL-Head LED Solar Post Lantern
IMPORTANT, RETAIN FOR FUTURE REFERENCE: READ CAREFULLY
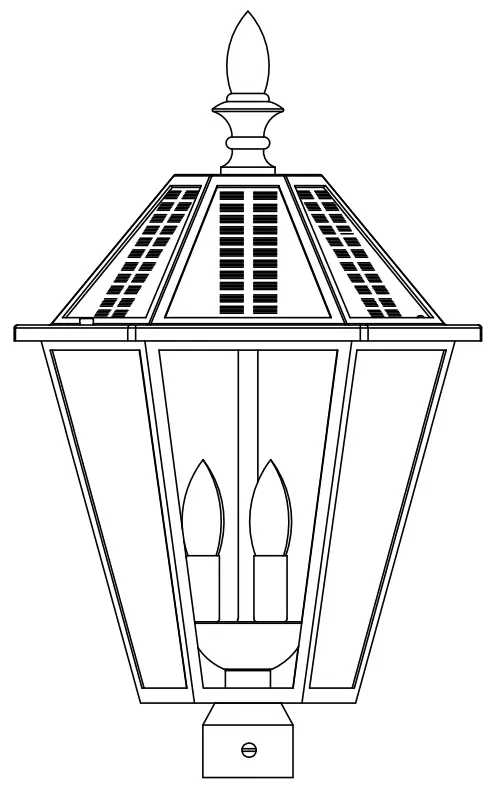
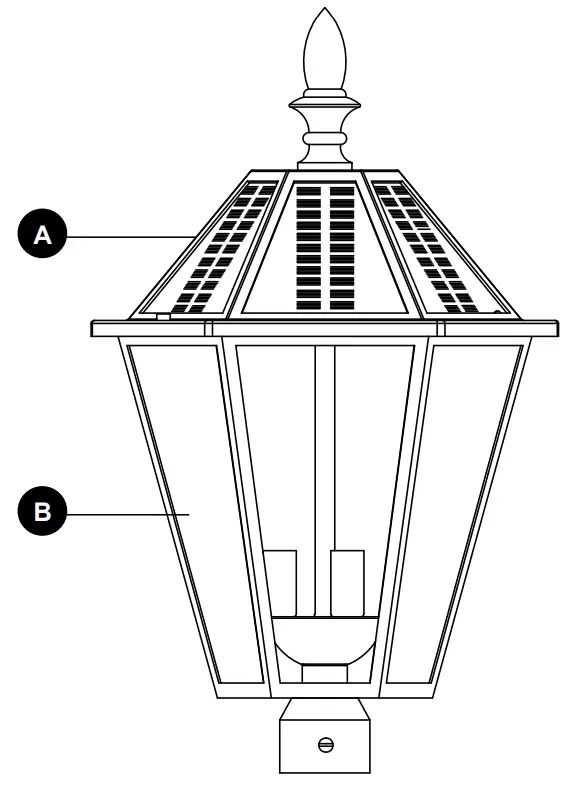
PACKAGE CONTENTS
| PART | DESCRIPTION | QUANTITY |
| A | Solar Panel Top | 1 |
| B | Lamp Head | 1 |
HARDWARE CONTENTS
(not shown actual size)
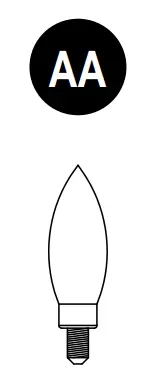 |
Bulb |
Qty. 3 |
 SAFETY INFORMATION
Please read and understand this entire manual before attempting to assemble, operate or install the product.
 WARNING:
The solar panel “Post Light” requires sunlight to charge the batteries and should be installed in an area with a minimum of 8 hours of direct sun exposure.
Do not put the battery in fire – it may explode.
Do not immerse into water.
Do not expose the light to fire or intense heat as the battery may explode.
Note: Charging conditions differ by time zone locations and affects total hours of light discharge.
Note: Batteries may have become depleted due to lack of sunlight for an extended period causing the bulbs to not illuminate. Please place the solar head in direct sunlight for at least 6 hours prior to assembly.
PREPARATION
Before beginning to assemble or installing lighting fixture, make sure all parts are present. Compare parts with package contents list and hardware contents list. If any part is missing or damaged, do not attempt to assemble, install or operate the product.
Estimated Assembly Time: 10-20 minutes.
Tools Required for Assembly: Phillips Screwdriver, Adjustable Wrench/Pliers.
ASSEMBLY INSTRUCTIONS
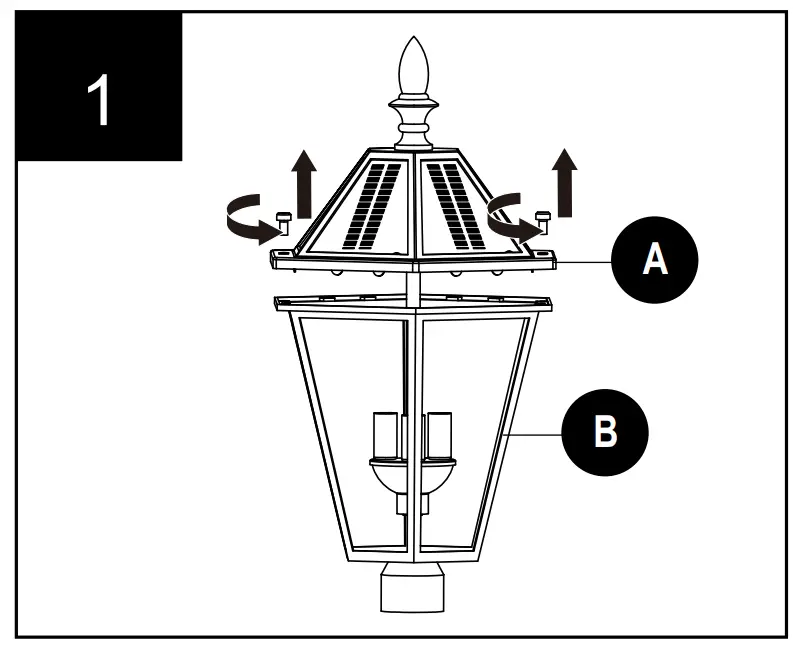
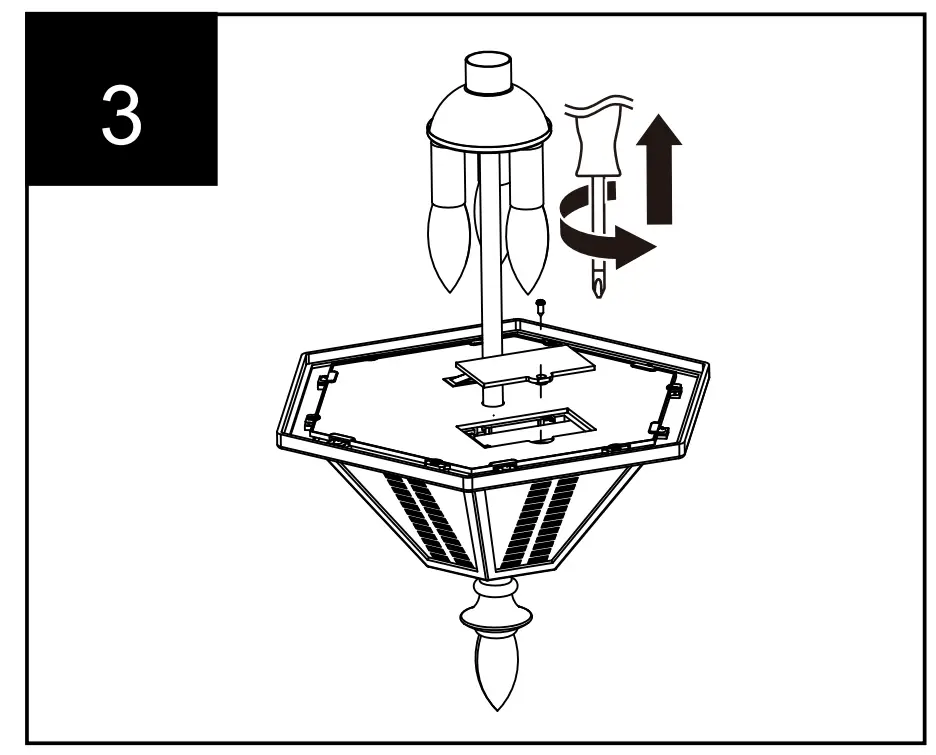
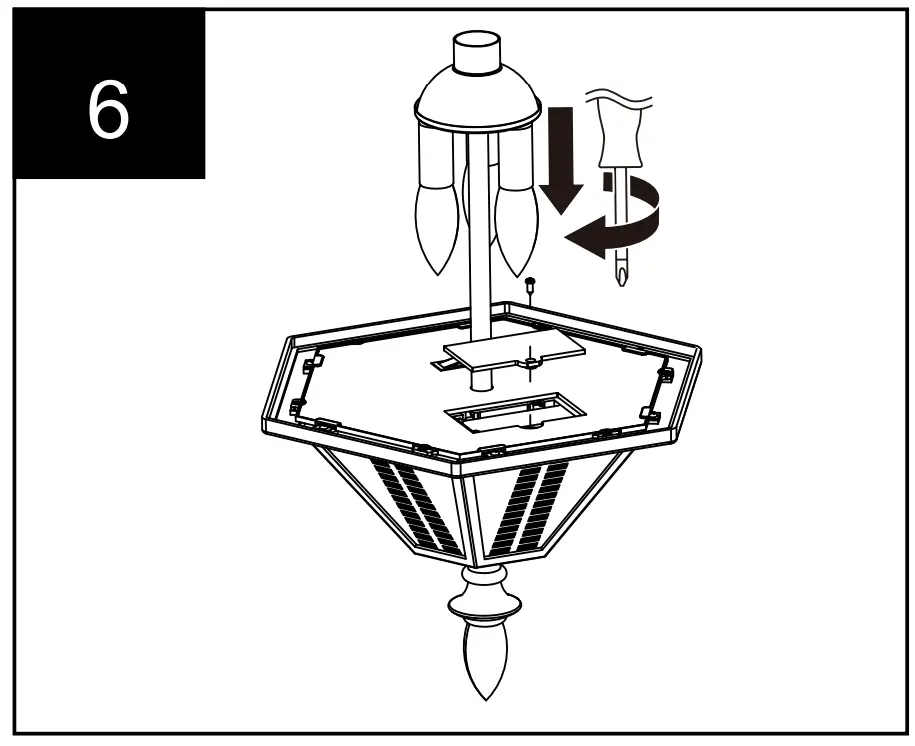
- Remove the thumbscrews preassembled in the solar panel top (A), then detach the solar panel top (A) from the lamp head (B).

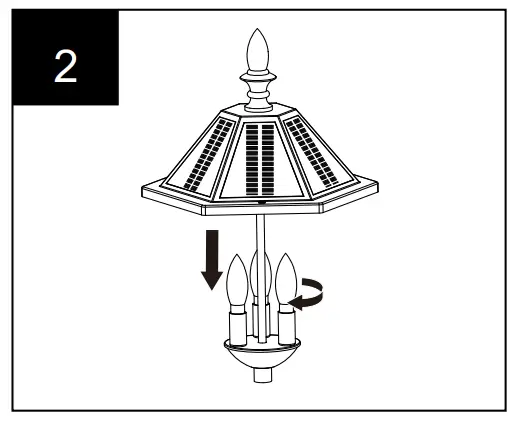
- Install the three LED bulbs (AA).

Hardware Used
Bulb
x 3
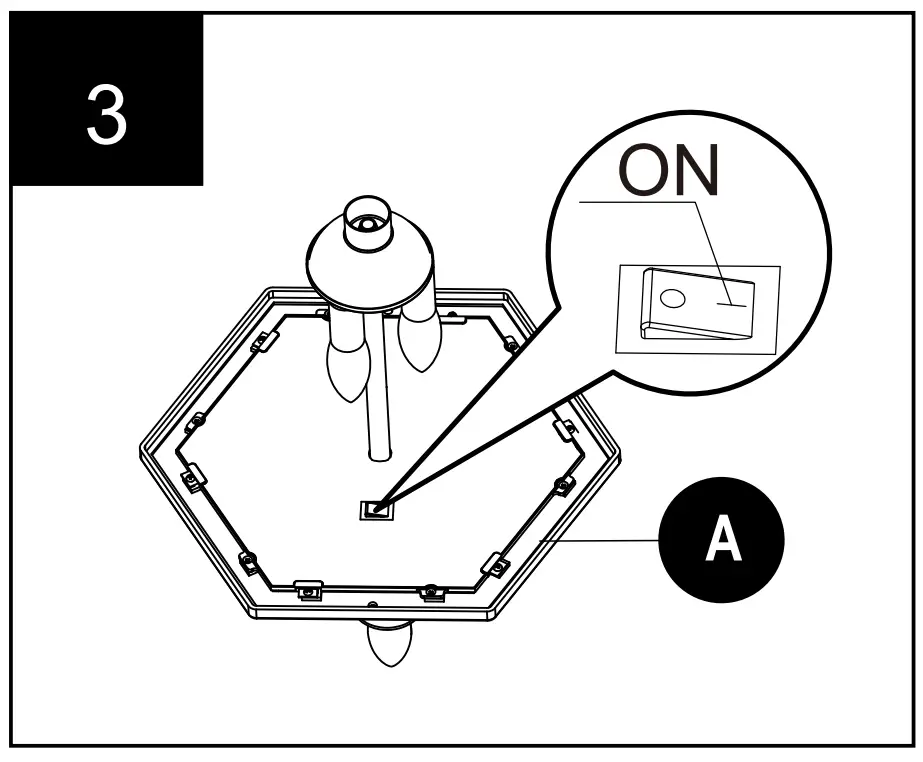
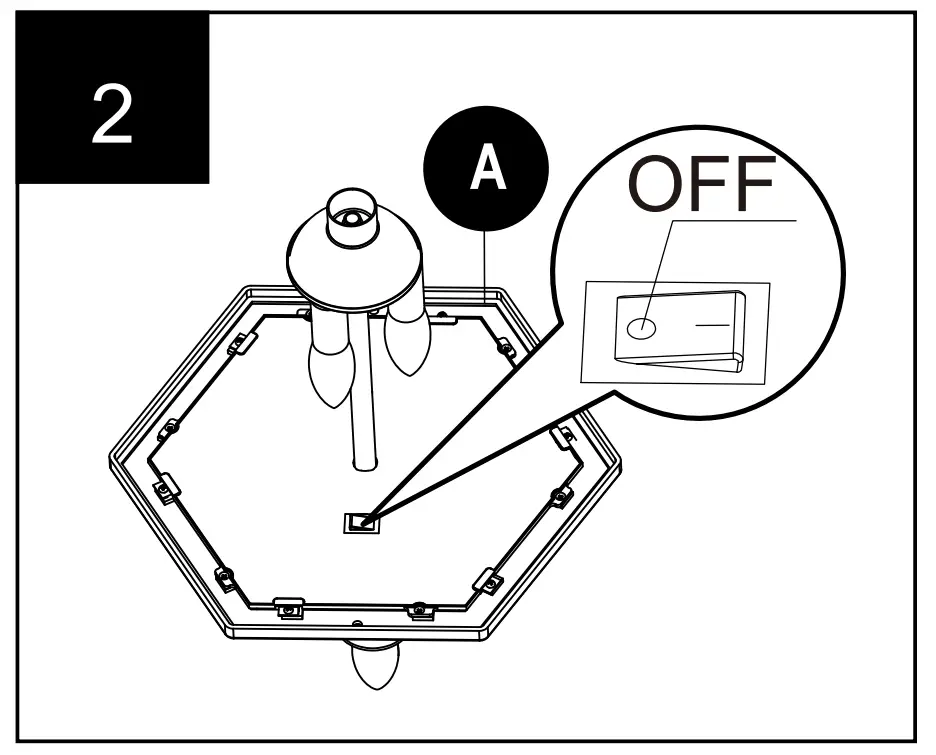
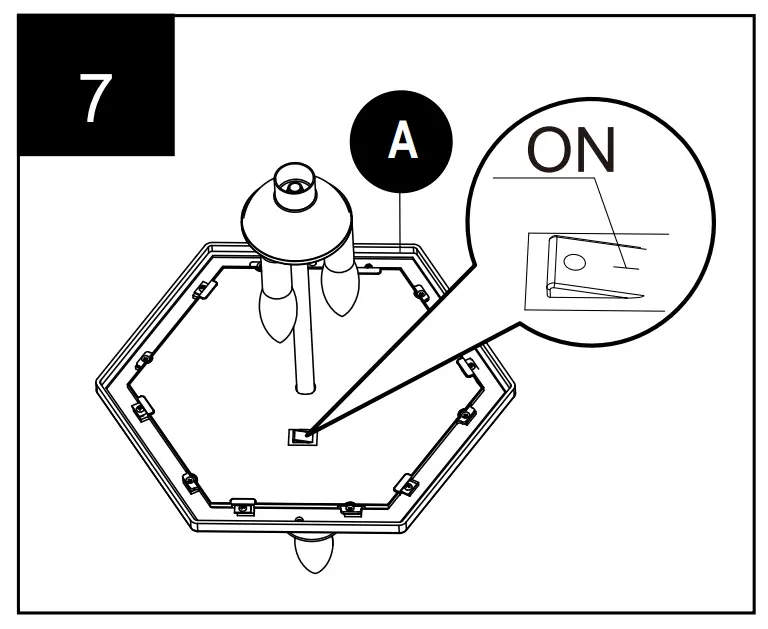
- Turn ON the switch in solar panel top (A).

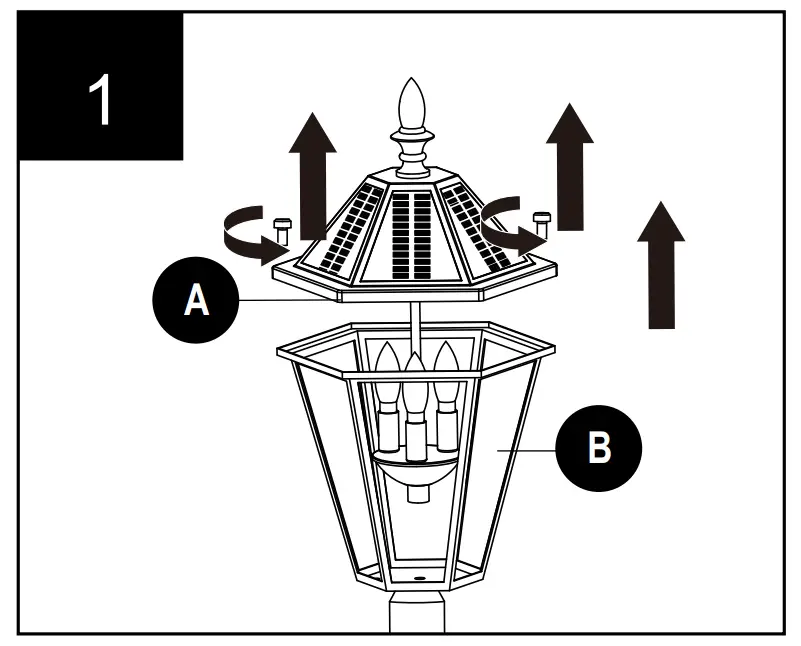
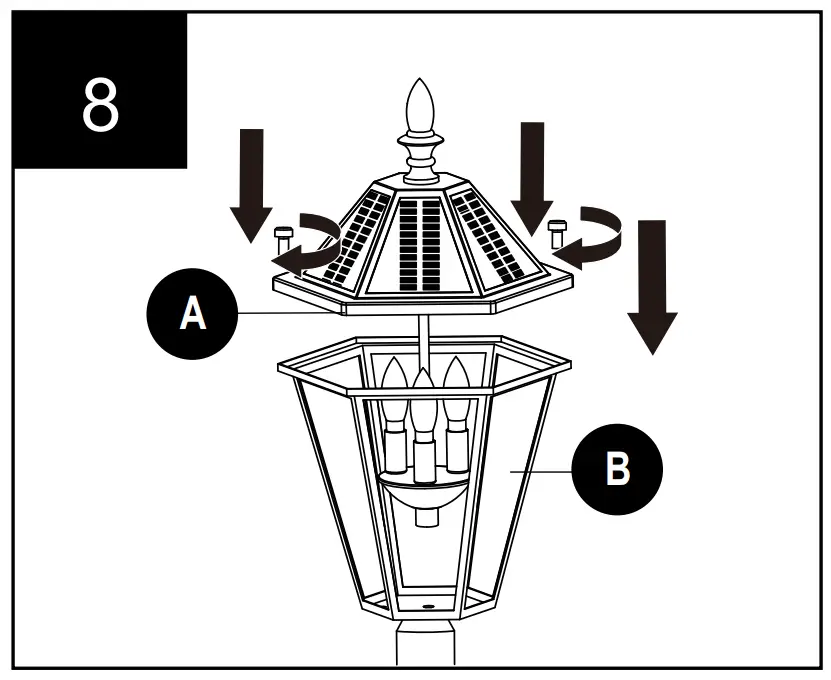
- Attach the solar panel top (A) to the lamp head (B) with the previously removed two thumbscrews.


MAXIMIZING SOLAR LIGHT POST PERFORMANCE
Charging: Charge in direct sunlight for 8-10 hours.
Location: Choose location with minimum 6-8 hours sunlight. When choosing a spot for your solar light, ensure that the device is not placed near nighttime light sources such as porch lighting, landscape lighting or street lighting.
Dusk To Dawn: The light will not activate during daylight hours. At sundown the light will go on automatically and last approximately 6-8 hours
Cleaning solar panels: It is important that dirt and debris is kept off of the solar panel to the greatest extent possible. A dirty solar panel will not fully charge the battery and thus shorten the battery life.
Battery replacement: Generally speaking, the rechargeable battery should be replaced every two years in order to maintain the maximum capacity. Please refer to the specs for max charge cycles.
Note: Run times and lighting performance will vary depending upon sunlight and weather conditions.
CAUTIONS: BATTERY INSTRUCTIONS
- Always purchase the correct size and grade of battery by ordering by the replacement battery part number found in BATTERY/BULB REPLACEMENT.
- Ensure the batteries are installed correctly.
- Remove batteries from equipment which is not to be used for an extended period of time.
For recycling and disposal of batteries to protect the environment, please check the internet or your local phone directory for local recycling centers and / or follow local government regulations.
BATTERY/BULB REPLACEMENT
Warning: The supplied LED bulbs have been specially developed for use with the solar post light model 12513LE4-SL-Head/6951302053 and must be replaced with model 170200121. The use of any other type bulbs will not function in the fixture.
- Remove the thumbscrews preassembled in the solar panel top (A), then detach the solar panel top (A) from the lamp head (B).

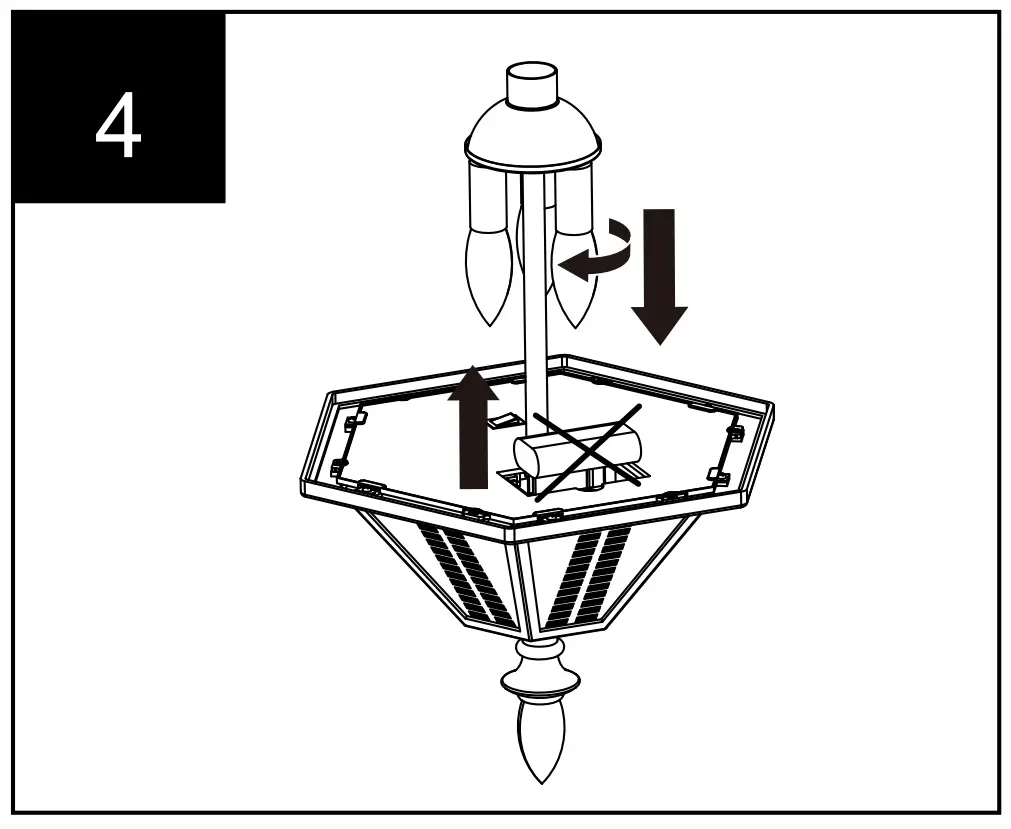
- Turn OFF the switch in solar panel top (A).

- Remove the pre assembled battery cover screw from the battery cover with a Phillips screwdriver (not included). Then remove the battery cover.
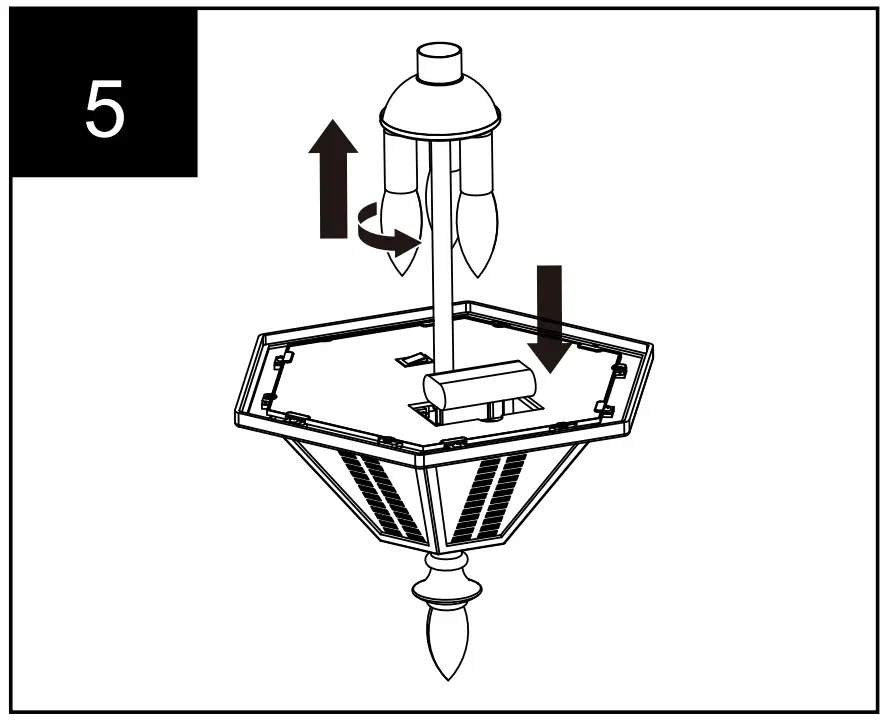
- Remove the old battery. If the LED bulb is broken, remove the broken solar LED bulb and replace.

- Insert new battery into battery compartment.

- Attach the battery cover to solar panel top with battery cover screw removed in step 3. Tighten with a Phillips screwdriver (not included)

- . Turn ON the switch in solar panel top (A).

- Attach the solar panel top (A) to the lamp head (B) with the previously removed two thumbscrews.

CARE AND MAINTENANCE
To clean, wipe with a damp, non-abrasive cloth.
TROUBLESHOOTING
| PROBLEM | POSSIBLE CAUSE | CORRECTIVE ACTION |
| The light will not go on. |
|
|
| The lights come on during the daylight. |
|
|
3-YEAR LIMITED WARRANTY
If this product fails due to a defect in materials or workmanship within three (3) years (Battery and bulbs excluded) from the date of purchase, return it along with proof of date of purchase and it will be replaced with the same or comparable model free of charge by LUTEC USA LLC..
This warranty is void if damage or defect has resulted from accident, abuse, misuse or faulty repair. This warranty gives you specific legal rights and you may have other rights that vary from state to state.
CUSTOMER SUPPORT
LUTEC USA LLC:
149B Houston Rd Troutman NC 28166
Ningbo UTEC Electric Co.,LTD
CN8, Far East Industry Park, Yuyao, China
www.lutec.com
[email protected]
Please call our Customer Service line at 877-714-8669 for assistance Monday – Friday 9 a.m. to 5 p.m. EST