Tempmate GS2 User manual
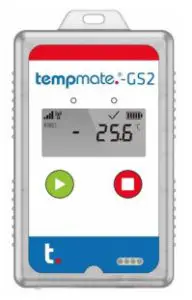
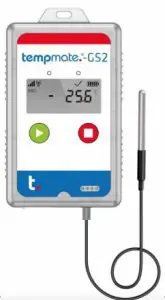
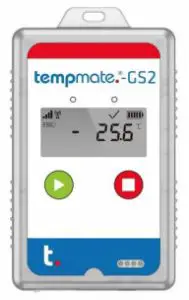
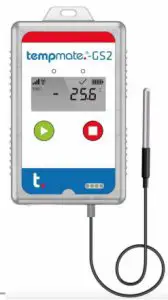
Appearance Instruction


Display Instruction
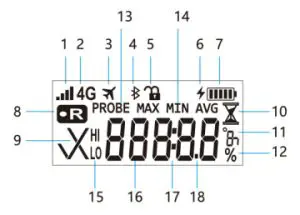
| 1 | Signal | |
| 2 | 4G Tag | 4G Sign of 4G logger |
| 3 | Flight mode | |
| 4 | Bluetooth | N/A |
| 5 | Hall | |
| 6 | Charging Icon | This icon will be displayed when charging |
| 7 | Battery Icon | |
| 8 | Recoding | Record status: Recording |
| 9 | Alarm | √ ok alarm × |
| 10 | Start delay | This icon is displayed during the start delay phase |
| 11 | Unit | C° F° |
| 12 | Humidly | % relative humidity |
| 13 | Probe | PROBE probe is connected OK |
| 14 | Statistic type | Max temp NM Min temp AvaAveracie temperature |
| 15 | Alarm area | HI to Triggered the high or low threshold |
| 16 | Measured Value | 8888 Time, the interval between minutes and seconds |
| 17 | Colon | Time, the interval between minutes and seconds |
| 18 | Decimal Point | The decimal point of the value. |
- Start:
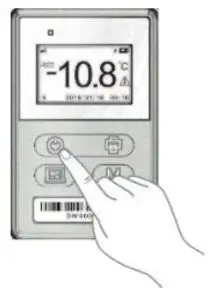
 Long press the “Start/Stop” button till “REC” has been showing on the LCD interface, the device is ready to monitor. At the same time, the record quantity also will be shown on the LCD interface
 - Stop:
 Long press the “Start/Stop” button till “REC” disappears from the LCD interface, the device has been stopped.
 - Check data:
 Short press the “Data” button, to show some information: MAX temperature value temperature value
 - Mode Switch
 • Long press the “Mode” button, to enter flight mode: In-flight mode, the logger only records data and doesn’t send data to the platform. LCD will be shut down, display nothing.
• Long press “Mode” button again, to quit flight mode: Data report, LCD show, everything back to normal
 Long press the “Start/Stop” button till “REC” has been showing on the LCD interface, the device is ready to monitor. At the same time, the record quantity also will be shown on the LCD interface
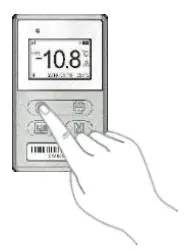 Long press the “Start/Stop” button till “REC” disappears from the LCD interface, the device has been stopped.
 Short press the “Data” button, to show some information: MAX temperature value temperature value
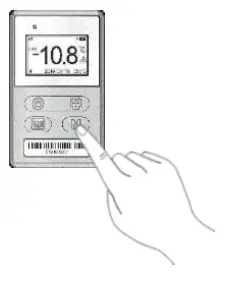 • Long press the “Mode” button, to enter flight mode: In-flight mode, the logger only records data and doesn’t send data to the platform. LCD will be shut down, display nothing.
Usage scenarios
Put the device in the container with goods together
This device complies with Part 15 of the FCC Rules. Operation is subject to the following two conditions: (1) this device may not cause harmful interference, and (2) this device must accept any interference received, including interference that may cause undesired operation.
Changes or modifications to this unit not expressly approved by the party responsible for compliance could void the user’s authority to operate the equipment.
NOTE: This equipment has been tested and found to comply with the limits for a Class B digital device, pursuant to Part 15 of the FCC Rules. These limits are designed to provide reasonable protection against harmful interference in a residential installation. This equipment generates, uses, and can radiate radio frequency energy and, if not installed and used in accordance with the instructions, may cause harmful interference to radio communications. However, there is no guarantee that interference will not occur in a particular installation. If this equipment does cause harmful interference to radio or television reception, which can be determined by turning the equipment off and on, the user is encouraged to try to correct the interference by one or more of the following measures:
— Reorient or relocate the receiving antenna.
— Increase the separation between the equipment and receiver.
— Connect the equipment into an outlet on a circuit different from that to which the receiver is connected.
— Consult the dealer or an experienced radio/TV technician for help.
This device and its antenna(s) must not be co-located or operated in conjunction with any other antenna or transmitter.
To maintain compliance with FCC’s RF exposure guidelines, This equipment should be installed and operated with a minimum distance of 20cm from your body.


