
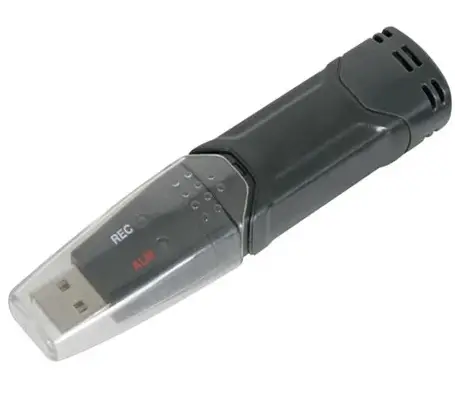
jetec THD8 E USB Data Logger Temperature and Humidity
BATTERY INSTALL
- Push the tenon as the arrow instructed and remove the battery cover
- Put the battery vertically on the battery groove
- Make the positive side of the battery contact positive spring plate first and push the negative side of spring to fix the battery position.
- Finish


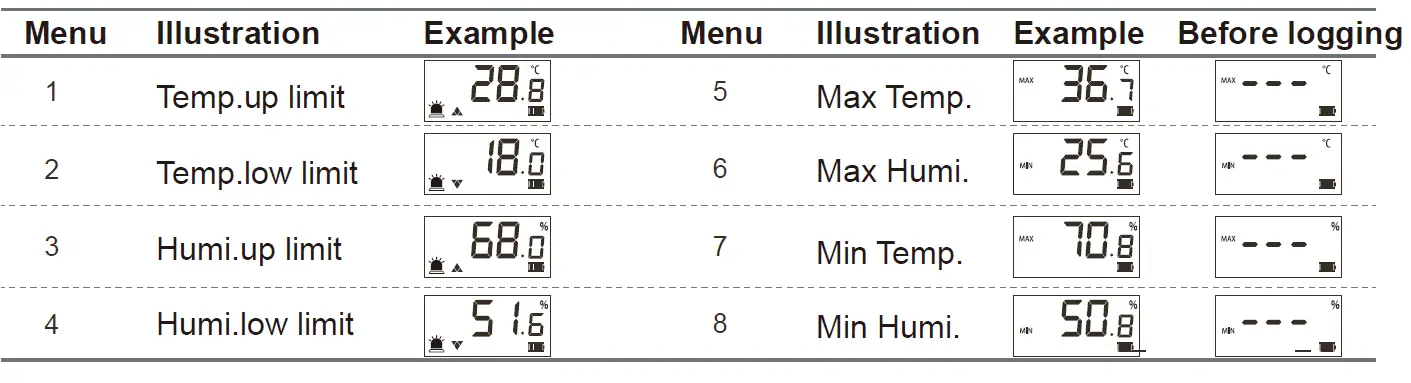
LCD

OPERATION

- Old PDF and record will be deleted after restart logging, please backup old data.
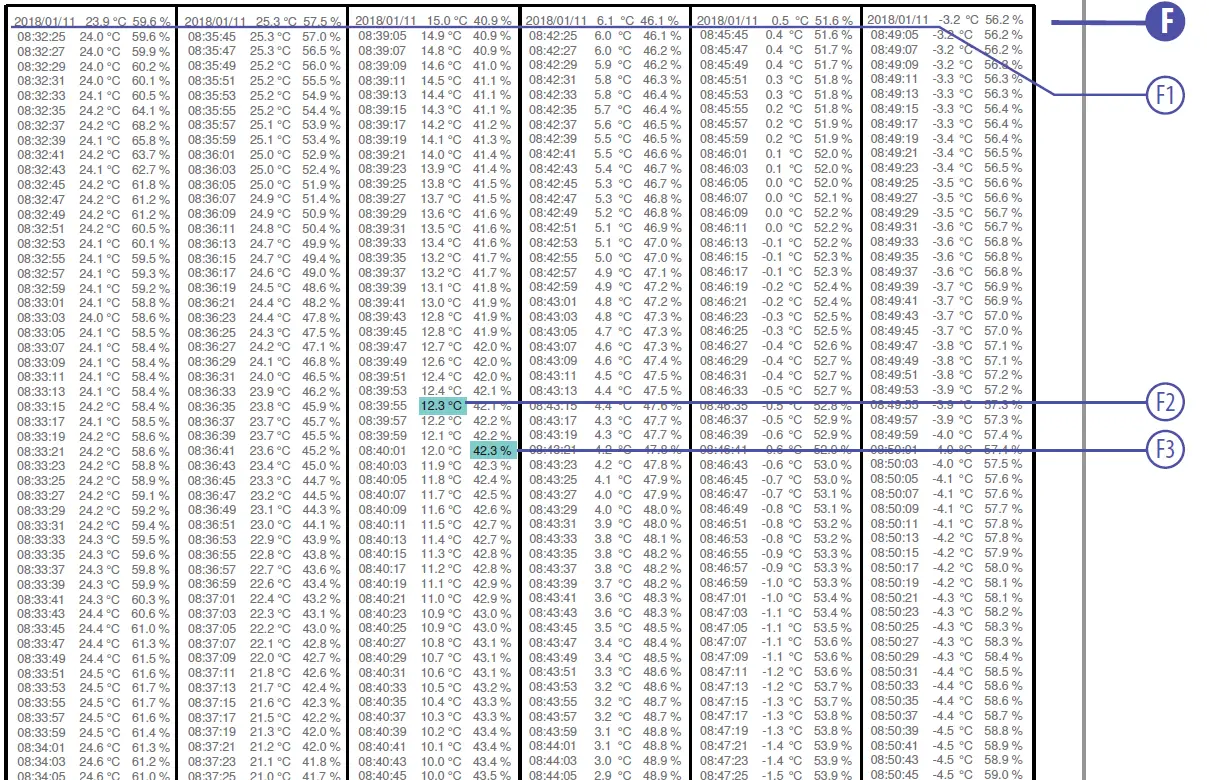
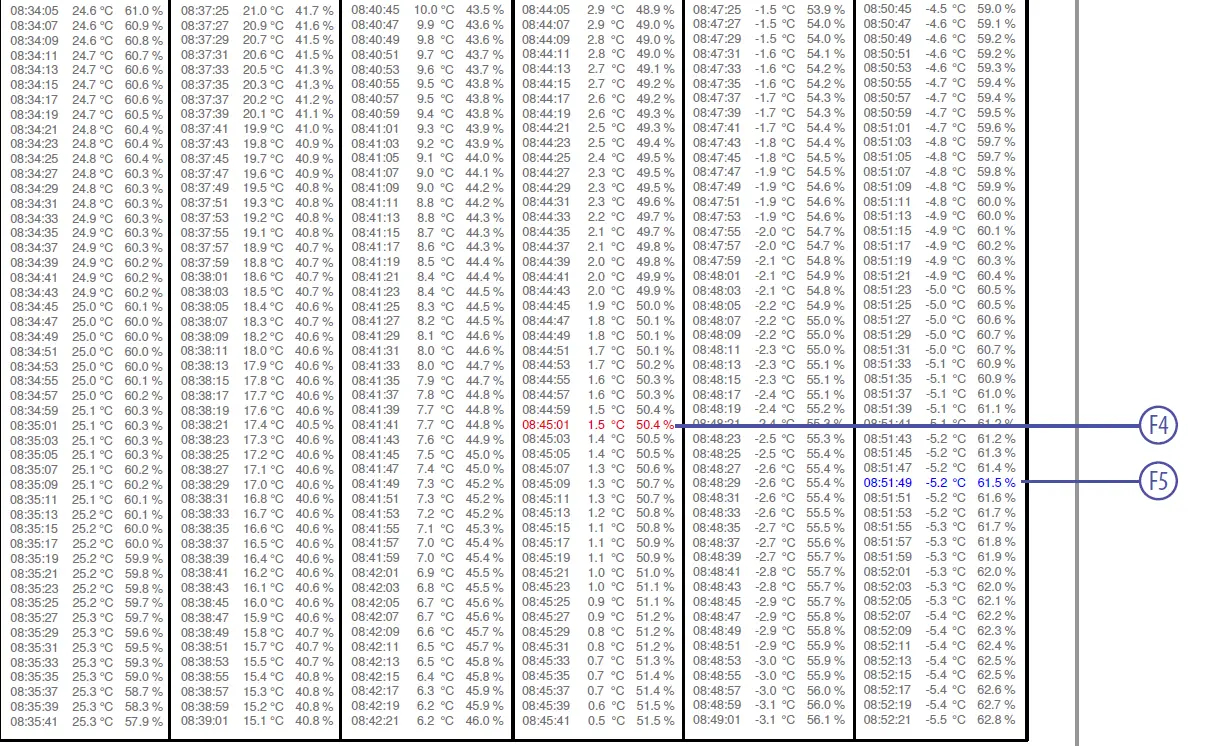
PDF REPORT
Simple
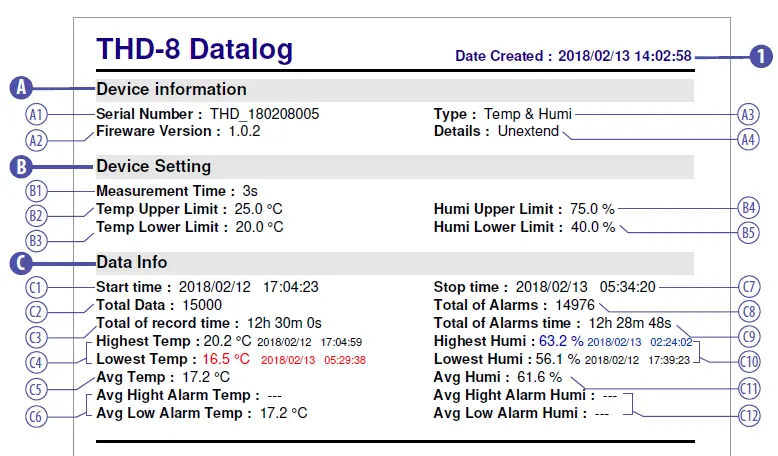
Detail
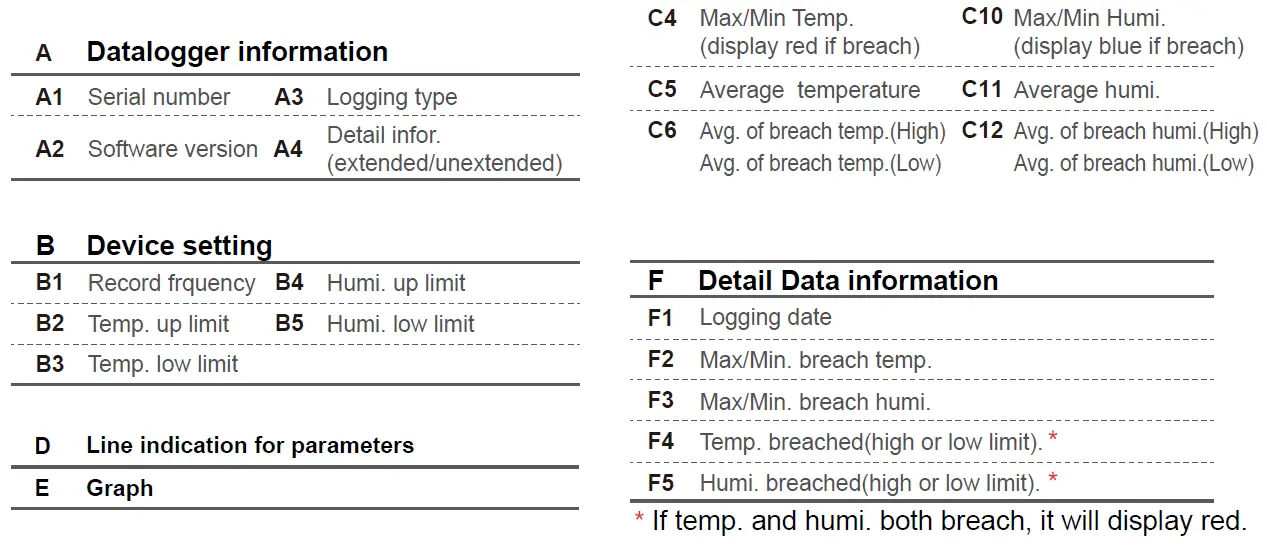
| C | Data information | |||||||||||
| 1 | PDF created time | C1 | Logging start time | C7 | Logging stop time | |||||||
| 2 | PDF name | C2 | Number of records | C8 | Number of alarm | |||||||
| 3 | Logging time period | C3 | Toal logging time | C9 | Toal alarm time | |||||||
User can make configuration by this software
Installation
- Please complete driver installation before using this software
- Open Installer folder, press
 , install according to the indication.
 - After installation, this icon will show on the desktop

- Open Installer folder, press
 , install according to the indication.
Software manual
- Open software, press
 , enter into the configuration page
 - Connect datalogger to computer, press
 to search the device and load.
- Dataloger name, could be revised.
- Record frenquency, Min. 5 second, Max. 24 hours. Temp. Unit°C, °F
- Temp. alarm range. 20 ~ 80℃ (0-110℉)
- Humi. alarm range. 0~100% rh
- Temp. correction range ±5
- Humi. correction range ±10
- PDF report type(if need detail information)
- Download record
In page, press
  and downlad the data to software. After loading, data will be saved to database, and can be searched in “Search Record” page.
- Datalogger name
- Number of record
- Data of record
- Data of alarm record
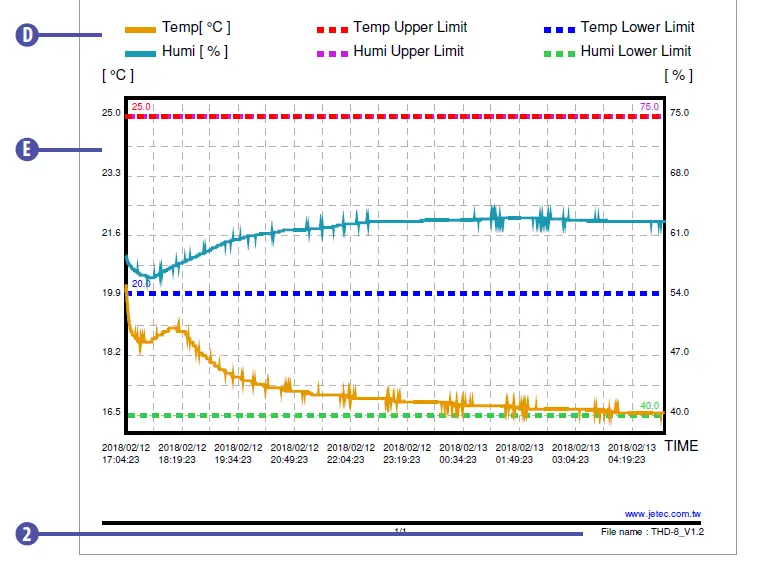
- Graph of Temp. and Humi.
- Search history record
Press search downloaded history record and graph.
- Device name Device will be named by ID+first logging time, if repeat, will add numbers. After selected device, time range will be datalogger recording period, and the latest Time. & Humi. alarm range. The range could be reset, but will not be saved for next review.
- File name, press
 to delete this file. ※Noted!The file could’t be resumed after deleted.
 - Time period of search.
- Max./Min. Temp.& Humi.and Temp. unit of search.
 Save record data(.CSV)
- Graph Comparison
Press compare four sets of recording graph.
 Import file
 Delete the selected file.
 File name
- Choose to compare Temp. or Humi.
- Press this column can extend the graph to full screen.
- Press this column can extend the graph to full screen.
 , enter into the configuration page
 to search the device and load.
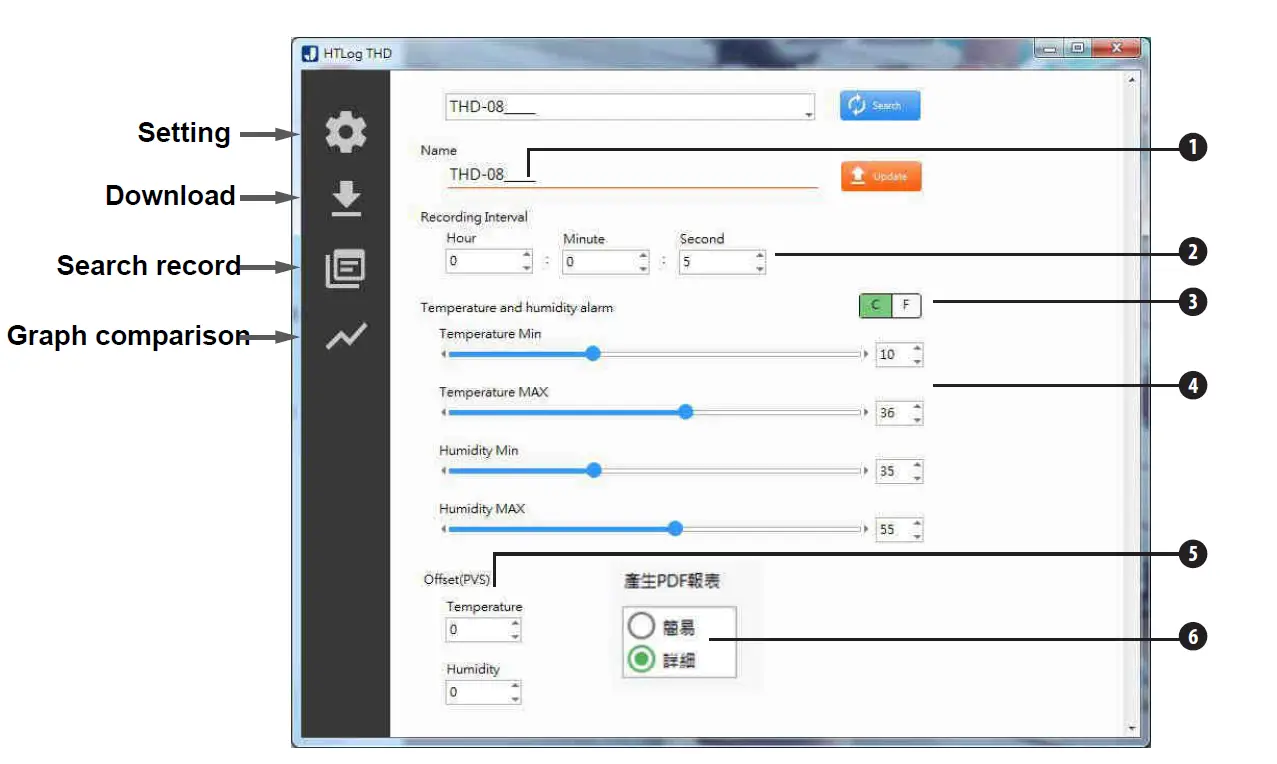
 page, press
  and downlad the data to software. After loading, data will be saved to database, and can be searched in “Search Record” page.
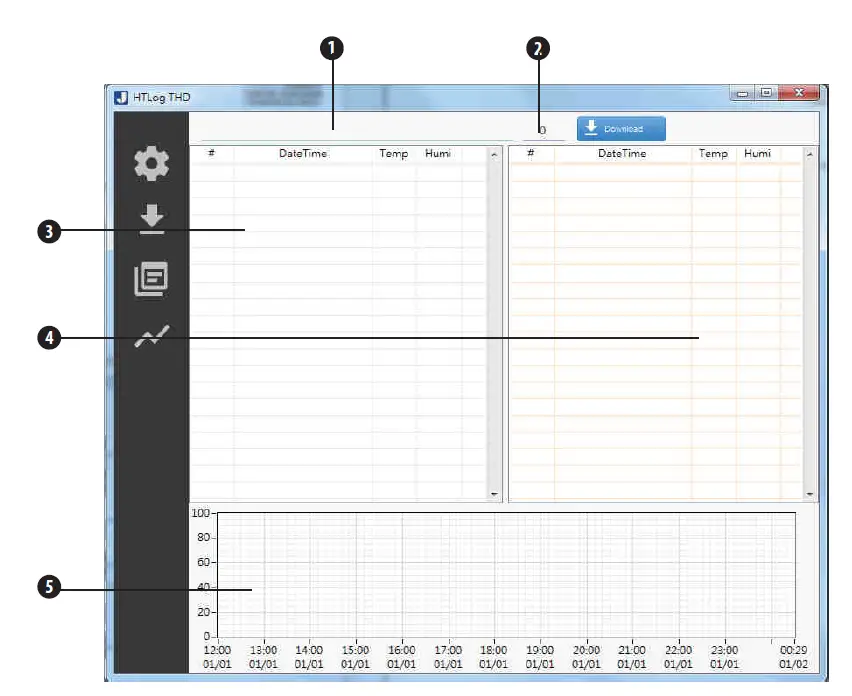
 search downloaded history record and graph.
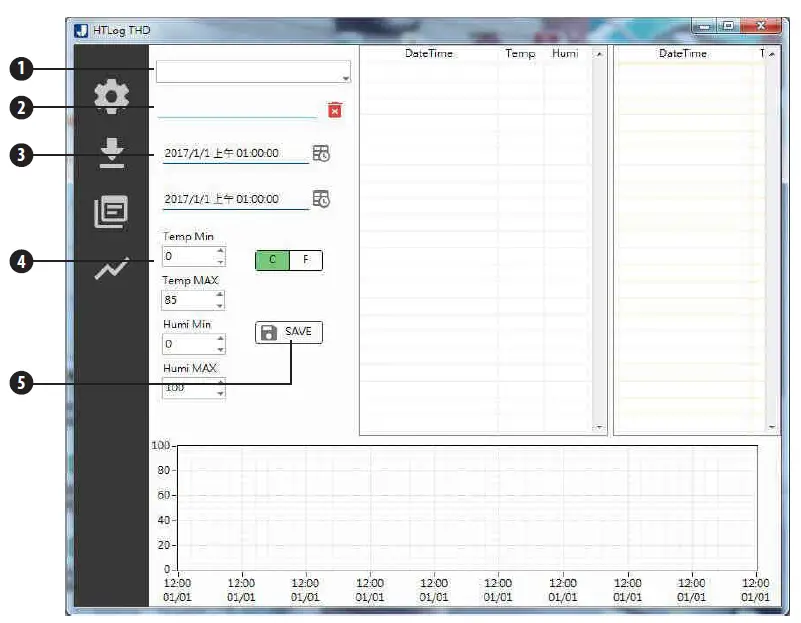
 compare four sets of recording graph.
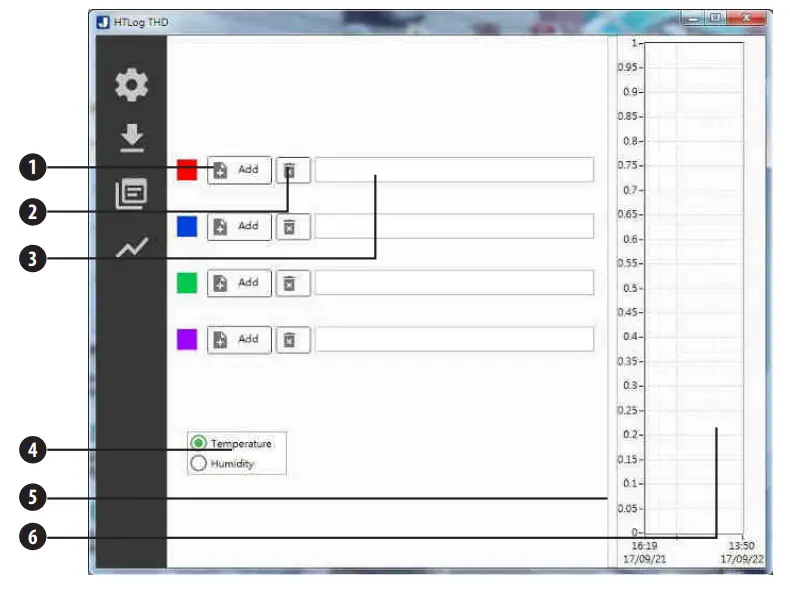
 Import file
 Delete the selected file.


