
![]()
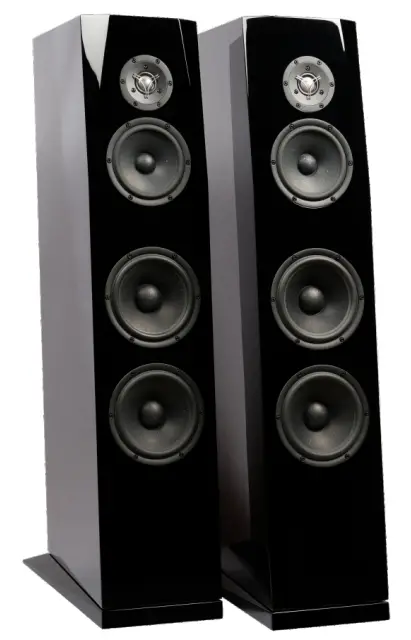
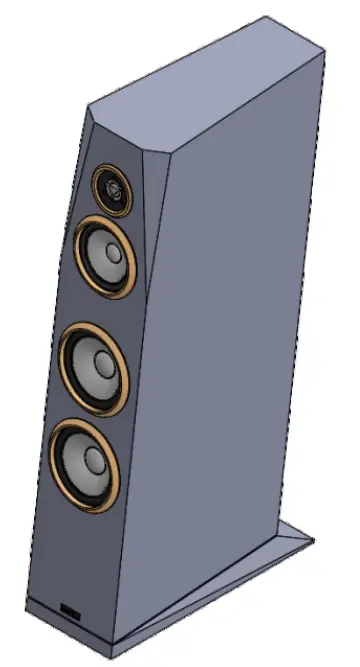
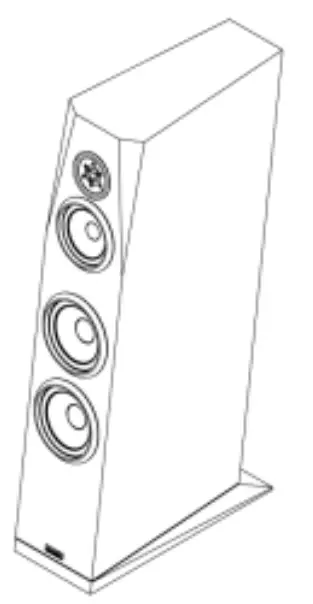
Sandu 3-Way Floor Standing Speaker
User Manual
 Sasandu | User Manual
Technical Specifications :
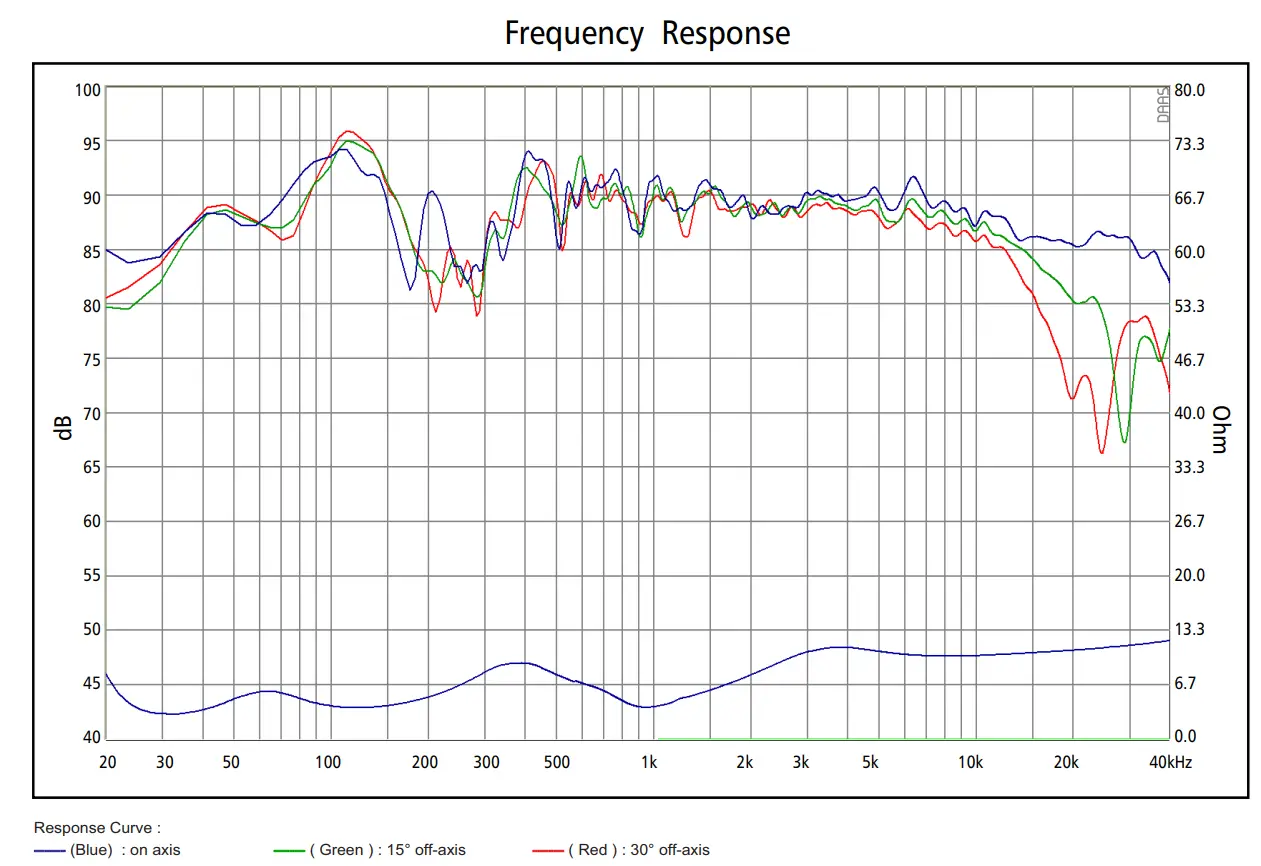
| Frequency range | 32-32000 Hz +3/-6 dB |
| Sensitivity (2.83V / 1m) : | 89 dB |
| Nominal impedance : | 4Ω |
| Max SPL: | 108 dB |
| Recommended amplifier : | 100-200 W |
| Cross-over frequencies : | 480 Hz & 2800 Hz |
| Speaker type: | 3-way Floor Stand |
| Enclosure type: | Bass are flex (woofers), sealed (midrange) |
| Port tuning frequency : | 32 Hz |
Drive Units:
| – High-frequency driver | SATORI TW29BN-B-8 or TW29BN-8 (29 mm beryllium dome) |
| – Mid frequency driver | 6.5″ SATORI MR16P-4 or MR16PNW-4 (advanced midrange) |
| – Low-frequency drivers | 2 x 7.5″ SATORI MW19P-8 or MW19PNW-8 (advanced midwoofer) |
Cabinet:
| 15mm, 18mm, 25 mm MDF | |
| Dimensions (H x W x D) : | 1100 x 230 x 615 mm / 43.30 x 9.05 x 24.21 inch |
| Port dimensions (inside) : | Ø75 x 150 mm (Ø3″ x 6.1″) |
Net Weight (pair) :
| – Cabinet only | : 28.5 kg / 62.83 lb |
| – Full assembly | : 32.5 kg / 71.65 lb |
Special Features:
– Advanced high-end drivers.
– Non-parallel cabinet walls.
– Facets and optimized tweeter position for reduced diffraction.
– Slanted internal partition for reduction of standing waves.
– Inclined base for time alignment of drivers.
– Large low compression midrange cavity.
– Large low noise vent. – Strategic internal bracing and damping.
– Solid single-wiring binding posts.
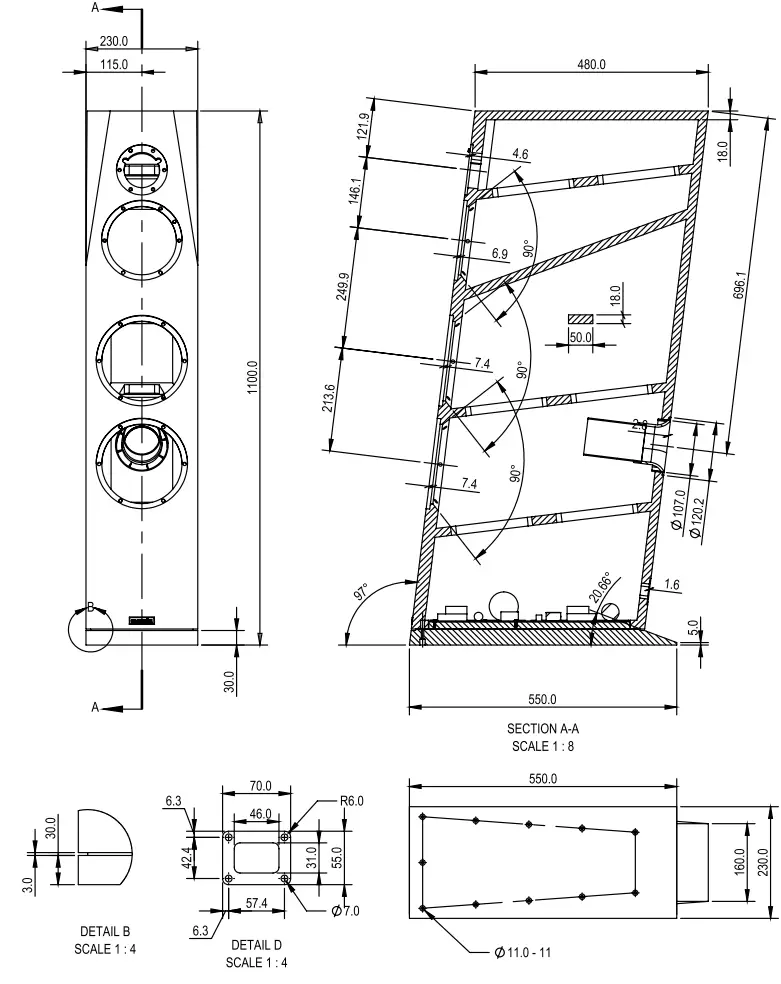
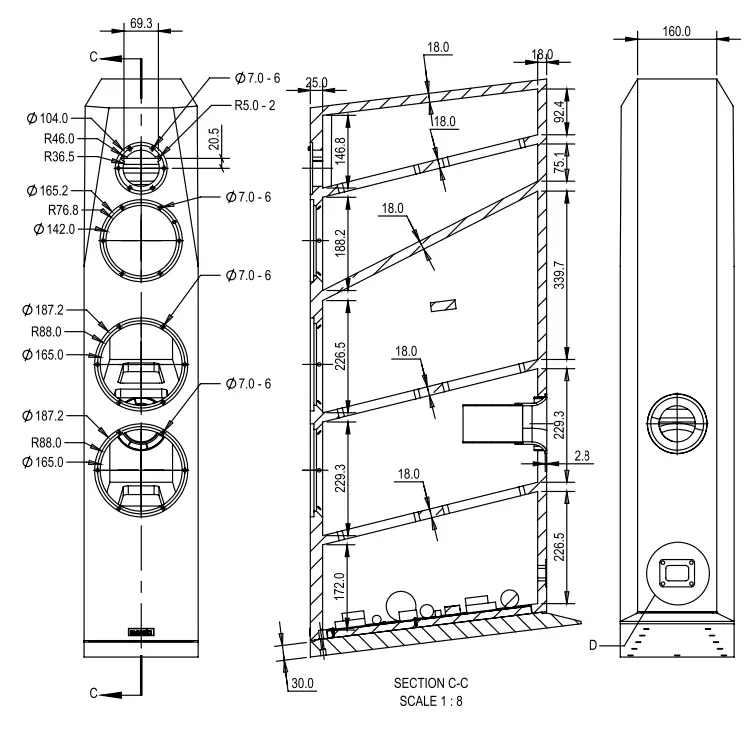
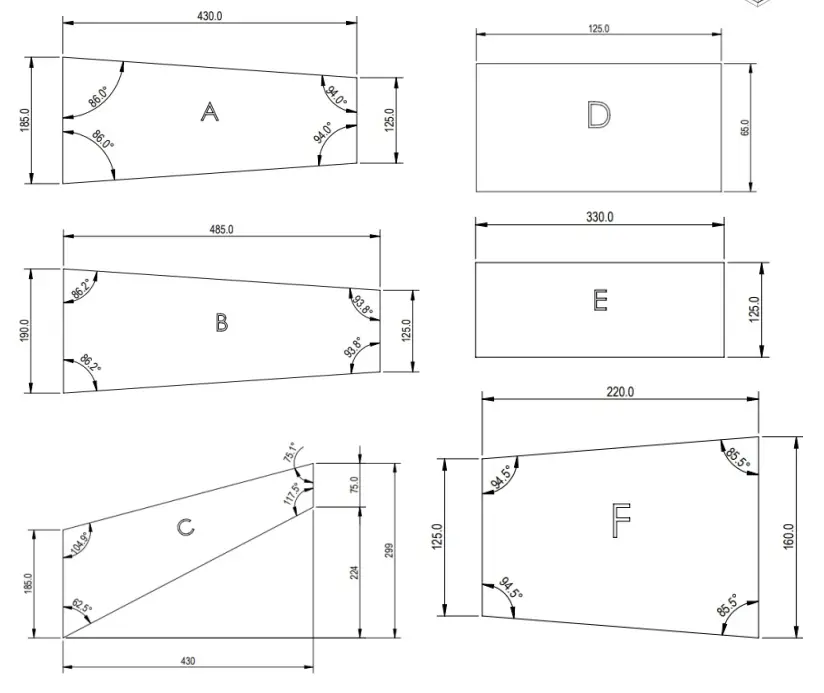
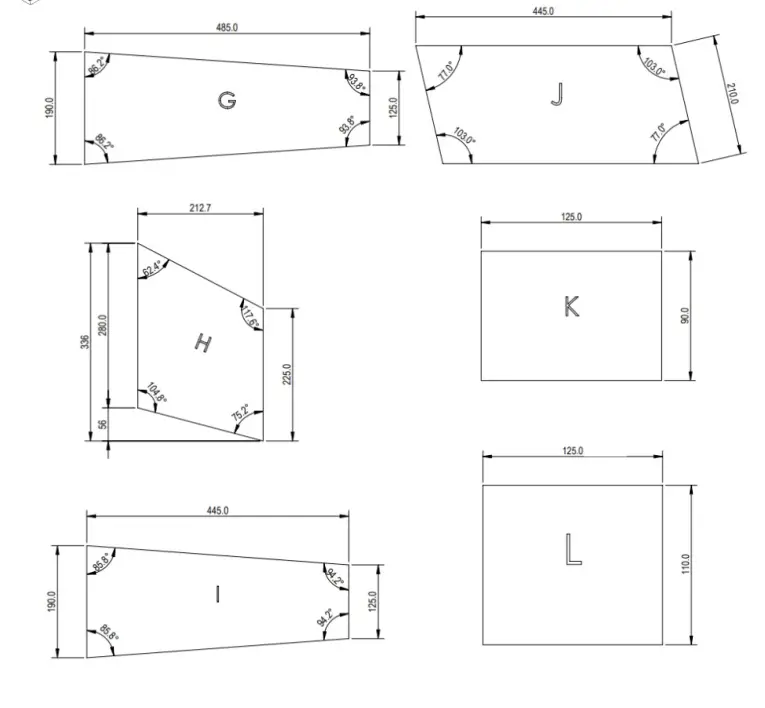
Mechanical Drawing (dimensions in mm)
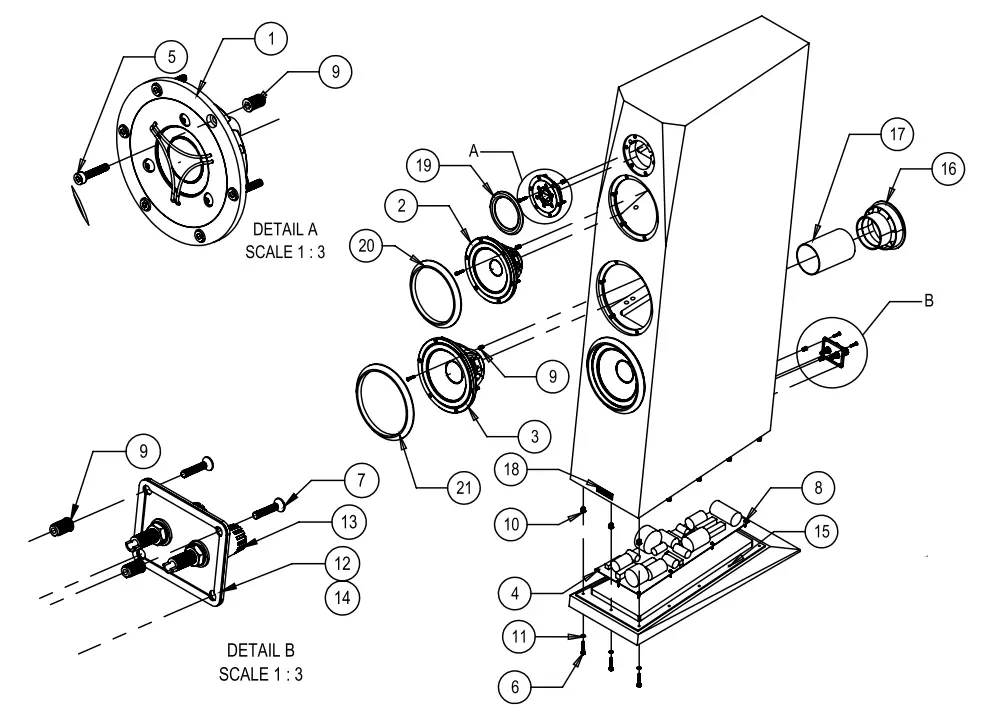
| NO | PART NAME | QTY |
| 1 | HF driver Satori TW29BN-B-8 or TW29BN-8 (sold separately) | 1 |
| 2 | MF driver Satori MR16P-4 or MR16PNW-4 (sold separately) | 1 |
| 3 | LF drivers Satori MW19P-8 or MW19PNW-8 (sold separately) | 2 |
| 4 | Sasandu kit crossover (sold separately) | 1 |
| 5 | Hex socket screw M4 x 20mm (for drivers) | 24 |
| 6 | Hex socket screw M5 x 30mm (for pedestal) | 11 |
| 7 | Countersunk screw M4 x 20mm (for terminal plate) | 4 |
| 8 | Wood screw 4 x 16 mm for crossover (from crossover kit) | 10 |
| 9 | Insert nut M4 (installed) | 28 |
| 10 | Insert nut M5 (installed) | 11 |
| 11 | Washer Plate | 11 |
| 12 | Stainless Terminal plate | 1 |
| 13 | Binding post | 1 |
| 14 | Seal gasket (for the terminal plate) | 1 |
| 15 | Seal gasket (for pedestal, installed on the cabinet) | 1 |
| 16 | Port flare (installed on the cabinet) | 1 |
| 17 | Port paper tube (installed on the cabinet) | 1 |
| 18 | Nameplate | 1 |
| 19 | Tweeter grille | 1 |
| 20 | Midrange grille | 1 |
| 21 | Woofer grille | 2 |

| NO. | PART NUMBER | DESCRIPTION | QTY. |
| 1 | A | DA-DACRON-(430x125x430x185)mm | 2 |
| 2 | B | DA-DACRON-(485x125x485x190)mm | 1 |
| 3 | C | DA-DACRON-(445x185x485x75)mm | 2 |
| 4 | D | DA-DACRON-(65×125)mm | 2 |
| 5 | E | DA-DACRON-(330×125)mm | 2 |
| 6 | F | DA-DACRON-(220x125x220x160)mm | 1 |
| 7 | G | DA-DACRON-(485x125x485x190)mm | 2 |
| 8 | H | DA-DACRON-(240x225x220x280)mm | 2 |
| 9 | I | DA-DACRON-(445x125x445x190)mm | 2 |
| 10 | J | DA-DACRON-(445x210x445x210)mm | 2 |
| 11 | K | DA-DACRON-(90×125)mm | 1 |
| 12 | L | DA-DACRON-(110×125)mm | 1 |
| NO. | PART NUMBER | DESCRIPTION | QTY. |
| 1 | A | DA-DACRON-(430x125x430x185)mm | 2 |
| 2 | B | DA-DACRON-(485x125x485x190)mm | 1 |
| 3 | C | DA-DACRON-(445x185x485x75)mm | 2 |
| 4 | D | DA-DACRON-(65×125)mm | 2 |
| 5 | E | DA-DACRON-(330×125)mm | 2 |
| 6 | F | DA-DACRON-(220x125x220x160)mm | 1 |
| NO. | PART NUMBER | DESCRIPTION | QTY. |
| 7 | G | DA-DACRON-(485x125x485x190)mm | 2 |
| 8 | H | DA-DACRON-(240x225x220x280)mm | 2 |
| 9 | I | DA-DACRON-(445x125x445x190)mm | 2 |
| 10 | J | DA-DACRON-(445x210x445x210)mm | 2 |
| 11 | K | DA-DACRON-(90×125)mm | 1 |
| 12 | L | DA-DACRON-(110×125)mm | 1 |
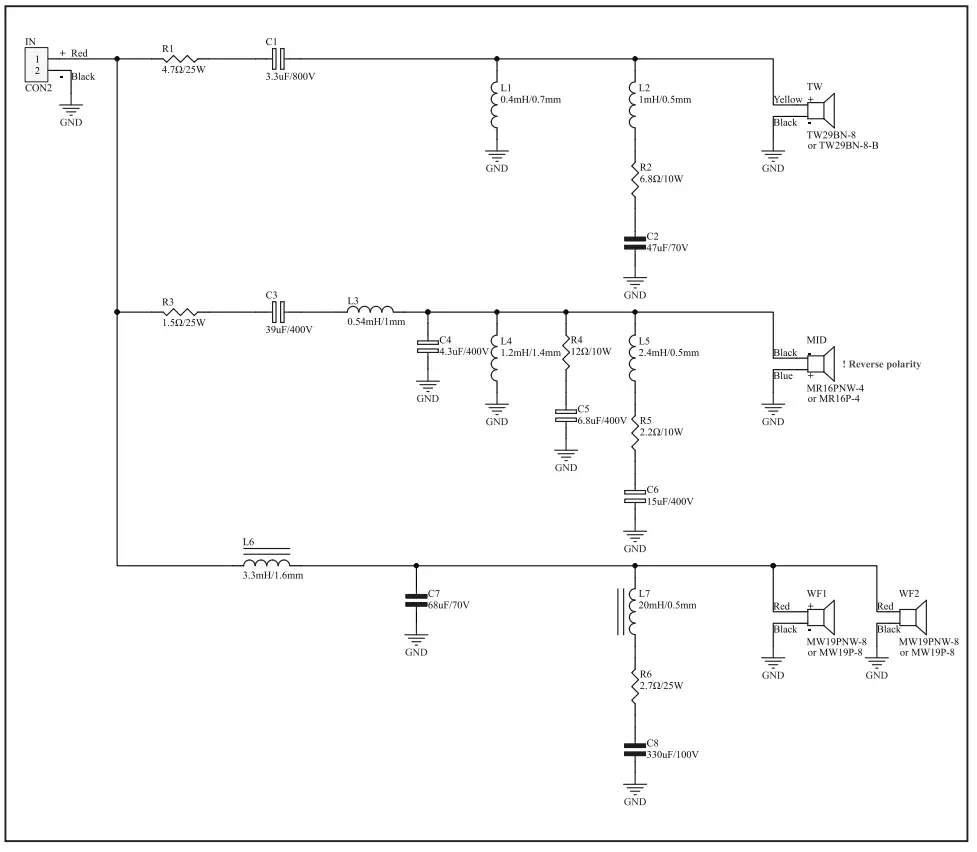
Damping Material Position (dimensions in mm)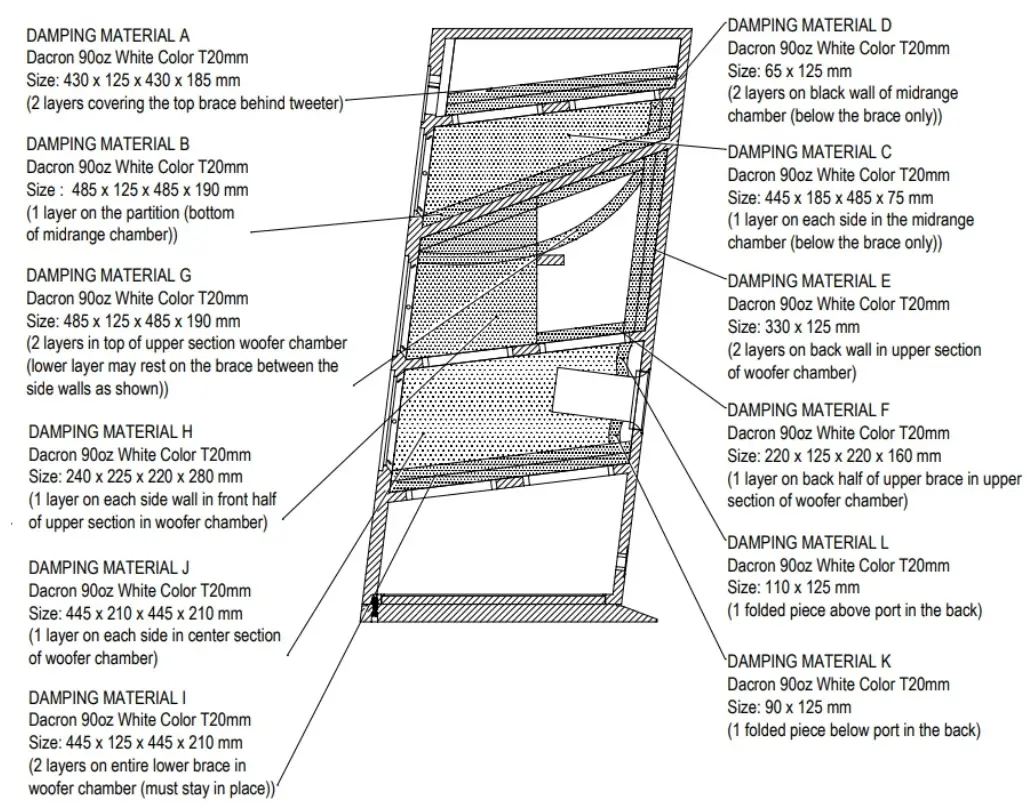 Crossover Schematic ( Sasandu )
Part List (each cabinet):
– High-frequency driver SATORI TW29BN-B-8 or TW29BN-8 (sold separately) …….. 1 pc
– Mid-frequency driver 6.5″ SATORI MR16P-4 or MR16PNW-4 (sold separately) ….. 1 pc
– Low frequency drivers 7.5″ SATORI MW19P-8 or MW19PNW-8 (sold separately).. 2 pcs
– Sasandu crossover kit (sold separately) ……………………………………………………… 1 pc
– Hex socket screw M4 x 20mm (for drivers) ………………………………………………… 24 pcs
– Hex socket screw M5 x 30mm (for pedestal) ………………………………………………. 11 pcs
– Countersunk screw M4 x 20mm (for terminal plate) ……………………………………. 4 pcs
– Wood screw 4 x 16 mm for crossover (from crossover kit) ……………………………. 10 pcs
– Insert nut M4 (Installed ) …………………………………………………………………………. 28 pcs
– Insert nut M5 (Installed ) ………………………………………………………………………… 11 pcs
– Stainless Terminal plate …………………………………………………………………………… 1 pc
– Binding post …………………………………………………………………………………………. 1 pair
– Seal gasket (for the terminal plate) ………………………………………………………………… 1 pc
– Seal gasket (for pedestal, installed on the cabinet) …………………………………………… 1 pc
– Port is (installed on the cabinet) ……………………………………………………………….. 1 pc
– Port paper tube (installed on the cabinet) ……………………………………………………….. 1 pc
– Damping ………………………………………………………………………………………………..1 pc
– Nameplate …………………………………………………………………………………………… 1 pc
– Tweeter grille…………………………………………………………………………………………. 1 pc
– Midrange grille………………………………………………………………………………………. 1 pc
– Woofer grille …………………………………………………………………………………………. 2 pcs
Tools Needed:
– Hex key 3mm size (for driver screw).
– Hex key 4mm size (for pedestal screw).
– Hex key 2.5mm size (for terminal plate screw).
– Philips screwdriver no. 2 (for crossover screw).
– Hot melt glue gun(for attaching the damping and sealing the wire hole).
Assembly Instructions:
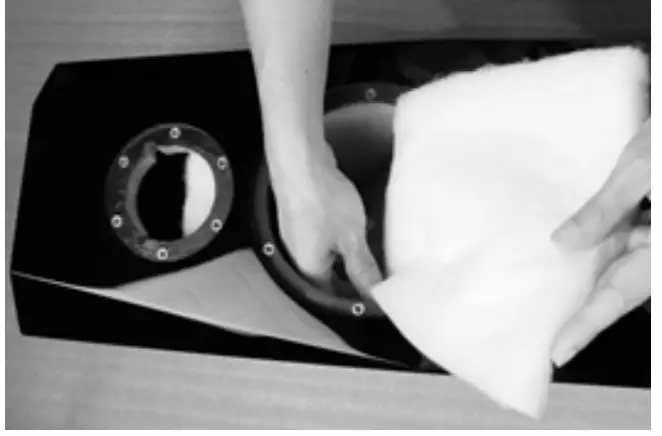
- Carefully remove the cabinet from the packaging. Locate the raw damping material inside the cabinet and set it aside.

- Cut the raw damping material into 18 pieces according to the cutting pattern diagram.

- Place each damping part into the cabinet according to the position diagram. Add a bit of glue if needed to hold the damping in place.

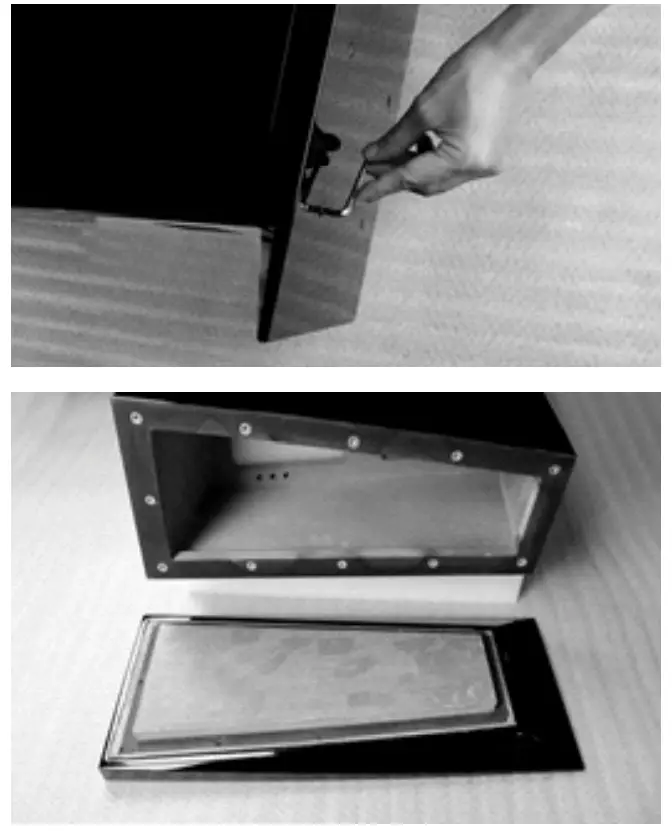
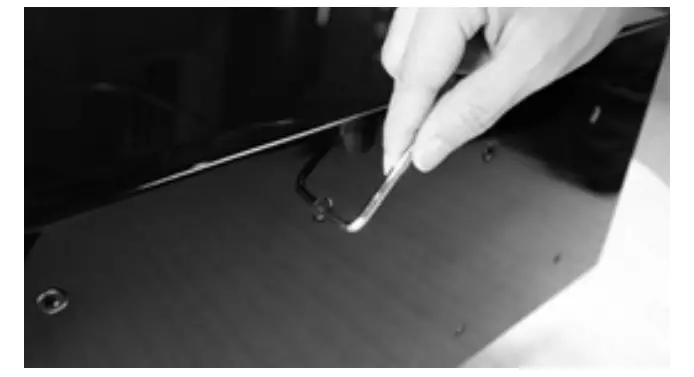
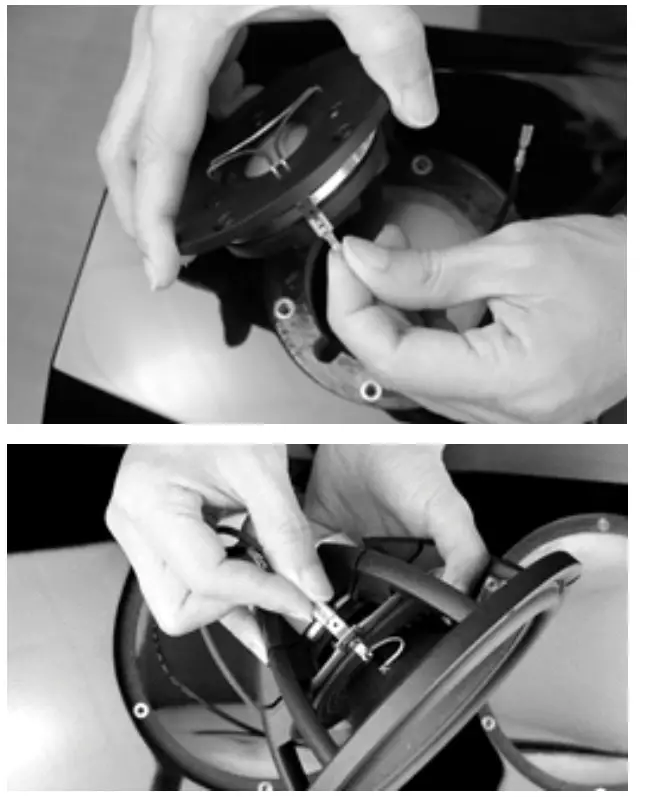
- Detach the pedestal by loosening the four screws under the speaker cabinet.

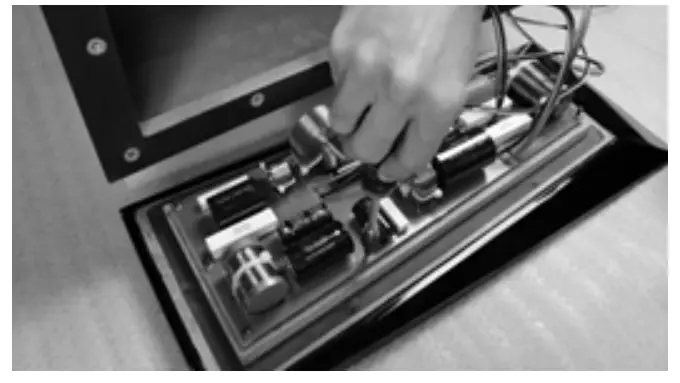
- Place the crossover onto the top of the pedestal, with the input cables towards the rear terminal side and the speaker wires towards the front panel.

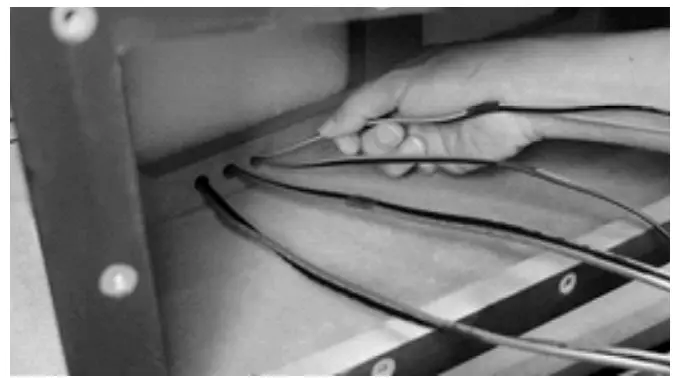
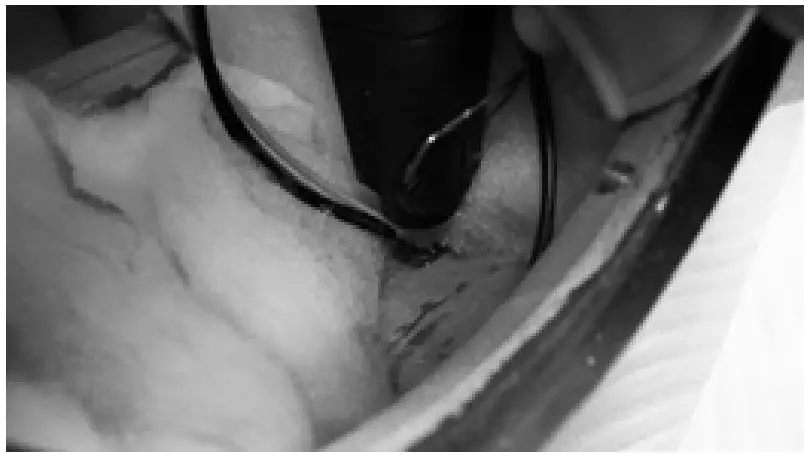
- Pass the four pairs of speaker wires through the holes in the bottom brace of the cabinet as shown.

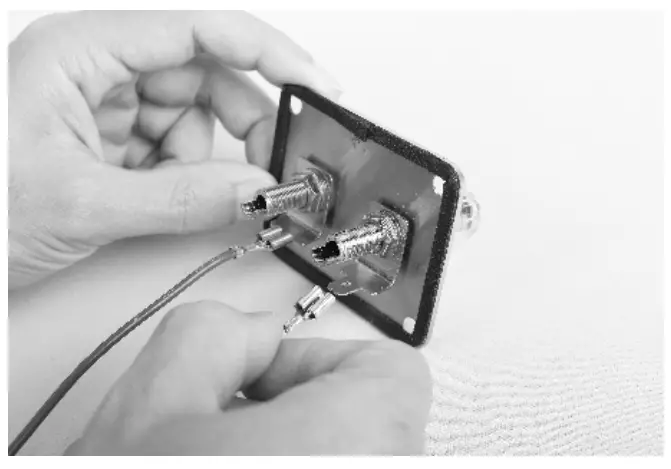
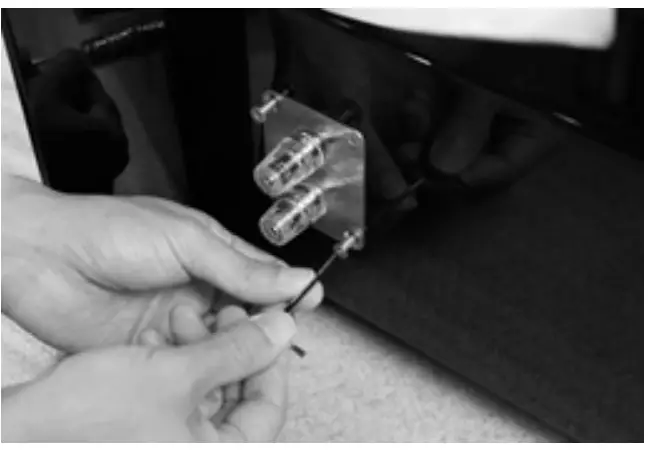
- Pass the input cable through the terminal hole on the rear of the cabinet, then connect to the binding posts.

- Mount the terminal panel onto the terminal hole at the back of the cabinet.

- Mount the pedestal with the crossover to the cabinet. Make sure to gently tighten all 11 screws without overdriving.

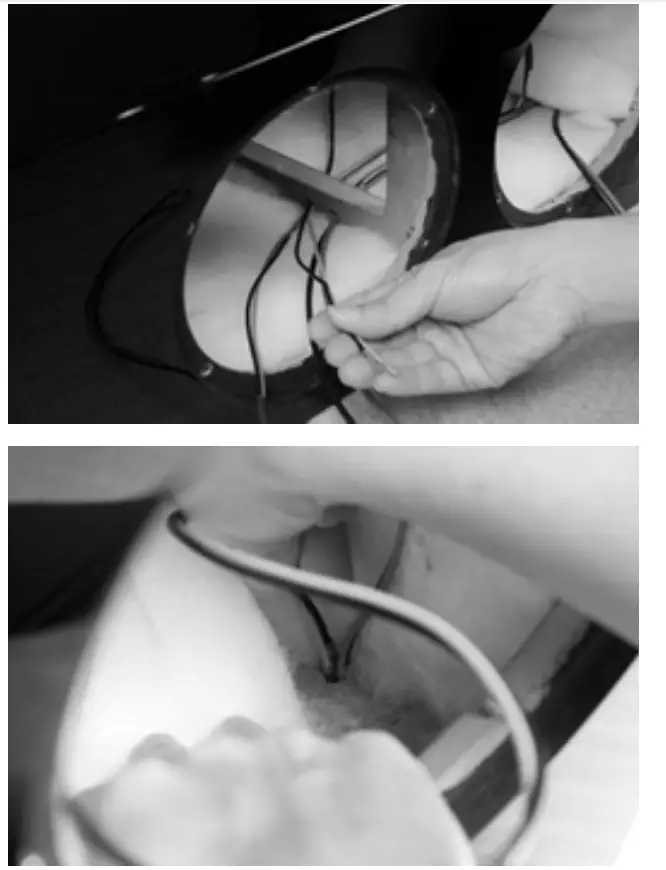
- Guide the four pairs of cables through the holes in each cabinet bracing. Pull the tweeter and midrange cables through the midrange chamber partition hole.

- Seal the cable holes on the midrange chamber partition with hot melt glue.

- Hook up the cables to the woofer, midrange, and tweeter terminals.

- Mount the drivers to the cabinet and gently fasten the screws. Take care, not to over-tighten.


Find Us On![]()
www.sbacoustics.com


