INSTALLATION INSTRUCTIONS
Matters needing attention:
- The OE halogen bulb would be extremely hot for a quite long time after shutting down . To avoid burns, please wait at least 0.5 hours before replacing the lamps.
- Wear gloves while replacing the lamps, and do not touch the LED chips.
- If the lamps do not light-up , please unplug the power line, connect it reversely and try again.
Models: H1/H3/H4/H7
![]()
Installation instructions
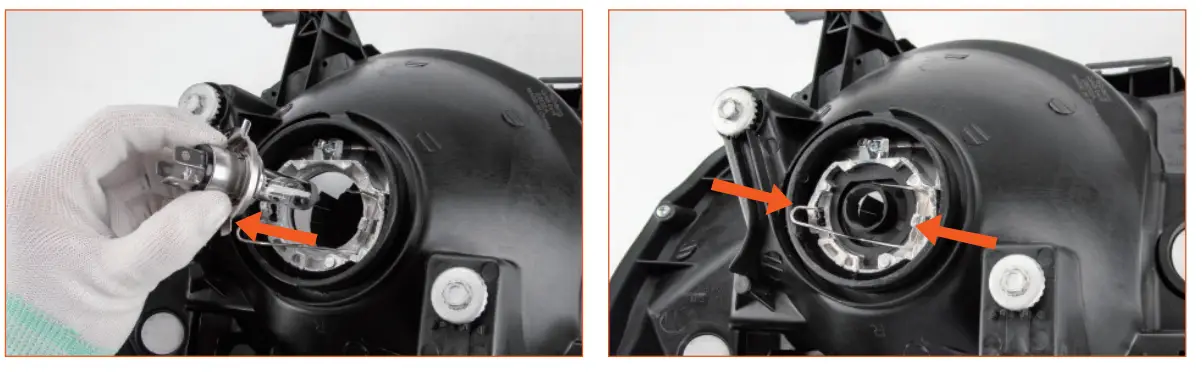
Fig. 1: Remove the dust cover and the OE Halogen bulb. and then remove the OE Halogen bulb;
Fig. 2: Insert the retainer holder into the assembly slot, match the tabs with slot, and lock the retainer holder with the buckle;
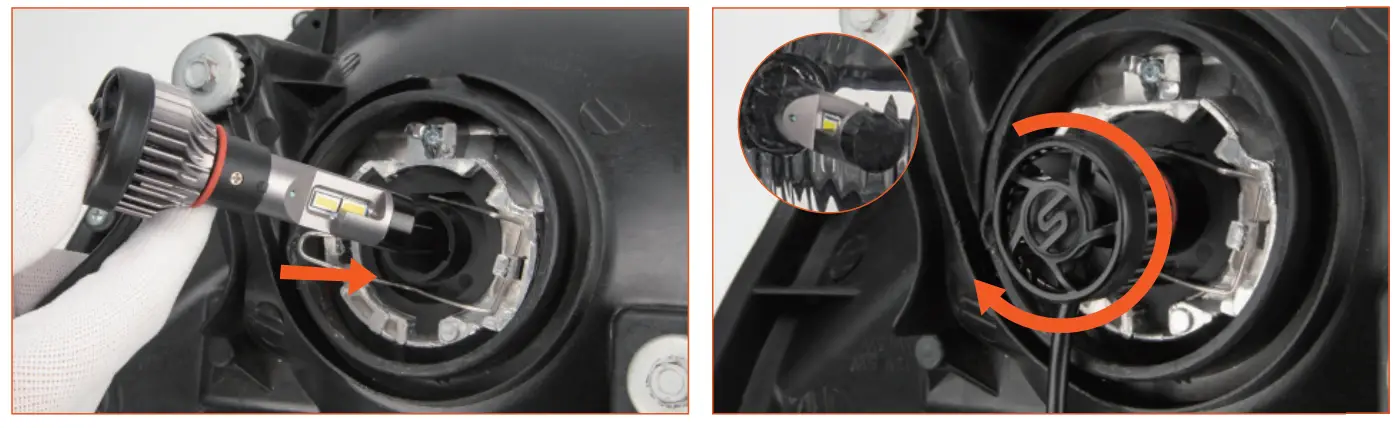
Fig. 3: Insert the lamps into the retainer holder with correct position ;
Note: H4 rotate clockwise until the LED chips face 3-9 o’ clock .
Fig. 4: Rotate the base of the lamps clockwise until it is in the correct position;
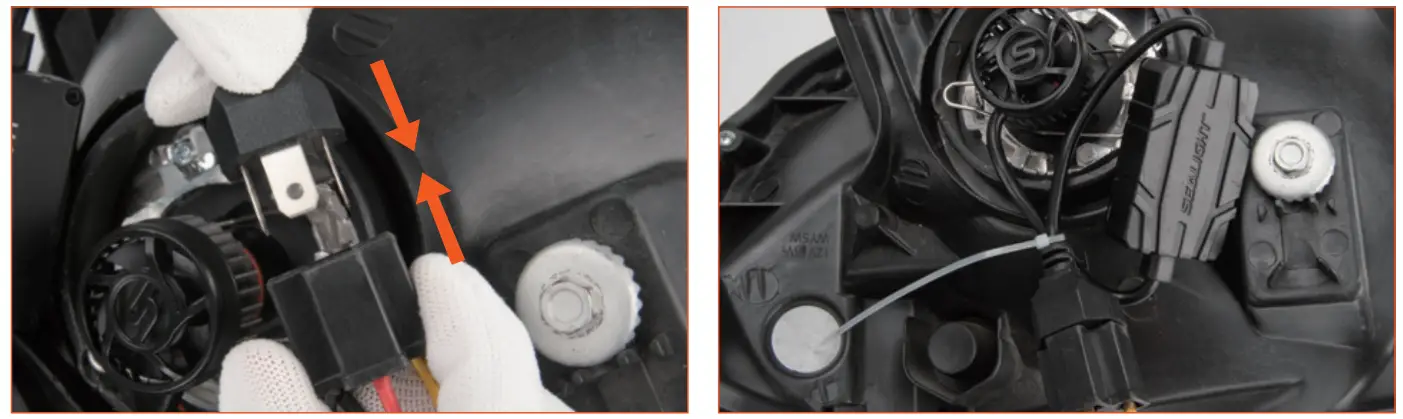
Fig. 5: Please double check the “+/-” polarity before connecting the plug. (Only apply for a few models).
Fig. 6: Sort and fix the wiring harness with Zip Ties.
Models: H8/H9/H10/H11/H16/9005/9006/9012
![]()
SEALIGHT LED H11
Installation instructions
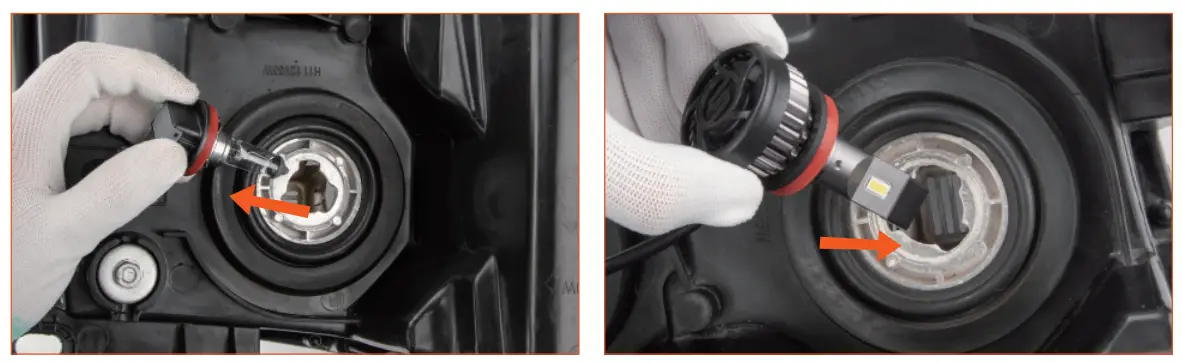
Fig. 1: Remove the dust cover and the Fig.
2: Line-up the retainer holder with OE halogen bulb. the slot of the assembly.
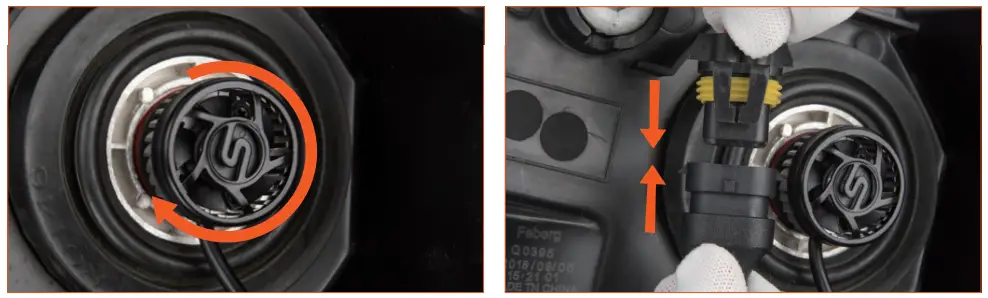
Fig. 3: Insert the lamps , turn them clockwise, then clamp tightly. Fig.
Fig. 4: Connect the power line.
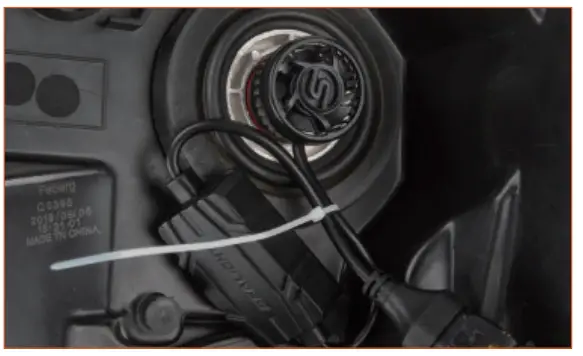
Fig 5: Sort and fix the wiring harness with Zip Ties.
Models: 9004/9007
![]()
Installation instructionsFig. 1: Remove the bulb retainer and
Fig. 2: Take apart the retainer holder OE halogen bulb from the vehicle. from LED lamps.
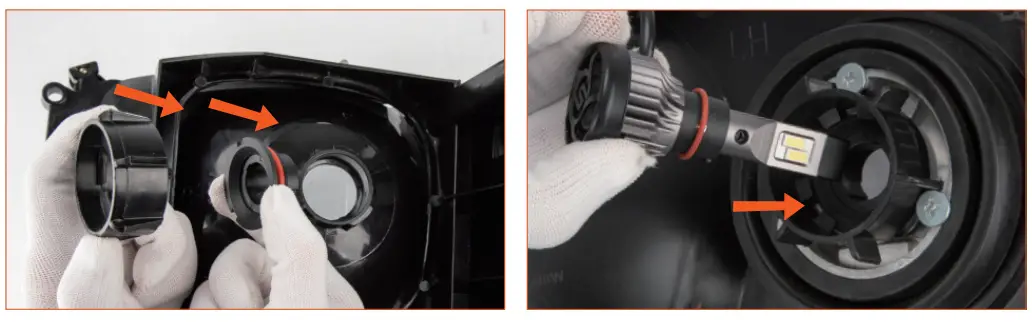
Fig. 3: Assemble the retainer holder with the bulb retainer together, and then insert them into the assembly.
Fig. 4: Insert the lamps into the retainer holder with correct position. Note: Line up the tiny tab of LED lamps with the slot of retainer holder.
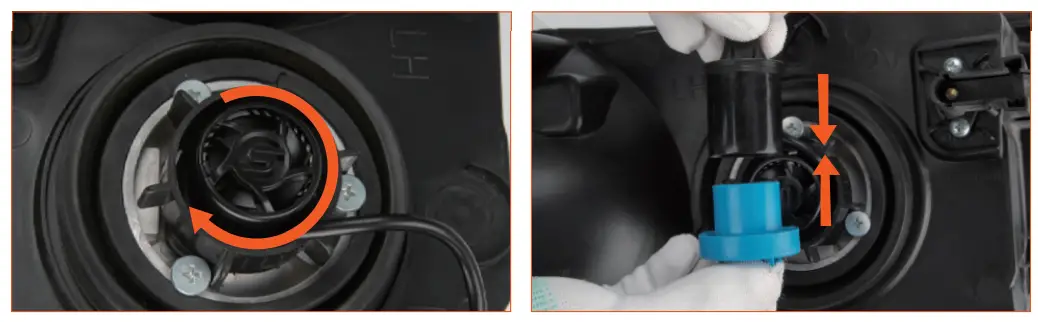
Fig. 5: Hold the base of the LED lamps, rotate clockwise until the LED chips face 3-9 o’ clock.(if your ighbeam and lowbeam are reverse, then rotate clockwise by 180° )
Fig. 6: Connect the power line.
step 7: Sort and fix the wiring harness with Zip Ties.
Models: 9008/H13
![]()
Installation instructions
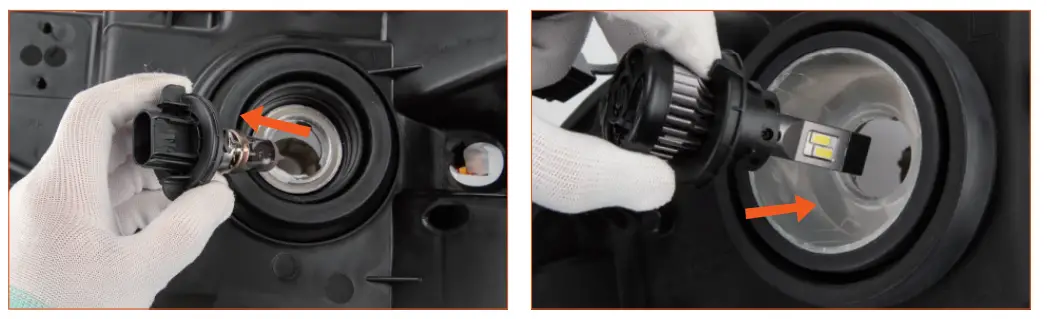
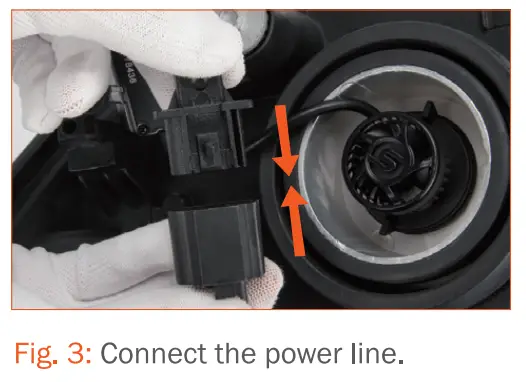
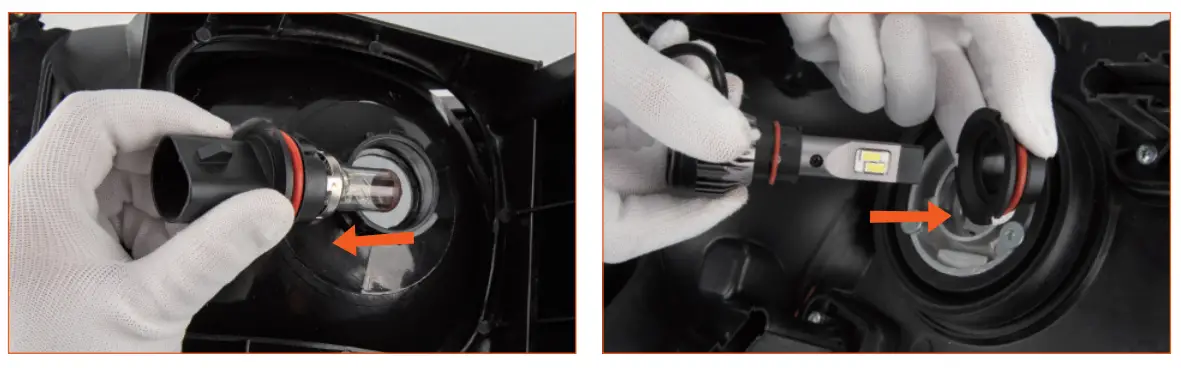
Fig. 1: Remove the OE halogen bulb
Fig. 2: Insert 9008/H13 into the assembly and rotate it clockwise, then lock it.
Note: If necessary, adjust the position of the retainer holder, use a screw driver to take apart the screws, hold the base of lamp and rotate it to the right position (The LED chips should face 3-9 o’clock or power cable and ground are vertical). Place the screws back and fix them.
step 4: Sort and fix the wiring harness with Zip Ties.
Suggestions
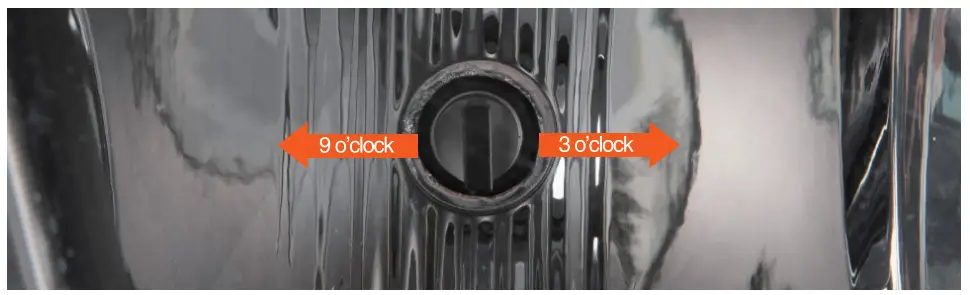
Suggestions: According to most vehicles’ configurations, we recommend keeping the LED chips facing the 3 o clock and 9 o clock positions to ensure the best beam pattern and visual effect. However, it is impossible to djust to this position for some vehicles. There is no need to worry about the position of the LED chips as ong as the beam pattern is acceptable. Picture: LED chips facing 3 o’clock and 9 o’clock positions
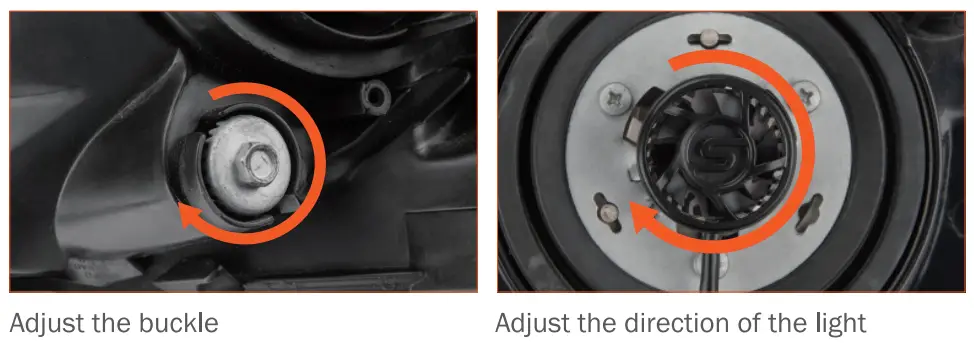
If you are not satisfied with the light pattern and visual effect after installation, please operate and adjust according to the figure
FAQ
Can I get an exchange for the correct model?
– A: Please contact our Customer Service for a replacement
– A: Some LED lamps are not in a 1:1 ratio with the OE halogen bulbs. The large base is for better heat dissipation and prolonging the life of the lamps.
– If the lamps are not suitable for installation, Please contact our Customer Service for a replacement.
– (1)Errors on instrument panel;
– (2) The Lamp keeps flashing;
– (3) Can’t switch between high and low beams;
– (4) High and low beam reversed,
– (5) The Lamp does not turn on or off.


