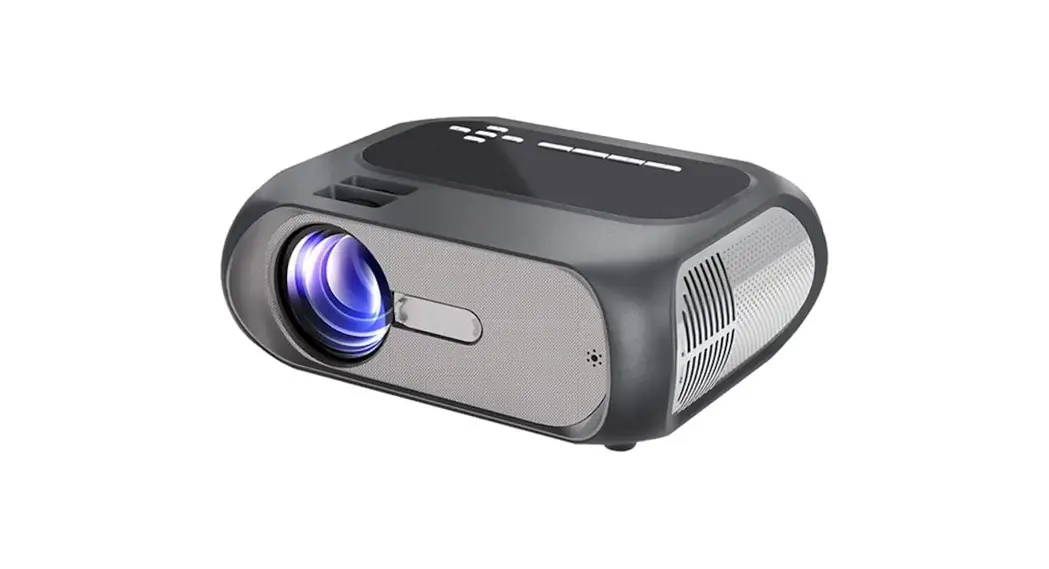
![]() T7-720P Same Screen Portable Projector
T7-720P Same Screen Portable Projector
User Guide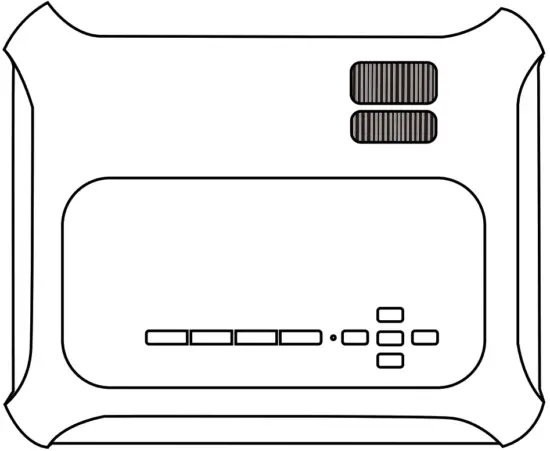
![]() Important Notes: This manual is suitable for the multimedia version. Please pay attention to the screening before using it.
Important Notes: This manual is suitable for the multimedia version. Please pay attention to the screening before using it.
First of all, thank you for your choice!
The instructions in this manual are for your reference about the Product. There may be differences due to updates, please check the manufacturer’s website to obtain the latest version of the instruction manual.![]() WARNING
WARNING
Please do not open the case in order to prevent electric shock. Customers cannot repair parts of the inside device. Please contact professional maintenance staff to repair it.
CHARACTERISTICS
- With this portable home theater projector, you can enjoy movies, sports, videos, pictures, and more, as if you were watching a 120 inches dynamic image.
- Multiple functional interfaces: HDMI/USB1/USB2/AV/VGA/3.5mm audio out
- The products have built-in speakers to match daily needs, You can also connect an external speaker or headset through a 3.5mm audio interface.
- The product adopts LED as the light source, The LED light source used is up to 30,000 hours.
- The LED projector is best for home video and entertainment. Video playback should not be in bright light environments.
Not recommend the projector for Word or spreadsheet. This is not suitable for use in the education domain, video playback is the main function.
Knowing Your Projector
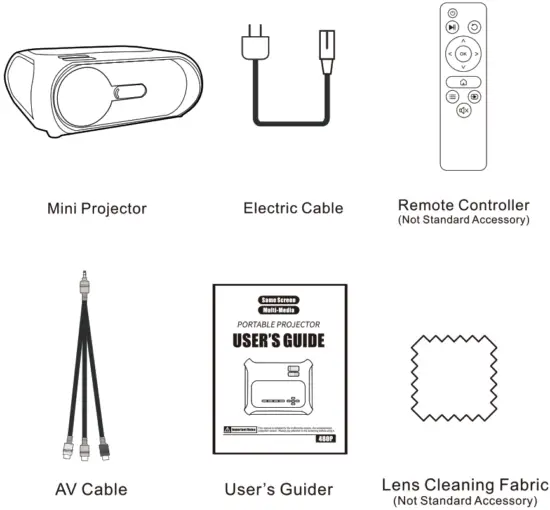
PACKING LIST
Introduction
| Lamp | LED | Image system | LCD |
| Native Resolution | 1280*720 | Resolution | 1920*1080 Max |
| Aspect Ratio | 16:9/4:3 | Input voltage | 100-240V 50/60Hz |
| Lens | F=130 | Projection distance | ≈ 1.2-4m |
| Image size | ≈ 40-140inch | Operation | Manual/Remote Macontrol |
| Power consumption | 70W Max | Loudspeaker | 4 Q 3W |
| Weight | 1.36kg | Size | 2461 88*92mm |
| Interface | USBx2/HDMI/AV/VGA/Audio (3.5 mm) | ||
Working temperature: -10-36°C
Support Formats
| File type | Support format |
| Audio | MP3/WMA/OGG/AAC/FLAC/APE/WAV |
| Pic | JPEG/BMP/PNG |
| Video | MP4/AVI/WMV/RMVB |
| Text | TXT |
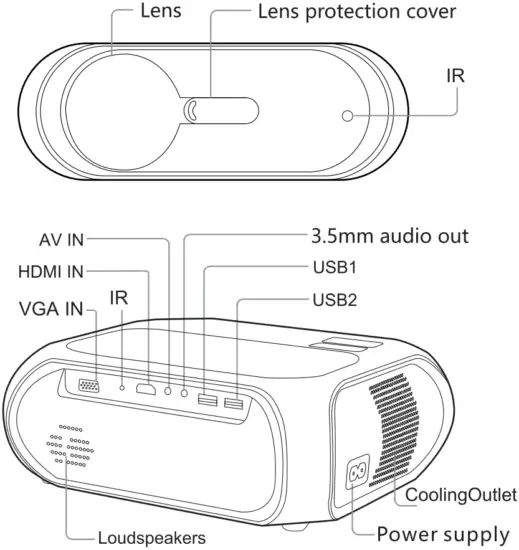
PARTS AND FUNCTIONS OF PROJECTOR
Introduction Of Keyboard
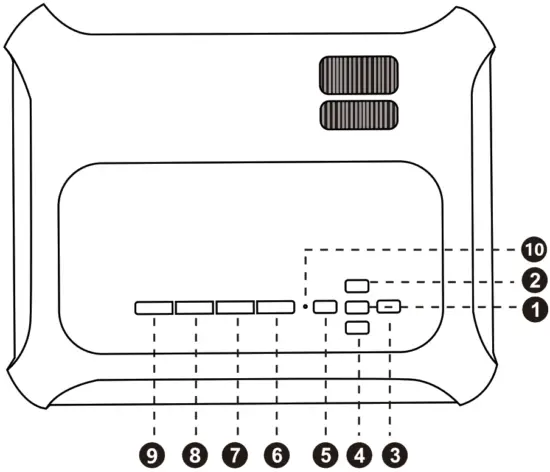
| 1. OK 2. 3. 4. 5. | 6. BACK 7. INPUT 8. MENU 9. ON/OFF 10. Pilot lamp |
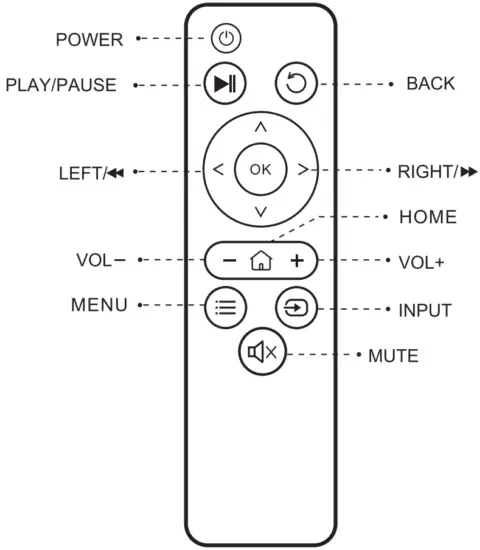
Introduction of remote control
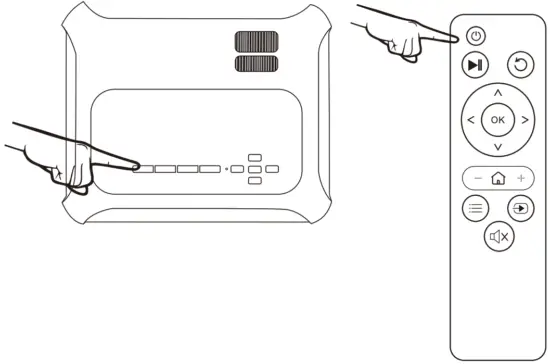
Power on/off
- Connect the projector with the power cord, then plug the power cord into the AC connector. When the indicator light stops flashing, the projector is under standby status.
- Press the
 buttons on the remote o projector.
Let’s Begin
First USE
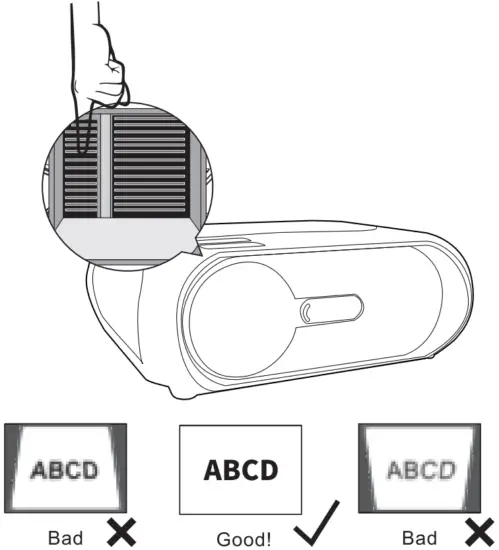
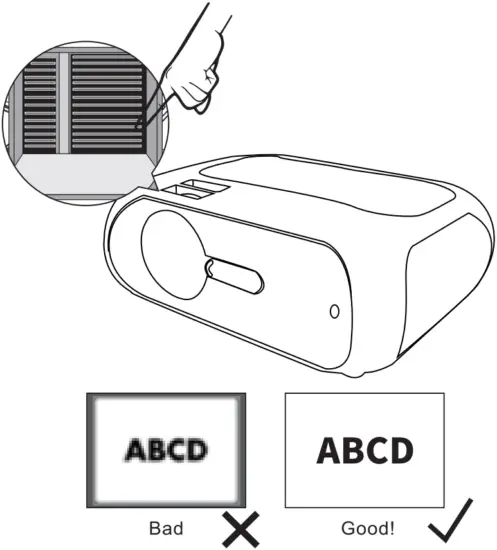
- Adjust the image (Keystone distortion)
When keystone distortion occurs, It is recommended to adjust the keystone correction ring.
- Adjust the image (Blurred image)
Adjust the focusing ring on the projector to obtain a satisfactory imaging effect.
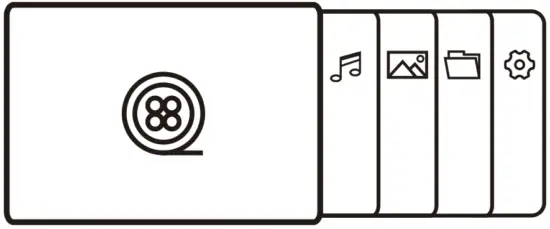
- When turn on, Display content (USB signals)
*Read the contents of the USB drive
- Selecting the input source
 Press the
  button, Select access signal.
*Significant differences based on different versions, Different UI has different “Input Source”
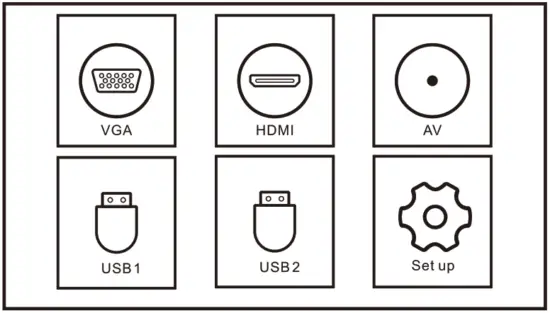 Press the
 PRODUCT CONNECTION
Multimedia input
Insert the USB into the relevant position as shown in the picture below. 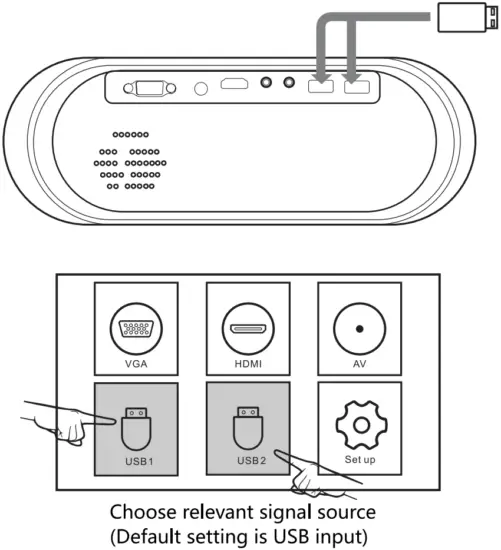 VGA Input
Choose VGA input, and connect the projector with VGA device as below.  AV Input
Choose AV input, and connect the projector as shown below. 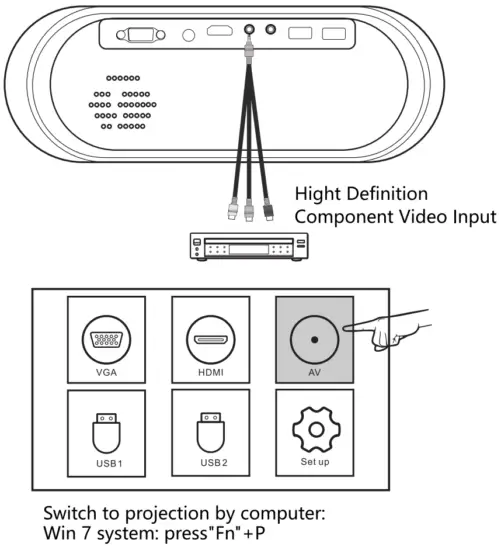 HDMI Input
Choose HDMI input, then connect the projector as shown below. 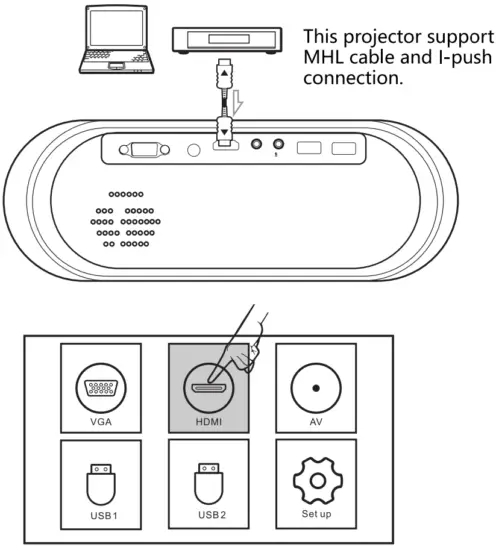 Audio out
Can connect with a 3.5mm head phone o similar audio devices.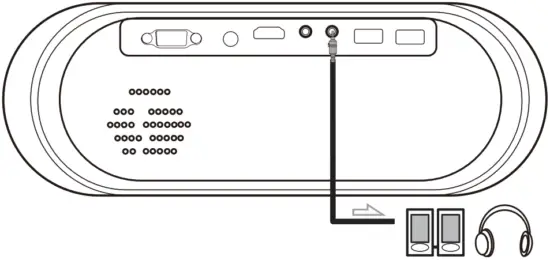
![]() This projector did not support Dolby audio – format for patent issues.
This projector did not support Dolby audio – format for patent issues.
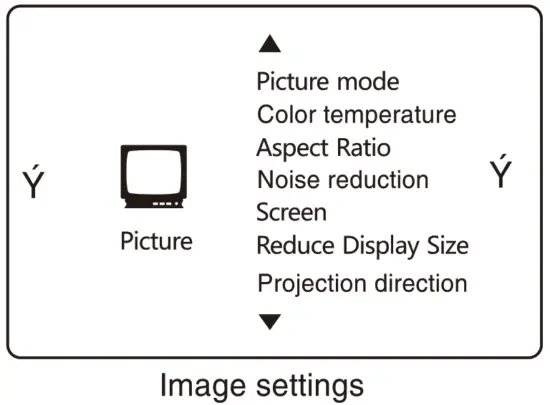
Projector settings
Properly set up the projector for a better film experience. The main parameters of projection can be set up through the following steps.
- Open the video page and press ”
 ” on the projector panel or remote control to the interface as shown below. Press “

 ” on the projector panel or remote control, choose between different options, and press “OK” to the submenu and properly set up the mode.
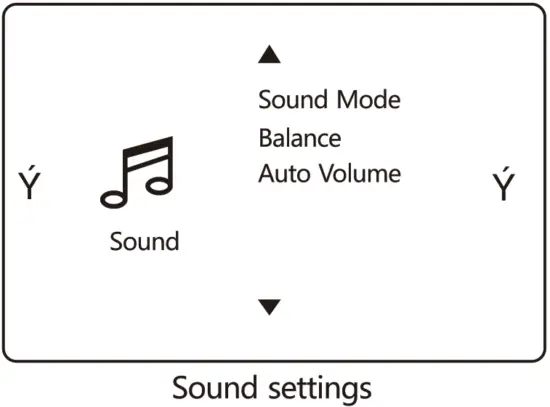
- Press ” ” on the remote control, or “ on the projector to get OSD, and then press “” until you get the sound menu. then use ““to choose the submenu you need to adjust

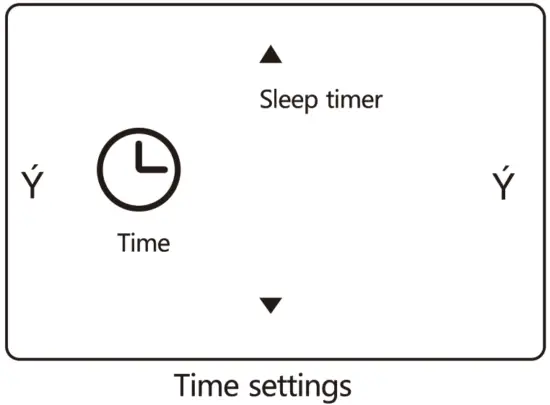
- Press “” on the remote control, or “on the projector to get OSD, and then press “” until you get the time menu. then use “ “to choose the submenu you need to adjust
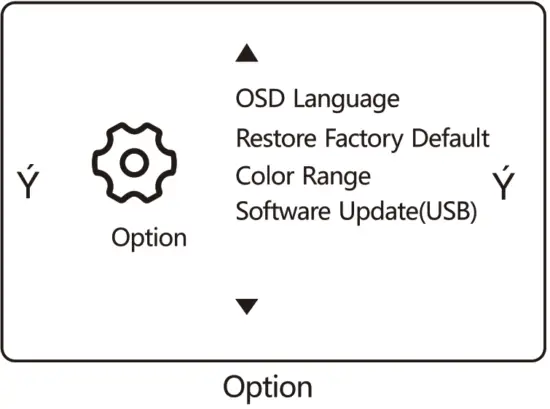
- Press “ on the remote control, or ““on the projector to get OSD, and then press “” until you get the option menu. then use “ “to choose the submenu you need to adjust

Operation instruction
Synchronize the phone screen
Wireless projection: iOS device
Select the phone’s easy projection option via the source button on the projector’s control panel or remote control. Press the “OK” key of the remote control and then switched the system to Android iOS.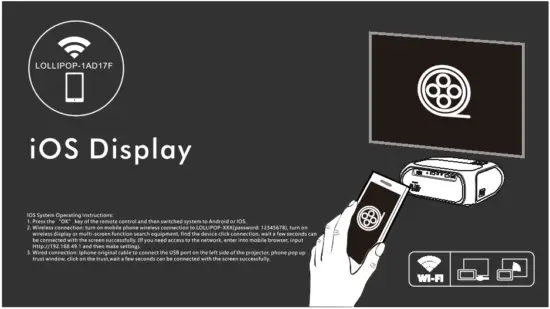 Open the iOS device, go to the “WLAN’ setting to search for the name of the projector device to be connected, then open the *mirror” function of the iOS device. Then it will pop up the name of the projector device. Then select the projector name to put the password to be connected successfully(As below pic shows) to realize the wireless connection function.
 Notice
Support iOS6 or above devices, if the phone can not be connected by wireless. please check if the mobile version is supported.
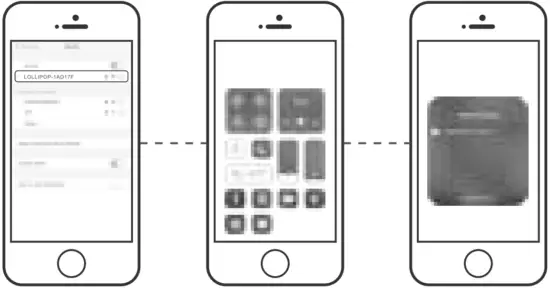
Wireless projection: Android device
Select the phone’s easy projection option via the source button on the projector’s control panel or remote control. Press the “OK” key of the remote control and then switched the system to Android iOS.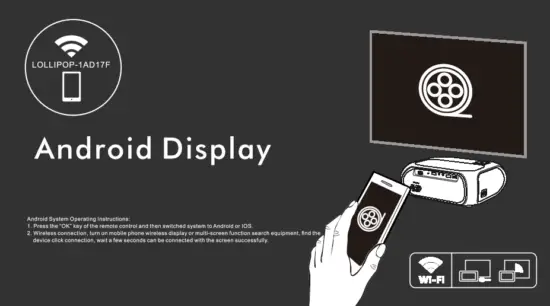 Open the Android device, go to “Device connectivity” under the setting, select “Wireless projection” to search for the projector name begin with “LOLLIPOP-1AD17F” (as the below pic shows), then select the projector name to realize the wireless connection function.
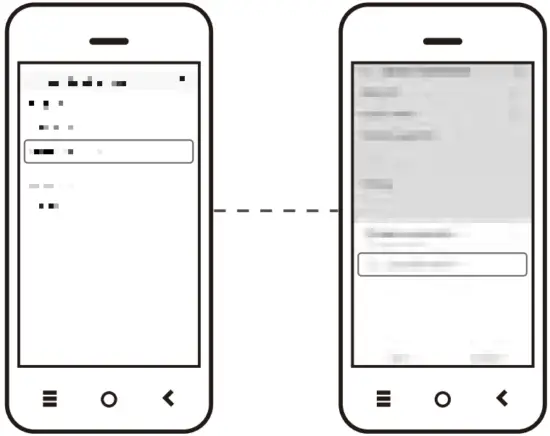 ! Notice
Support Android 5.0 or above devices, if the phone can not be connected by wireless, please check if the mobile version is supported.
Wired connection: iOS device
Select the phone’s easy projection option via the source button on the projector’s control panel or remote control. Press the “OK” key of the remote control and then switched the system to Android iOS.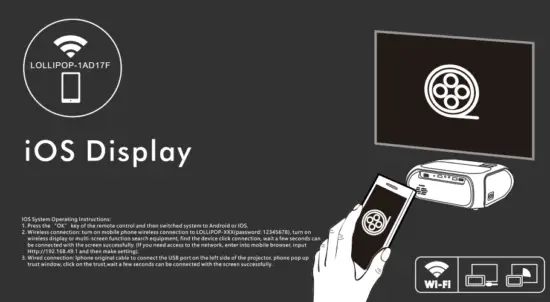 Connect to the USB interface through the Apple Data cable. For the first time (after connecting to the projector device, it will connect automatically), a dialog box will pop up to ask “Trust the device?”. Click “Trust” and wait for 3-5 seconds, then the content of the iPhone or iPad will be projected to the projector screen.
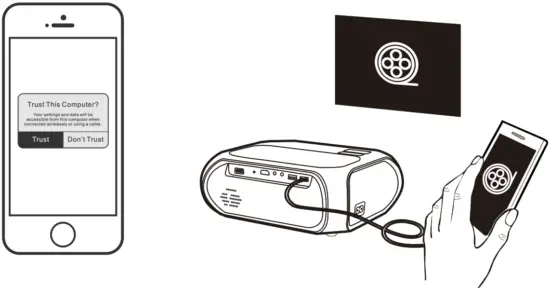 ! Notice
Some iOS devices will pop up in the “This accessory may not be supported” window, please feel free to use it. because this is the normal notification, please wait patiently for the wired connection program updates if the mobile phone system version is upgraded, it will not be able to match the screen.
Wired connection: Android Device
Select the phone’s easy projection option via the source button on the projector’s control panel or remote control. Press the “OK” key of the remote control and then switched the system to Android iOS.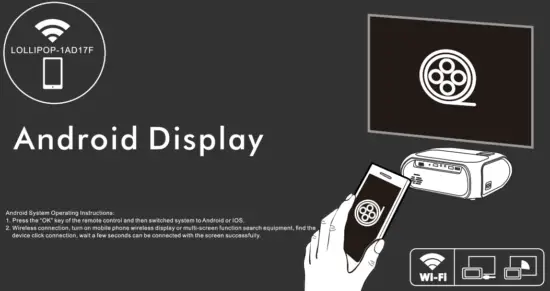 Connect the mobile original data cable to the USB2 interface (if there is no original data cable, please select the brand data cable, otherwise it will affect the same screen effect). Open the “USB tethering’ in the mobile phone’s “setting” interface (as the below pic shows). Wait for 3-5 seconds to achieve Android mobile content projected to the projector screen.
 ! Notice
The USB debugging mode must be turned on when using this function. If the mobile phone operating system version is upgraded, the screen cannot be displayed. Please wait patiently for the wired connection program update. Support Android 5.0 or above devices, if the phone can not be connected by wired, please check if the mobile version is supported.
The data is only for reference
Projection distance and size

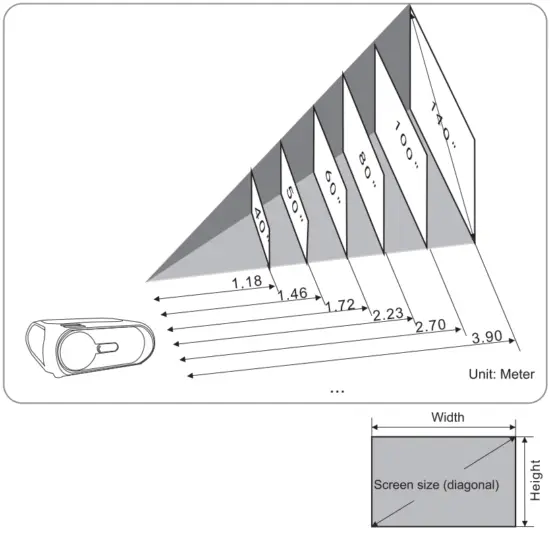
| Alleged screen size (inch) | Screen size width x height (m) | Projector distance (m) |
| 40″ | 0. 50(H)x0. 89(W) | 1. |
| 50″ | 0.62 (H)x 1.10 (W) | 1. |
| 60″ | 0.75 (1-1)x 1.33 (W) | 2. |
| 70″ | 0.87 (H)x 1.55 (W) | 2. |
| 80″ | 1.00 (H)x 1.77 ono | 2. |
| 100″ | 1.25 (H)x 2.21 (W) | 2.70 |
| 120″ | 1.55 (H)x 2.66(W) | 3.30 |
| 140″ | 1.74 (H)x 3.10 (W) | 3.90 |
Design allowable error +1-8% This table measures the front end and the center of the lens and assumes that the projector is horizontally placed.![]()


