StarBoard QS & YL – F8 Series LCD
*This manual is for reference only; actual device maybe has some differences with this manual.
- Issue date: 2021.11.20
- Version: 1.0
IMPORTANT INFORMATION FOR PLACEMENT
If the IFPD is not positioned in a stable location, it can be potentially hazardous due to falling. Cause any injuries, particularly to children, can be avoided by taking simple precautions such as:
- Do not put the machine on places that are unstable, easy to tilt and fall.
- Do not place a cloth or other materials between the and supporting furniture.
- Ensure the is not hanging over the edge of the supporting furniture.
- Do not place heavy objects on the machine.
- Do not use the machine beside equipment of strong radiation.
- Using cabinets or stands recommended by the manufacturer of the unit.
- Only use furniture that can safely support the unit.
- Do not place them on tall furniture (for example, cupboards or bookcases) without anchoring both the furniture and the to a suitable support.
- Do not let children climb on furniture to reach its controls.
- Do not use immediately after moving from a low temperature to a high as this causes condensation, which may result in fire, electric
![]() CAUTIONS
CAUTIONS
- Please use this product’s standard power cable instead of other types to avoid burning the monitor and cause a safety risk.
- In case of electric shock, the back cover should not be opened by non-technical maintenance staff.
- Before operation, please check the compatibility between the local voltage and the monitor’s rated voltage. If the monitor will not be used for a long period, the user should remove the plug from the power socket.
- Please use a single-phase power supply socket and make sure the earth wire is well connected.
- Do not install or put the machine near places with a heat source such as hot stoves, heat-transfer tubes, power amplifiers, sources of direct strong light, dust, high humidity, and places with mechanical vibration. To achieve better performance, please keep the monitor away from high voltage distribution networks, large metal objects, radar stations, etc.
- If an abnormal sound and smell appear, cut off the power supply and unplug the device immediately. Stop using it and ask technical staff to resolve the problems.
- If the monitor will not be used for a long time, please unplug the power cable for safety.
- Avoid liquid and metal entering the device. If any liquid or metal falls into the device, please shut the monitor down and cut off the power supply immediately and contact technical maintenance personnel to repair it.
- Do not use chemical reagent to wipe the machine, solvent may cause deterioration or damage to the paint surface. Disconnect the power supply and wipe it with a cloth if there is dust or dirt. Use a clean, soft cloth to wipe the screen gently.
- Do not switch off/on the device frequently in a short time in case that it will affect the lifetime of the interactive touch monitor. After the normal shutdown, please wait about three minutes or longer before turning on the device.
- To extend the service life of the LCD screen, please do not set display brightness and contrast to the maximum value for long periods.
- Don’t place the interactive touch monitor on an unstable stand, bracket, or table, otherwise, the monitor may fall and cause damage.
- Take care when moving the interactive touch monitor to avoid being hit, squeezed, etc. Particularly pay attention to the protection of the screen part to avoid the glass breaking and causing damage.
- You should follow the manufacturer’s instructions and use the manufacturer’s recommended installation accessories when installing the device.
- The best distance between the eyes of the viewer and listener and the screen is 5 to 7 times of screen diagonal.
- If wall mounting in a normal cement wall, solid wall or wood wall ensure it can withstand three times the weight or more of the interactive touch display and please ensure good ventilation condition; For the mounting on a special wall (such as steel structure wall, hollow structure, glass, marble, etc.), it is recommended that you must evaluate force bearing of the wall first.
- Avoid the interactive touch monitor being exposed to direct sunlight, as it will accelerate the interactive touch monitor aging, and may cause abnormalities of the touch device.
- When writing on the screen, please do not use hard or sharp objects instead of a writing pen.
- Take a 10-minute break after watching for 30 minutes. Children under two years should not watch the screen. Children above two years old should not watch the screen for more than an hour a day.
- This is a Class A information technology device. If it is used in a residential environment, it may cause radio frequency disturbances, the User may be required to take some appropriate measures.
ACCESSORIES LIST
 |  | 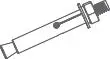 | |
| Monitor | Power Cable | Touch USB Cable | Extend/M8 Screws |
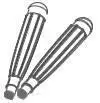 | 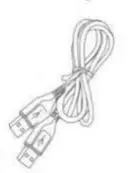 |  | |
| Writing Pens | HDMI Cable | Remote Controller | |
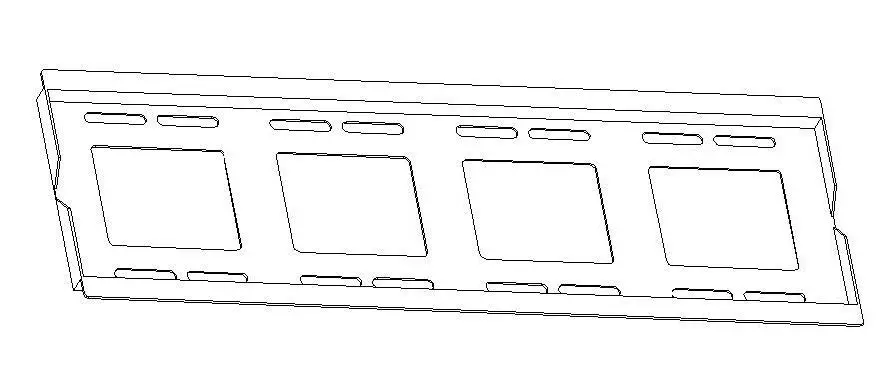 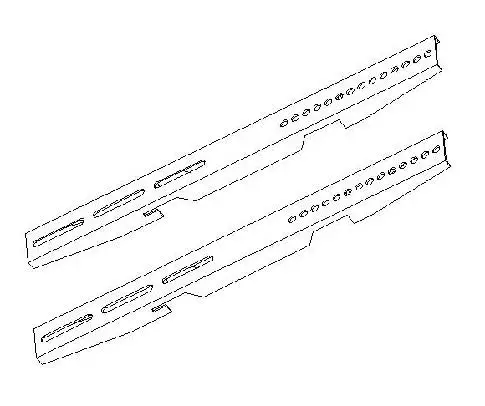 | |||
| Wall Mounters | |||
DEVICE INSTALLATION
The mounting bracket should use the rack or mount that is designated by the manufacturer. If the mounting bracket is not from the manufacturer, the bearing capacity should be ensured not less than 4 times its actual bearing weight. The bearing capacity of the support for bearing the mount should not be less than 4 times its actual bearing weight, and ensure the interactive monitor is stable.
The mounting surface for the interactive monitor should be firm with enough bearing capacity and should not be less than 4 times its actual bearing weight. When the mounting surface is the wall or rooftop of buildings, it must be solid brick, concrete, or another strong equivalent mounting surface. If the mounting surface is made of loose materials (old building brick wall, wood, solid brick wall…), metal or non-metal structures, or the decoration layer of the mounting surface is too thick, the strength of the surface is deficient and corresponding reinforcement and support measures should be taken to avoid a safety hazard.
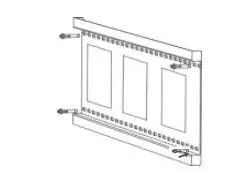
- Step1. Install the holder on the back of IFPD
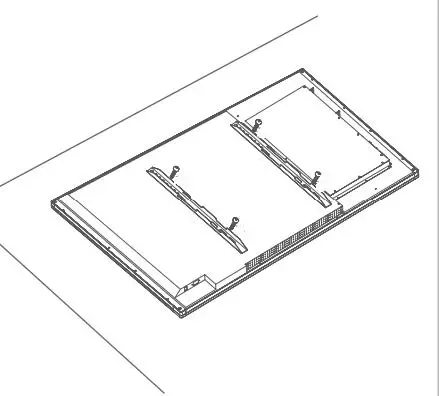
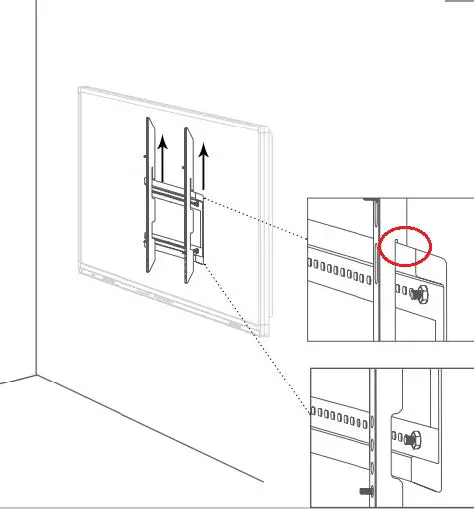
- Step2. Install the wall holder parts to the wall
- Step3. Hang the IFPD to the wall mount

Heat Dissipation
| Cooling ventilation | Distance to mounting surface(cm) | ||||
| requirements | |||||
| Nominal output | Left/right | Top | Bottom | Back | |
| Above 100W | 10 | 20 | 20 | 10 | |
*Notes: when the monitor inlay wall or box, the vent area of bottom/flank/top sides should be no less than 50% of packing surface and air circulation needs to be kept well.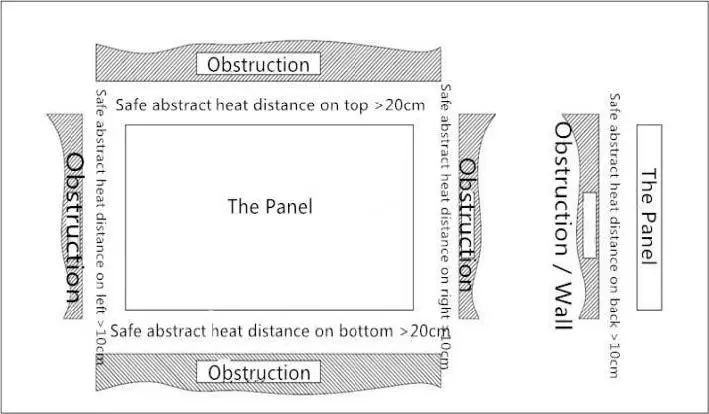
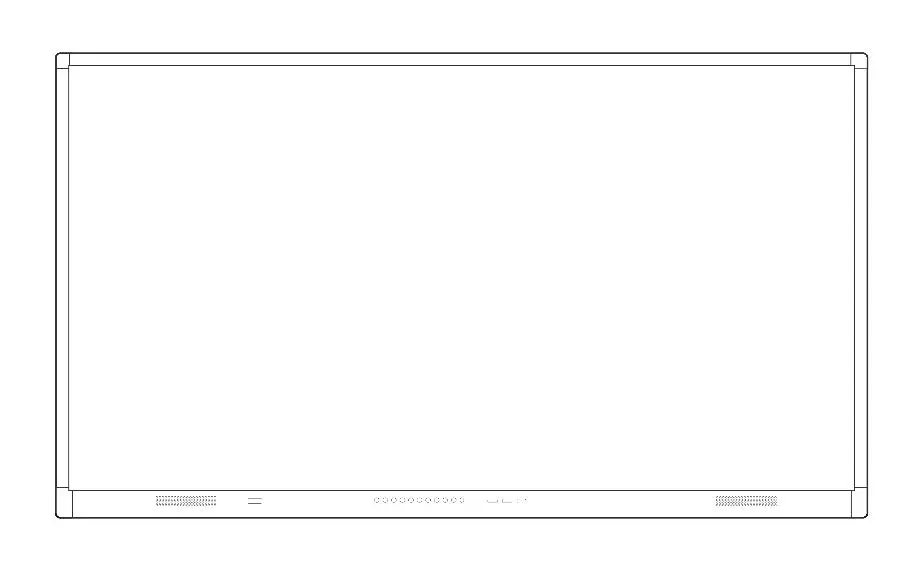
DEVICE CONTROL PANEL
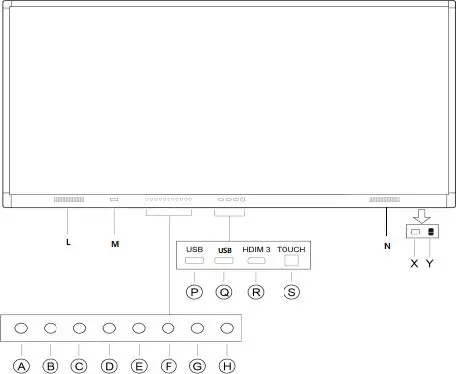
*Note: Front panel picture is for reference only, may differ from actual product.
| INTERFACE PANEL | ||
| S/N | ITEM | Description |
| A | Power | Turn on/off the panel |
| B | Source | Go to the source menu |
| C | Menu | Display/Exit (back to the previous level) OSD menu |
| D | VOL+ | Increase the volume |
| E | VOL- | Decrease the volume |
| F | CH+ | Choosing the next channel |
| G | CH- | Choosing the previous channel |
| H | ES | Turn-On/Off Energy-saving mode, in this mode, the sound is on, but the display will turn off |
| P | Android USB | Multimedia USB input of Android system, support playing |
| Q | PC USB | Multimedia USB input of OPS, support playing documents, pictures, audios, and videos directly |
| R | HDMI | Front HDMI source input |
| S | Touch USB | External PC Touch port, only output under HDMI source |
| M | IR Receiver | Remote controller signal receiver |
| L&N | Speaker | Speakers |
| X | Power In | AC110-220V |
| Y | Switch | Physical power on/off |
REAR PORTS
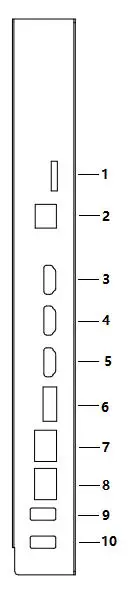
| Number | ITEM | DESCRIPTION |
| 1 | TF | SD card slot |
| 2 | Touch | Touch USB out port, used with HDMI 1/2/3 |
| 3 | HDMI 1 | Source HDMI 1 input port |
| 4 | HDMI 2 | Source HDMI 2 input port |
| 5 | HDMI 3 | Source HDMI 3 input port |
| 6 | DP | HD Multimedia Signal Input (Maximum support 3840*2160@60Hz) |
| 7 | LAN IN | Wired network input port (10M/100M) |
| 8 | LAN OUT | HDMI output port |
| 9 | USB | USB input port |
| 10 | USB | USB input port |

| Number | ITEM | DESCRIPTION |
| 1 | HDMI OUT | HDMI output port |
| 2 | BLUETOOTH | Antenna for Bluetooth |
| 3 | N/A | N/A |
| 4 | WIFI | Antenna for Wi-Fi |
| 5 | RS232 | Serial communication transmission of data control |
| 6 | MIC | Microphone input |
| 7 | EARPHONE | Earphone output |
| 8 | AUDIO | External PC audio input, used with VGA input |
| 9 | VGA | External PC VGA display input, used with Audio input |
| 10 | TOUCH | Touch output port, used with rear vision input |
| 11 | USB | USB input port |
OPS SLOT
Plug the OPS computer into the slot and fasten it with two M4 screws on the up and down.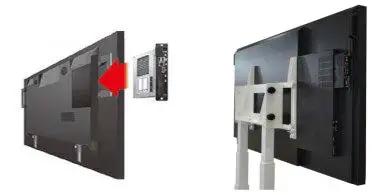
Note:
The OPS computer is not plug-and-play. Disconnect the interactive panel from the power before inserting the OPS computer.
Remote Control
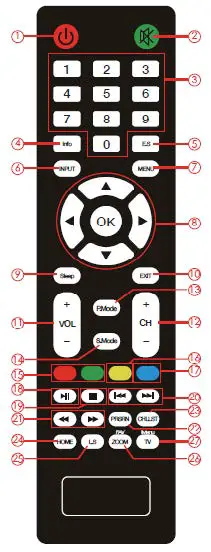
- Power: Turn on/off the Machine
- Mute: Mute or Restore the Sound
- 0-9: Number Buttons
- Info: Show display information
- E·S: Turn on/off-screen display, turn to Eco model
- Input: This allows the user to switch the input source
- Menu: Get into OSD menu
- Up/Down/Left/Right/OK: Select & Enter
- Sleep: Set an auto Shut-Down time
- Exit: Exit current menu
- VOL+/-: Increase/Decrease volume
- CH+/-: Channels switch
- P.Mode: Adjust picture mode
- A.Mode: Adjust Audio Mode
- N/A
- Freeze: Turn on/off-screen freeze mode (only available under VGA/HDMI input)
- Lock: Lock/unlock the touch
- Play/Pause: Available under media playing
- Stop: Available under media playing
- Forward/Backward: Available under media playing
- Fast Forward/Backward
- PRSRN: Screenshot on the current image
- CHLLST: Unavailable
- HOME: Back to home page
- L.S: Unavailable
- ZOOM: Adjust display scale
- TV: Unavailable
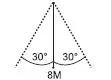
REMOTE CONTROL EFFECTIVE DISTANCE
Remote controller should be used in the effective distance, its sensor should face to IR receiver of StarBoard, while straight-line distance should be nearer than 8M, the angular offset should be under 30°.
CONNECT PC WITH STARBOARD
Connect PC with StarBoard via an HDMI cable and a Touch USB cable, switch StarBoard to a specific source, then we can show the image from PC to StarBoard and control our PC by Touch on StarBoard.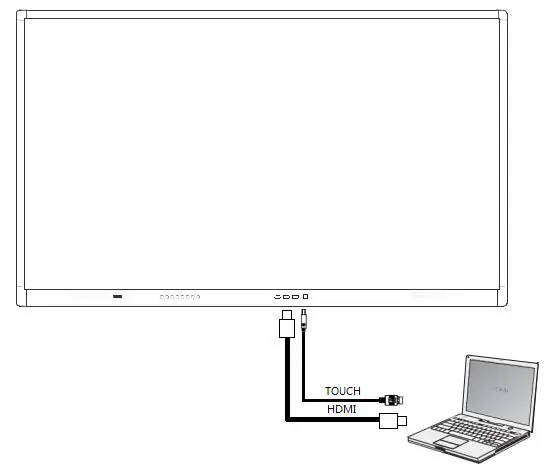
POWER ON
- Make sure to use AC 100~240V 50/60Hz as the power supply for the interactive touch screen monitor.
- Turn on the power key (near the Power port) of the touch screen (the index light will be red).
- The touch screen will enter into active condition once powered, if you don’t need the touch screen to enter into active condition after it is powered or if the monitor is not the model which will not auto-activate, then you can turn on touch monitor as per the following steps.
- Turn on the “Power” key on the touch screen or “standby” key on the remote to power the touch screen (the index light will be in green), then press “PC” key on the touchscreen to turn on the PC(Note – Only available for the touch screen with built-in OPS).
POWER OFF
- Press the “Power” key on the touch screen or the “ Stand by” key on the remote when you want to shut down the touch screen.
- If you want to shut down the touchscreen completely, please turn off the power key under the right bottom of the touch screen when on standby.
- If it is with OPS, please power off the PC first before shutting down the monitor. It is recommended that Windows control be used to turn off the OPS. To turn off OPS physically, then press the PC button on the front frame or the OPS port panel.
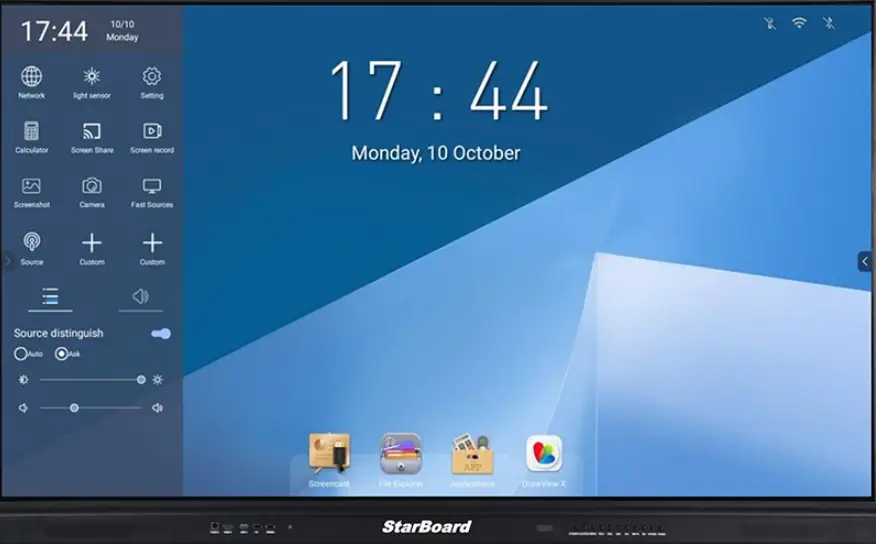
HOME PAGE
Shortcut Icons
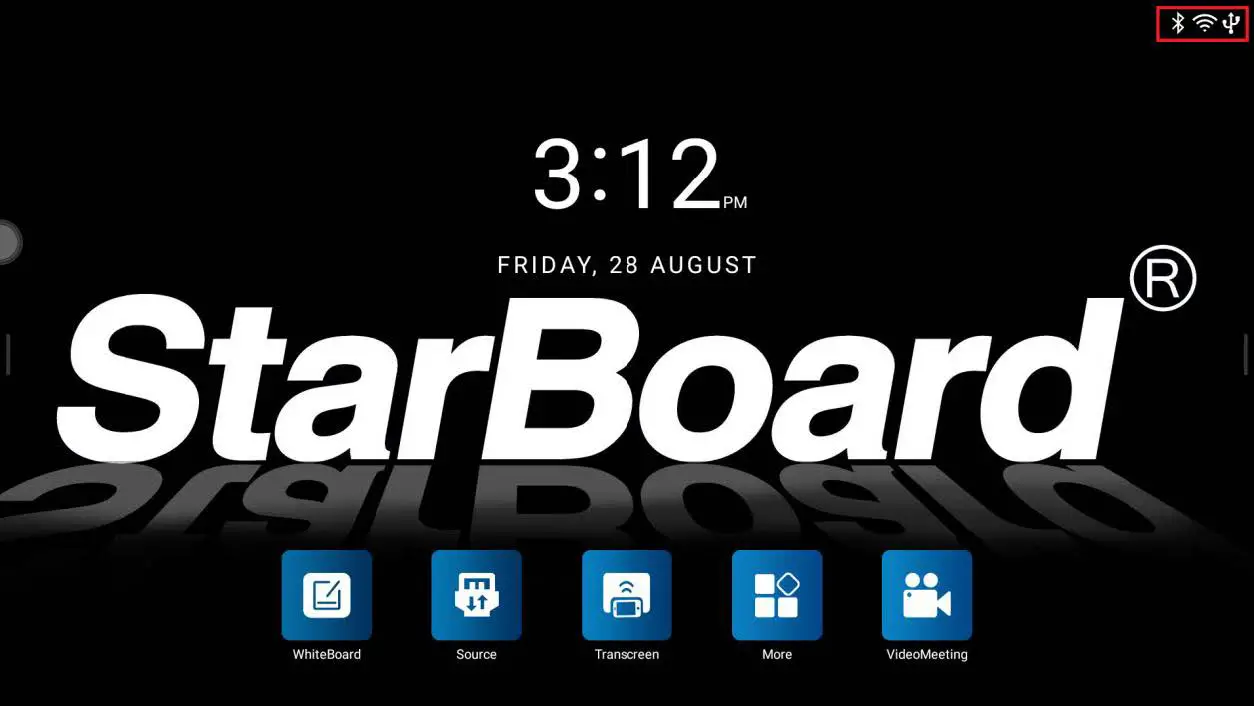
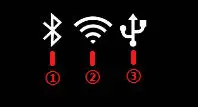
- Status and shortcut of Bluetooth
- Status and shortcut of Wi-Fi
- Status and shortcut of USB device
FLOATING BALL
Floating Ball allows the user have more quick operations during using StarBoard. This ball could be moved everywhere, user can show/hide it or customize its operation shortcuts in the user menu.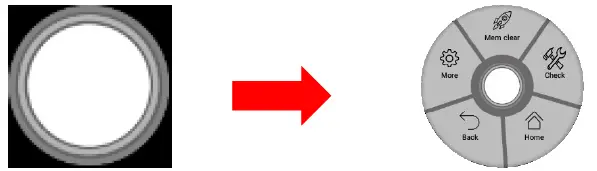
SIDE BAR
Sidebar is a functional shortcuts bar, which is hidden on the sides, user can call it out from the Left/Right/Bottom side (Tap the white bar on the Left/Right side or slide up from the bottom side). It contains many frequently used operations shortcuts.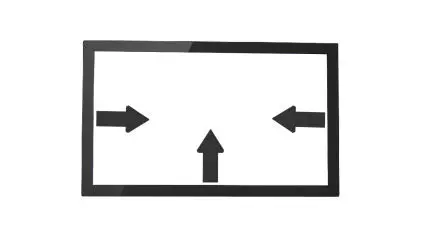

| NAME | ICON | DESCRIPTION |
| Backward |  | Tap to back to the previous step |
| Home Page |  | Tap to back home page |
| Recent Applications |  | Tap to show recent used applications list |
| Source |  | Tap to enter source selection |
| Settings |  | Tap to get into the settings menu |
| Quick Note |  | Tap to call out a quick note (transparent background) |
| Volume |  | Tap to adjust the volume |
| Screen Brightness |  | Tap to adjust screen brightness or change back-light mode |
Input Source
StarBoard can change input source from Android to HDMI input, VGA input, or other sources.
StarBoard contains HDMI 1/2/3, FRONT HDMI, DP, VGA, OPS, the user just connects his PC or another device with these input ports and then switches to a specific source. It is possible to switch sources from the home page “Source” or sidebar.
Selected input sources would be highlighted with blue, inputted sources would show green on the end side, have not been inputted sources would show grey on the end side.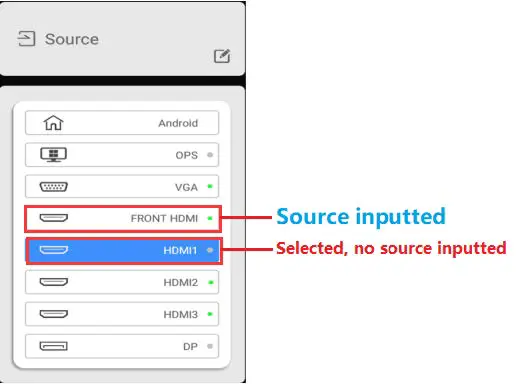
SBS NOTE

ABOUT SBS NOTE
SBS Note, full name StarBoard SoftWare Note, is one of StarBoard most distinctive applications which allows the user to make his presentation more vivid in different ways. Users can paint, select, move, add objects, media to their presentation.
HOW TO USE SBS NOTE
Pens
Users can select different types of pen and different colors for painting.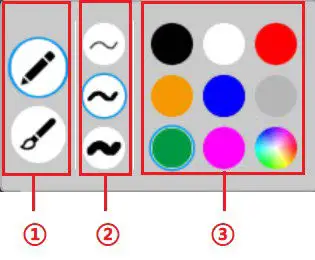
| NO. | NAME | DESCRIPTION |
| ① | Types | Multi Pen and Painting Pen is selectable (Multi-Pen allows more than one point painting at the same time) |
| ② | Weights | 3 pen weights are selectable, reflected in painting |
| ③ | Colors | Allows user select different colors for pens, also allows adding custom color |
Eraser

| NAME | ICON | DESCRIPTION |
| Circle |
| Select objects by a dotted line, objects contains or intersected would be deleted |
| Common eraser |
| An area would appear when the user’s finger tap the screen, objects passed by the area would be deleted |


- Select
 Allows user select object(s), and selected object could be moved, deleted, and so on. After tapping this icon, the user can draw with a dotted line, objects contained in its area would be selected, then these objects would be operable.
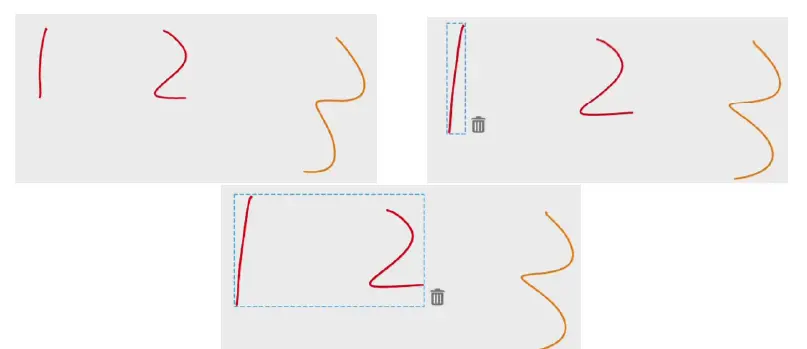
- Forward/Backward
 Allows user back to previous steps or go forward to next steps.
 - More

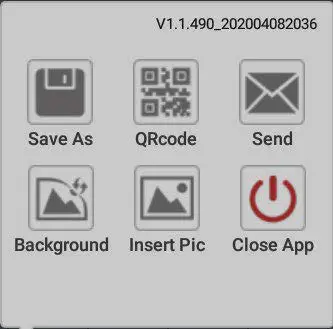
NAME ICON DESCRIPTION Save As 
Save image as a picture or PDF file in local storage or USB disk Q Rcode 
Create a QR code, which could be scanned by mobile device, and shows the current image on a mobile device Send 
Send current images in SBS Note to a specific mail address Background 
Change the background image of SBS Note Insert Pic 
Insert a picture to SBS Note Close APP 
Exit and close SBS Note - Minimize
 Minimize SBS Note and back to the previous window, user can call out SBS Note by tapping SBS Note icon on the home page again.
 - Clear-Up
 Tap to clear-Up the whole screen image.
 - Pages Operations
 These icons allow users to create a new SBS Note page and switch these pages created one by one.
NAME ICON DESCRIPTION Add 
Create a new page, less than 10 pages when it is Multi Pen/ less than 5 Pages when it is Painting Pen Previous Page 
Go to the previous page Current Page/The number of Pages 
Shows the current page and the number of all pages, tap to preview all the pages, user can delete specific pages Next Page 
Go to the next page - Transparent Background
 When this option is activated, then the background of SBS Note would turn to transparent and shows the last screen before the user gets into SBS Note. When it is off, then the background would back to the image user set or the default image again.
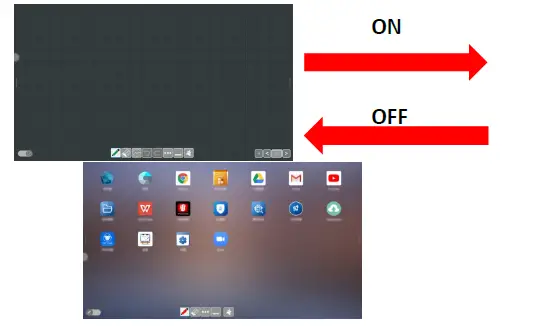
File Explorer

File Explorer is an app that allows users to manage their local storage or extra storage from USB flash disk. Common operations are built inside explorer (share, copy, delete, rename…)
*The extra storage from USB flash disk or hard disk should be under 32 GB when is under Android source, it might be unable to be recognized by StarBoard if the size is larger than 32 GB.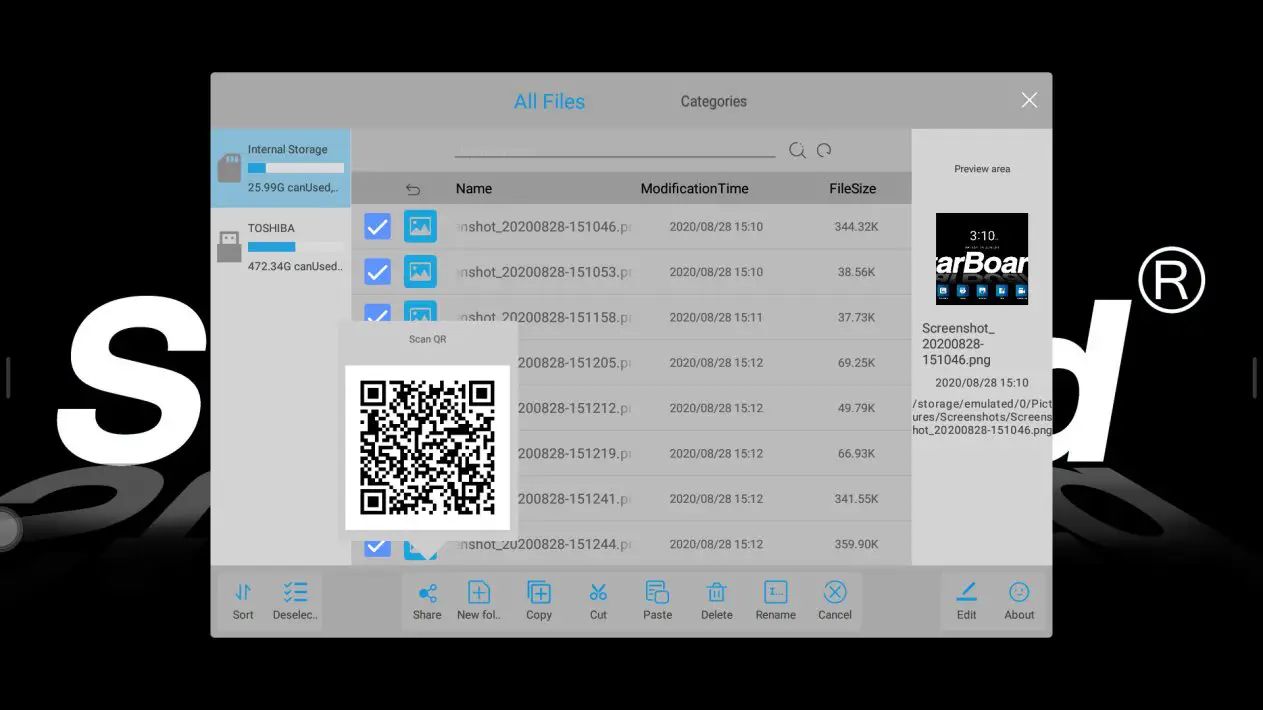
Settings
Contains many settings about StarBoard, users can alter these settings if needed. (such as floating ball, network, language, display…).
Applications
Get into and view all applications installed.
Users can also add new applications from Appstore or from “.APK” files.
- From AppStore
Users need to connect with the network, then download and install applications in-app store. - From APK files
Users need to download “.apk” files from other app stores or websites, then put these APK files to USB flash disk, then insert USB flash disk to StarBoard USB ports (Android USB ports), find and install them from File Explorer.
Browser
StarBoard built-in browser.
TROUBLESHOOTING
| Fail to start up, the power indicator does not brighten after powering on. |
|
| Touch function does not work |
|
| Android OS does not respond to any operation. |
|
| Remote Controller does not work. |
|
| Unable to connect with the network. |
|
| Unable to start up StarBoard, while power indicator is Red. |
|
| Android applications do not work. | Install them from StarBoard App store. If there is no that app in StarBoard App store, then please contact us. |
*If these suggestions have not solved your problem, or you have encounter any other problems, please contact us.


