![]()
Mounting guide
Bullet Mounting guide
![]() Important warnings and safety instructions
Important warnings and safety instructions
x Avoid exposing the camera to shocks, high pressure or temperatures above 60ºC.
x Avoid placing the camera near fans, ventilation or other noise sources. This will degrade audio performance.
x Avoid scratching or leaving fingerprints on the lens cover, this degrades image quality. If possible, keep the protective plastic on the lens cover during installation.
x Do not clean the camera with harsh detergents, gasoline or chemicals such as Acetone.
x Do not try to repair the unit yourself. Refer all servicing of the camera to Ava or contact a reseller.
! Disconnect power from the unit when performing a maintenance task.
! This product should be supplied by a Power over Ethernet Power Sourcing Equipment (PSE) compliant to IEEE 802.3at Type 2 (PoE+).
! The camera and the PoE PSE must be installed within the same building, as described by Environment A of the IEEE 802.3at standard. The PoE PSE must be properly grounded.![]() Please contact AVA’s certified dealers (or distributors) for power adapters.
Please contact AVA’s certified dealers (or distributors) for power adapters.![]() The minimum ground screw type is 3.5mm.
The minimum ground screw type is 3.5mm.
Overview
 | 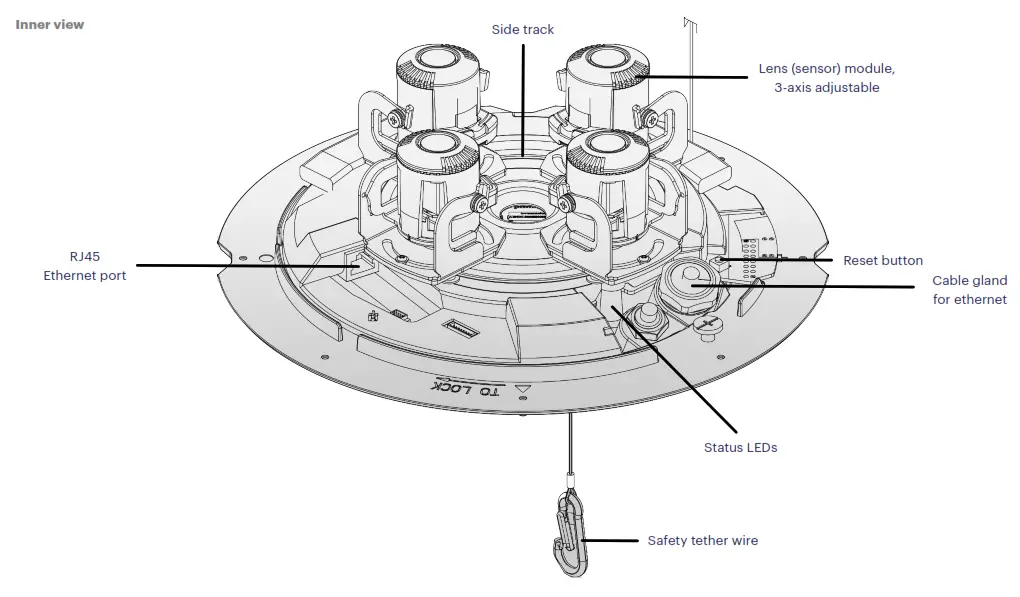 |
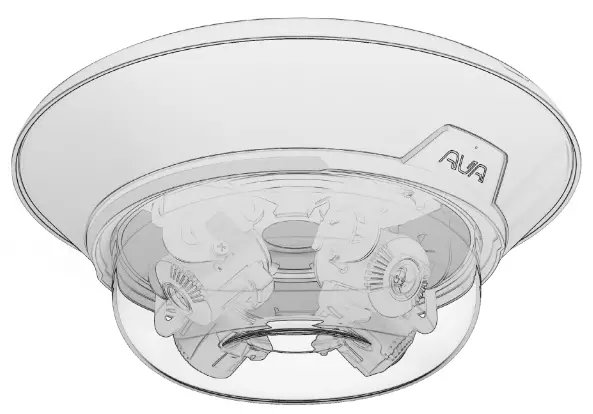
Camera mount – preparation
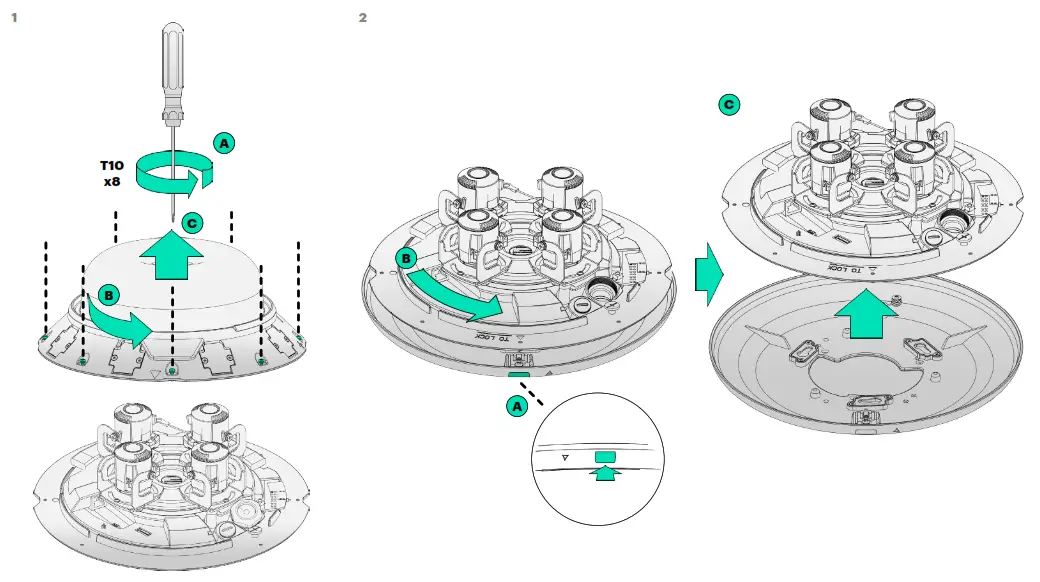 | 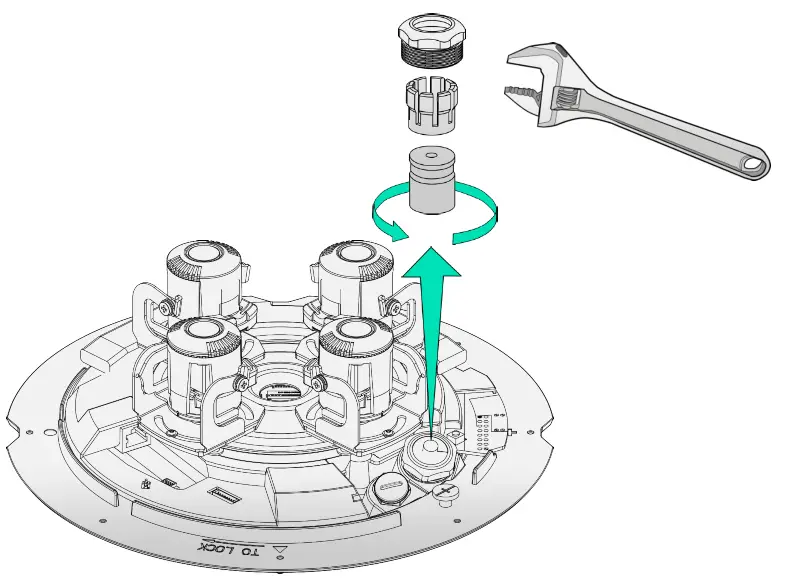 |
Ceiling mount
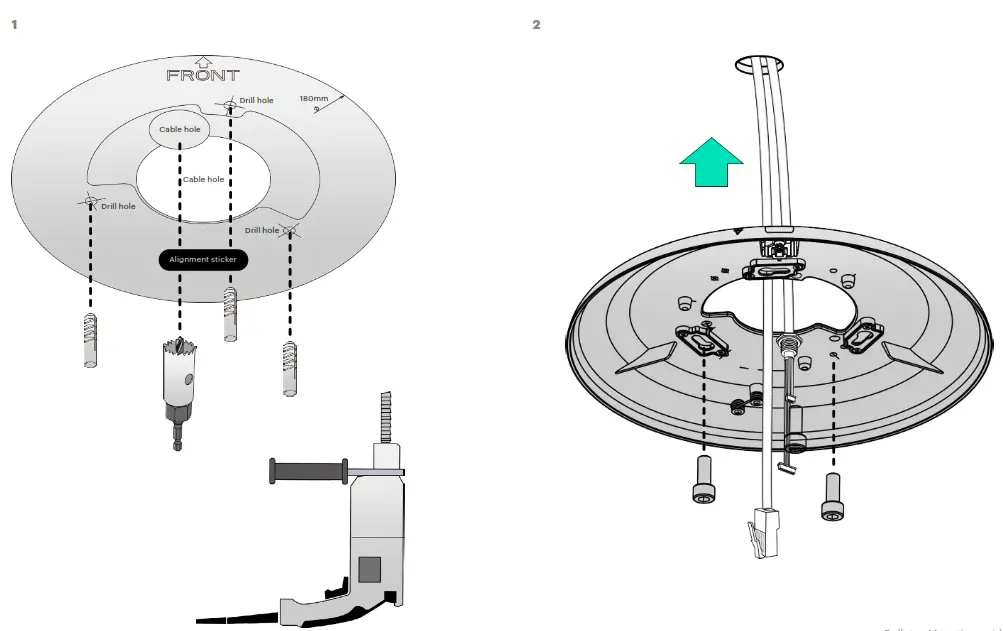 In-ceiling mount
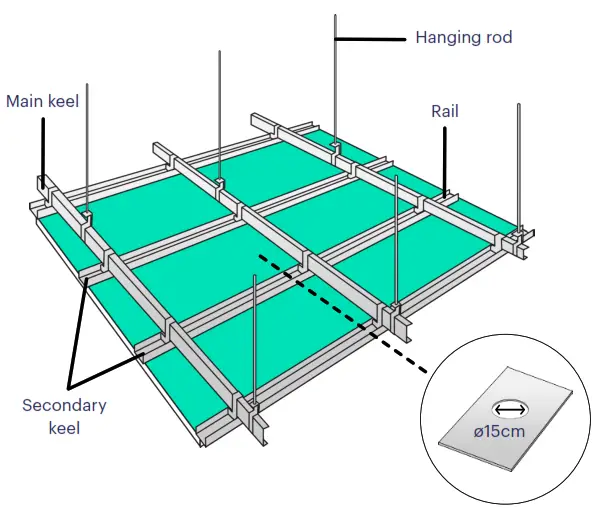
![]() If needed, add hanging rods to strengthen the ceiling structure. Weight of camera: 2.7 Kg Weight of Recessed kit: 1.1 Kg
If needed, add hanging rods to strengthen the ceiling structure. Weight of camera: 2.7 Kg Weight of Recessed kit: 1.1 Kg
2 Assemble the bracket rod with the two bracket stands and place the assembly at the desired location before the screws are fastened.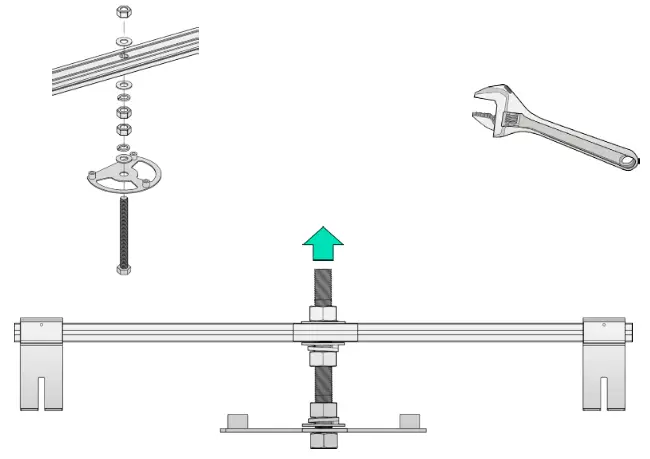
3 Adjust the position relative to the ceiling tile, the mounting plate should be a little bit higher than the lower edge of the ceiling tile. Make sure you can press the release button on the mounting plate. Tighten the hex nuts when the adjustment is done.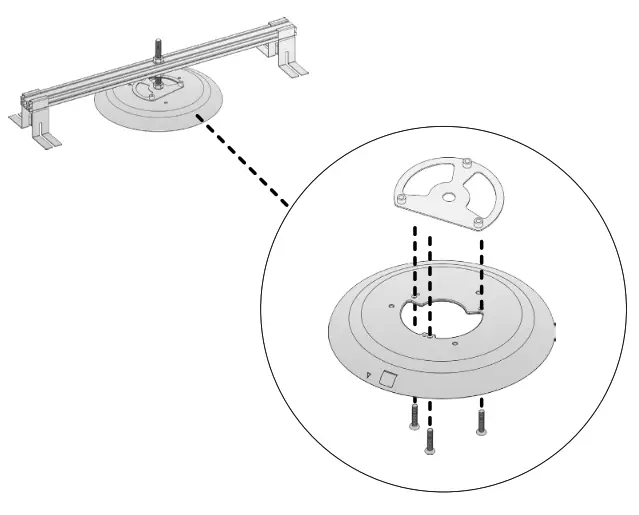 4 Fasten the two nuts to secure the positions of the bracket stands on the hang rod. Remove the assembly from the ceiling and install the ceiling tile.
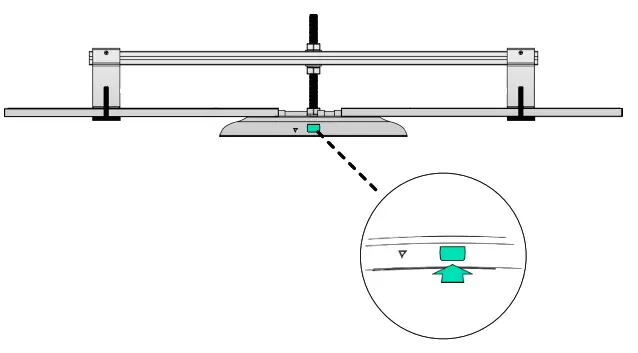
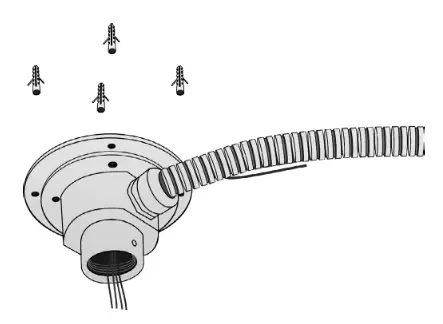
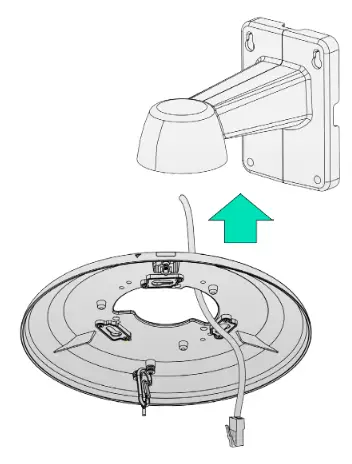
Pendant mount
- Use the alignment sticker and drill holes for the Pendant head, secure it with the screws.

 Required:
ACQ-PEN-HEA Pendant head
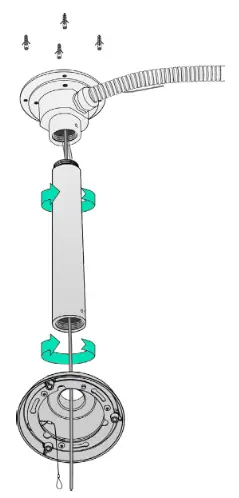
ACQ-PEN-PIP Pendant pipe 40cm
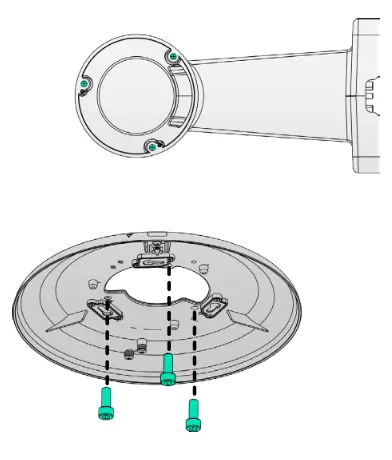
ACQ-MNT-ADA Mounting adapter - Install the Pendant pipe and secure with the upper hex screw, install the Mounting adapter and secure it with the lower hex screw.

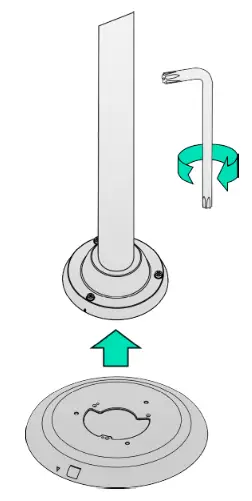
- Install the top mounting plate.
Note the front indicators indicate the default front side of the camera. Install the mounting plate with the orientation you prefer.
Wall mount
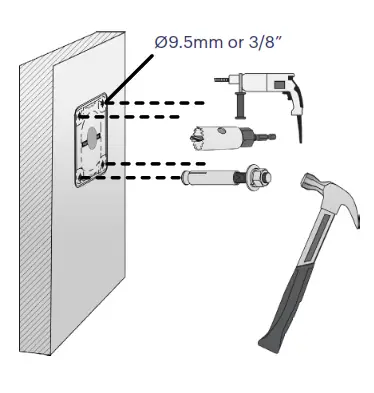
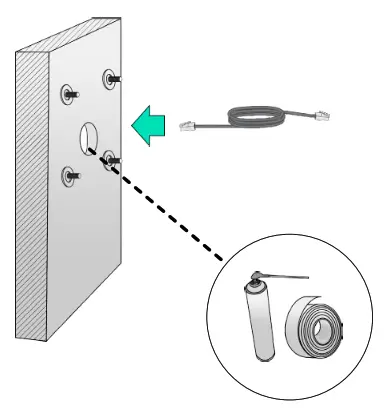
- Attach the alignment sticker to the wall. Drill 4 holes for screws and 1 hole for routing cables.
 Required: ACQ-WAL-MNT Wall mount bracket
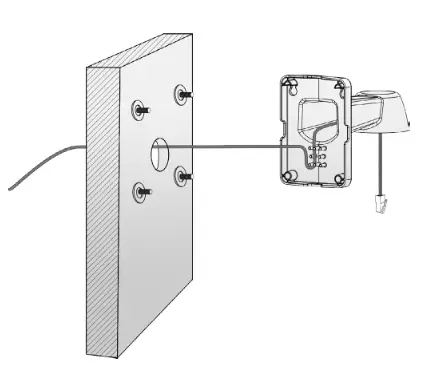
 - Leave one washer on each threaded pole. Connect the Ethernet cable and use foam tapes or seal foam to ensure the back-end connection is waterproof.

- Route the cables along the routing guide poles to form drip loops.

Pole / Corner mount
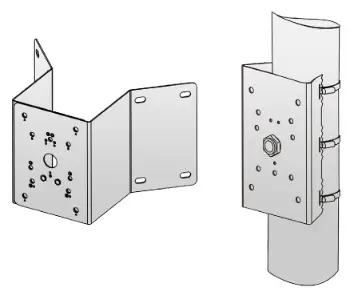
- Install the Pole bracket to the pole wrapping the metal band around the pole. Or install the Corner bracket to the corner using correct type of screw.
 Required: ACQ-WAL-MNT Wall mount bracket ACQ-POL-MNT Pole bracket or ACQ-CRN-MNT Corner bracket
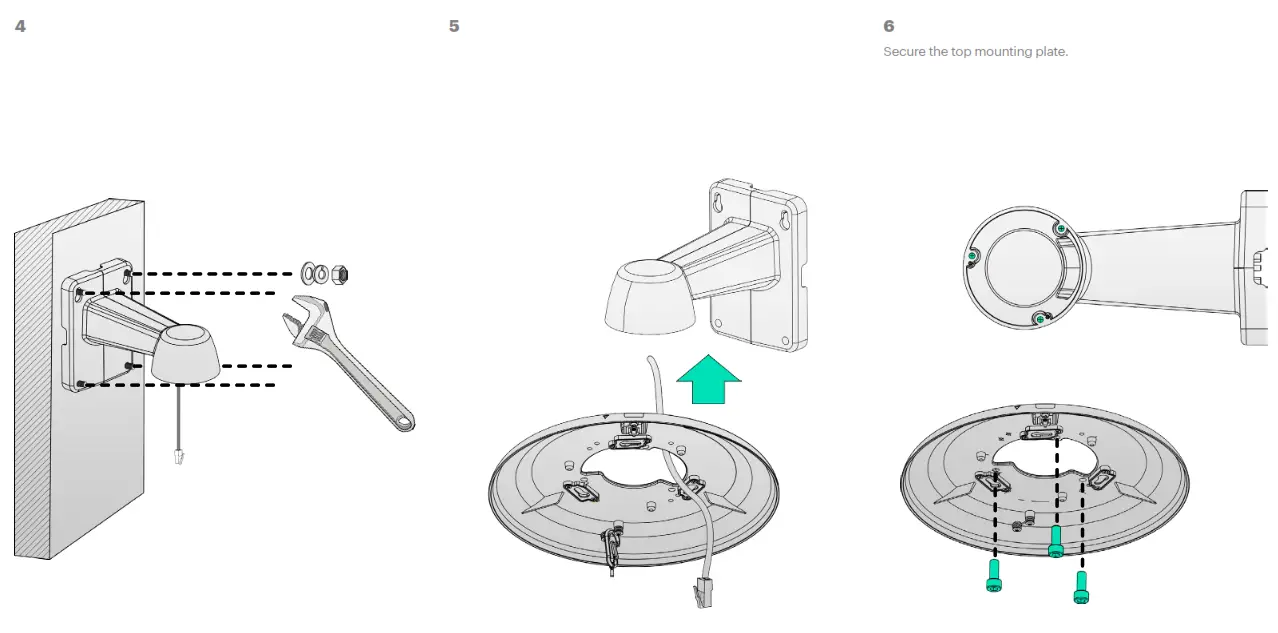
 - Install the Wall mount bracket to the Pole or Corner bracket as described on the previous page. Align the top mounting plate with the center of the Wall mount bracket.

- Secure the top mounting plate.

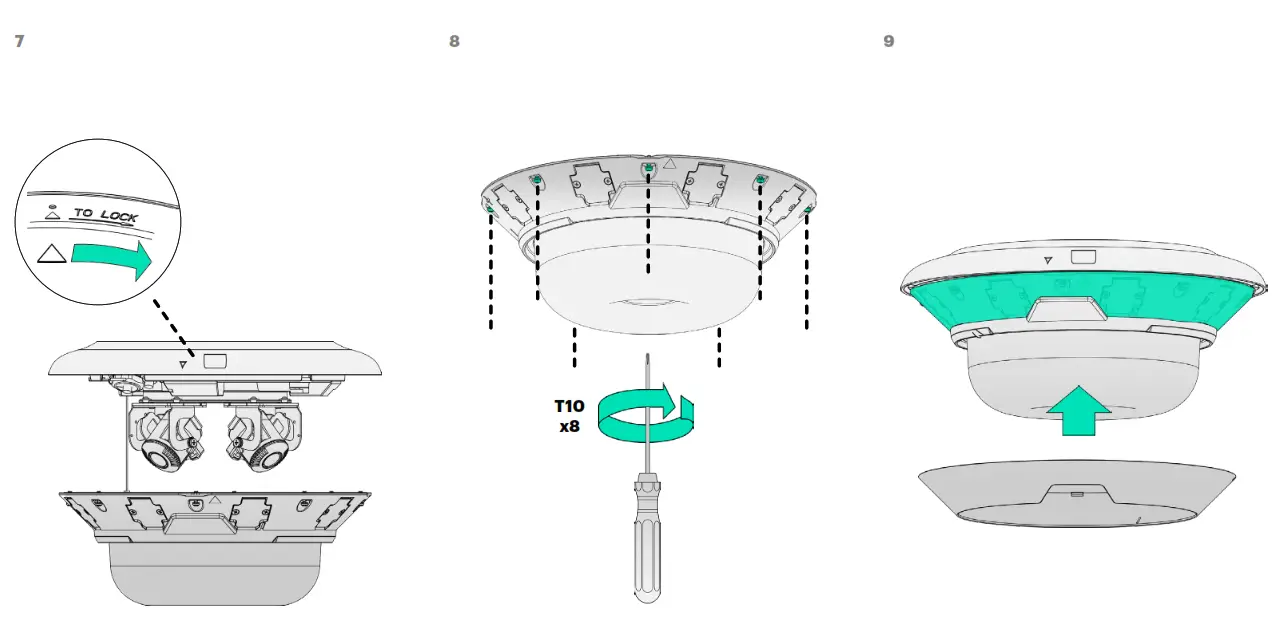
Camera mount – final installation
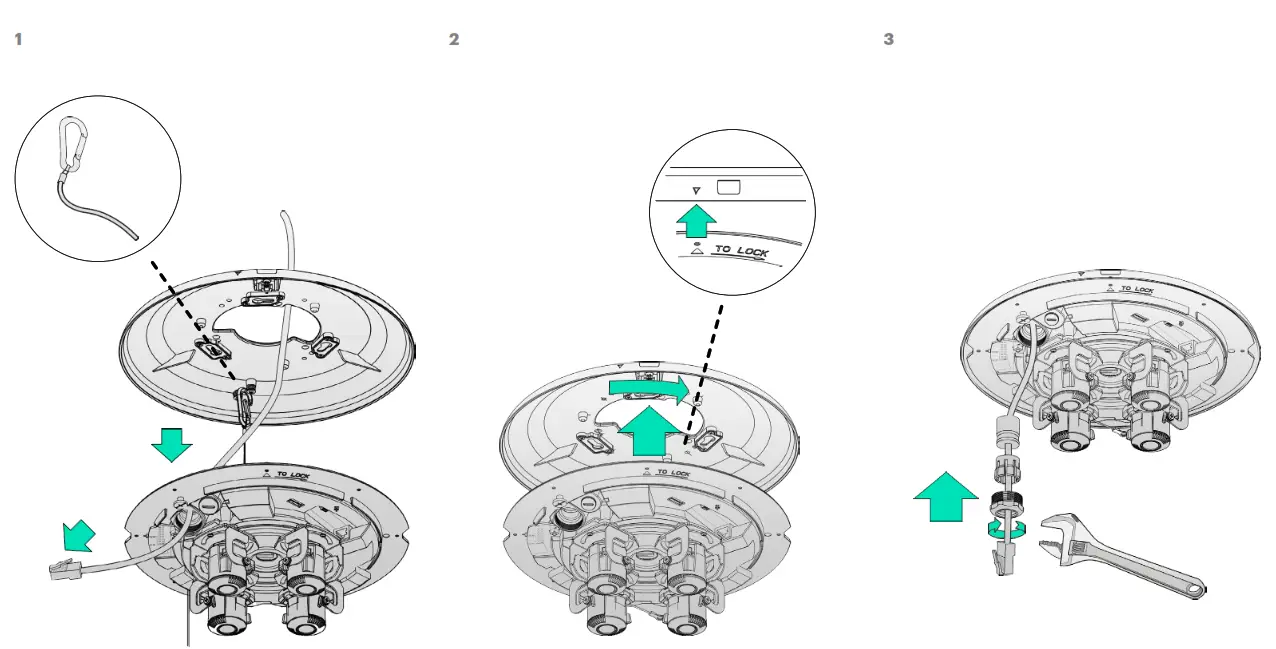 |  |
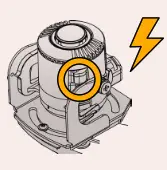
![]() Mind the electrostatic damage by avoiding contact with exposed circuitry.
Mind the electrostatic damage by avoiding contact with exposed circuitry.