![]()
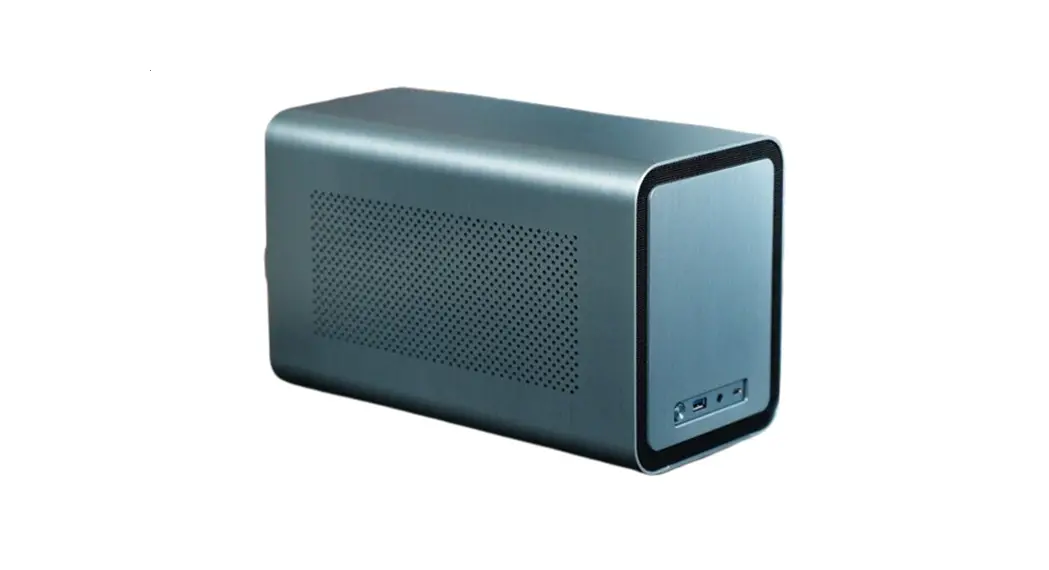
N1
Manual

Specifications
| Size | 170mm (W) * 354mm (D) « 217mm (H) |
| Drive bays | 2.5″SSD*1/3.5″HDD*5 |
| Front I/O | USB3.0 * 1+ Type-C « 1 Combined, Audio * 1 Headphonet+mic Combined |
| PSU | SFX/SFX-L (<150mm L) |
| Cooler | <70mm |
| CPU | <185mm L Low profile |
| PCI Slot | 1 |
| Fan (Pre-installed | 140mm*1 Front |
| Weight | Net: 3.8 kg |
Accessories
| A. Screws/PSU*5+MB*5
| B. Washer | C. Screw SSD |
| D. Rubber grommet | E. Scrows | F. HDD Handle |
| G. Aluminum feet | H. Cable ties |
Connectors
| USB 3.0 Connection |
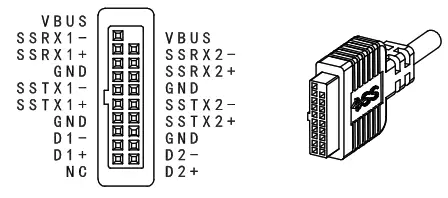 |
| Power Button Connection |
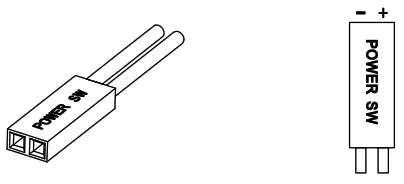 |
| HD Audio Connetion |
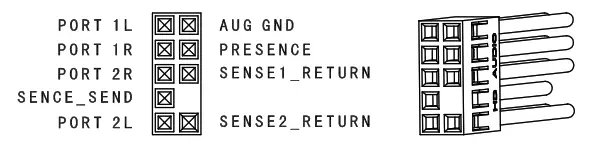 |
| Power LED Connection |
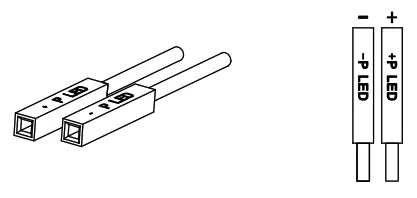 |
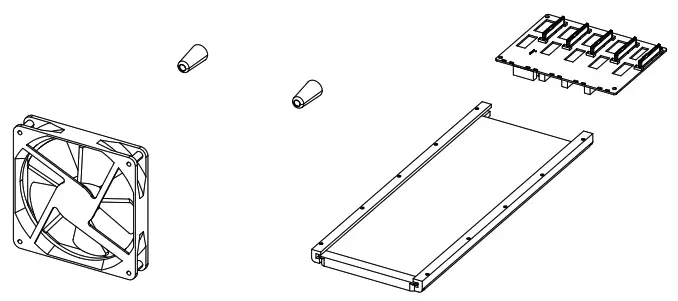
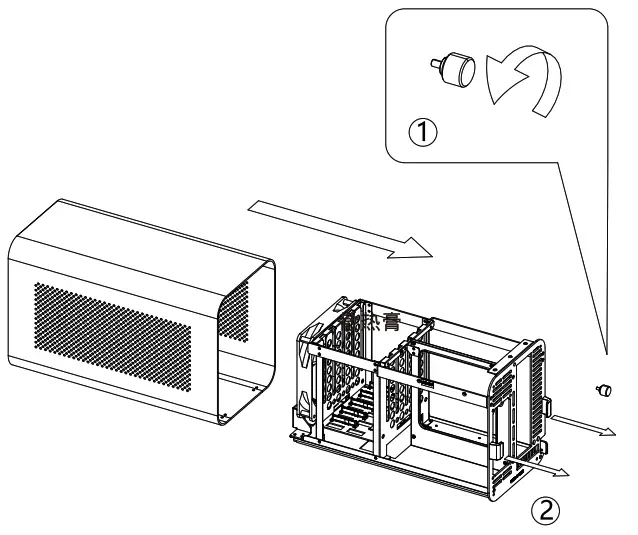
Product exploded view
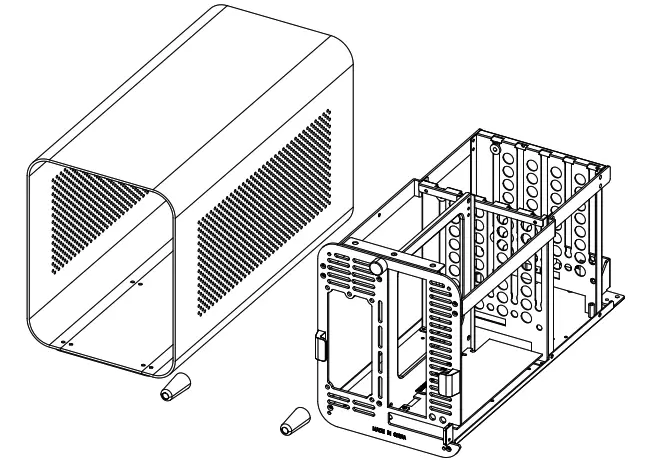
- Remove cover
 Release rear panel screws 2, Hold the handle to pull out chassis out
 - Install Motherboard
 Insert the rear IO bracket and motherboard as shown in degrame, secure with 4 screws
 - GPU/add-on card installation
 Remove PCI bracket 2, Install the card to motherboard, secure with screw
 - PSU Installation
 Insert the PSU to the case, and secure with screws
 - 3.5″ HDD Installation
 1. Pre-install the rubber grommets and HDD handle to HDD, secure with screws
2. Insert the HDD to the correspond slot - 2.5″ SSD Installation
 Insert the SSD to corresponding bracket, screw-fix it with one side
 - Cover installation
 1. After finishing hardware installation, insert the chassis into the cover
2. Secure the rear panel with screws - Vertical case stand installation
 Install the vertical case stand to the rear panel
 Release rear panel screws 2, Hold the handle to pull out chassis out
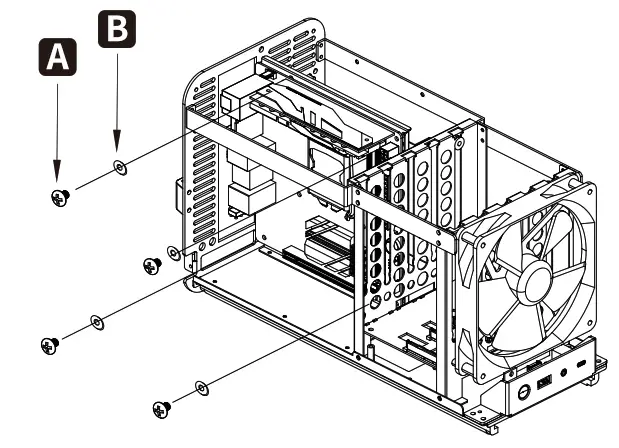 Insert the rear IO bracket and motherboard as shown in degrame, secure with 4 screws
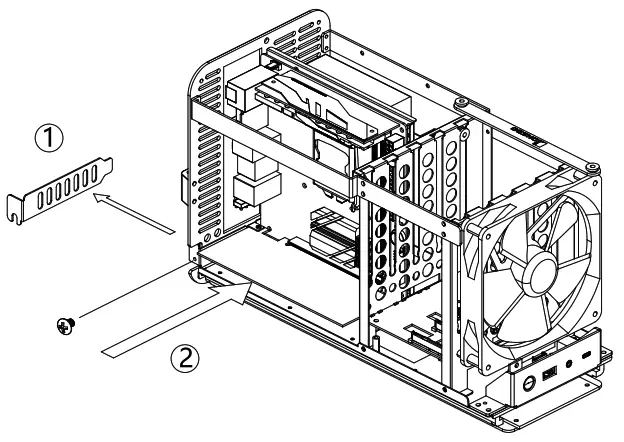 Remove PCI bracket 2, Install the card to motherboard, secure with screw
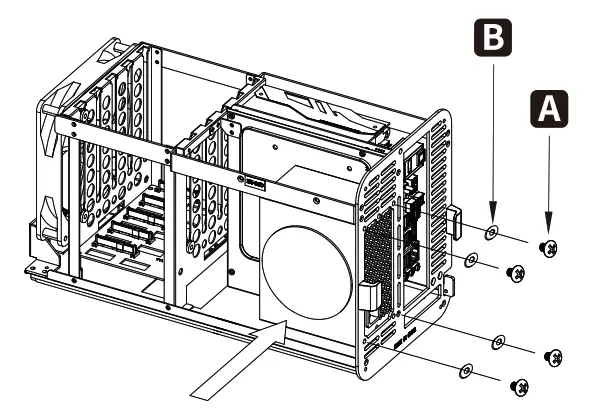 Insert the PSU to the case, and secure with screws
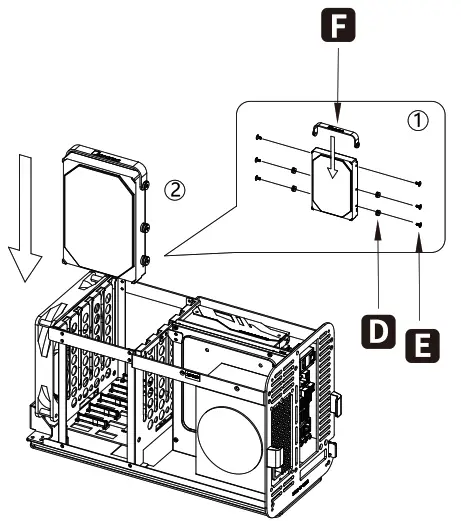 1. Pre-install the rubber grommets and HDD handle to HDD, secure with screws
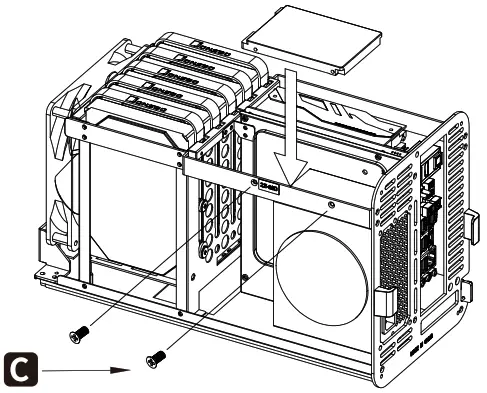 Insert the SSD to corresponding bracket, screw-fix it with one side
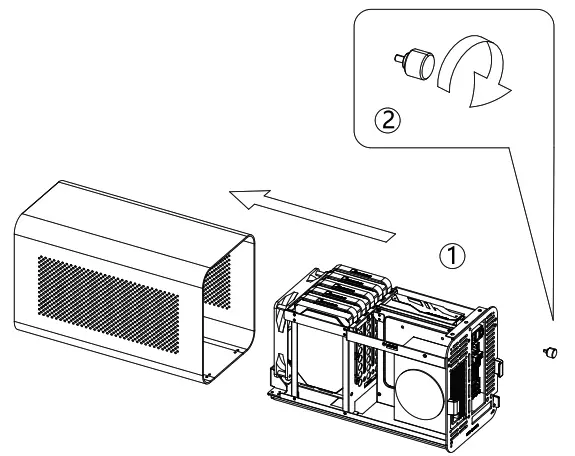 1. After finishing hardware installation, insert the chassis into the cover
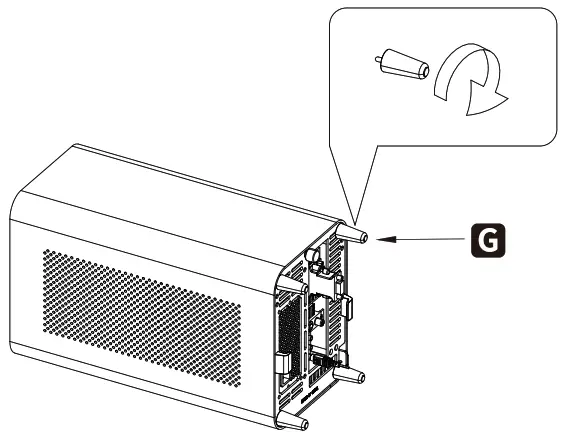 Install the vertical case stand to the rear panel


