
![]()
WIRELESS BLUETOOTH HEADSET
INSTRUCTION MANUAL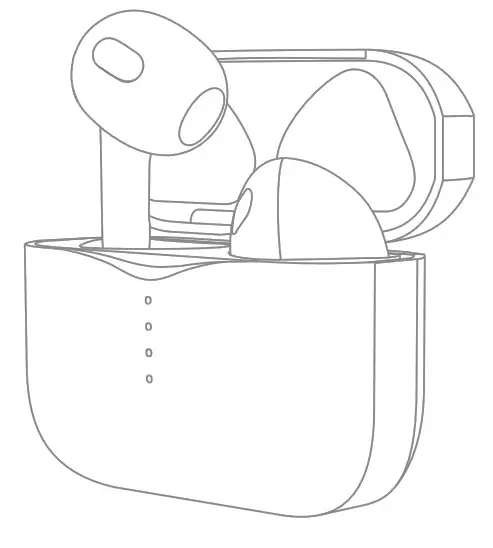
High Version
How to connect
- Please keep the distance between the Bluetooth headset and the mobile phone (or another connected device) within 1 meter. the closer the better:
- Open the lid of the charging box, the indicator light of the charging box is on. the L/R earphones are automatically paired, and the Bluetooth device is waiting to be connected;
- Turn on the users mobile phone Bluetooth function (or another Bluetooth device), search or scan, at this time the mobile phone will search for nearby Bluetooth devices, click on the searched headset name after a successful connection you can make a mobile phone call at this time Listen to the song;
- If the headset is not connected for 3 minutes, the headset will automatically shut down
Earphone operation mode (power on and pairing)
| Boot up | When the charging compartment is opened the headset automatically turns on L/R is automatically paired |
| Shut down | Put the earphone into the charging box and close the lid, wait for 2-3 seconds to automatically shut down |
| IOS system | Long press the ear handles for 2-3s to enter Sin |
| Android system | Long press the ear handles for 2.3s to enter the voice assistant |
Earphone opera ion mode (call control)
| Call answer | Press the ear bar once (L/R) on the touch area to answer the call |
| Call hang up | Press the eat bar once CUR) on the touch area to hang up the phone |
| Incoming call rejection | Press the ear bar twice (UR) on the touch area to reject the call |
Earphone operation mode (playing music)
| Play / Pause | Ear bar press 1 time (L/R) touch area |
| Previous piece | Press the ear bar 3 times in a row (L/R) touch area |
| Next track | Press the ear bar 2 times in a row (L/R) touch area |
LED status indication
| Product status | Indicator light definition |
| Charging box charging | Indicator light flashes slowly, each light indicates power: 25% 50% 75% 100% |
| Finished charging | The Indicator light is always on, indicating that the battery is 100% full |
| Four LED lights in the charging compartment | 4 Indicator light (from bottom to top) each light indicates power: 25% 50% 75% 100% |
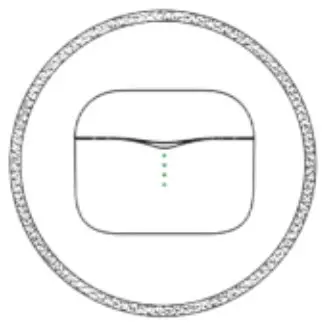
| Charging compartment to charge the headset | L/R earphone entering the warehouse contact indicator light 4 Indicator lights flashing After the L/R is put into the warehouse, the earphone will be charged in the charging compartment, and the green light will flash for 3-4 seconds and the light will be off |
| Press the charging compartment button | Display the current battery level of the charging compartment |
Charging compartment battery display
| Charging compartment power display (from top to bottom) | 4 light: indicates power: 76%-100% /less than light off |
| 3 lights: indicates power: 51%-75% / less than light off | |
| 2 lights: indicate power: 2694-50% / less than light off | |
| 1 light: indicates power: 1096-25%/need to replenish power |
Wireless charging instructions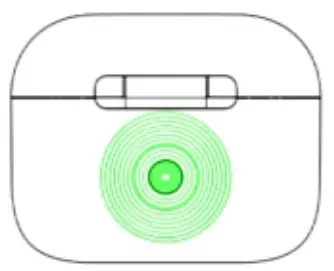 The wireless induction charging area
Please place the wireless charging receiver (the back of the charging has placed the center of the voiceless charger)
FCC Warning Statement
Changes or modifications not expressly approved by the party responsible for compliance could void the user’s authority to operate the equipment. This equipment has been tested and found to comply with the limits for a Class B digital device, pursuant to Part 15 of the FCC Rules. These limits are designed to provide reasonable protection against harmful interference in a residential installation. This equipment generates uses and can radiate radio frequency energy and, if not installed and used In accordance with the instructions, may cause harmful interference to radio communications. However, there is no guarantee that interference will not occur in a particular installation. If this equipment does cause harmful interference to radio or television reception, which can be determined by turning the equipment off and on, the user is encouraged to try to correct the interference by one or more of the following measures:
– Reorient or relocate the receiving antenna.
– Increase the separation between the equipment and receiver.
– Connect the equipment into an outlet on a circuit different from that to which the receiver is connected.
– Consult the dealer or an experienced radio/TV technician for help.
This device complies with part 15 of the FCC Rules. Operation is subject to the following two conditions: (1) This device may not cause harmful interference, and (2) this device must accept any interference received, including interference that may cause undesired operation.
The device has been evaluated to meet general RF exposure requirements.


