![]()
![]() Quick Start Guide
Quick Start Guide
Outdoor Pan/Tilt Home Security
Wi-Fi Camera
Tapo C500 Outdoor Pan-Tilt Home Security Wi-Fi Camera
![]() Setup Video
Setup Video
Scan QR code or visit https://www.tp-link.com/support/setup-video/#cloud-cameras
 https://www.tp-link.com/support/setup-video/#cloud-cameras
7106510378 REV1.2.0
*Images may differ from actual products.
Set Up Your Camera
STEP 1
DOWNLOAD APP
Get the Tapo app from the App Store or Google Play.
 Scan to download
https://www.tapo.com/app/download-app/![]()
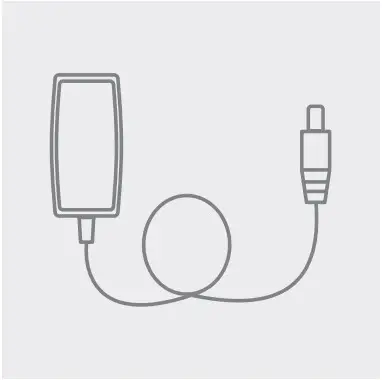
STEP 2
POWER UP
Plug in the adapter to power up your camera.
STEP 3
SET UP
Tap the![]() button in the app and select your model.
button in the app and select your model.
Follow the app instructions to complete setup.

Mount Your Camera
![]() The camera is not waterproof when set on a table or shelf.
The camera is not waterproof when set on a table or shelf.
Mount the camera via Option 1, 2 or 3 when installing outdoors.
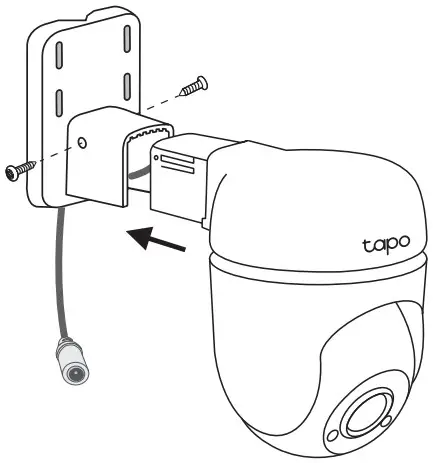
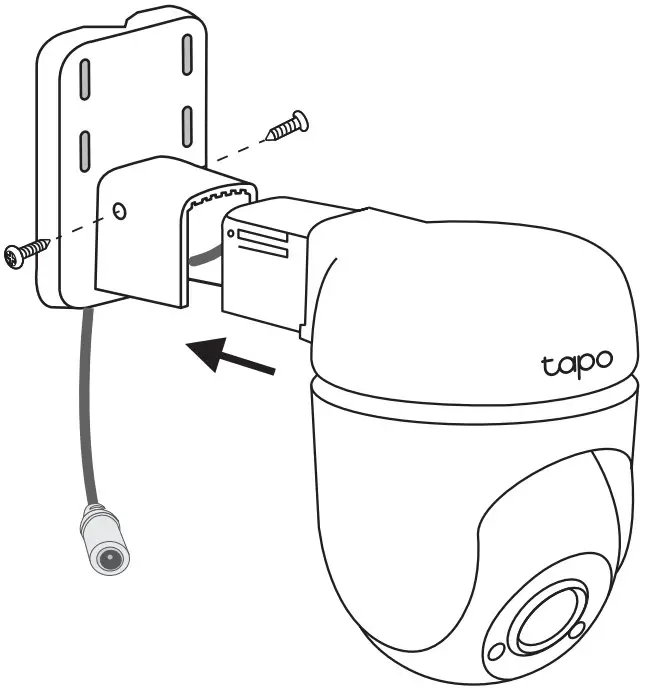
Option 1: Wall Mount
- Affix the Camera and Bracket
Route the camera power cord through the opening of the bracket. Use two bracket screws to affix the bracket and the camera.
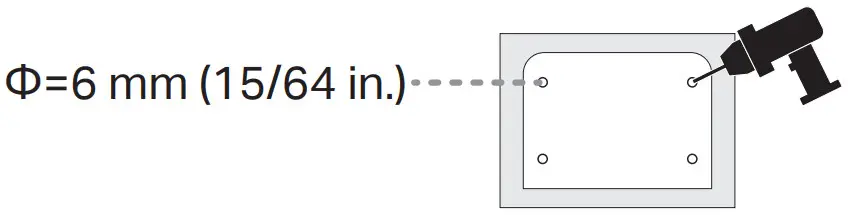
- Drill Holes
Stick the mounting template to the desired mounting place. Drill four screw holes according to the template.
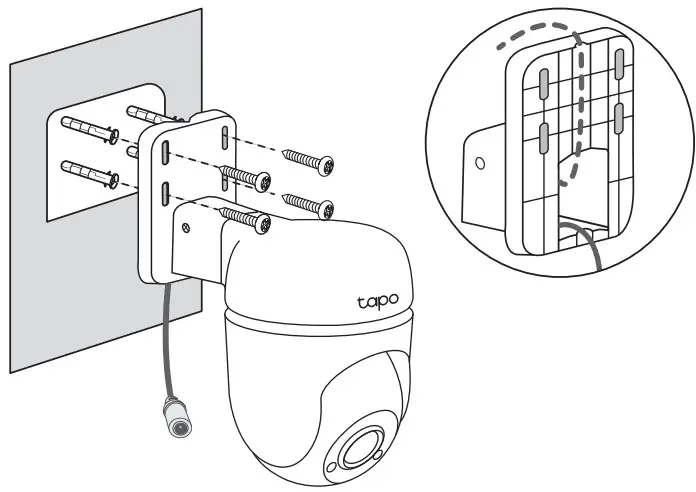
- Mount the Camera
Insert four mounting anchors into the holes, then use the mounting screws to affix the camera and bracket over the anchors.
- Connect to Power
Connect the camera to a power outlet using the provided power adapter. Install the waterproof seal for the power connectors.

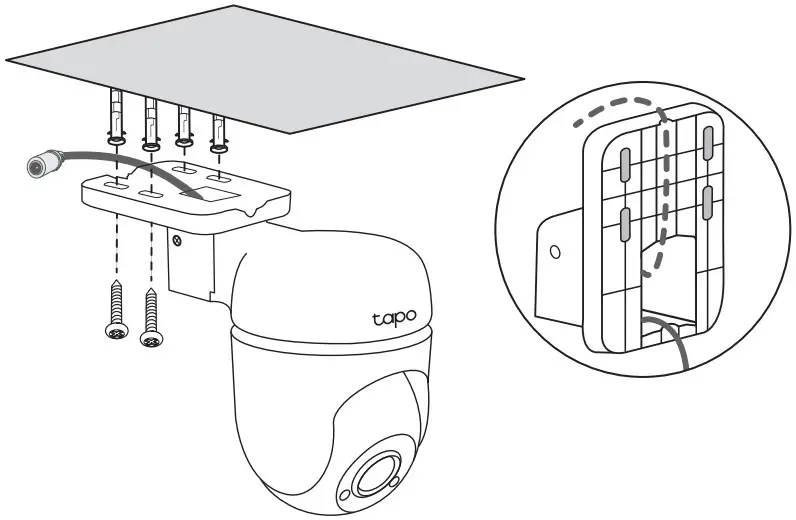
Option 2: Overhang Mount
- Affix the Camera and Bracket
Route the camera power cord through the opening of the bracket. Use two bracket screws to affix the bracket and the camera.
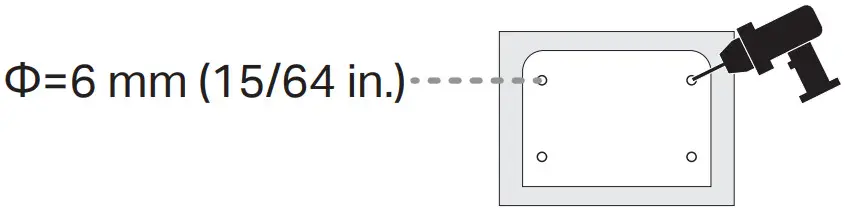
- Drill Holes
Stick the mounting template to the desired mounting place. Drill four screw holes according to the template.
- Mount the Camera
Insert four mounting anchors into the holes, then use the mounting screws to affix the camera and bracket over the anchors.
- Connect to Power
Connect the camera to a power outlet using the provided power adapter. Install the waterproof seal for the power connectors.


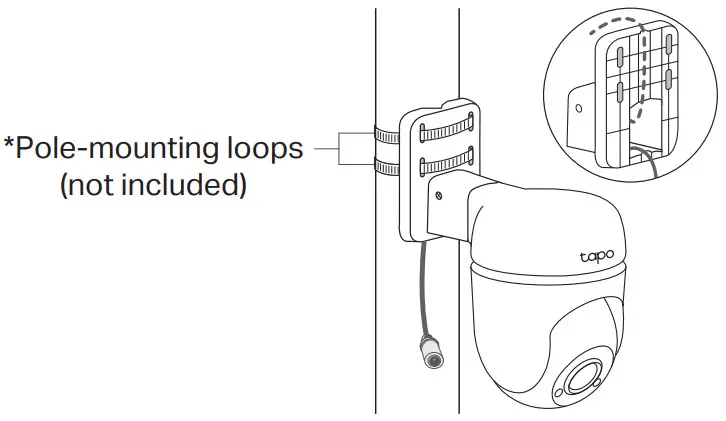
Option 3: Pole Mount
- Affix the Camera and Bracket
Route the camera power cord through the opening of the bracket. Use two bracket screws to affix the bracket and the camera.
- Mount the Camera
Mount the camera on the pole using two pole-mounting loops* (loop width ≤ 12mm).
- Connect to Power
Connect the camera to a power outlet using the provided power adapter. Install the waterproof seal for the power connectors.

Appearance
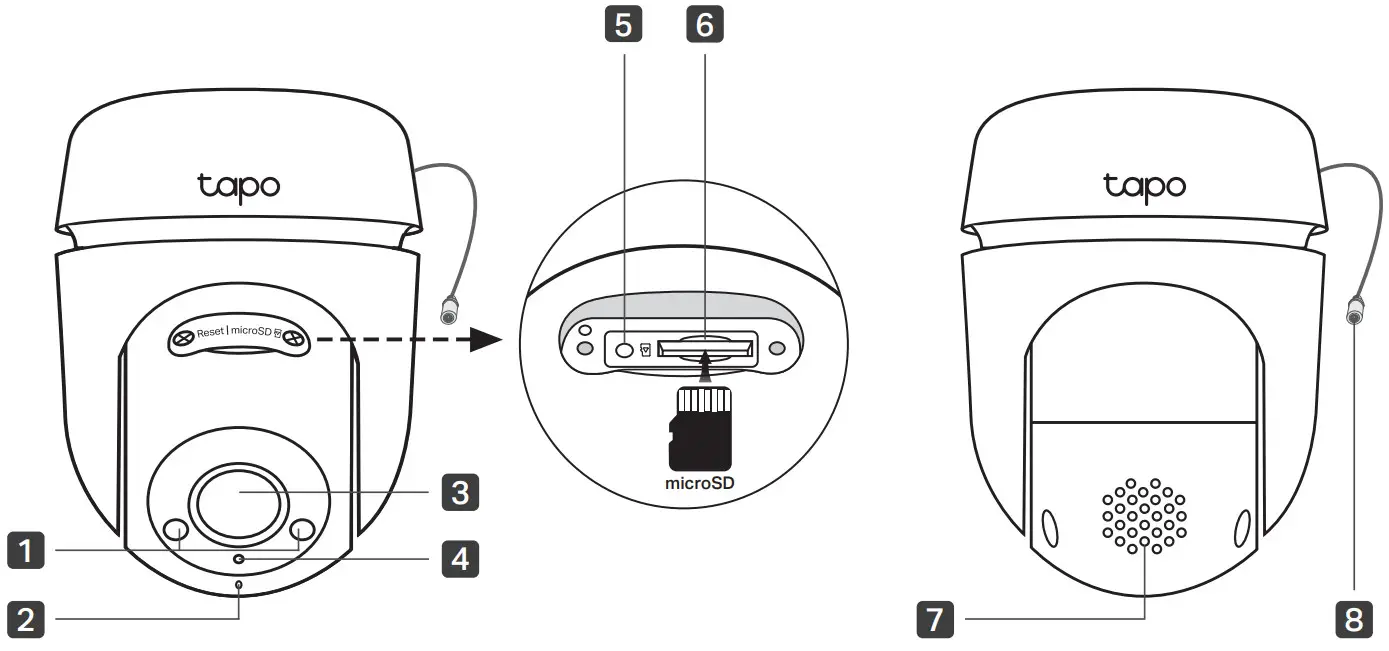
- White Light LEDs
- Microphone
- Lens
- System LED
- Reset
- microSD Card Slot
- Speaker
- DC Power Connector
Reset Button
Loosen the screws. While the camera is powered on, use a pin to press and hold the RESET button for at least 5 seconds until the System LED blinks red. The camera will reset and reboot.
microSD Card Slot
Loosen the screws and insert a microSD card*.
Initialize it on the Tapo app for local recording.
*microSD card not included.
DC Power Connector
Used to connect to a 12V DC power adapter
System LED Indication
| Solid red | Starting up |
| Blinking red and green | Ready for setup |
| Blinking red slowly | Connecting to Wi-Fi |
| Solid amber | Connected to Wi-Fi |
| Solid green | Connected to the cloud |
| Blinking red quickly | Camera resetting |
| Blinking green quickly | Camera updating |
Safety Information
- Do not use damaged charger or USB cable to charge the device.
- Do not use any other chargers than those recommended.
- Do not use the device where wireless devices are not allowed.
- Adapter shall be easily accessible.
- Use only power supplies which are provided by manufacturer and in the original packing of this product. If you have any questions, please don’t hesitate to contact us.
- Keep the device away from fire or hot environments. DO NOT immerse in water or any other liquid.
- Do not disassemble, repair or modify the product.
- Do not use the product if the casing has been broken. Danger of electric shock.
- Never touch the product with wet hands.
- Do not place near automatically controlled devices such as fire alarms. Radio waves emitted from this product may cause such devices to malfunction resulting in an accident.
- Observe restrictions on using wireless products in fuel depots, chemical plants or when blasting operations are in progress.
- Do not use liquid to clean the product. Only use a dry cloth.
- Never put metal objects inside the product. If a metal object enters the product turn off the circuit breaker and contact an authorised electrician.
- This product is not intended to be used when providing medical care. Consult the manufacturer of any personal medical devices, such as pacemakers or hearing aids to determine if they are adequality shielded from external RF (radio frequency) energy.
- Do not use this product in health care facilities. Hospitals or health care facilities may be using equipment that could be sensitive to external RF energy.
- Do not place heavy objects on top of the product.
- When you leave the product unused for a long time unplug the product from the power outlet.
- This product may interfere with other electronic products such as TV, radios, personal computers, phones or other wireless devices.
- Adapter should be used indoors where the ambient temperature is lower than or equal to 40ºC.
- Operating Temperature: -30 ºC ~ 60 ºC (-22°F ~ 140°F )
Please read and follow the above safety information when operating the device. We cannot guarantee that no accidents or damage will occur due to improper use of the device. Please use this product with care and operate at your own risk.
TP-Link hereby declares that the device is in compliance with the essential requirements and other relevant provisions of directives 2014/53/EU, 2009/125/EC, 2011/65/EU and (EU)2015/863. The original EU declaration of conformity may be found at https://www.tapo.com/support/ce
TP-Link hereby declares that the device is in compliance with the essential requirements and other relevant provisions of the Radio Equipment Regulations 2017. The original UK declaration of conformity may be found at https://www.tapo.com/support/ukca/
![]() Visit www.tapo.com/support
Visit www.tapo.com/support
for technical support, user guides,
and more information https://www.tapo.com/support/
![]() ©2023 TP-Link
©2023 TP-Link


