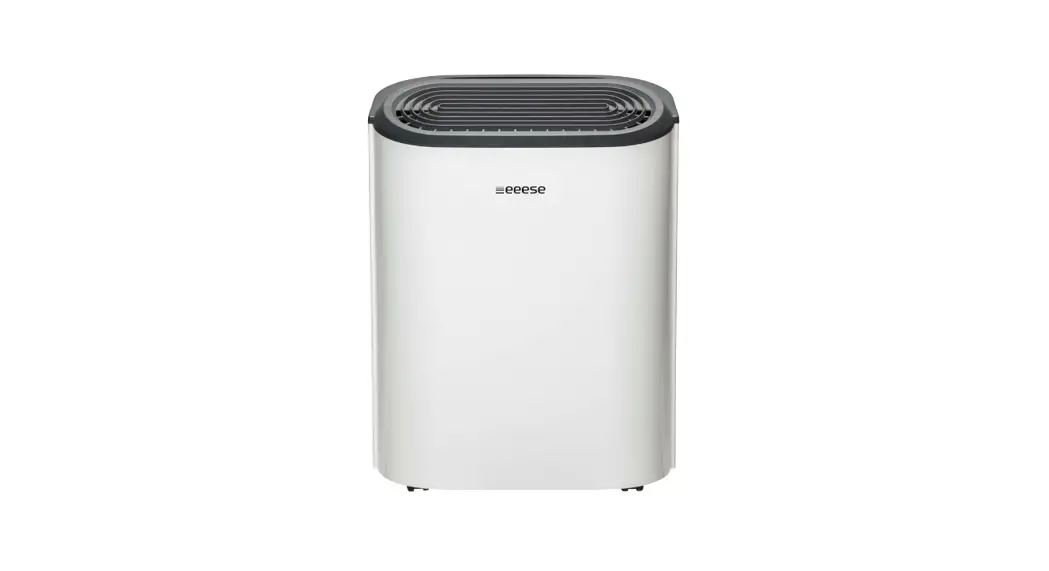
![]() 2505 Dehumidifier Valdemar
2505 Dehumidifier Valdemar
User Manual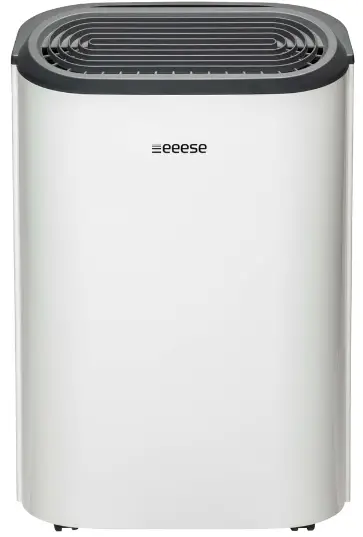 User manual
Dehumidifier Valdemar
Art. 2505
2505 Dehumidifier Valdemar
Thank you for choosing this product.
Please read this instruction manual before using it.
eeese air care
[email protected]
Web: eeese-air-care.com
MV-2505-11-2021
| Read the user manual before any use, refer to the corresponding section in this user manual. | |
| Recycle unwanted materials instead of disposing of them. All appliances and packaging should be sorted and tendered at a regional recycling centre and be processed in an ecological manner. | |
| The product conforms to the applicable European and other directives. | |
| This unit uses a flammable refrigerant. If refrigerant leaks and comes in contact with fire or heating part, it will create harmful gas and there is risk of fire. |
Safety Instructions
Warning
This appliance is intended for use in a domestic environment only. Any other use is not recommended by the manufacturer and may cause fire, electrical shocks or other person injury and property damage.![]() Power Cord
Power Cord
Do not pull the power cord in order to unplug the device from the socket.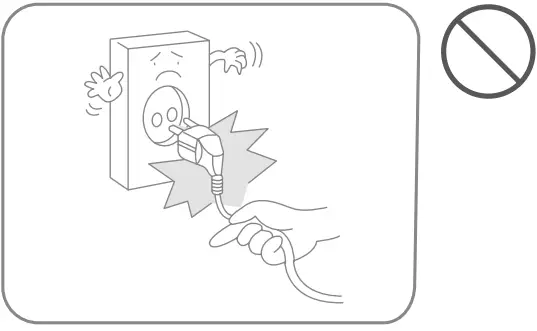 Do not put any heavy objects on the power cord in order o avoid safety hazard.
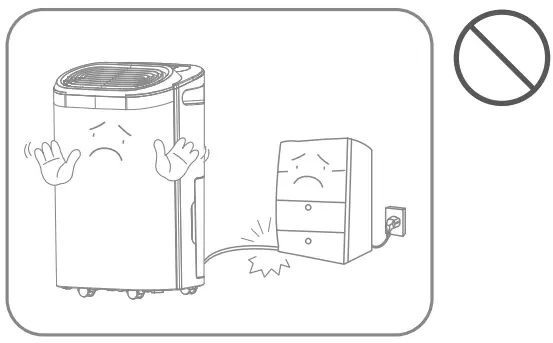 Do not attempt to change the power cord, contact the authorized service centre for repair.
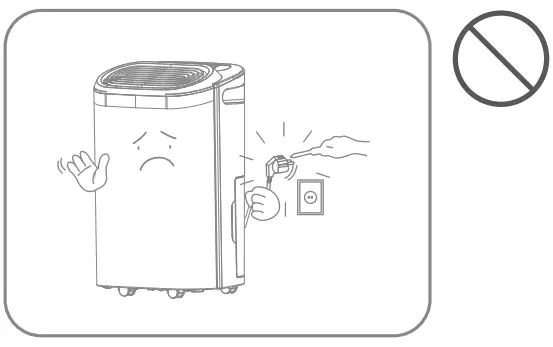 The socket has to be earthed and appropriately secured.
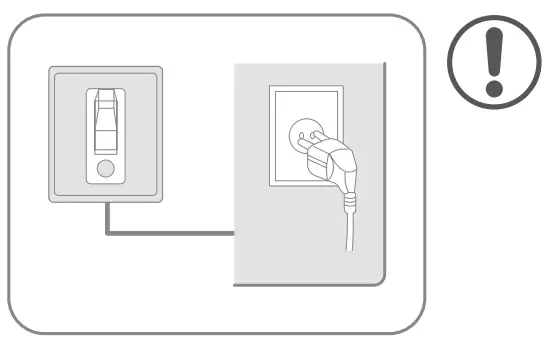 Do not use the appliance in overloaded extension cord.
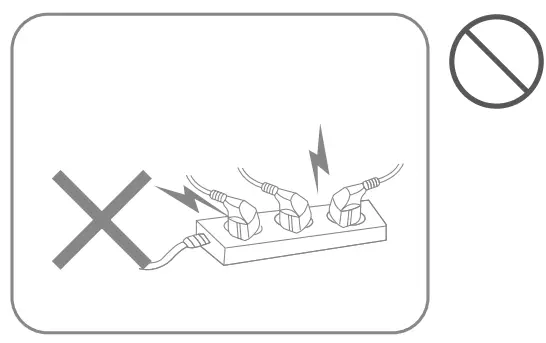
Do not use the appliance if its socket holes cannot firmly hold a plug.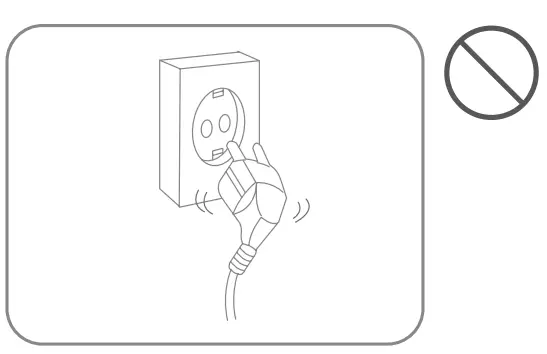
Do not touch the plug with wet hands in order to avoid electric shock.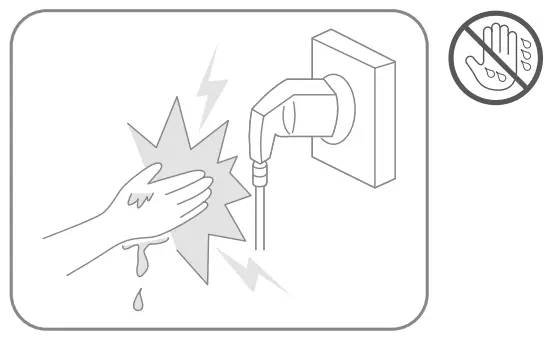
Please pull out the plug during lightning storms. Placement
Do not put flammable and explosive objects around the appliance in order to avoid fire.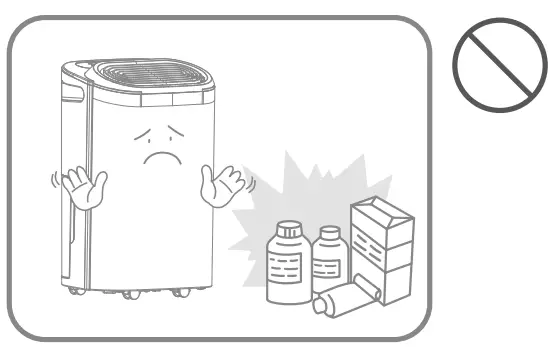 Do not use the appliance in a draughty place.
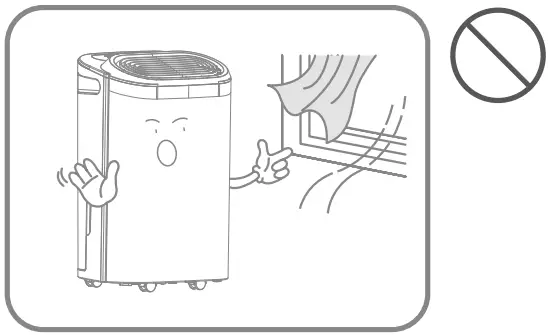 Do not use the appliance in swimming pool or similar facilities in order to avoid safety hazard.
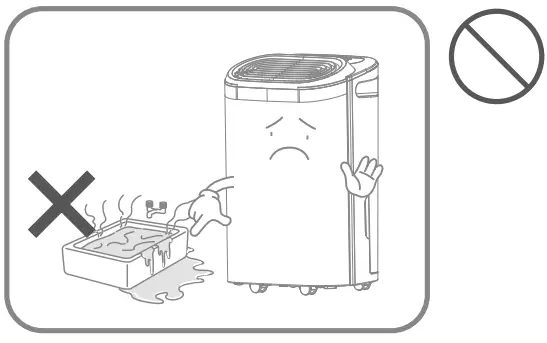 Place the appliance on a stable, flat surface.
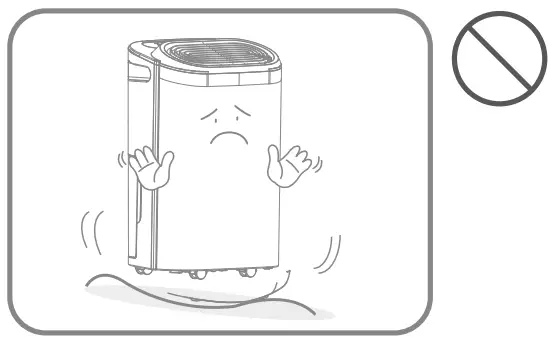 During Use
Please turn off the power and unplug the power cord before moving it.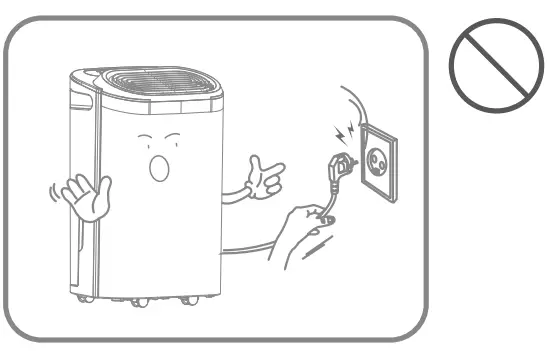 Children should be supervised to ensure that they do not place stick into the appliance.
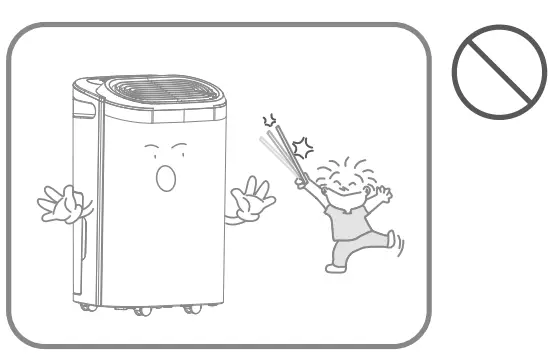 Do not push the appliance over or let the appliance suffer strong impact in order to avoid malfunction.
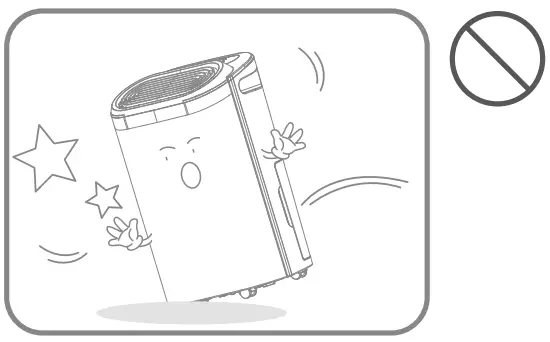 Do not put hands on the air outlet in order to avoid injury or malfunction.
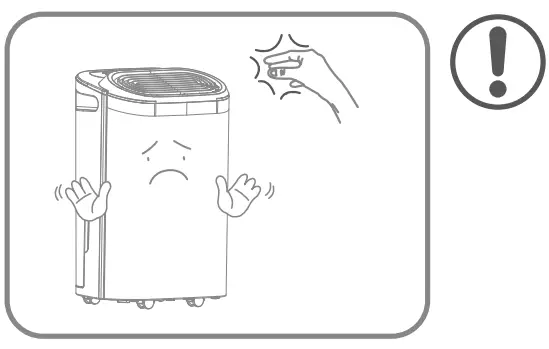 Do not pour water into the appliance in order to avoid malfunction.
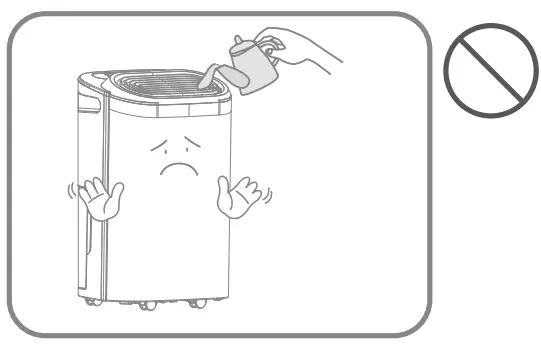 Do not put any heavy objects on the appliance in order to avoid malfunction.
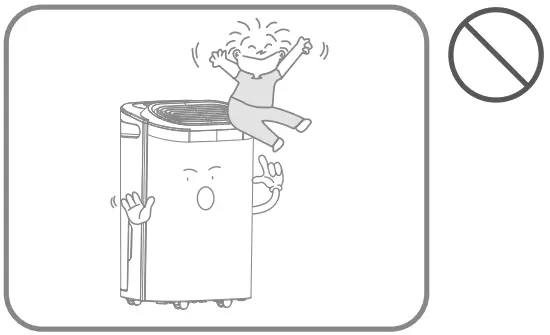 The appliance must not be covered when being used.
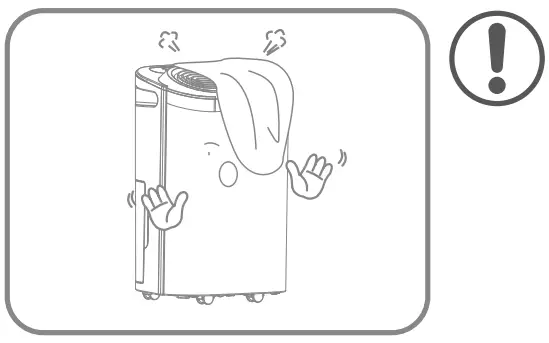
Parts List
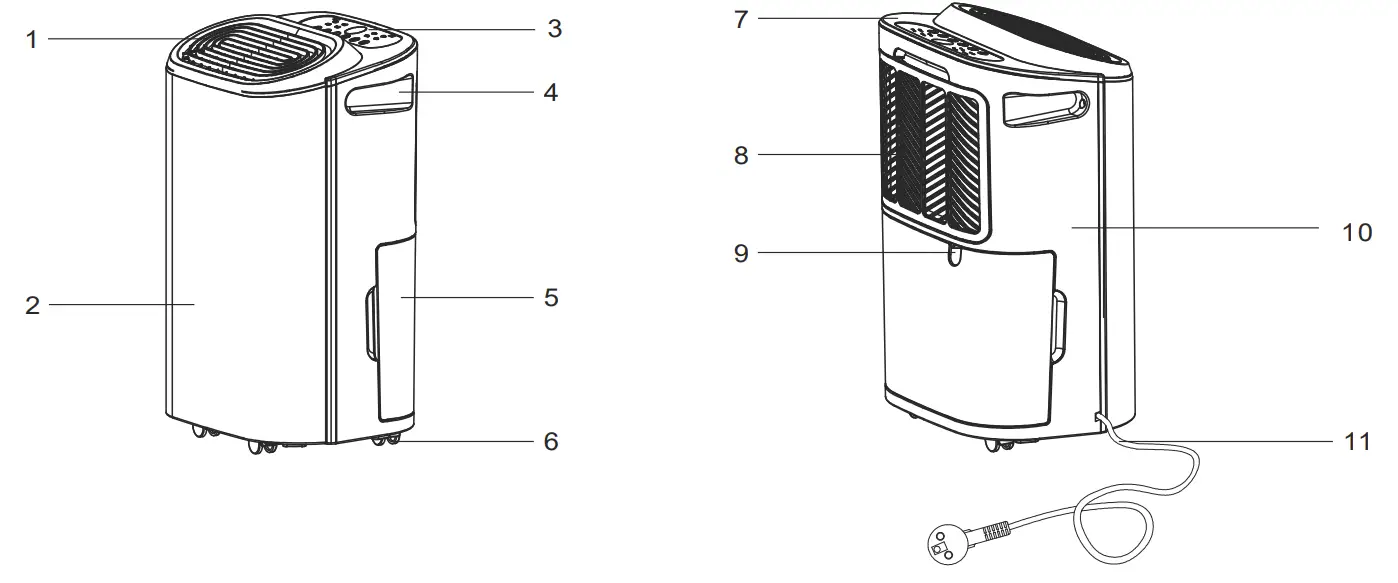
Components
| 1. Air Outlet 2. Front Cover 3. Control Panel 4. Handle 5. Water Tank 6. Casters | 7. Top Cover 8. Air Inlet Grille 9. Drainage Outlet 10. Rear Cover 11. Power Cord |
Control panel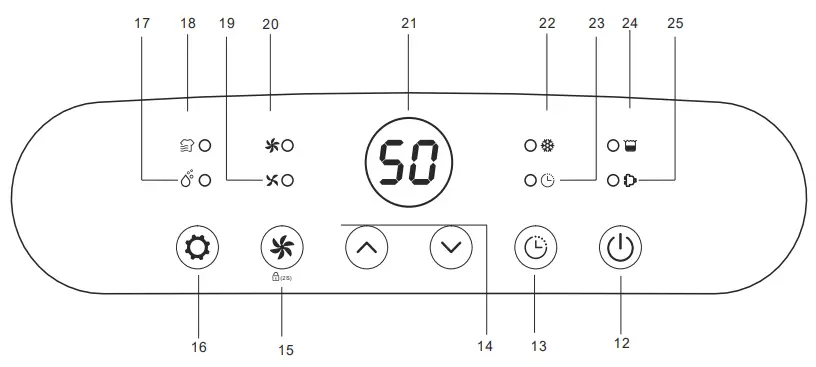
| 12. Power button 13. Timer Off button 14. Up and Down Buttons 15. Fan speed button/Child lock button 16. Mode button 17. Manual Indicator 18. Laundry drying Indicator | 19. Low Fan Speed Indicator 20. High Fan Speed Indicator 21. Humidity Reading Display 22. Defrost Indicator 23. Timer Indicator 24. Tank Full Indicator 25. On/Off Indicator |
Drainage
26. Drainage outlet
27. Drainage pipe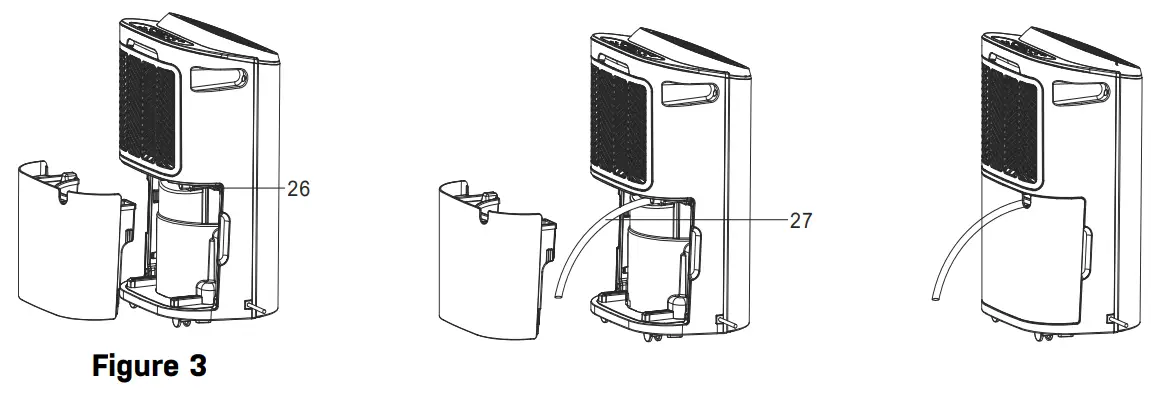
Prior to Operation
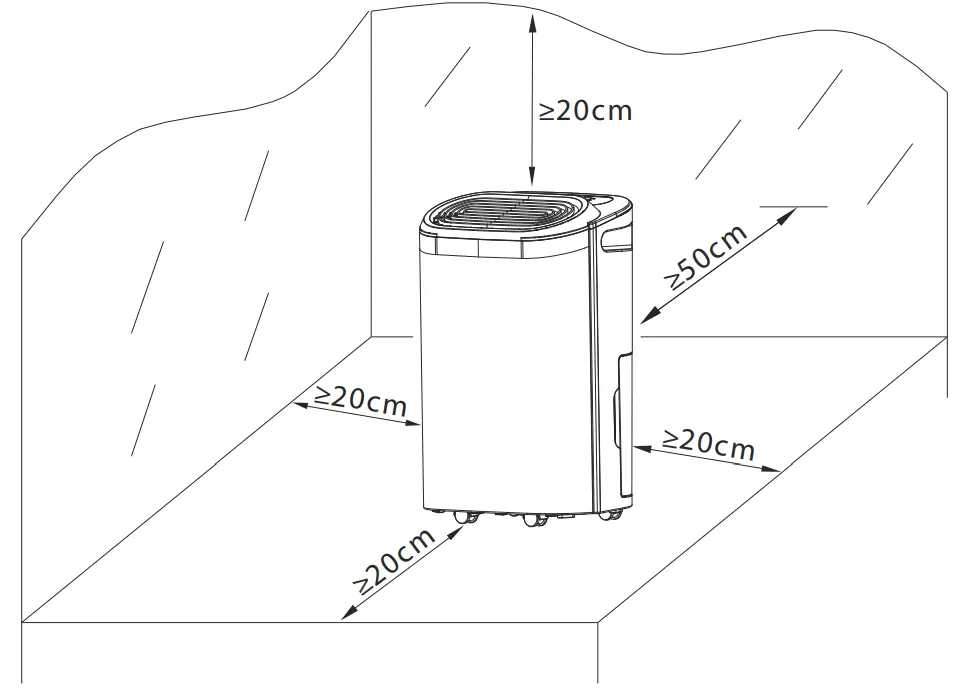
- Place the dehumidifier in an upright position on a stable, flat surface.
- Ensure the dehumidifier is at a safe distance at least 50 cm away from a wall or furniture.
- Supply power should be in correspondence with the value on the nameplate, power outlet needs to be grounded.
- Ensure the tank is correctly fitted, if the tank is full or not in place, the tank full light comes on and the dehumidifier will stop working.
- Turn on the power and run the machine as per instructions below.
Continuous Drainage
In general, water will be collected by tank, if you want continuous drainage, please do steps as follows (refer to figure 3)
a. Remove the water tank.
b. Mount a drainage hose (14mm inner diameter) to the drainage outlet.
c. Put the water tank back in place.![]() Please always make sure the hose is going downhill, and is not blocked or kinked.
Please always make sure the hose is going downhill, and is not blocked or kinked.
Operation Instructions
Switch On / Switch Off The Unit [ Power button ]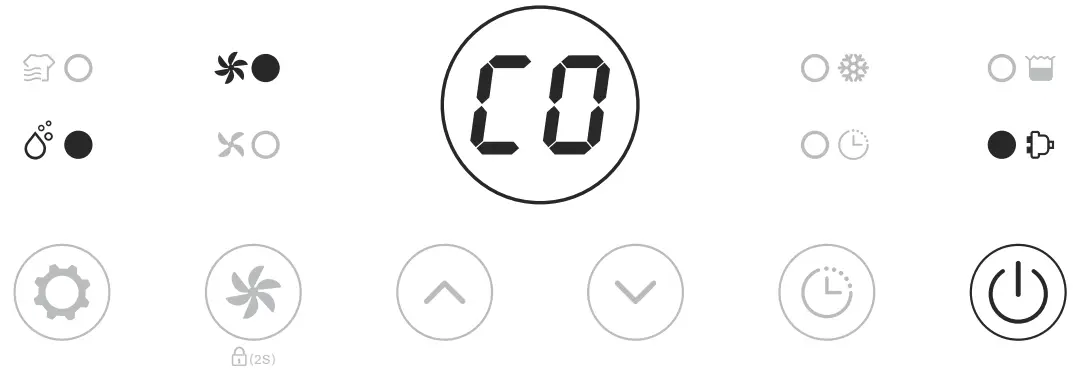 Connect to the power supply and press the power button once to turn on the unit.
By default mode the unit runs on manual continuous dehumidifying with high fan speed.
The on/off indicator will be on.![]() Press the power button to turn off the unit, it will stop working, fan will work for some seconds to blow out the hot air inside the unit.
Press the power button to turn off the unit, it will stop working, fan will work for some seconds to blow out the hot air inside the unit.
When the machine is in standby mode, the on/off inicator will flash slowly.
Auto Shut-off Timer Function [ Timer button ]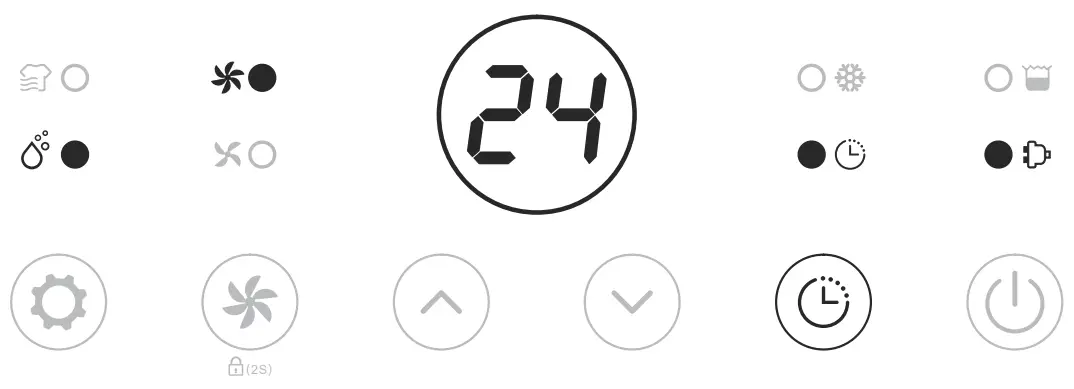 At working mode, press the timer button to select your preffered timer hour from 00-24 for automatic switch off.
At standby mode, press the timer button to select your preffered timer hour from 00-24 for automatic switch on.![]() Auto timer off setting will be cancelled if the timer button is pressed 2 times in 3 seconds.
Auto timer off setting will be cancelled if the timer button is pressed 2 times in 3 seconds.
Auto timer off setting will be cancelled if the unit is switched off and switch on again.
Auto timer on setting will be canceled if the unit is switched on by manual.
Humidity Setting [ Up and Down buttons ]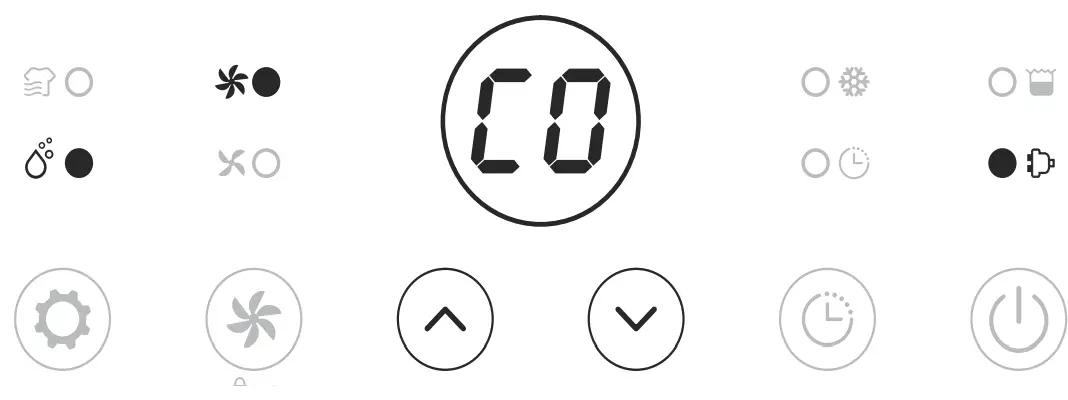 Press the up/down buttons to select your preferred humidity from CO-30%-35%-40%45%-50%-55%-60%-65%-70%-75%-80%-CO. CO means continuous dehumidifying
regardless of ambient humidity.
Fan Speed Option [ Fan Speed button ]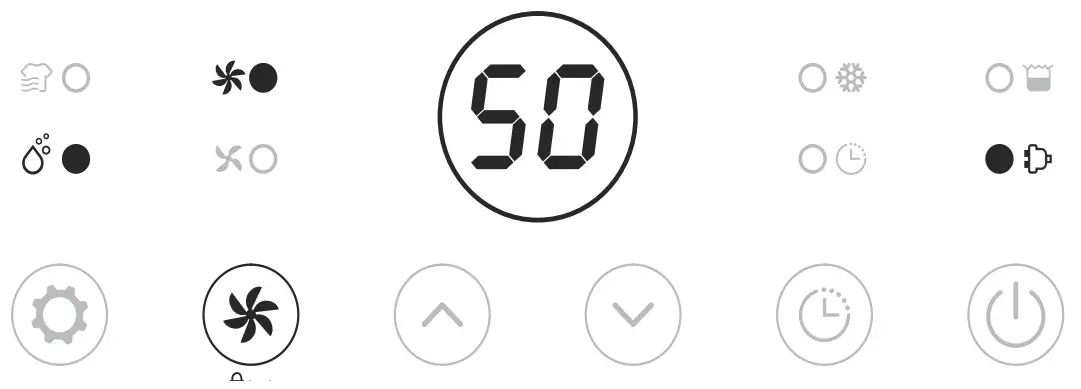 Press the fan speed button to select your preferred fan speed setting of low and high to meet the different usage requirements.
![]() Fan speed button is invalid at Laundry drying mode and Defrost mode.
Fan speed button is invalid at Laundry drying mode and Defrost mode.
Multifunction Optional [ Mode button ]
Laundry Drying Mode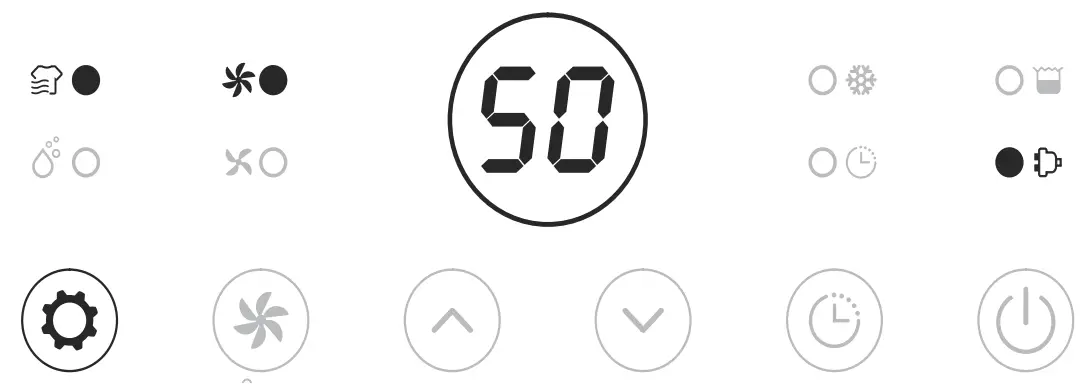 Press the mode button once to select Laundry Drying mode. The unit runs in continuous dehumidification with high fan speed for 6 hours then switch off automatically.
Manual Mode
Press the button 2 times to select Manual mode. The unit runs by default continuous dehumidifying with high fan speed.![]() At manual mode all buttons are valid.
At manual mode all buttons are valid.
Safety Childlock Function [ Fan Speed button-2 seconds ]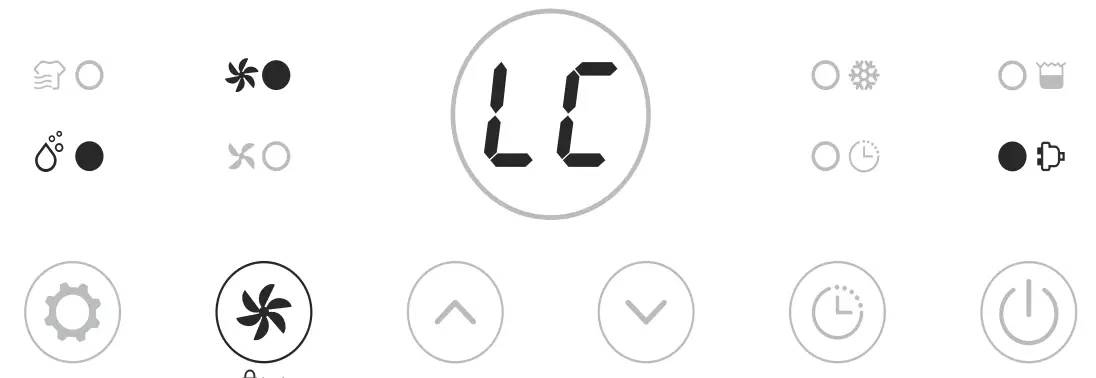
Press the Fan speed button for 2s to lock all buttons with a beeping sound, the same operation can unlock it.![]() Safety childlock function can be set at standby mode and working mode but can’t be activated when water tank is full.
Safety childlock function can be set at standby mode and working mode but can’t be activated when water tank is full.
Low Temperature Defrost Indicator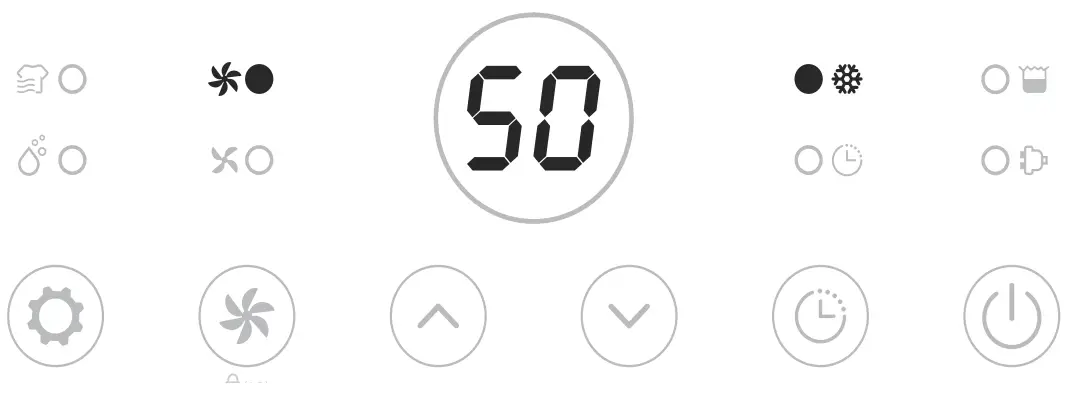 When the ambient temperature is too low, the dehumidifier will enter into defrost mode, the unit runs with high fan speed without dehumidifying.
Auto Shut off with Water Tank Full Indicator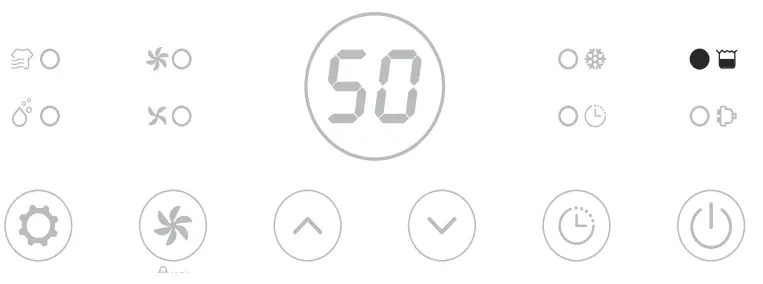 The unit will enter into standby mode when the water tank is full or when the water tank is not installed properly. After emptying the tank, or installing the water tank properly, the unit will go on to the previous mode.
![]() Except for the power button, all other buttons are invalid.
Except for the power button, all other buttons are invalid.
Memory Function:
A) Dehumidifier and timer settings are retained:
When the power plug is disconnected and reconnected, or when the power returns after a power cut.
B) The dehumidifier setting is retained, but the timer setting is cancelled: When the dehumidifier is switched off and on with the on/off button.
C) Dehumidifier and timer will return to factory settings:
When the dehumidifier is switched off with the on/off button and the plug is pulled out. And then switched on again.
Cleaning
When used regularly, the filter may become clogged with dust and particles. Therefore the filter should be cleaned at least every two weeks.
Follow these steps:
1 Switch the device off and remove the plug from the socket before cleaning. Clean the housing with soft, dry cloth. If the device is extremely dirty, use a mild cleaning agent. Wipe the dehumidifier with a slightly damp cloth. Never spray the device with water.
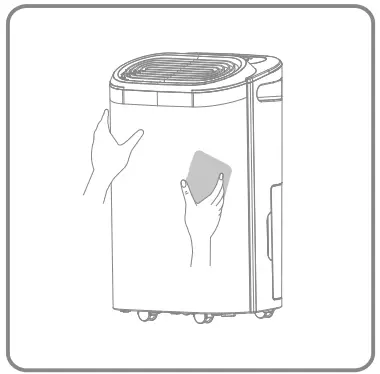 3. Remove the filter, clean the filter with a vacuum cleaner or soapy water no hotter than 40℃.
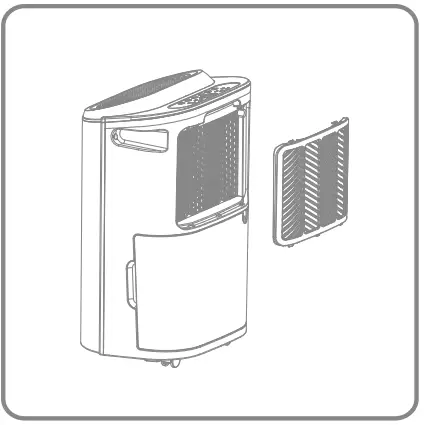 Rinse and dry the filter completely before installing back to the device.
Storage
If the dehumidifier will not be used for a long period of time, take the following steps:
- Remove the plug from the socket and empty the tank, make sure the tank and the dehumidifier is completely dry. This may take a couple of days.
- Clean the air filter.
- Check the dehumidifier for perfect condition to ensure a safe use of it after a long period of storage.
- Pack the device with the suitable packaging.
- Store the dehumidifier in a dust-free location, and out of direct sunlight. Preferably covered with a sheet of plastic.
Display Error Codes
Please contact your local distributor if any of the error codes below appears.
| Display Code | El | E2 |
| Error | Temperature sensor error | Humidity sensor error |
| Display | Flash every 30 seconds | Flash every 30 seconds |
| What is happening | Device still dehumidifies is in defrost mode only. | Device still dehumidifies but is in continuous dehumidifying midifying mode only |
Trouble Shooting
Check the following before contacting technical support .
| PROBLEM | POSSIBLE CAUSE | SOLUTION |
| The device does not work | The power is not connected | Insert the plug into the wall outlet |
| The water tank is full | Empty the tank | |
| The tank has not been replaced correctly | Replace the tank | |
| Water removal ca-pacity is too low | Runtime is too short | Be patient and wait |
| Ambient temperature or humidi- ty is too low | It is normal that the device does not dehumidify in these conditions | |
| The device works, but reduces the relative humidity insufficiently | The room is too big | We recommend using a dehumidifier with a greater capacity |
| There is too much ventilation | Reduce ventilation (e.g. close windows and shut doors) | |
| The air filter is clogged | Clean the air filter | |
| Set humidity is higher than the ambient humidity | Set the humidity lower than ambient humidity | |
| Dehumidifier is blowing out warm air | The dried air is passed over heating coils before it is blown into the room as part of the dehumidifying process | This is normal, a dehumidifier is not an air cooler |
| The display is not showing the hu- midity set point | The display shows the room rel- ative humidity not the set point | Press the humidity control button once to see the target relative humidity |
| Water on floor | There is residual water in tank, and the device is lurched too much by moving | Be careful when moving the tank |
| The dehumidifier is noisy | The air filter is blocked or the device is on an uneven surface | Clean the filter or put the de-vice on a flat surface |
Technical Specifications
| Model ADAM Art. no | 2505 | |
| Recommended working area m2 | 2-80 | |
| Timer | 1- 24 h | |
| Power Supply | 220-240V – 50Hz | |
| Dehumidifying Capacity | 22 L/day (30°C RH 80%) | |
| 13 L/day (27°C RH 60%) | ||
| Power Consumption | 245 W | |
| Air Volume m3/h | High | 155 |
| Low | 130 | |
| Noise Level dB(A) | High | 46 |
| Low | 43 | |
| Water Tank Capacity | 4.5L | |
| Operating Temperature | 5-35°C | |
| Refrigerant | R290 | |
| Compressor | Piston | |
| Net Weight | 15.3 kg | |
| Filter | Washable | |
| Drain Hose included | No | |
| Drain Hose Diameter (mm) | 14 | |
| Product Size (WDH) | 360 x 242 x 548 mm | |
The above technical data are for reference only. We reserve the right to modify them without notice.
Service
If you have any questions or need more information, please feel free to call Customer service on +45 6916 3200
If you need service or to make a warranty claim, you must create a case directly in our support system. Go to the website under SUPPORT.
Warranty
Limited warranty
We guarantee that all parts are free of defects in materials and workmanship for a period of two years from the date of purchase. The warranty covers only material or manufacturing defects that prevent the product from being able to be installed or operated in a normal way.
Defective parts will be replaced or repaired.
The warranty does not cover transportation damage, any use other than what is intend- ed, damage caused by incorrect assembly or improper use, damage caused by impact or other error, or by improper storage.
The warranty becomes void if the user modifies the product.
The warranty does not include product-related damage, property damage or general operational loss.
The manufacturer’s liability cannot exceed the repair or replacement of defective parts and does not include labour costs to remove and reinstall the defective part, transportation costs to and from the service center, and all other materials necessary to carry out the repair.
This warranty does not cover failure or malfunction as a result of the following:
- Lack of proper installation, operation or maintenance of the unit in accordance with our published manual supplied with the unit.
- The workmanship of any installation of the unit.
- Misuse, alteration, accident, fire, flood, lightning strike, rodents, insects, negligence or unforeseen events.
- Use of non-factory authorised parts or accessories in conjunction with the product.
Limitation of liability
This is the only warranty provided by the manufacturer. No one is authorised to make any other warranties on our behalf.
This warranty is in lieu of all other warranties, expressed or implied, including but not limited to any implied warranty of fitness for a particular purpose and saleability. We expressly disclaim all liability for consequential damage, accidental damage, indirect loss or loss related to a breach of the expressed or implied warranty.
This warranty gives you specific legal rights, which may vary by country.
Complaints
In the event of any warranty claim a valid purchase receipt must be presented. Read about raising a warranty-claim under the SERVICE section.
IMPORTANT!
If you need technical help – contact our service line:
DK-telephone +45 6916 3200
We have specialist knowledge of our products and the field in general, so you can get help quickly and easily.
Thank you for choosing this product.
Please read this instruction manual before using it.
![]() eeese air care
eeese air care
[email protected]
Web: eeese-air-care.com
MV-2505-11-2021


