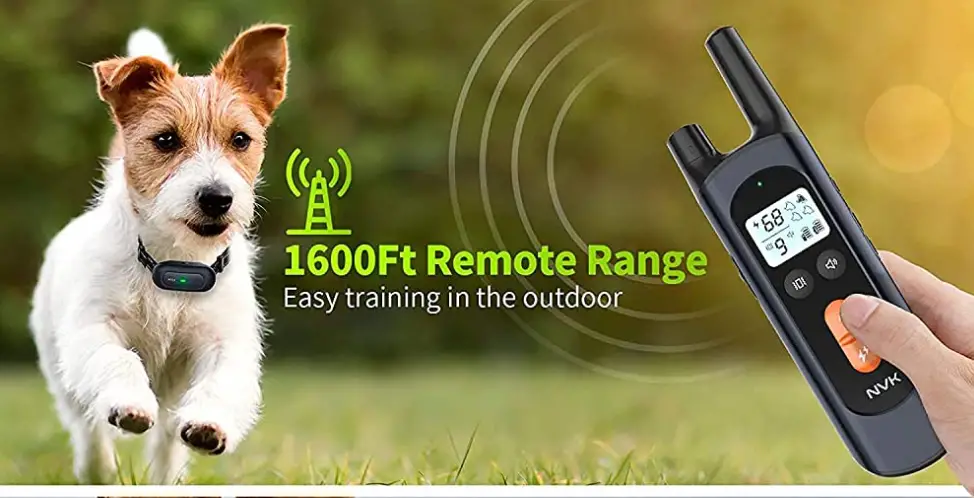

Quanzhou Purplebox TFX1 Dog Training Collar
Manufacturer. Quanzhou Purplebox Electronics Co., Ltd.
Address: No. 41 , Wanrong Street, Luojiang District,Quanzhou City, Fujian Province, China
Version: TX-X1(V1.0)202303
Our product is designed to cultivate your pets’ good habits, not to punish them. Please do not overuse this product on pets.
NOTE: Please read the user guide before using this product. Do not discard.
Packing List
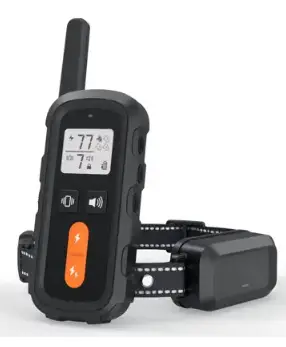
- Remote control(Transmitter) × 1

- Training Collar (Receiver) x 1

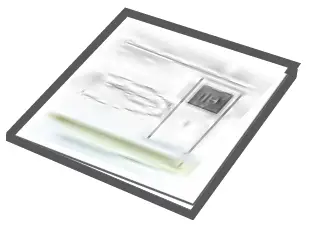
- Test board & mounting board x 1

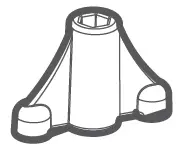
- E-shock Contactors × 2 set

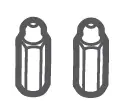
- Silicone protective sleeve × 2 sets

- Lanyard x 1

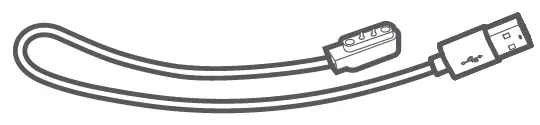
- Magnetic charging cable x 1

- User guide × 1


Technical Parameter
TF-X1 Training Collar (Receiver)

TF-X1 Remote control(Transmitter)
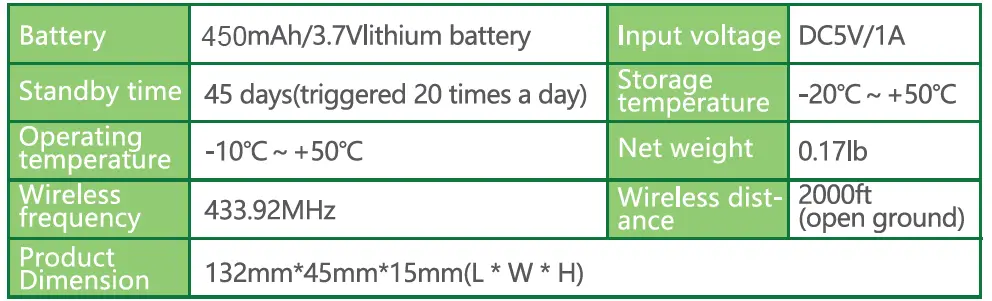
Receiver collar is IP67 waterproof and dustproof, the remote control is not waterproof.
Features
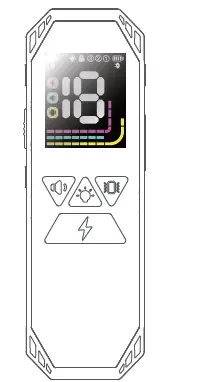
- Remote control (Transmitter) dot matrix colour screen display.
- Three training modes: warning sound, vibration and E-shock.
- Remote control(Transmitter) can be paired with 3 receivers.
- 18 levels of intelligent graded electric shock, 8 levels of vibration.
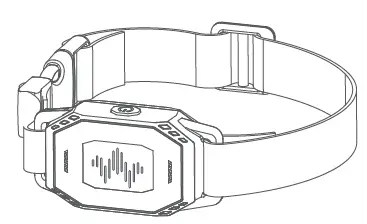
- Training Collar (Receiver) with RGB dog finder light design, two kinds of dog finder indication.
- Two-way wireless communication, Remote control(Transmitter) can display receiver power.
- Remote control(Transmitter) can shut down the receiver remotely.
- New, adoptable magnetic charging with IP67 dustproof and waterproof receiver (transmitter not waterproof).
Important statement
| Safe use statement | |
 |
|
| Electric shock safety statement | |
 |
|
| Wearing and training safety statement | |
 |
|
  |
Note: The IP67 standard is the result of static laboratory tests. |
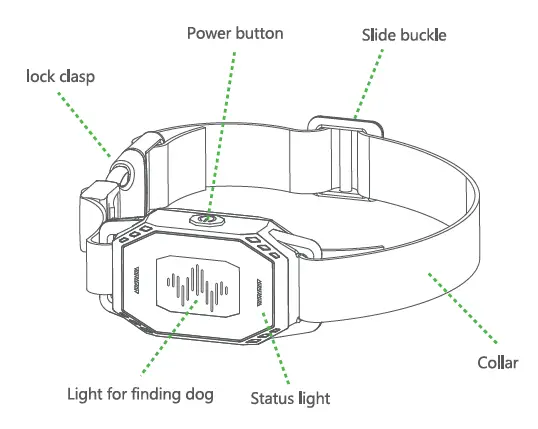
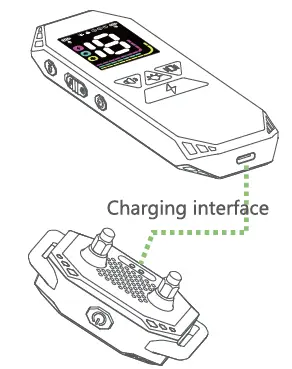
Receiver Introduction
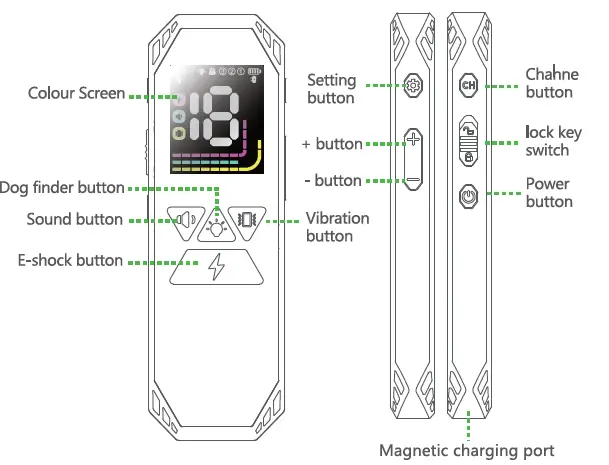
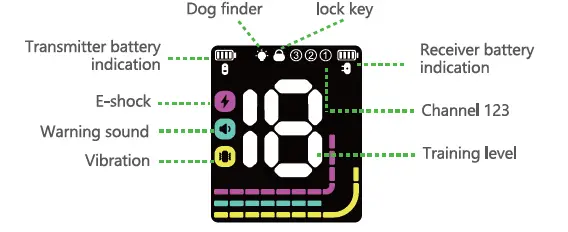
Transmitter Introduction
Using Instructions
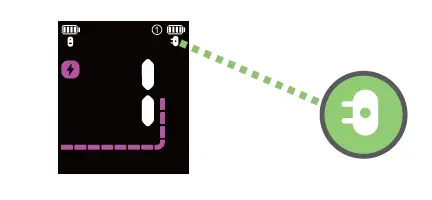
Charge the product before using it
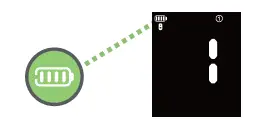
When the remote control(Transmitter) is charging, the battery icon is flashing and the charging time is 1.5-2 hours. The battery icon remains on when the battery is fully charged.
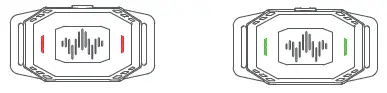
When the Training Collar is charging , the status light is red and the charging time is 1.5-2 hours. When the battery is fully charged, the status light is on in green.
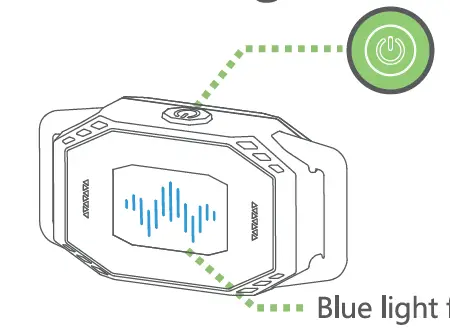
Turn On/off
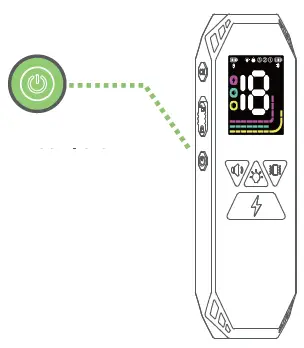
Press and hold the transmitter button for 2 seconds, the screen will light up to indicate that it is powered on. In the power-on state, press and hold the button for 2 seconds to power off.
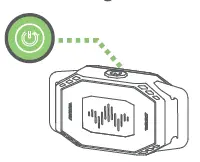
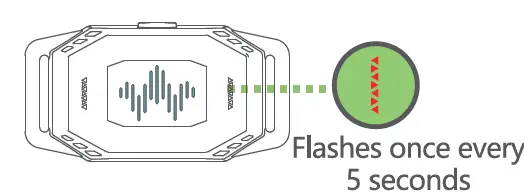
Press and hold the receiver’s button for 2 seconds, the receiver will “beeping beeping ” twice means power on. In the power-on state, the green statue light flashes once every 5 seconds (The status light will turn off within 10 minutes of each operation). Press and hold the button for 2 seconds, and the receiver will make a long “beeping ” to indicate that power off.
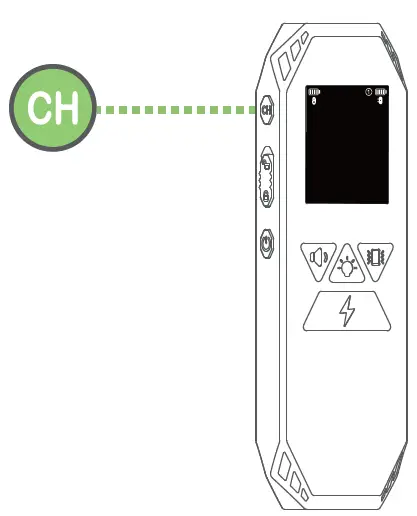
Remote Power-off
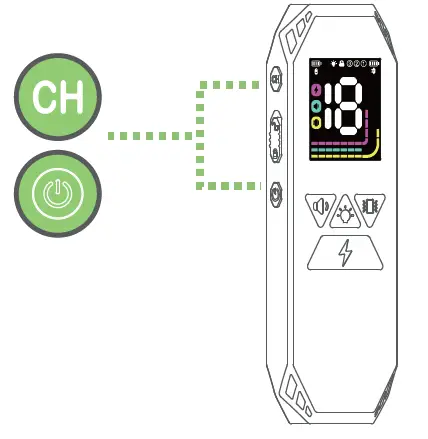
When both the transmitter and receiver are turned on, press and hold the button and the CH button of the transmitter for 2s to turn off the transmitter and receiver, during which the receiver icon on the transmitter screen flashes .
Channel switching on/off
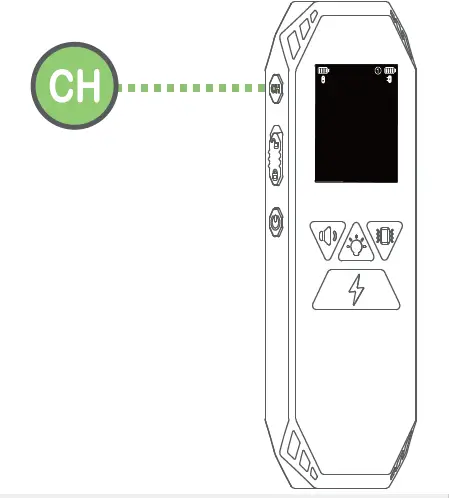
- The factory default of a single receiver is channel 1, and channel switching is disabled. If the user needs channel switching, please enable the channel switching function first.
- In the standby state, press and hold the CH button of the transmitter for 5 seconds to turn on and off the channel switching function.
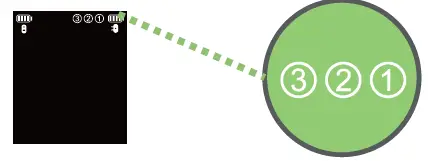
- When the channel switching function is turned on, the icons of all channels flash; when the channel switching function is turned off, the icon of the current channel flashes.
Channel switching
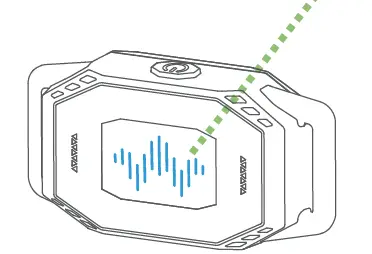
- When the channel switching function is enabled, short press the CH button of the transmitter to switch between channel 1, channel 2, and channel 3; when the receiver receives the command of the transmitter to switch channels, the blue indicator light flashes 5 times.
- When the channel switching function is turned off, short press the CH button of the transmitter, it will stay on the current channel; when the receiver receives the command of the transmitter to switch the channel, the blue indicator light flashes 5 times.
Key Lock Function
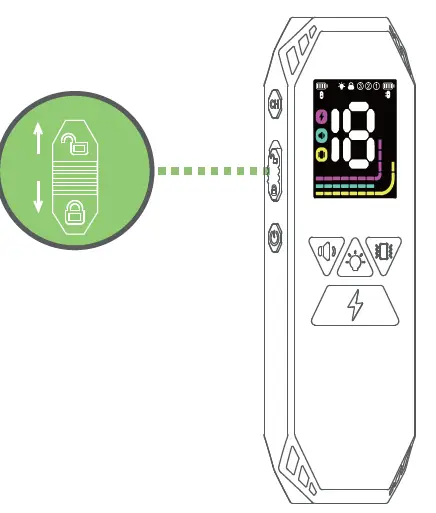
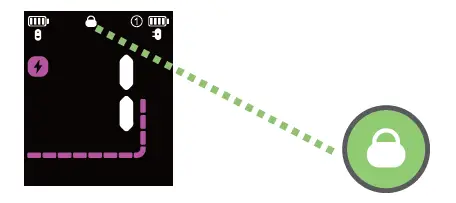
Push the key lock button downward to turn on the key lock function, and the key lock icon will light up. At this time, when any key is pressed, the transmitter has no functional response, and the key lock icon flashes. Push the key lock button upward to turn off the key lock function.
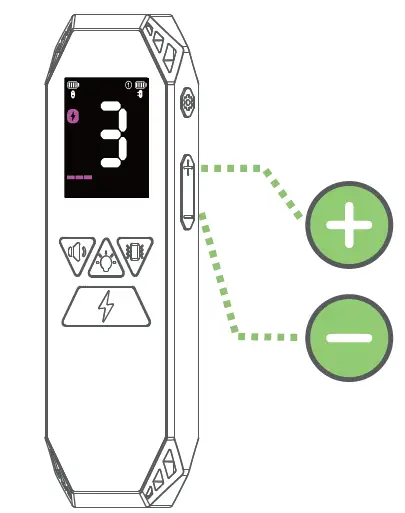
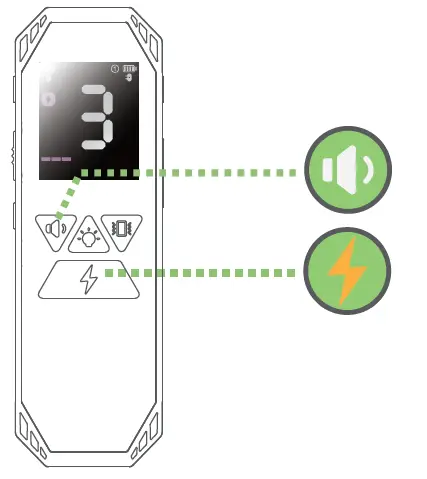
E-shock Level Setting
When the screen is on, short press the ![]() button or
button or![]() button to adjust the shock level. The shock level is adjustable from 0-18, 0 is off.
button to adjust the shock level. The shock level is adjustable from 0-18, 0 is off.
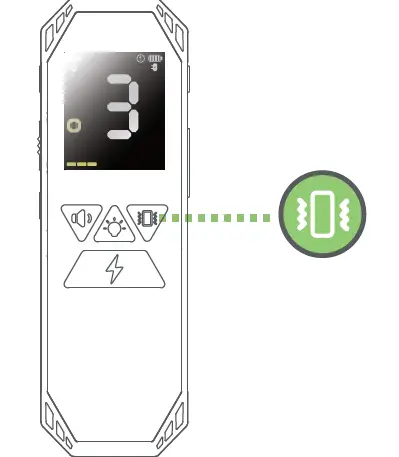
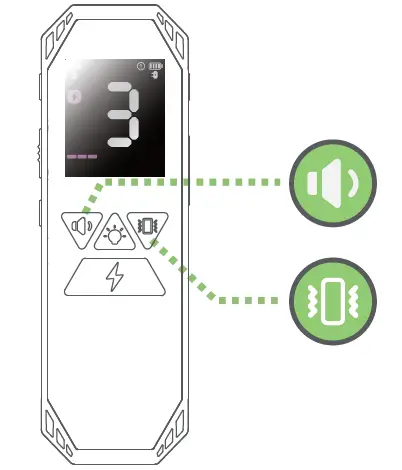
Vibration level setting
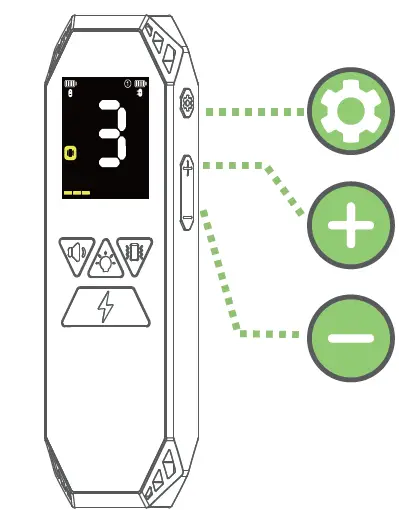
- When the screen is on, short press the transmitter
 button to enter the vibration level setting interface.
 - Short press the
 key or the
  key to adjust the vibration level.
 - vibration is adjustable from 1-8 levels.
- After the vibration icon flashes for 5 seconds, it will automatically exit the vibration level setting.
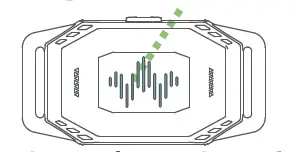
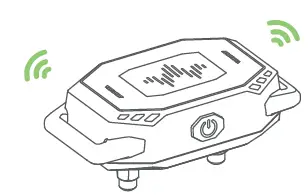
Dog Finder
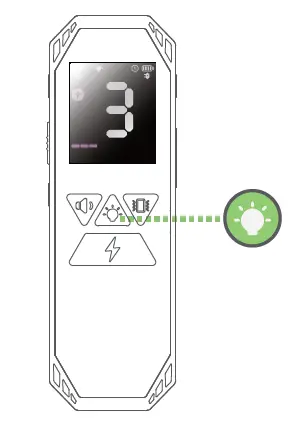
- In the standby state, short press the transmitter’s
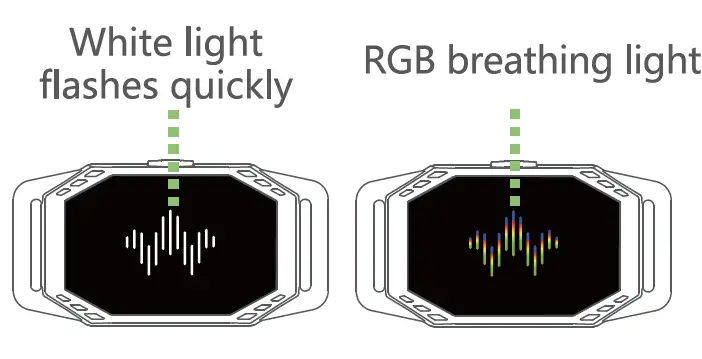
 button to turn on the receiver’s dog finder function. The white light flashes quickly after the first press, the transmitter’s dog finder icon flashes, and automatically turns off after 10 minutes.
 - short press the- button again to switch the display of the breathing light, and the transmitter’s dog finder icon remains on.
- Short press the- button for the third time to turn off the receiver’s dog finder function.
Training Instruction
- In the standby state, short press the
 button of the transmitter, the receiver will beep for 1 second after receiving the command; long press the button, the receiver will stop working after beeping for 10 consecutive times.

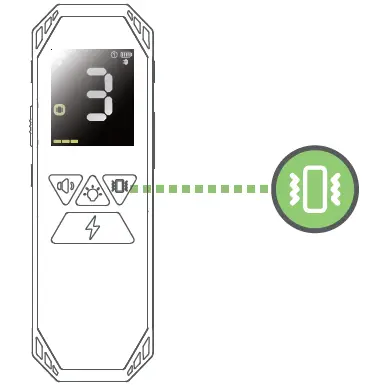
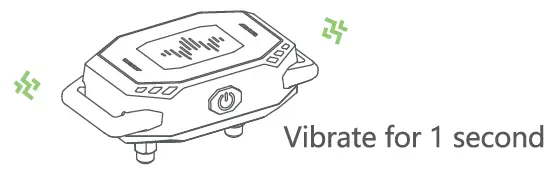
- In the standby state, short press the
 button , the receiver vibrates for 1 second after receiving the command; long press the button , the receiver will stops working after vibrating continuously for 10 times.
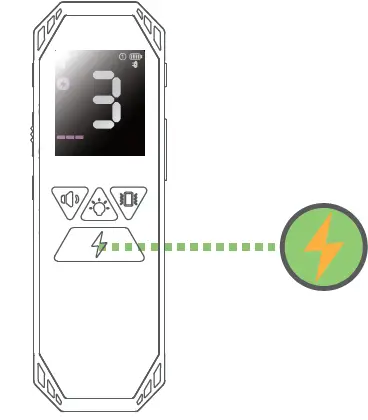
- In the standby state, short press the
 button, the receiver receives the command to shock once at the preset level; long press the button, the receiver will stops working after E-shock continuously for 5 times.

 button , the receiver vibrates for 1 second after receiving the command; long press the
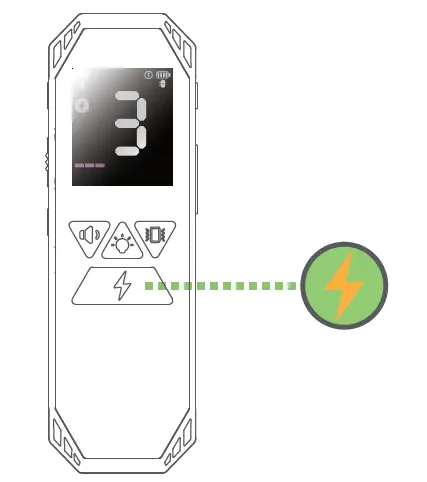
Pairing Instruction
- When the receiver is powered on, short press the
 button twice to enter the pairing state, and the blue indicator light flashes.
- Switch the transmitter to the channel you want to pair, each channel can only be paired with 1 receiver, press the transmitter and button simultaneously for 2 seconds, the transmitter sends a pairing command to the receiver, and the channel number of the transmitter flashes.
- The blue light stays on for 3 seconds

- After the pairing is successful, the blue indicator light of the receiver will light up for 3 seconds.
- In the pairing state, if the pairing is not successful for more than 30 seconds, the receiver will automatically exit the pairing state.
Transmitter Factory Reset
Within 15 seconds of restarting, press and hold the![]() button and the
button and the button for 2 seconds, the backlight flashes 5 times, indicating that the factory reset is successful.
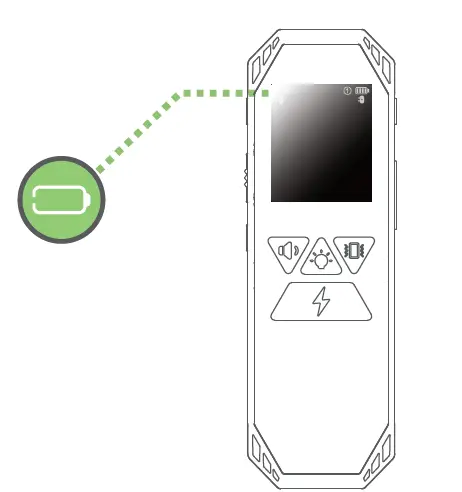
Low Battery
When the battery of the receiver is lower than 1 bar, the red status light flashes once every 5 seconds, the receiver will automatically shut down after 20 minutes.
When the battery of the transmitter is lower than 1 bar, the battery icon flashes, the transmitter will automatically shut down after 20 minutes.
Setting Guide
Choose the appropriate level according to the dog’s temper and set the appropriate level according to the dog’s temper and the degree of endurance to electric shocks. Please start training from the lowest level.
For example, the dog responds to the level of electric shock with ear shaking, tongue licking, neck tightening, etc. This is the appropriate level. The level of electric shock varies according to the training conditions. If the dog’s attention is highly distracted, a strong level is needed to stimulate it.
| DOG | 5-10kg | 10-15kg | 15-25 kg | 25-35kg | 35-50kg |
| Sensitivity | -6 + | -6 + | -6 + | -6 + | -6 + |
| Sound | Default | Default | Default | Default | Default |
| Vibration | 1 ~ 2 | 2~3 | 3~4 | 4~6 | 7~8 |
| E-shock | OFF | 0 FF | 1 + | 1 + | 2+ |
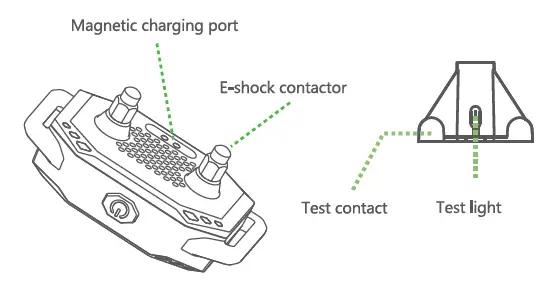
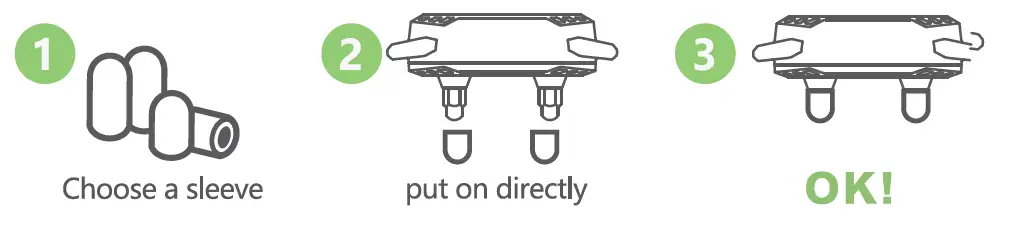
Assemble the receiver
Install the E-shock contactors
Select the appropriate long/short E-shock contactors, and use the mounting plate to install them on the holes on the back of the product.
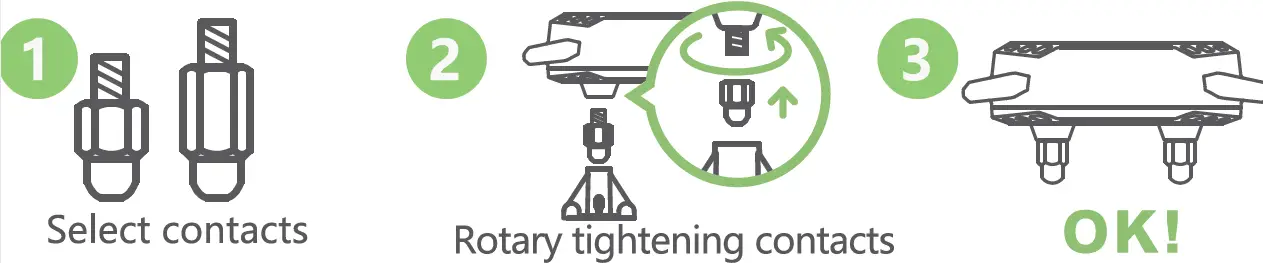
Please use appropriate force, otherwise the device will be damaged.
Install the silicone protective sleeve
Then choose the long/short conductive silicone protective sleeve to directly cover the E-shock contact, which can effectively reduce the physical damage of the E-shock contact to the dog’s skin.
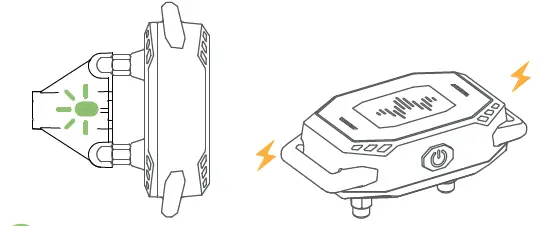
Function Testing
After assembly, functional testing is recommended. Please follow the steps below to test.
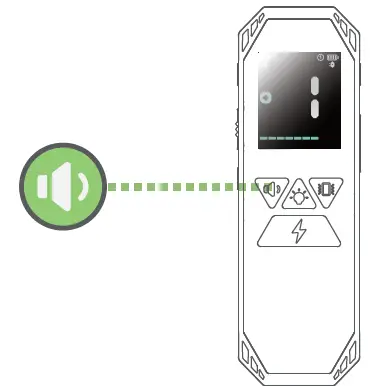
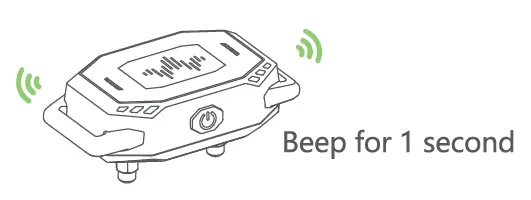
- Short press the button of the transmitter to test the sound, the receiver will beep for 1 second.


- Short press the button of the transmitter to conduct vibration test, the receiver will vibrate for 1 second according to different vibration levels.


- Press the test board on the E-shock column of the receiver, short press the button of the transmitter to perform the E-shock test, and the light on the test board will be lit. The higher the shock level, the brighter the light.
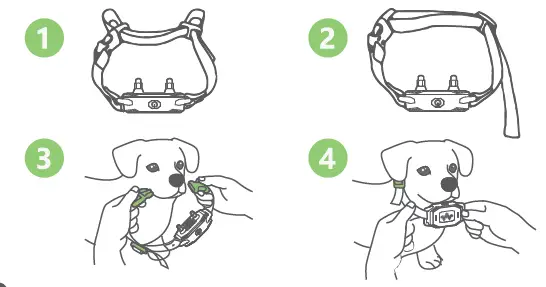
Wear the Bark Collar
The collar ranges from 20 cm to 62 cm (8 inches to 25 inches). Before wearing, please adjust the buckles and sliders to make the collar size to the correct length to ensure the shock contacts can be firmly attached to the dog On the neck, if you can fit a finger between the collar strap and the dog’s neck, it’s the right size.
FAQ
Why doesn’t the receiver work when the transmitter is operating in E-shock function?
There may be three reasons for this problem. The first is that the milter and receiver are not paired, so try pairing again. Second, the operating in E-shock function?
Is the product safe and humane?
I’ll All means of receiving do not cause any direct damage to the pet’s LiD body, but can make them very uncomfortable. Even so, do not over- use this product on pets. See all safety notices in the manual.
Why don’t the receiver and transmitter work?
There may be two reasons for this problem. The first is that the LiD transmitter and receiver are not powered on, please refer to the manual for the power-on operation. Secondly, the transmitter and receiver batteries are exhausted, please charge the receiver and transmitter, the charging time is about 2 hours.
Troubleshooting
| PROBLEM | ANALYSIS | METHOD OF EXCLUSION |
| Can’t power on |
|
|
| Can not be charged |
|
|
| The receiver does not respond to the operation of the transmitter |
|
|
Terms of Use & Liability
Terms of Use & Liability
- Terms of Use
When you start using the product, it means that you have accepted all the terms, conditions, and statements in this user guide. - Use it correctly
This product is designed for pets that need training. Please use this product correctly and carefully read the user guide and any specific ‘safety” and “caution” statements. - legally use is forbidden
This product is suitable for pets. This device is not designed to harm pets. Using this product not in accordance with the user guide may violate local laws. - Scope of Responsibility
The manufacturer is not responsible for any direct, indirect, punitive, non-significant losses and other indirect losses caused by incorrect use or abuse of this product. The buyer assumes all risks and responsibilities of using this product. - Modification of terms and conditions
The manufacturer reserves the right to change the terms, conditions, and declarations related to the products.
Certification Statements
This device complies with Part 15 of the FCC Rules. Operation Is subject to the following two conditions:
- This device may not cause harmful interference.
- This device must accept any interference received, including interference that may cause undesired operation.
Warning: Changes or modifications not expressly approved by the party responsible for compliance could void the user’s authority to operate the equipment.
Note: This equipment has been tested and found to comply with the limits for a Class B digital device, pursuant to Part 15 of the FCC Rules. These limits are designed to provide reasonable protection against harmful interference in a residential installation. This equipment generates uses and can radiate radio frequency energy and, if not installed and used in accordance with the instructions, may cause harmful interference to radio communications. However, there is no guarantee that interference will not occur in a particular installation. If this equipment does cause harmful interference to radio or television reception, which can be determined by turning the equipment off and on, the user is encouraged to try to correct the interference by one or more of the following measures:
- Reorient or relocate the receiving antenna.
- Increase the separation between the equipment and receiver.
- Connect the equipment into an outlet on a circuit different
FCC from that to which the receiver is connected.
Consult the dealer or an experienced radio/TV technician for help.
The device has been evaluated to meet general RF exposure requirement.
The device can be used in portable exposure condition without restriction.
The company declares under its own responsibility that this product complies with the basic requirements of CE (2014/30/EU) and RoHS (2011/65/EU). Without the approval of our company or the distributor, unauthorized changes or modifications to the equipment may violate the CE regulations, may cause the user to lose the right to operate the equipment, and invalidate the warranty.
Recycling information & Battery Disposal
Please observe the regulations for electronic and electrical devices to be disposed of in the respective country. In some countries or regions, this device must be recycled. If this device is no longer required, it must not be disposed of with normal municipal waste. Separate collection of spent batteries is required in many regions; check the regulations in your area before discarding spent batteries. For more recycling information, please refer to local regulations.


