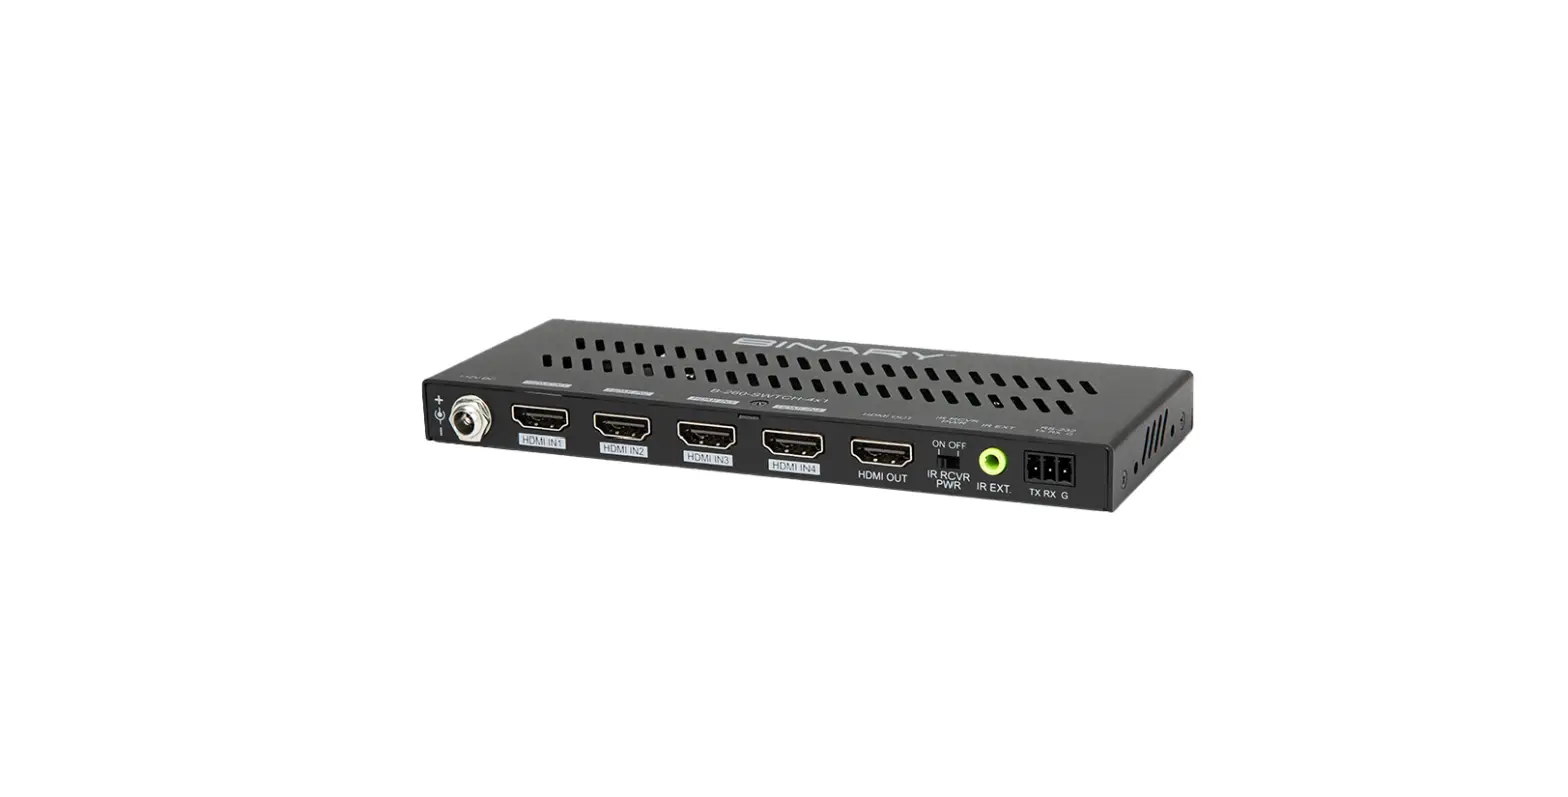
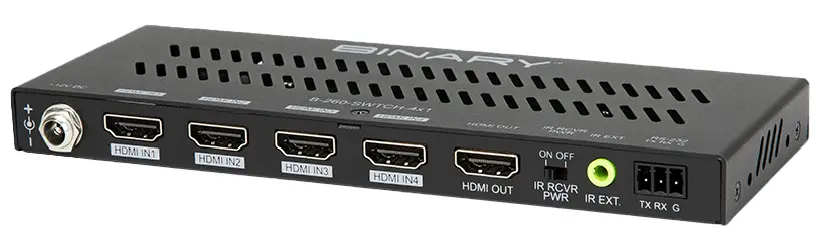
BINARY B-260-SWTCH-4X1 4K HDR Switch
PRODUCT OVERVIEW
- Thank you for purchasing a Binary product. For proper installation and optimum performance, please read the instructions in this manual.
- The B-260-SWTCH-4×1 Switch features HDMI 2.0 and HDCP 2.2 compatibility and supports resolutions up to 4K@60Hz 4:4:4 8bit, enabling four Ultra HD sources to be switched to one
- Ultra HD or non-Ultra HD display. The switch is controllable by a front panel button, IR remote** and/or RS-232.
FEATURES
- 4 to 1 HDMI switch
- HDMI 2.0 with 4K@60 4:4:4 8-bit and HDCP 2.2 compliant
- Supports manual switching
- Supports various control options
- Compact size and easy-to-install
PACKAGE CONTENTS
- 1 x B-260-SWTCH-4×1 Switch
- 1 x DC 12V Power Adapter
- 1 x Switch IR Remote (Requires IR receiver, sold separately)
- 1 x Phoenix Male Connector (3.5mm, 3 Pins)
- 2 x Mounting Ears (with Screws)
- 2 x Drywall Screws
- 4 x Rubber Feet
- 1 x Installation Manual
IR control requires connection to an external control system via an IR extension cable, or an external IR receiver, which are sold separately.
DEVICE LAYOUT
Front
- A. Power Led
- On: Power on
- Off: Power off
- B. HDMI IN 1-4 LED
- On: The HDMI IN source is selected and active.
- Off: The HDMI source is not selected nor active.
- C. HDMI OUT LED
- On: An HDMI display is connected to the switch.
- Off: No HDMI display is not connected to the switch.
- D. SWITCH Button
- Press to cycle through the active sources, inactive sources will not be selectable.
Back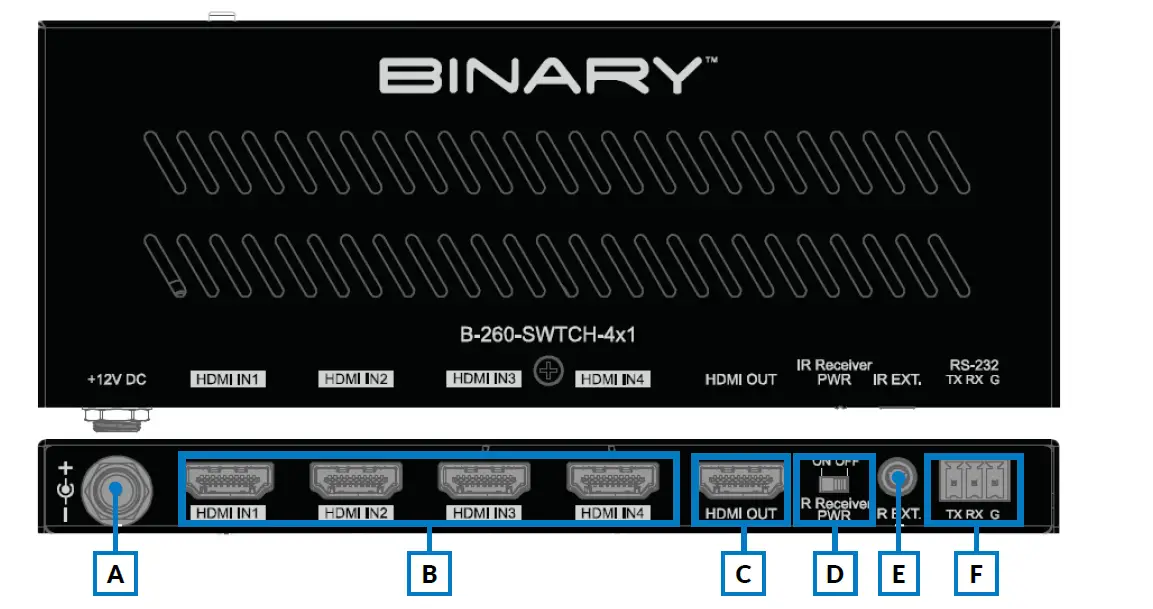
- A. +12V DC
- Connect the provided 12V DC power supply’s cord and tighten it in place.
- B. HDMI IN (1-4)
- Connect to the output of HDMI source(s) to the input(s) you require.
- C. HDMI OUT
- Connect to the input of a HDMI display or other similar device.
- D. IR Receiver PWR
- ON Position: IR receiver port supplies 12V power.
The unit can be controlled through an IR receiver (sold separately) in the ON position. - OFF Position: IR receiver port does not supply 12V power.
The unit can be controlled with a standard mono cable from a control system in the OFF position.
- ON Position: IR receiver port supplies 12V power.
- E. IR EXT.
- IR extension port. Connect an IR extension cable, control cable or external IR receiver (not included) .
- When connecting to an unpowered IR receiver or a control device, ensure that the IR
- Receiver Power Switch is in the OFF position.
- When connecting to a powered IR receiver, ensure that the IR Receiver Power Switch is in the ON position.
- F. RS-232
- Connect to an RS-232 control device.
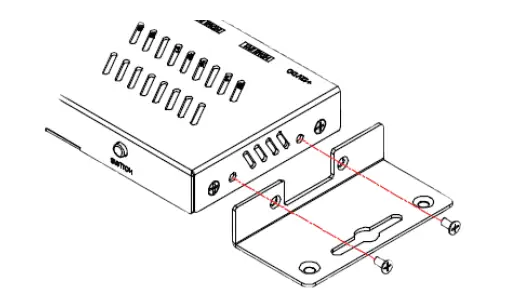
INSTALLATION
- The B-260-SWTCH-4×1 can be placed on a solid and stable surface, installed in an equipment rack, or mounted to a wall or distribution box.
- When installed on a rack shelf, wall, or distribution box we strongly recommend that the included mounting ears be used to secure the device.
- When installing on a solid surface the use of the mounting ears is optional.

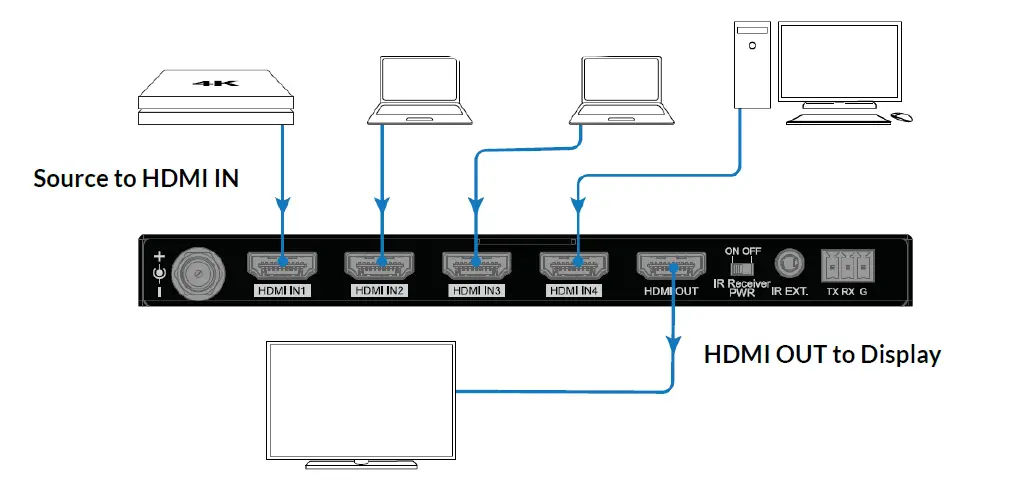
CONNECTIONS
Caution: Disconnect the power from all devices in the system before making connections.
Failure to do so may damage a device
- Connect the HDMI sources (such as PC, Blu-ray player, Apple TV, 4K media player, etc) to HDMI IN 1-4. Ensure you are using a high-quality HDMI cable capable of supplying the desired maximum resolution.
- Connect the HDMI display device (such as a TV, projector, etc.) to HDMI OUT. Ensure you are using a high-quality HDMI cable capable of supplying the desired maximum resolution.
- Connect any additional control options. Refer to the IR Control or RS-232 Control diagrams for more details.
- Connect the provided DC 12V power cord.
- Power on all connected devices

IR Receiver Connections
To control the switch with an IR receiver, set IR Receiver PWR to ON and connect an IR receiver (sold separately) to the IR EXT port.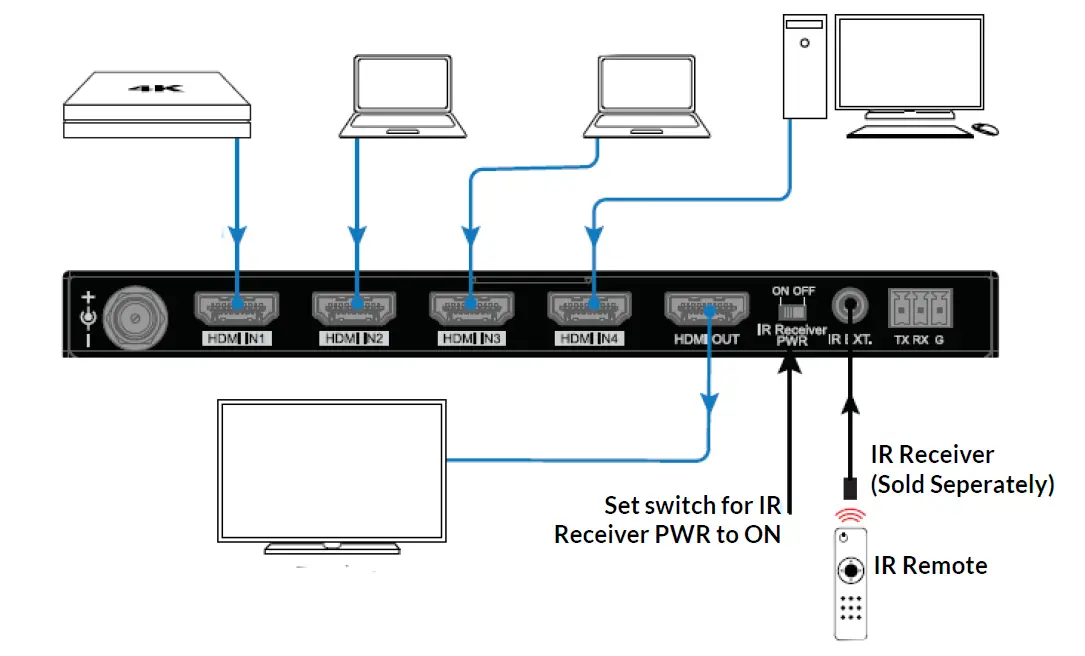
IR Controller Connections
To control the switch with an IR controller, set IR Receiver PWR to OFF and connect the IR controller (sold separately) to the IR EXT port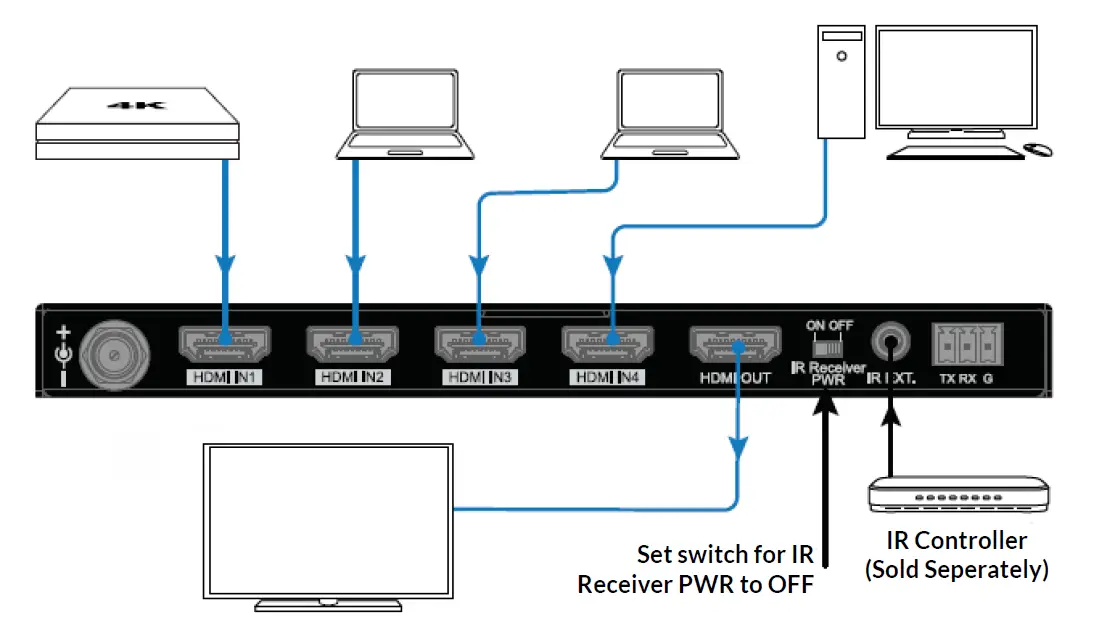
RS-232 Control Connections
To control the switch using RS-232, follow the below wiring diagram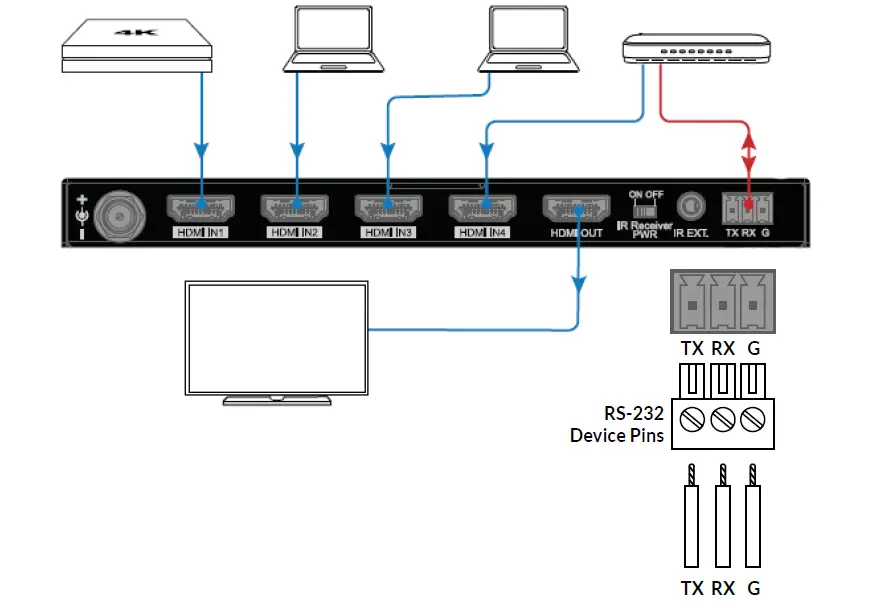
SELECTING A SWITCH INPUT
Front Panel
Push the SWITCH button, on the front panel, to cycle through inputs.
IR Control
The switch can be controlled via IR using the provided IR Remote or using IR via a control system. In order to use the included IR Remote an IR receiver must be purchased separately
| Buttons IR Codes Description | ||
| ► | 0x02 0x0a | Switch to the next active source input (Cycle 1-4) |
| ◄ | 0x02 0x08 | Switch to the previous active source input (Cycle 1-4) |
| 1 | 0x02 0x04 | Switch to source input 1 |
| 2 | 0x02 0x05 | Switch to source input 2 |
| 3 | 0x02 0x06 | Switch to source input 3 |
| 4 | 0x02 0x0c | Switch to source input 4 |
| 5 | N/A | Not available |
Note: The encoding format for the above IR codes is NEC (38KHz). Any third party device used for IR control of the switch must support NEC (38KHz).
RS-232 Control
Configuration for control system serial ports can vary. Refer to the documentation for the system in use for proper connection and configuration. Below are the parameters for RS-232 control.
Important: There must be devices connected to the inputs and outputs of the switch for RS-232 commands to execute
| Parameters | Value |
| Baud Rate | 9600 bps |
| Data Bits | 8 bits |
| Parity | None |
| Stop Bits | 1 bit |
| Follow Control | None |
The command structure for RS-232 is outlined below
| Function | Command | Parameter | Description | Return |
|
Switch Input |
SET SWITCH | IN1<CR> | Switch to source input 1 |
SWITCH<CR> |
| IN2<CR> | Switch to source input 2 | |||
| IN3<CR> | Switch to source input 3 | |||
| IN4<CR> | Switch to source input 4 | |||
| NEXT<CR> | Switch to the next input (Cycle 1-4) | |||
| PREV<CR> | Switch to the previous input (Cycle 1-4) |
Example: SET SWITCH IN1 <CR> switches to input 1.
You can use <CR> -or- <LF> to end a command. All commands must end with a carriage return or a line feed
SPECIFICATIONS
| Technical | |
|
Connector Type | x4 HDMI In x1 HDMI Out x1 IR EXT x1 RS-232 (Phoenix connector) x1 DVC 12V in |
| Input/Output Signal Type | HDMI with 4K@60Hz YUV 4:4:4, HDCP 2 2 |
| Input/Output Supported Resolution | Up to 4096×2160 @ 60Hz, including 4K @ 60Hz/4K @ 30Hz/1080P/1080i/720p |
| Supported Audio Formats | PCM 2 0/5 1/7 1, Dolby TrueHD, Dolby Atmos, DTSHD Master Audio, and DTS:X |
| Maximum Data Rate | 18 Gbps |
| Supported Control Methods | IR, RS-232, CEC, DIP switches |
| General | |
| Operating Temperature | 0°C to 40°C (32°F to 104°F) |
| Storage Temperature | -20°C to 60°C (-4°F to 140°F) |
| Humidity | 10% to 90%, non-condensing |
| ESD Protection | Human-body Model: ±15kV (Air-gap discharge)) |
| Power Supply | -DC 12V, 2A |
| Power Consumption (Max) | -3 19W |
| Dimensions (W x H x D) | 175mm (6 89”) x 16mm (0 63’) x 66 2mm (2 61”) (Without Mounting Ears) |
| Weight | 0 25 kg / 0 55 lb |
LIMITED WARRANTY
Find details of the product’s Limited Warranty at snapone.com/legal or request a paper copy from Customer Service at 866.424.4489. Find other legal resources, such as regulatory notices and patent information, at snapone.com/legal.
SUPPORT
Need Help? Contact Tech Support!For chat and telephone, visit tech.control4.com/s/contactsupport
Email: [email protected]. Visit tech.control4.com for discussions, instructional videos, news, and more.
Copyright ©2022, Wirepath Home Systems, LLC. All rights reserved. Control4 and Snap AV and their respective logos are registered trademarks or trademarks of Wirepath Home Systems, LLC, dba “Control4” and/or dba “SnapAV” in the United States and/or other countries. Snap AV and Binary are also registered trademarks or trademarks of Wirepath Home Systems, LLC. Other names and brands may be claimed as the property of their respective owners. All specifications subject to change without notice.
220317
200-B-260-SWTCH-4X1-B


