![]()
![]() TREX SEAL INSTALLATION INSTRUCTIONS
TREX SEAL INSTALLATION INSTRUCTIONS
INSTALLATION:
WHEN INSTALLING THE TREX RAIN ESCAPE DECK-DRAINAGE SYSTEM
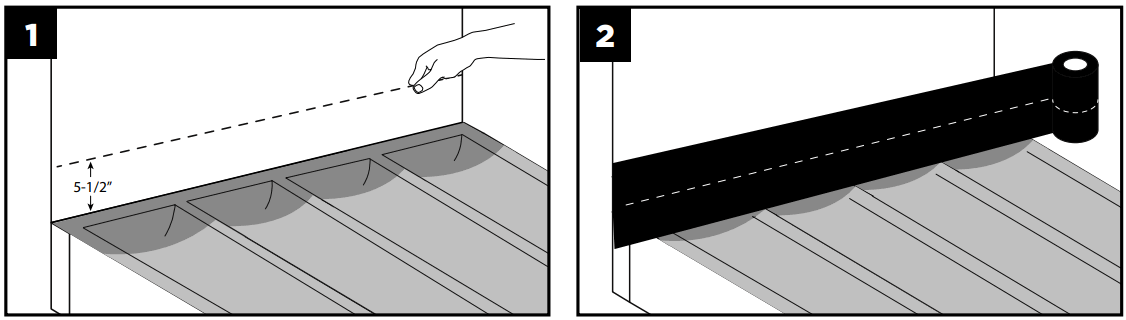 | |
| 1. Install the Trex RainEscape system. Mark a 5-1/2″ line above the ledger board under the house wrap. | 2. Unroll the Trex Seal Ledger tape. |
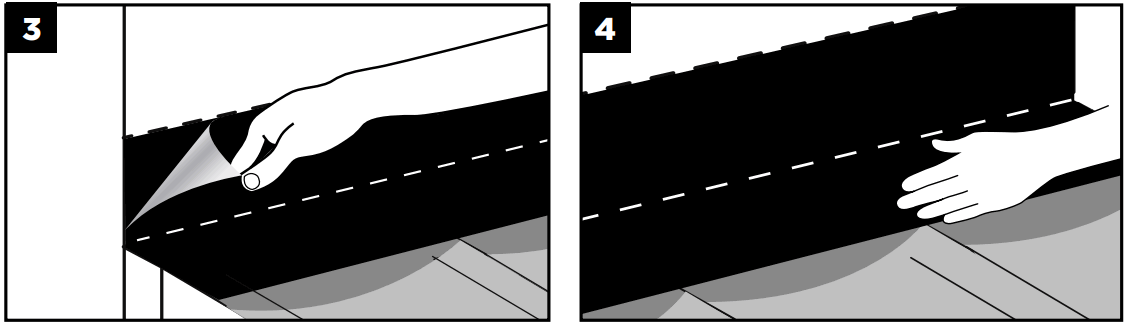 | |
| 3. Fold the Trex Seal Ledge tape in half. Remove one of the release liners. Press to seal against the vertical surface at the 5-1/2″ line. | 4. Once the vertical surface is attached, remove the second release liner, unfold the Trex Seal Ledger tape, and press firmly against the Trex RainEscape system. |
WHEN NOT INSTALLING THE TREX RAIN ESCAPE DECK-DRAINAGE SYSTEM
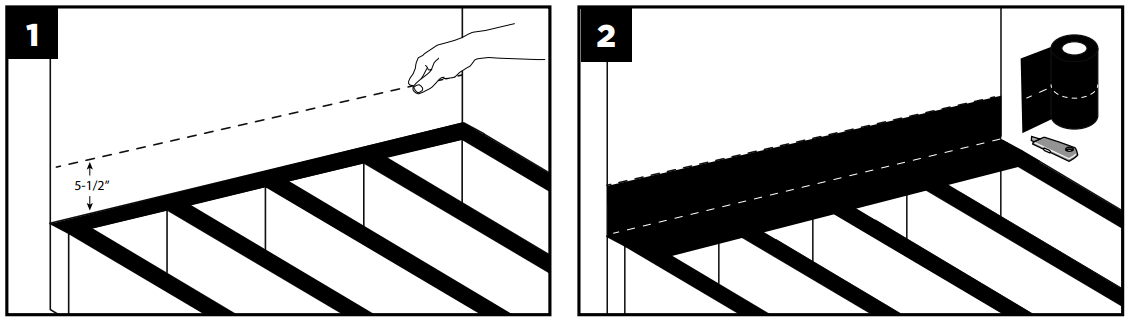 | |
| 1. Mark a 5-1/2″ line above the ledger board under the siding | 2. Unroll the Trex Seal Ledger tape and fold in half. Remove one of the release liners. Press to seal against the vertical surface. |
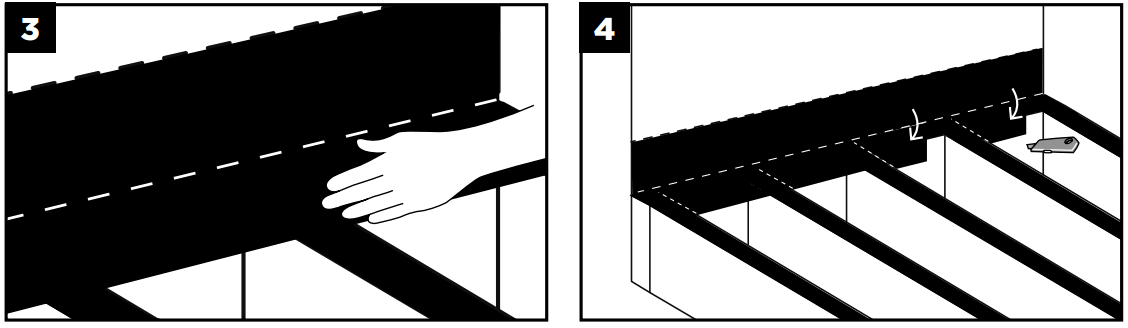 | |
| 3. Once the vertical surface is attached, remove the second release liner, unfold the Trex Seal Ledger tape, and press firmly against the ledger. | 4. With a utility knife or scissors, cut along each joist side and fold the tabs down. Firmly press the cut tabs against the ledger. |
 For more information, visit trexseal.com
© 2022 Trex Company, Inc. All rights reserved. Trex® RainEscape® products are manufactured and sold by IBP, LLC under a Trademark License Agreement with Trex Company, Inc. RainEscape® is a federally registered trademark of IBP, LLC.


