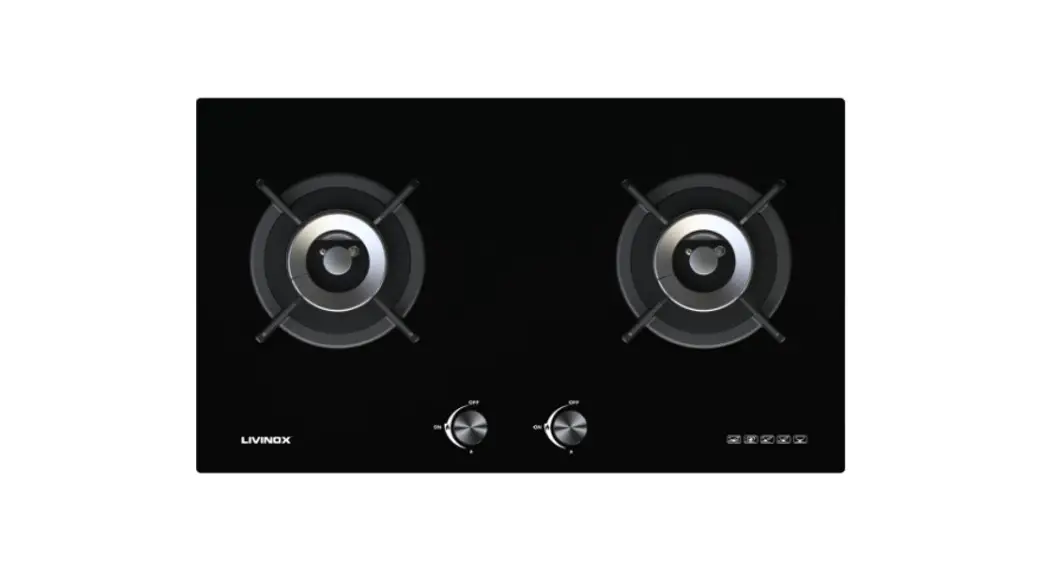
![]() MAPLE 2BA-BL 2 Burner Glass Hob
MAPLE 2BA-BL 2 Burner Glass Hob
Instruction Manual
LGH-MAPLE 2BA-BL 2 Burner Glass Hob
Dear Consumer,![]() Thank you for your purchase of our products. To ensure you use the appliance in the best effect, please read this instruction manual with care before using and save it for future reference.
Thank you for your purchase of our products. To ensure you use the appliance in the best effect, please read this instruction manual with care before using and save it for future reference.
The manufacturer declines all responsibility for damage to persons or things caused by non observance of the above prescriptions or by interference with any part of the appliance or by the use of non original spares
SPECIAL PRECAUTIONS
To avoid any danger and loss when using the hob, we make below mark. Below is all about special precautions. Please pay full attention to it and operate ina right way.
Marks are identified by different danger and loss level
![]() If ignoring this mark and operate unproperly, it may lead die, hurt or fire.
If ignoring this mark and operate unproperly, it may lead die, hurt or fire.![]() ATTENTION If ignoring this mark and operate unproperly, it may lead die, hurt or fire.
ATTENTION If ignoring this mark and operate unproperly, it may lead die, hurt or fire.
ADVICE In order to be safe and convenient when using it, please kindly understand this content.
Marks for ATTENTION
![]()
![]() DANGER
DANGER
1.stop using the hob immediately. 2.turn off the gas valve 3.open windows and doors 4.contact the local gas company 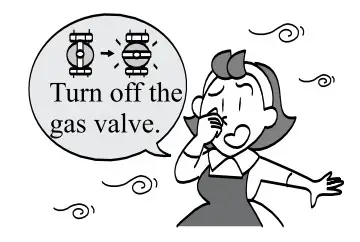 | If case of gas leakage *do not ignite any fire. *do not turn on any electrical appliance *do not touch power plug *do not use telephone nearby Flame spark will lead fire. 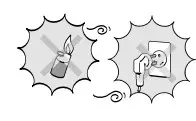 |
gas, or in case of earthquake, fire, please do as below: 1.turn the knob to OFF position 2.turn off the gas valve 3.contact our after-sale service dept immediately Above is to avoid fire or fault. | If use the gas other than that are appointed, it may leads gas cooker damage or even fire. |
| |
![]() ATTENTION
ATTENTION
cupboard. And the space can not be sealed, with hole of diameter not less than 0.2 sq | |
| Gas container can not be put right below Or hob. Gas pipe not more than 2 meters. | |
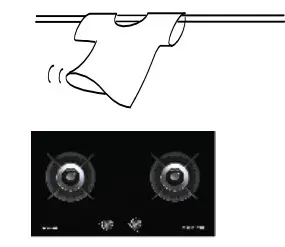
 Do not touch the trivet and burner immediately after using it, because Do not touch the trivet and burner immediately after using it, becausethey’re very hot. |
ADVICE
Check whether the gas pipe are in a good situation sometimes. The pipe should be changed for every two years.
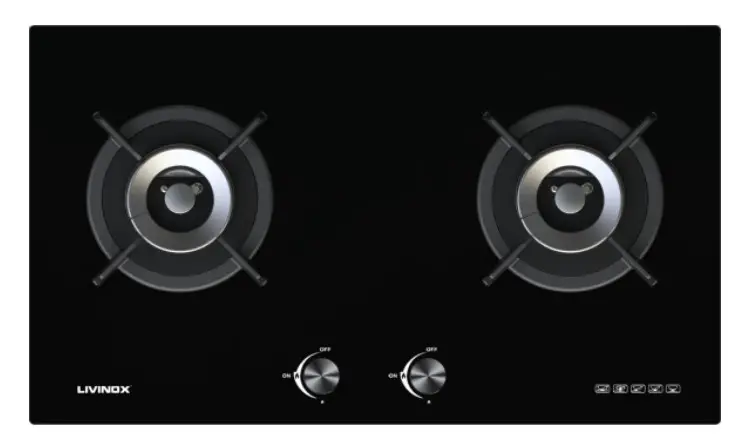
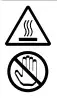
PARTS IDENTIFICATION
1.PARTS IDENTIFICATION
Remark: above is the built-in hob structure and part identification. Other type of hob can refer to above picture.
INSTALLATION
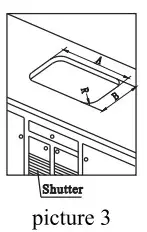
- Open holes in the cupboard:
Open holes in the cupboard with the instruction paper in the package. (see picture 3)
- Install the gas pipe
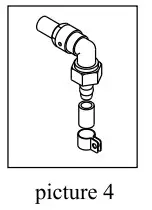
A. If to use plastic tube: put in the airproof caution, connect the tube and hob connector, fasten the clip. (see picture 4) B. If to use metal tube: put in the airproof caution, fasten the nuts on the connection. (See picture 5)
- Put the hob in the right hole on the cupboard, check whether it’s installed in a balance. The bottom of top plate should be stuck with seal packing.
- check leakage: turn on the gas valve. check whether with soap water there’s leakage in the connection. If any leakage, it needs to be reinstalled.(there’ll be air bubble for leakage).
 B. If to use metal tube: put in the airproof caution, fasten the nuts on the connection. (See picture 5)
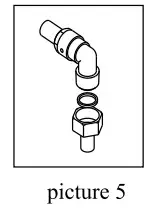
DIRECTION FOR USE
Ignition safety hob have flame failure protect device. When accident flame failure occurs by wind or spilled liquid, the flame failure protect device will shut the gas supply automatically.
- put in battery properly. (battery case in the right-front side at the hob bottom).
- turn on the gas valve
- Turn the knob left until it reaches the full on position (about 90 degree anti-clockwise). Having heard the sound of continuous sparks, simultaneously the burner will be ignited. Keep pushing the knob for 5-8 seconds before taking your hands off.
- you can choose five different fame by turning the hob.
- turn the hob to OFF by clockwise. After continuous sound, the gas supply will be broken, and flame out.
NOTE:
- For the newly installed hob or hob not used for some time, it may fail to ignite at first time, because there’s air in the tube. You can repeat until the air is exhausted out, then it can work.
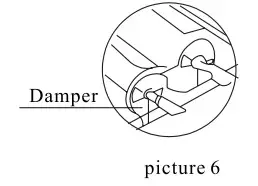
- If there’s yellowish flame or uneven flame, adjust the damper at the bottom to get an normal flame.
PRODUCT DIMENSIONS

CLEANING AND MAINTENANCE
To ensure the hob can be used properly, the clearance and maintenance is necessary. Keep the hole of burner cap and gas flow not to be stuff. Keep the electrode and thermocouple clear. Before clearing and maintenance, shut off the gas supply and let all parts cold.
Wash burner caps, burner, electrode, thermocouple and trivets with mild detergent when they’re dirty. Then put them back to their proper position. Use steel wire to clear the dirt in the burner cap. When the top plate get dirty, never use any sharp or hard brush but only sponge brush with mild detergent to clean them.
To check the gas tube often, and change new gas tube for every two years.
TROUBLE-SHOOTING GUIDE
| Trouble | Cause | Remedy | |
| Burners can not be ignited. | Gas supply is not opened | Turn on the gas | 0 |
| Gas type is bent or crushed. | Straighten or changing the tube | 0 | |
| Short of gas supply | Replace it | 0 | |
| Air remains in the gas piping | Repeat igniting operation until all air in the piping is purged out. | 0 | |
| Electrode not in right position | Adjust it’s position | ||
| Small spark when ignition operation | Clear the Electrode | 0 | |
| Out off battery | Replace or install the battery | 0 | |
| Electrode broken | Replace the ignition electrode | ||
| Flame is extinguished | Thermocouple dirty., broken, or not in right position | Clear or replace it, or adjust it’s position | |
| Electromagnet valve broken | Replace it | ||
| Valve broken | Replace it | ||
| Uneven flame in thermocouple | Adjust the damper | 0 | |
| Gas leakage (or smell of gas) | Cracks or holes in Gas pipe | Replace it with a new one | |
| The main flame of burners is not ignited | Ignite again after the gas is clear in the air. | 0 | |
| Gas valve is not well sealed | Replace gas valve | ||
| Sealing packing for gasvalve is broken | Replace the sealing packing. | 0 | |
| Flame not regular | Burner cap not in proper positior | Put it to proper position | 0 |
| Week flame | Gas pressure not enough | Check the gas flow | |
| Flame easy to fall | Damper hole is too big | Adapt the damper | 0 |
| Long and yellow flame | Damper hole is too small | Adapt the damper | 0 |
| Uneven flame | Hole for burner cap is stuff | Clear the hole | 0 |
Remark: Trouble with mark “‘ O ”can be solved by final users. Trouble with “A” must be repaired by technical people.If final user can not solve problem according to above guide, call our after-sale service.
![]() LIVINOX Malaysia Sdn Bhd
LIVINOX Malaysia Sdn Bhd
Blok B-1-29, Dataran Cascades
NO.13A, Jalan PJU5, Kota Damansara
47810 Petaling Jaya, Selangor.


