Electrolux E7US1-4MN Iron Multicom Retail Podgorica User Manual
SAFETY INFORMATION
Before the installation and use of the appliance, carefully read the supplied instructions. The manufacturer is not responsible for any injuries or damage that are the result of incorrect installation or usage. Always keep the instructions in a safe and accessible location for future reference.
- This appliance can be used by children aged from 8 years and above and persons with reduced physical, sensory or mental capabilities or lack of experience and knowledge if they have been given supervision or instruction concerning the use of the appliance in a safe way and understand the hazards involved.
- Children should be supervised to ensure that they do not play with the appliance.
- Keep all packaging away from children and dispose of it properly.
- Keep children less than 8 years of age away from the appliance and its cord when in use and when cooling down.
- Cleaning and user maintenance shall not be made by children without supervision.
- Care should be taken when using the appliance due to the emission of high temperature steam to avoid the risk of burns.
- Do not install or use a damaged appliance or accessories. Do not change the specification of this appliance. All service or repairs must be carried out by the Authorized Service Centre.
- Turn off the appliance and disconnect it from the mains after each use, before moving or carrying out any maintenance.
- If the supply cord is damaged, it must be replaced by the manufacturer, its service agent or similarly qualified persons in order to avoid a hazard.
- Use only accessories, parts or tools recommended for this appliance.
SAFETY INSTRUCTIONS
- This appliance is intended to be used in household (indoors) and similar applications.
- Do not use a damaged appliance.
- The appliance shall be installed in accordance with local wiring regulations.
- Make sure that the parameters on the rating plate are compatible with the electrical ratings of the mains.
- Always use a correctly installed shockproof socket.
- Do not pull the mains cable to disconnect the appliance. Always pull the mains plug.
- Do not let the appliance stay unattended while it is connected to the mains.
- Do not immerse the appliance body, cord or plug in water. Keep the mains cable away from sharp objects and heat sources.
- Always place the appliance on a flat and stable surface.
- Do not hold the hose directly or twist the hose connector when using the appliance to avoid the risk of burns.
- Do not point the steam nozzle directly at people, animals, or easily damaged clothing (such as leather clothing) during the use of the appliance.
- Do not pull the steam hose to move or lift the appliance.
- Do not expose the appliance to very high or freezing temperatures.
- Always use purified water to iron clothes.
- Never use the appliance with the empty water tank. Do not exceed the maximum filling volume as indicated on the water tank.
- During use, the indicator light is turned off and then turned on, which is caused by the startup of appliance overheat protection and will recover after a period of time.
- Concerning the lamp(s) inside this product and spare part lamps sold separately: These lamps are intended to withstand extreme physical conditions in household appliances, such as temperature, vibration, humidity, or are intended to signal
information about the operational status of the appliance. They are not intended to be used in other applications and are not suitable for household room illumination. - Do not use harsh abrasive cleaners or sharp metal scrapers to clean the appliance to avoid damaging the surface or water leakage.
- Refer to corresponding chapters for details on filling, cleaning, and descaling of the appliance.
- Store the appliance in a dry place to avoid possible moisture condensation inside the appliance.
- Before storing, let the appliance cool down, empty the water tank, and wind up the mains cable. Always place the steam nozzle in an upright position on the steam nozzle hook.
- Before disposal, disconnect the appliance from the mains and cut off the mains cable.
Environmental Concerns
 This symbol on the product or on its packaging indicates that the product contains a rechargeable battery which shall not be disposed with normal household waste.
Recycle materials with the symbol![]() .
.
Put the packaging in relevant containers to recycle it.
Help protect the environment and human health by recycling waste of electrical and electronic appliances.
Do not dispose of appliances marked with the symbol![]() with the household waste.
with the household waste.
Return the product to your local recycling facility or contact your municipal office.
PRODUCT DESCRIPTION
General description
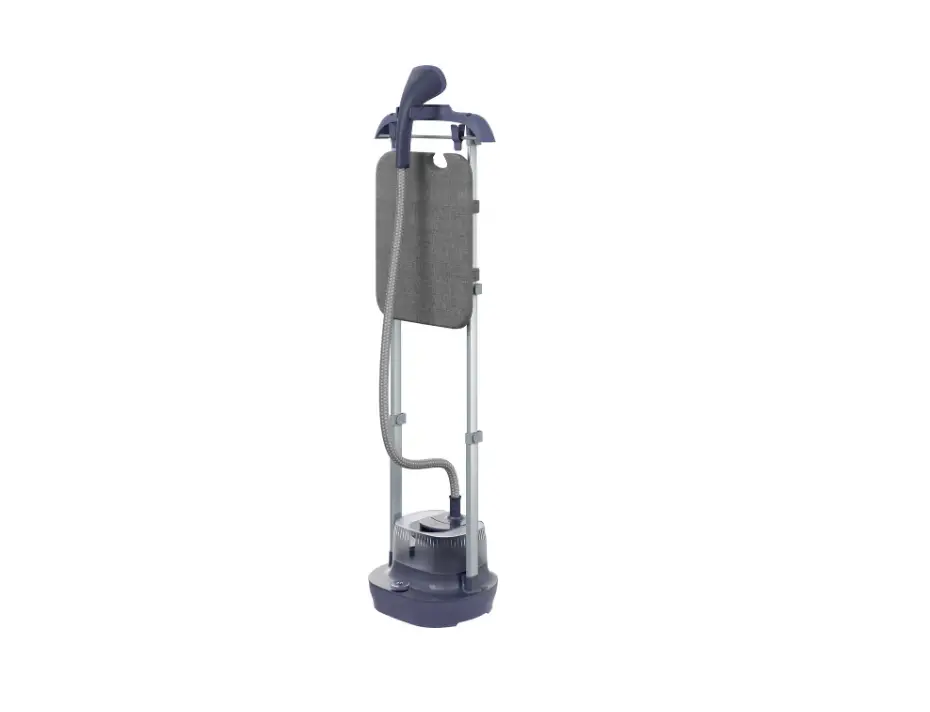
Garment steamer uses high temperature steam for ironing. It is more effective with ironing delicate materials or heavy fabrics and removing creases.
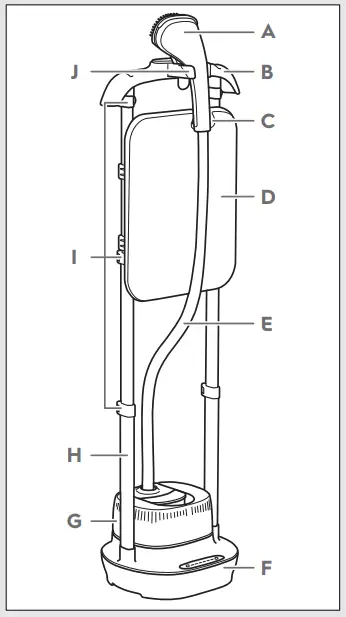
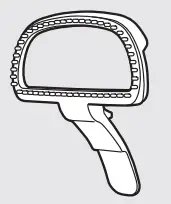
- A. Steam head
- B. Hanger
- C. Steam head hook
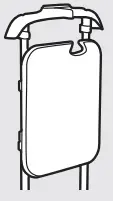
- D. Ironing board
- E. Steam hose
- F. Base unit
- G. Water tank
- H. Adjustable poles
- I. Pole locks
- J. Hanger and steam head hook.

Accessories
 |  |  |
| Brush To improve ironing results. Align the back of the brush with the steam nozzle and press the bucket at the bottom of the brush. | Glove To avoid burns during ironing | Ironing board To place the clothes on a stable surface. It can be used vertically or horizontally |
BEFORE FIRST USE
 | |
DAILY USE
| Step 1: Open the pole lock. Stretch the telescopic rod to fully unfold each section. |
| Step 2: Lock the rod lock. |
| Step 3: After the telescopic rod is fully extended, align the bulge of the telescopic rod with the jack groove on the base unit. |
| Step 4: Press down the telescopic rods until they click. |
 Filling the water tank Filling the water tank |
| Step 1: Hold the water tank handle and lift it up. |
| Step 2: Unscrew the water tank cover. |
| Step 3: Fill the water tank. |
| Step 4: Screw back the water tank cover. |
| Step 5: Hold the water tank handle. Make sure the water tank cover points downwards. Check the water quantity and ensure that there is no water leaking from the position of the water tank cover. |
| Step 6: Place the water tank vertically on the base unit. |
 Power on Power on |
| Step 1: Plug the appliance. |
| Step 2: Press the power button. |
| Step 3: Press the adjustment button. |
| Step 4: After approximately 45-70 seconds, the steam nozzle will start to generate steam. |
 Ironing the clothes Ironing the clothes |
| Step 1: Hang the clothes on the hanger. |
| Step 2: Hold the steam nozzle and keep it vertical. |
| Step 3: Attach the steam nozzle to the clothes and iron down. |
| Icon Function | Application | Steam amount | |
 ON/OFF ON/OFF | To turn on and off the appliance. | – | |
 | |||
| |||
| To de-wrinkle the garments with steam. | |||
| To steam thinner and delicate clothes with lower amount of steam. |  | ||
| To steam thicker clothes made from wool with more steam. | | ||
| To steam thicker clothes made from cotton with more steam. | | ||
 Linen Linen | To steam thicker clothes made from linen with more steam. | | |
 | Steam button | To regulate the amount of steam. Press the button the add/remove steam. | – |
HINTS AND TIPS
 Tips to improve the effects of ironing Tips to improve the effects of ironing |
|
| Use Garment refresh kit Pure – ultimate fabric finish with long-lasting freshness |
| PNC: 900 923 464/3 Model: EGRFK1 |
For more information check: www.electrolux.com/shop |
CARE AND CLEANING
 CAUTION: Before cleaning, wait until the product is cold CAUTION: Before cleaning, wait until the product is cold | |
 DOs DOs |
|
|
|
 DON’Ts
| Storage |
|
 Descaling Descaling |
| This appliance needs to be descaled regularly. For the descaling frequency, check the table below. |
| Step 1: Remove the water tank from the main unit. |
| Step 2: Fill the water tank. |
| Step 3: Shake the water tank gently and till it to drain the water. |
| Step 4: Pour the mix of 200 ml of water and 200 ml of white vinegar into the water tank, place it on the base unit, and gently shake the main engine to fill the boiler with water. |
| Step 5: Let the appliance stand for about 8 hours. |
| Step 6: Shake the main engine gently. |
| Step 7: Turn the calcium removal knob clockwise. Tilt the product and drain the solu‐ tion. |
| Step 8: Turn the calcium removal knob clockwise. |
| Step 9: Fill the water tank to its full capacity and load it into the appliance. |
| Step 10: Repeat the procedure from steps 5-9. |
| Step 11: Turn on the power supply and start the appliance, so that it can continuously re‐ lease steam. |
| Step 12: Turn off the host power and unplug the power plug. |
| Classification | Hardness in mg/L | Hardness in mmol/L | Hardness in dGH/°dH | Descaling frequency |
| Soft | 0 – 60 | 0 – 0.60 | 0.3 – 3.00 | More than 1 year or unnecessary |
| Moderately hard | 61 – 120 | 0.61 – 1.20 | 3.72 – 6.75 | 9 – 12 months |
| Hard | 121 – 180 | 1.21 – 1.8 | 6.78 – 10.08 | 6 – 9 months |
| Very hard | > 181 | > 1.81 | > 10.14 | 3 – 6 months |
| Descaling frequency is based on the using estimation of 2 tanks per week | ||||
The recommended time of self-cleaning is around 36 hours (based on water hardness more than 10 °dH).
| ||||
TROUBLESHOOTING
| No steam is released and the power light is off. | Connection problem | |
| The appliance is not switched on. | Press the ON/OFF button. | |
| No steam is released but the power light is on. | The water level in the water tank is too low. | Fill water into the water tank. |
| Water leakage from the steam nozzle | The steam nozzle cracked. | Replace with a new set of steam hose. |
| Condensation from the steam hose | Lift the steam nozzle in upright position. | |
| Water leaking out from the water tank. | The water tank cracked. | Replace with a new water tank. |
| The steam hose is in U shape or bent for a long period of time. | Lift the steam hose in upright position. | |
| The water tank is deformed. | Filling up the water tank with hot water | Replace with a new water tank |
| Chemical residue from inadequate cleaning process. | ||
| The steam output is too little | The switch or the heating unit is damaged. | Contact an Authorized Service Centre. |
| There is a gurgling sound when the appliance operates. | Condensation from the steam hose. | Lift the steam nozzle in upright position. |
| The steam hose is in U shape or bent for a long period of time. | Lift the steam hose in upright position. |