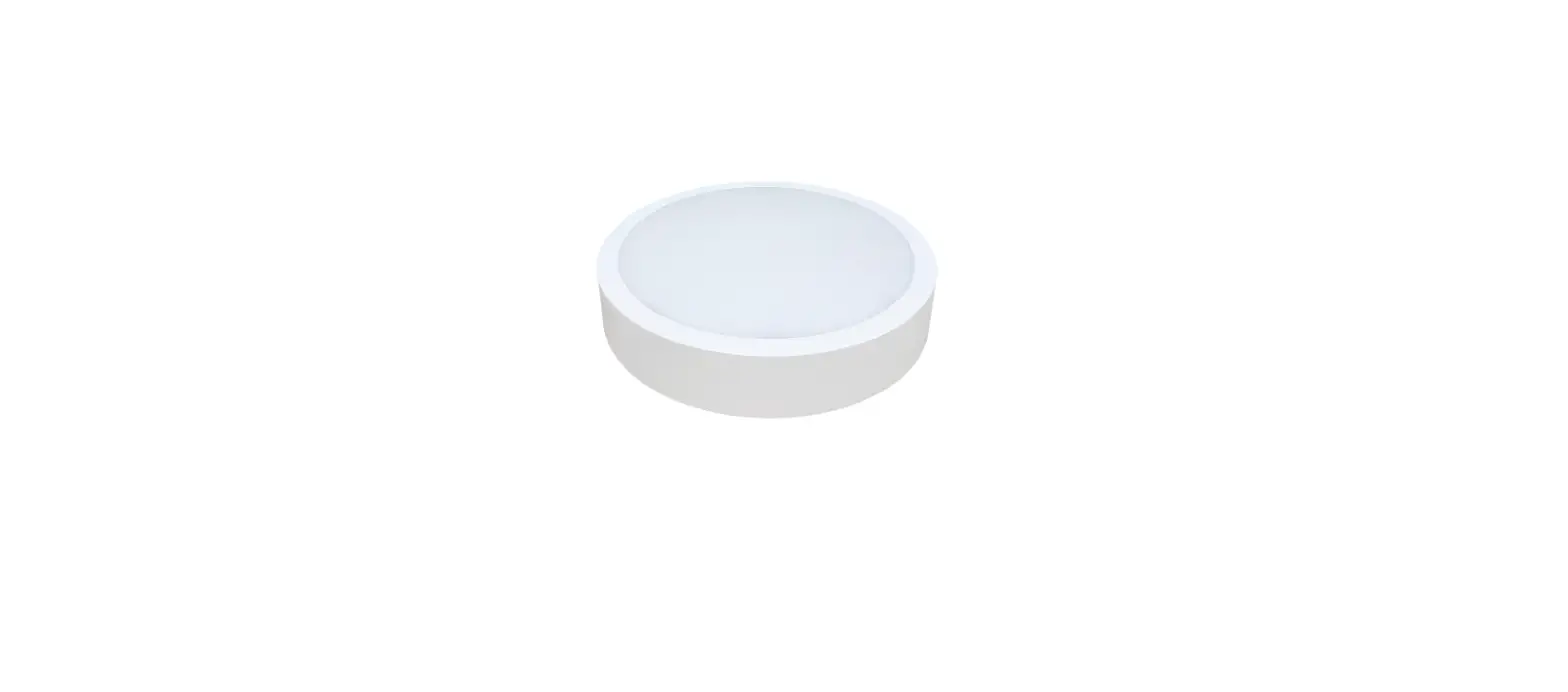
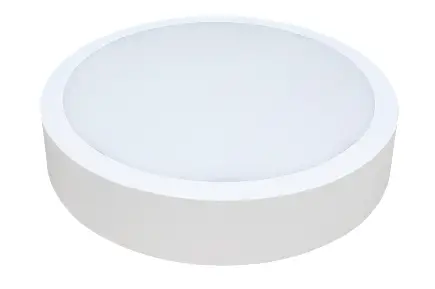
 A LED Quanta Q290 Ceiling LED Light
 Important: Please read the instruction manual carefully prior to installation and keep it for future reference.
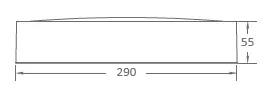
| Ordering Code | Product | Power (W) | Function Description |
| Fitting Series | |||
| Sensor DIM, | |||
| Brida Sensor CCT Hvid / Sort | Brida | 18 | color temperature selectable, power switchable |
Mounting: Wall or Ceiling Light features:
Ra: >80
Life Time: 5 years
Light Source: LED SMD2835 Input: 220V-240V 50/60Hz
CCT
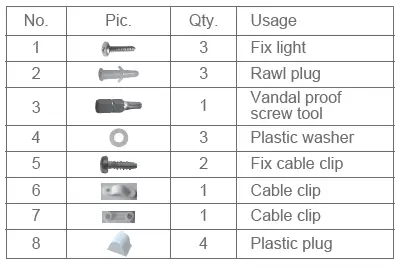
Accessories

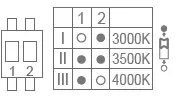
Colour Temperature Code
| Code | Colour Temperature | CCT(K) | Lumen | |
| Hvid | Sort | |||
| 30K | Warm White | 3000 | 2070 | 1980 |
| 35K | Natural White | 3500 | 2160 | 2030 |
| 40K | Cool White | 4000 | 2196 | 2070 |
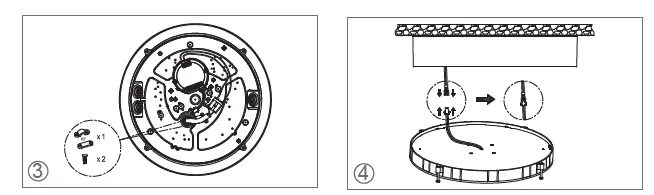
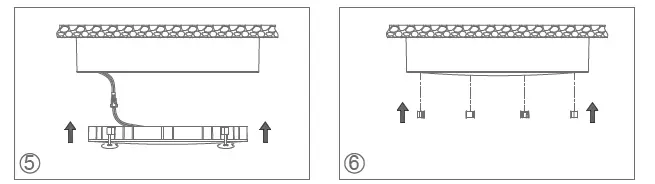
Installation
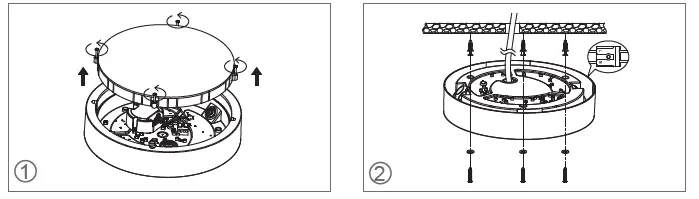
- Unscrew the diffuser anticlockwise. Vertically remove the diffuser and PCBA.
- Cut off the power. Thread the input cable through the rubber plug to the fixture. Connect the L, N wire referring to the wiring diagram.
- Knock the rawl plugs into the pre-drilled holes on ceiling /wall.
- Wear plastic washers on self-tapping screws and tighten them to fix the fixture on ceiling/wall.
- Contact an authorised technical service centre for any repairs possibly required use only original spare parts.
- Do not touch LED while installing or maintaining.
- Sealing the entrance hole with glue after install is needed.
- The light source contained in this luminaire shall only be replaced by the manufacturer or his service agent or a similar qualified person.
Instruction for Light Source Disassembly
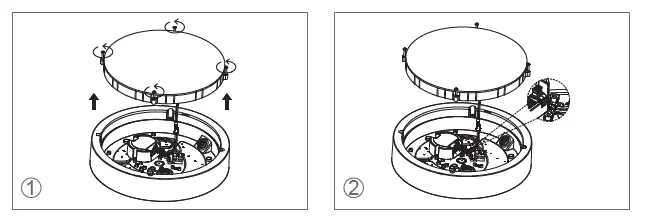
- Unscrew the diffuser anticlockwise and vertically take it out.
- Disconnect the DC power cable from the driver.

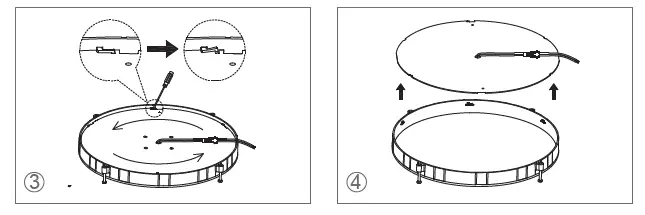
- On the reverse of diffuser, use the screwdriver to pry the clips to release the PCBA, then twist the PCBA anticlockwise.
- Take out the PCBA (light source) from the diffuser.This product contains a light source of energy efficiency class <D>

- Install the cable clip.
- Connect the DC cable.
- Mount the diffuser onto the base with screws.
- Install the plastic plugs to hide the screws.

Wiring

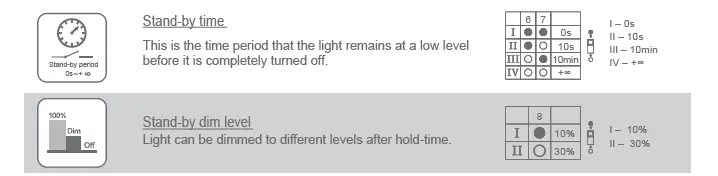
Sensor Setting Options
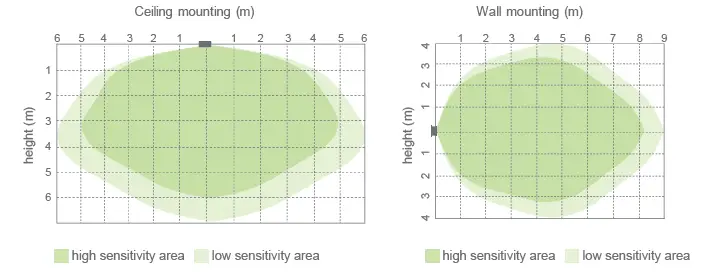
Detection Pattern
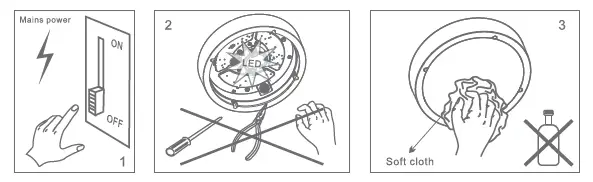
Maintenance
- Cut off the main power first.
- Don’t touch LEDs while maintaining or cleaning.
- Don’t use chemicals to clean the fixture.

Environmental protection: waste electrical products should not be disposed of with household waste. Please recycle where facilities exist. Check with your local authority or retailer for recycling advice.
Caution
- The product must be installed by professional technicians and power supply must be cut off before installation.
- The diameter for AC input wire is 0.75mm² (complying with 60245 IEC57), which complies with the latest IEE electrical standards or national standards.
- Do not touch the electronic circuit and its components.


