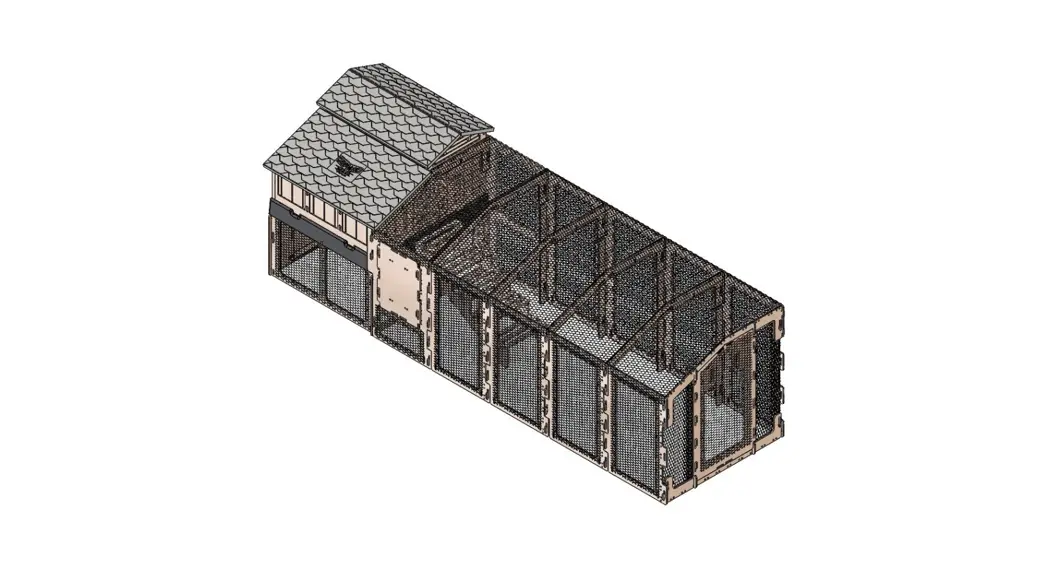
![]() Small Coop Run Extension
Small Coop Run Extension
Instruction Manual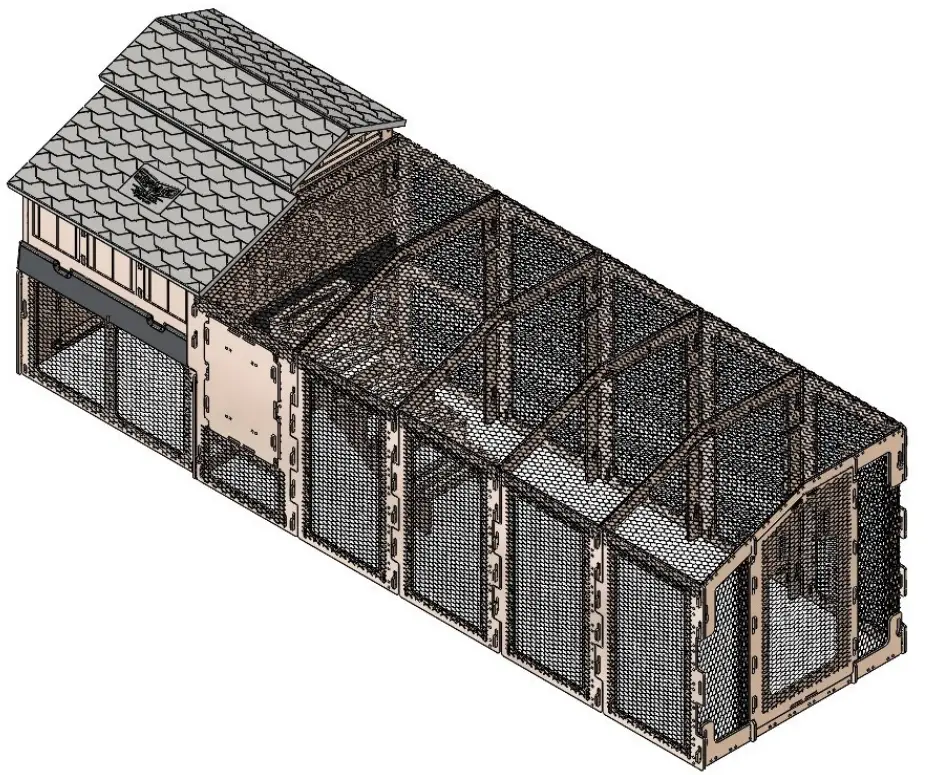 Small Coop Run Extension
Instruction Manual
for Snap Lock Small Chicken Coop Run
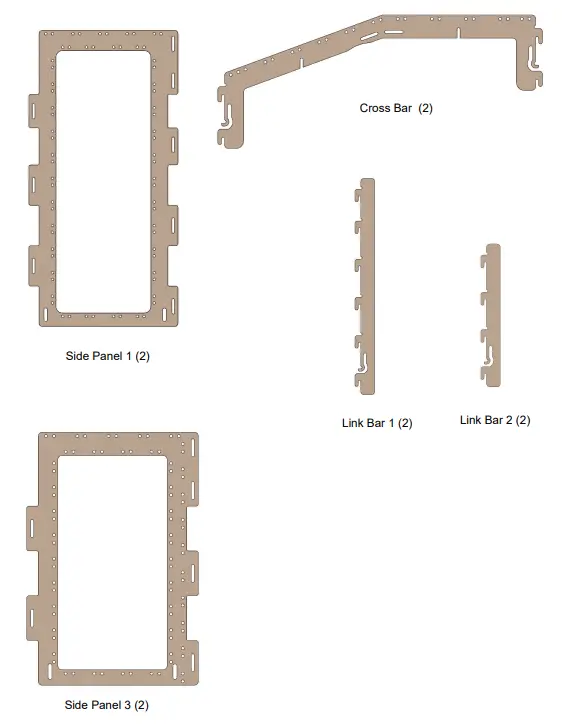
PARTS LIST FOR THE SMALL SNAP LOCK CHICKEN COOP RUN
This kit for the Small Model SNAP LOCK CHICKEN COOP RUN includes the following:
- one envelope containing instructions, the warranty
- It also includes all the parts listed on this page
SMALL COOP RUN EXTENSION Assembly
Step 1: First remove the SMALL CHICKEN COOP RUN end assembly. First detach any wire twists or zip ties used to connect the chicken wire along the end section.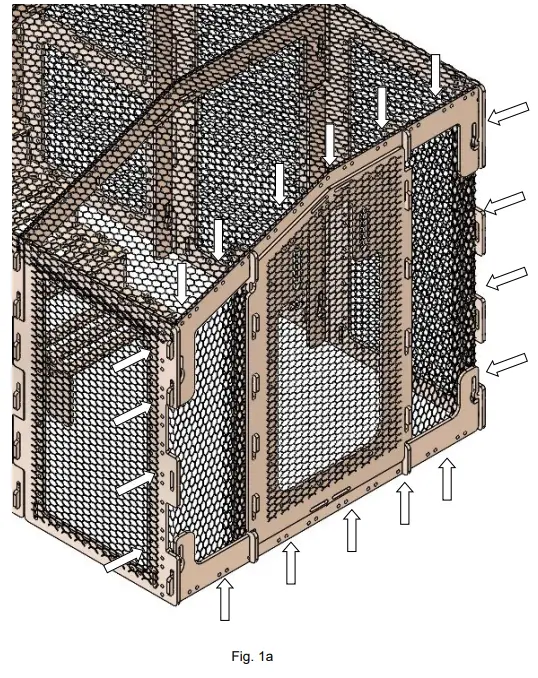 Step 2: Then remove first the cross bar, followed by the door and door supports, followed by the bottom bar. Set these components aside as they will be used later. To remove the cross and bottom bar, first place a screw driver or other lever into the locking lever and lift to disengage the lock. Then lift firmly to align the slots and tabs, then
pull away from the side panel to remove. Step 3: Now assemble the extension. Connect the Side Panel 1s together by using the Link Bar 1 as shown. First align the side panel 1s so that the slots on one side align. Then insert the Link Bar 1 into the slots leaving the top two slots open. Press down firmly until the it locks into place.
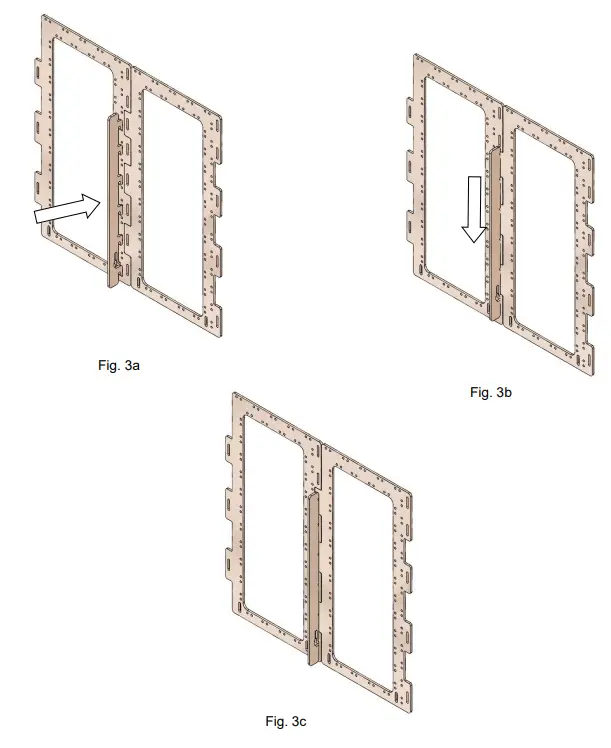 Step 4: Repeat this process with the support bar 2 and side panel 3s on the reverse side of the side panels to assemble the second wall of the CHICKEN COOP RUN EXTENSION
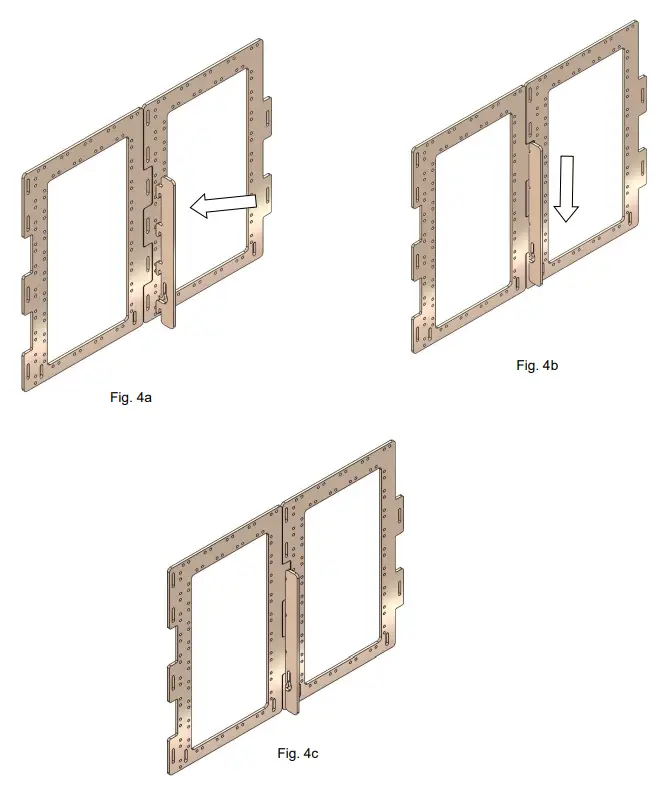 Step 5: Place both side panel assemblies so that the slots align with the open slots on the end of the SMALL CHICKEN COOP assembly. Lock them into place as shown by inserting two Link Bars into the slots, leaving the top two slots on the SMALL CHICKEN COOP assembly open. Press the Link Bars down until they lock into place.
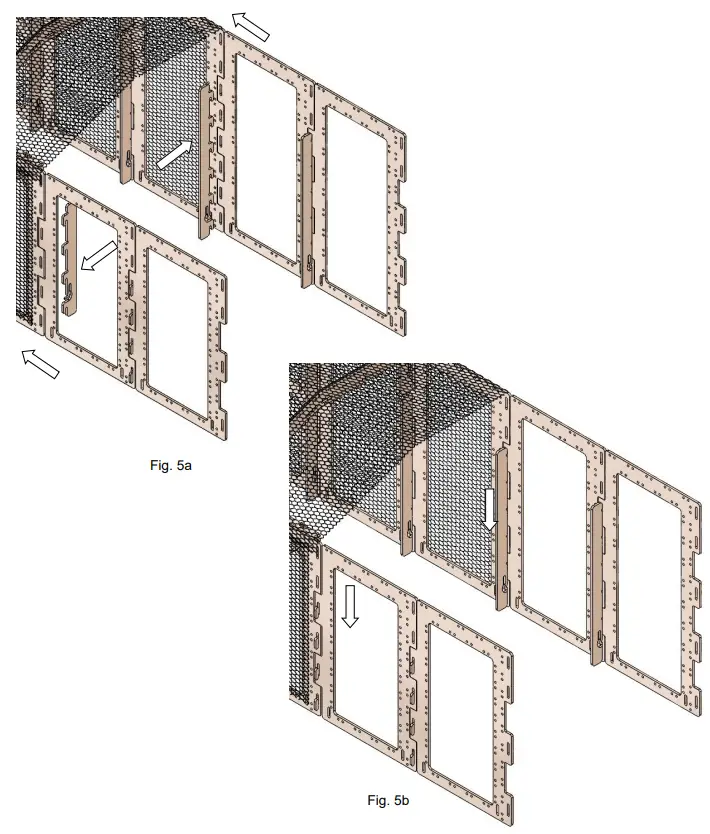 Step 6: Install the Bottom Bar and both Door Frame 1 and 2 components from the original SMALL CHICKEN RUN assembly onto the end of the SMALL CHICKEN RUN EXTENSION as shown. Press the side panels outward to allow the tabs of the Bottom Bar to fit. Press the Bottom Bar down firmly until it locks into place.
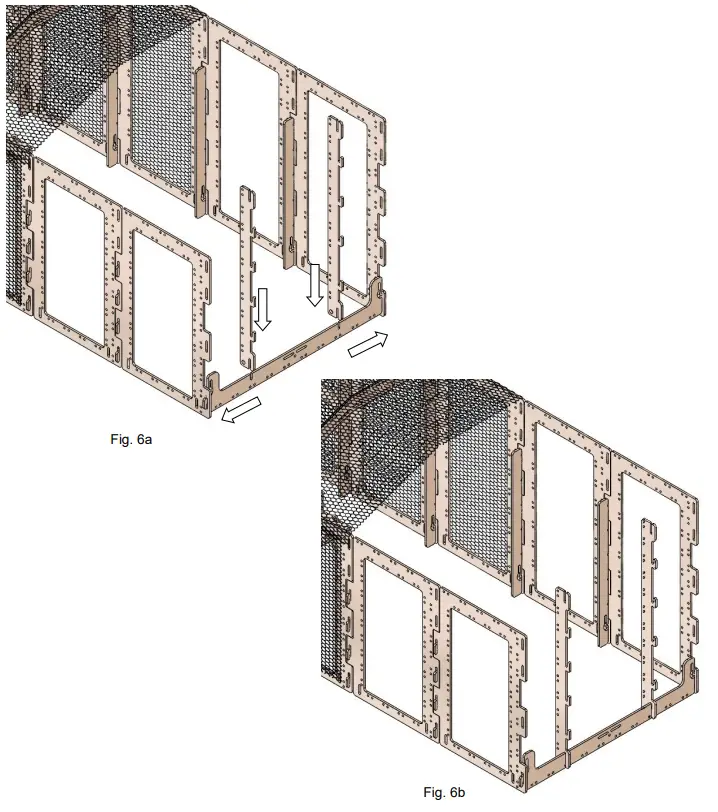 Step 7: Now attach the two included Cross Bars and the Cross Bar removed from the original CHICKEN COOP RUN assembly into the top two slots of the side panels. Press the Side Panels outward to insert the tabs, then press the Cross Bars downward until they lock into place.
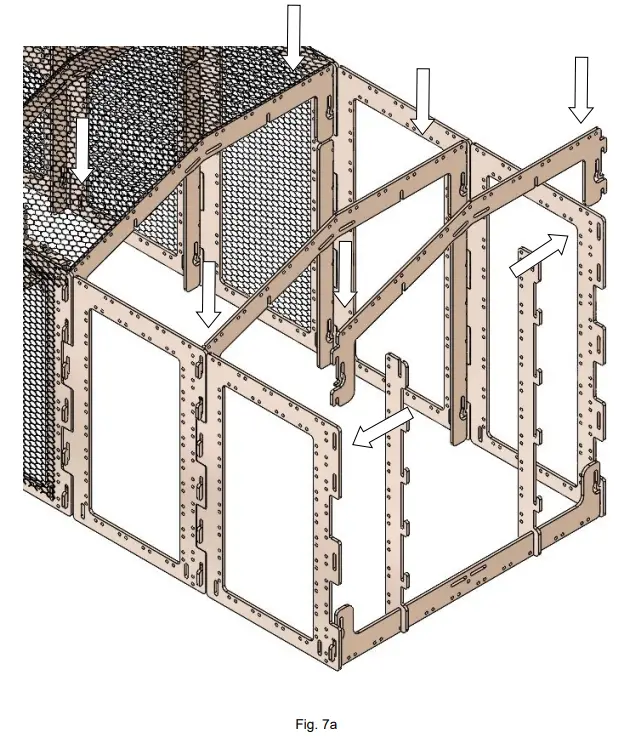 Step 8: Place the End Door from the original SMALL COOP RUN assembly back into place, now at the end of the SMALL COOP RUN EXTENSION assembly
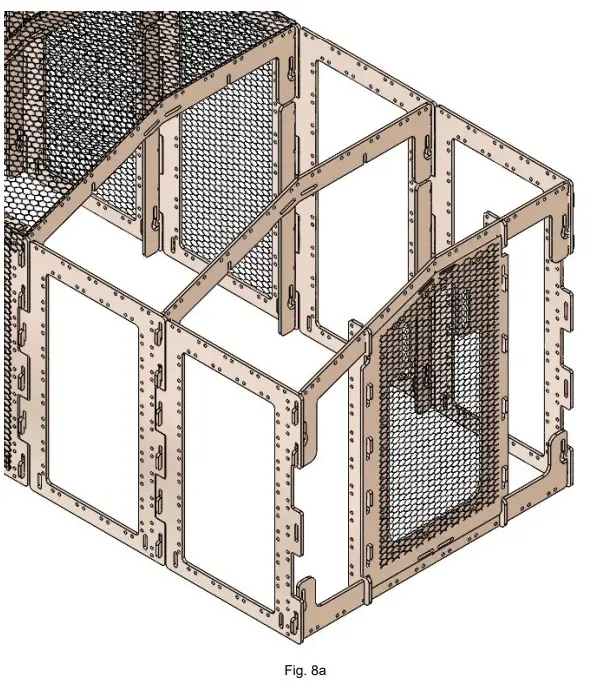 Step 9: The Snaplock Small Chicken Coop Run Extension is compatible with all standard chicken wire. Chicken wire is not included with the Snaplock Small Chicken Coop Run Extension.
Cut the chicken wire to the following dimensions and quantities
38” x 17” quantity 2
30” x 17” quantity 2
48” x 21” quantity 2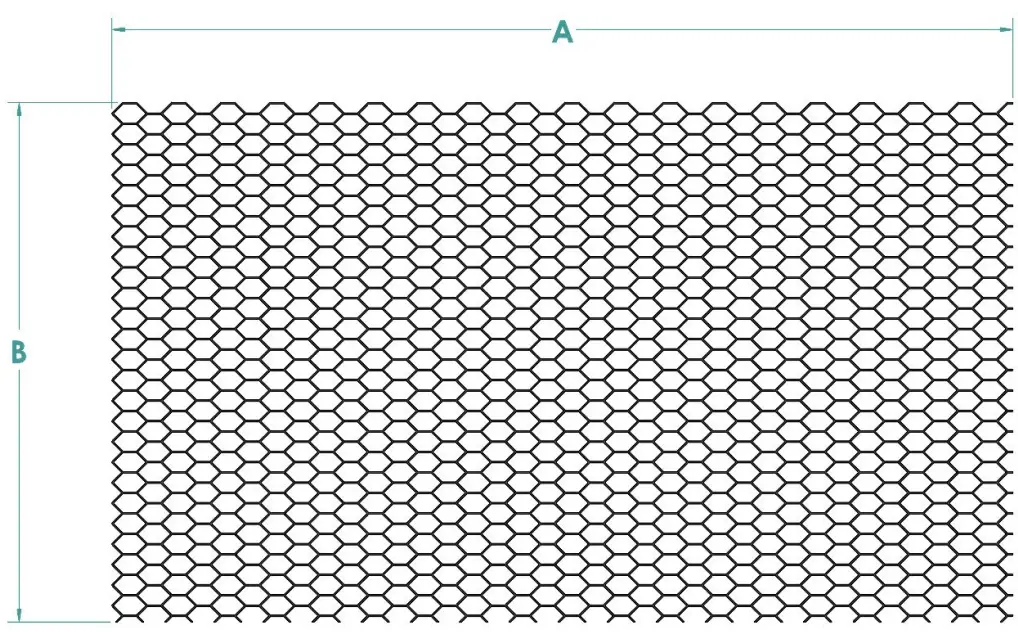 Step 10: Use any zip tie or wire twist to attach the chicken wire segments to the Small coop run extension as shown
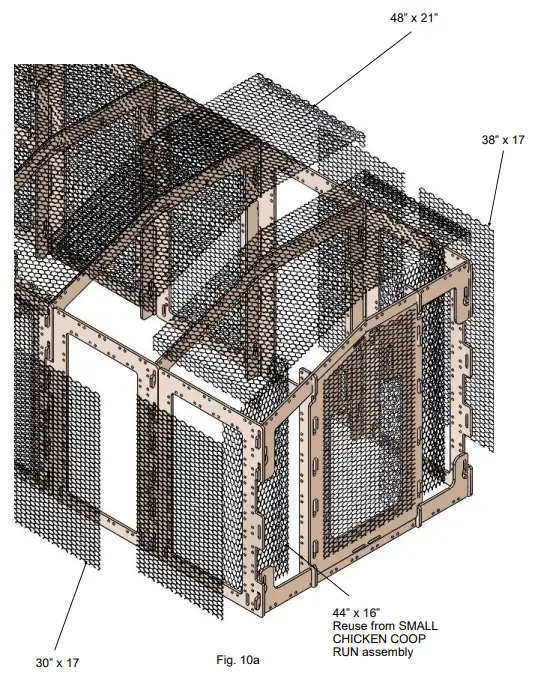 Step 10 continued: Use any zip tie or wire twist to attach the chicken wire segments to the Small coop run and stand as shown
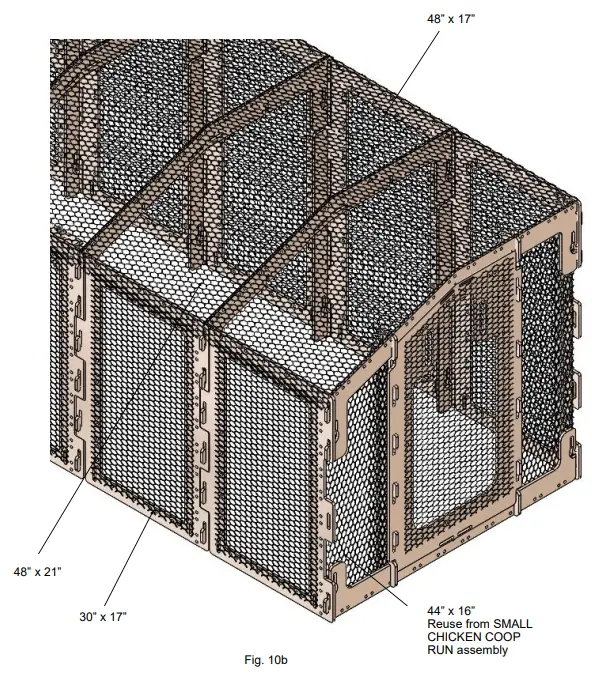 Step 11: You have now completely assembled the SMALL COOP RUN EXTENSION to the SMALL COOP RUN.
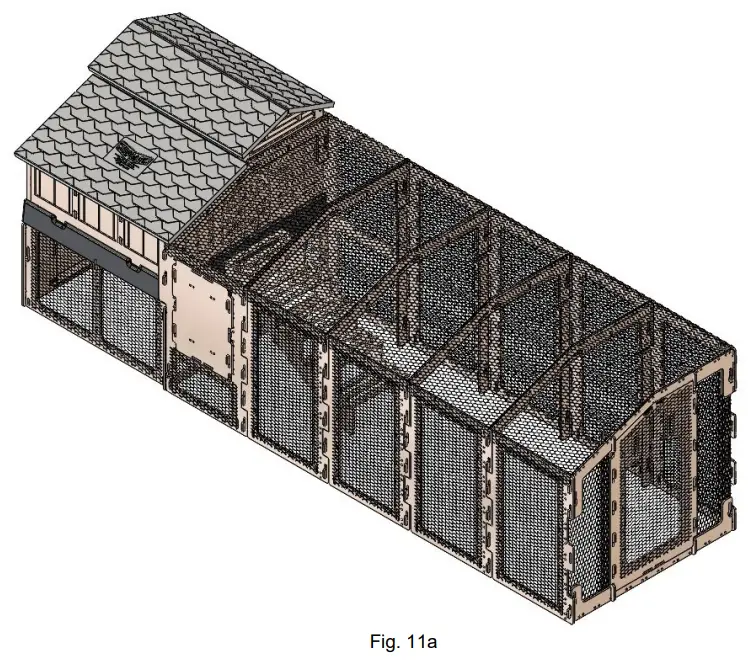
![]()


