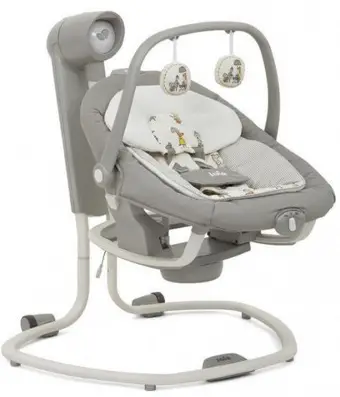
Joie Serina 2 in 1 Swing
WARNING:
- NEVER leave the child unattended. Always keep your child in view.
- Do NOT use this product once your child can sit up unaided or weighs more than 9kg (approximately 0-6 months).
- Never use this product on an elevated surface(e.g. a table)
- Always use the restraint system.
- This product is not intended for prolonged periods of sleeping.
- DO NOT let children play with this product.
- DO NOT move or lift this product with the baby inside it.
- To avoid injury ensure that children are kept away when unfolding and folding this product.
- This product does not replace a cot or a bed, when your child needs to sleep, it should be placed in a suitable cot or bed.
- Be aware of the risk of open fire and other sources of strong heat such as electric bar fires, gas fires, etc in the vicinity of the product.
- To avoid strangulation, DO NOT place items with a string around your child’s neck, suspend strings from this product, or attach strings to toys.
- All assembly fittings should be unfolded completely and tightened properly before using the product.
- DO NOT use the product if any parts are broken, torn or missing.
- DO NOT use accessories or replacement parts other than those approved by the manufacturer.
- Non-rechargeable batteries are not to be recharged.
- Rechargeable batteries are to be removed from the product before being charged.
- Rechargeable batteries are only to be charged under adult supervision.
- Different types of batteries or new and used batteries are not to be mixed.
- Batteries are to be inserted with the correct polarity.
- Exhausted batteries are to be removed from the product.
- The supply terminals are not to be short-circuited.
- Change batteries when product ceases to operate satisfactorily.
- Keep the batteries out of children’s reach.
- To prevent possible injury by entanglement, remove the toys when the child starts trying to get up on its hands and knees in a crawling position.
- To avoid suffocation, remove plastic bag and packaging materials before using this product. The plastic bag and packaging materials should then be kept away from babies and children.
- Transformers used with the product are to be regularly examined for damage to the cord, plug, enclosure and other parts, and in the event of such damage, they must not be used.
- The product must only be used with the recommended transformers.
- It is dangerous to use this product on an elevated surface e.g. a table.
- Do not use the reclined cradle once your child can sit unaided.
Parts List
Read all the instructions in this manual before using this product. If you have any further questions, please consult the retailer. Some features may vary depending on model. No tools are required for assembly.
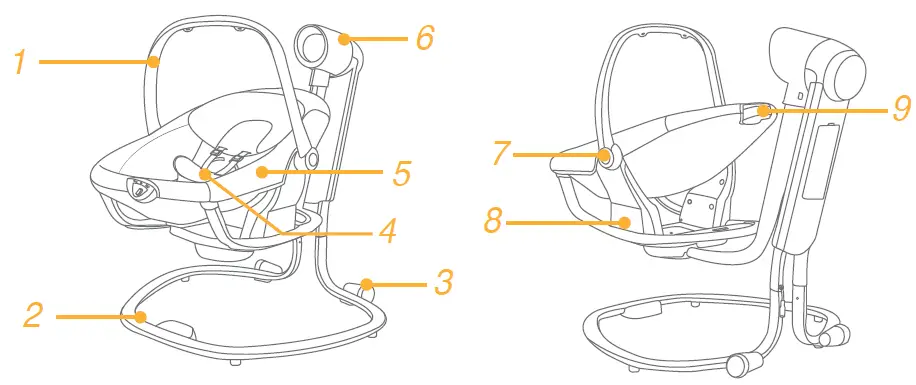
- Handle
- Bracket Tower Assembly
- Wheels
- Crotch Harness Cover
- Seat Pad
- Electronic Module
- Handle Adjustment Button
- Rocker
- Reclining Adjustment Button
FEATURES
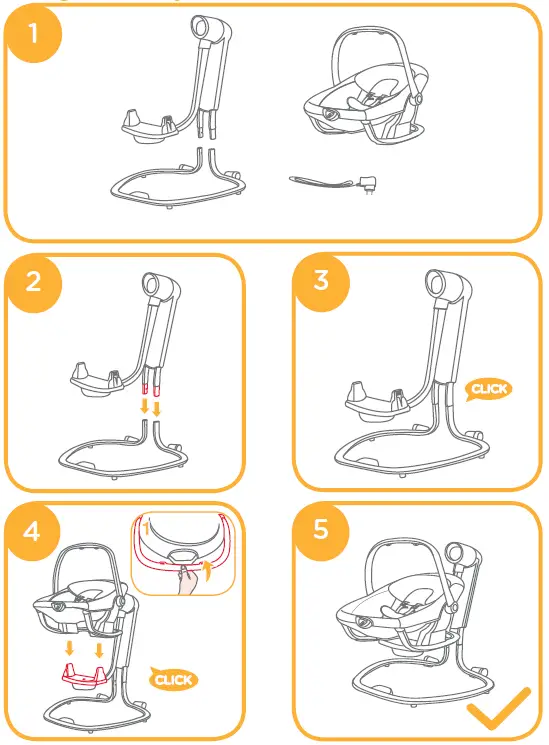
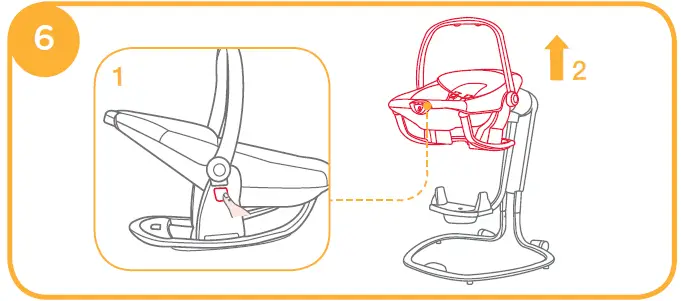
Swing Assembly: Rotate the handle up first to the most upright angle 4 -1.
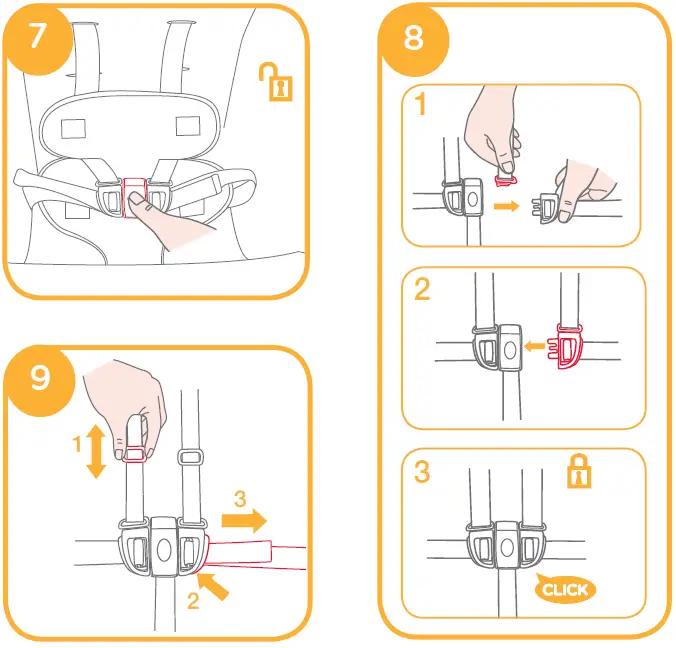
Use Buckle:
Release Buckle
Press the center button to release the buckle. 7
Lock Buckle
Match the waist belt buckle with the shoulder buckle 8 -1, and click into the center buckle. 8 -2
A “click” sound means the buckle is locked completely. 8 -3
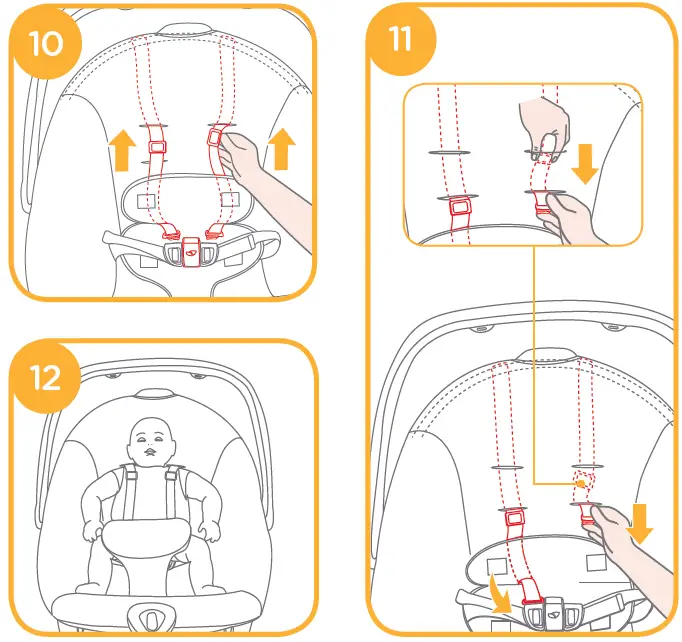
- To avoid serious injury from falling or sliding out, always secure your child with harness.
- Make sure your child is snugly secured. The space between the child and the shoulder harness is about the thickness of one hand.
- Do not cross the shoulder belts. This will cause pressure on the child’s neck.
Use Shoulder Harnesses:
see images 10 – 12
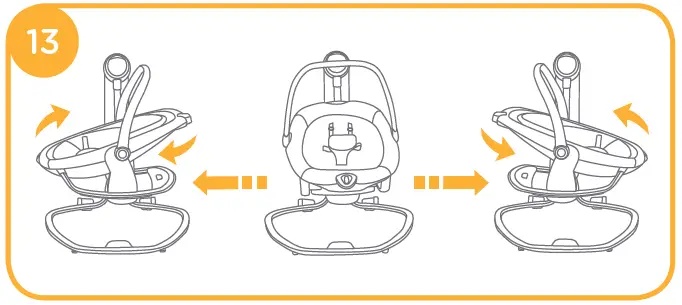
Rotate the seat:
see images 13
The seat can be rotated by 180 degrees from side to side.
Use Wheels:
see images 14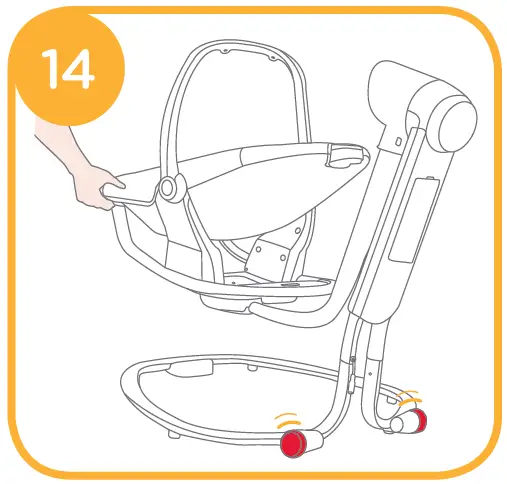
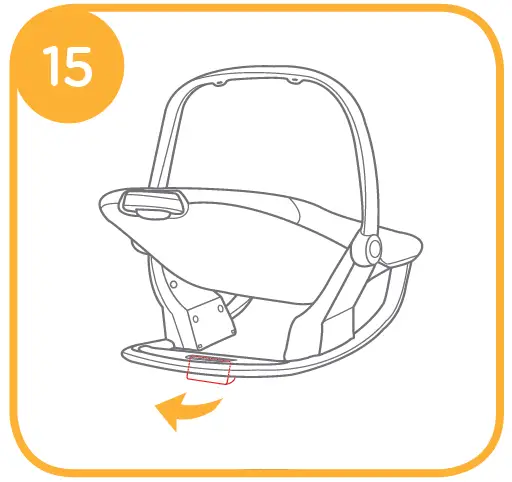
To stabilize the rocker:
see images 15
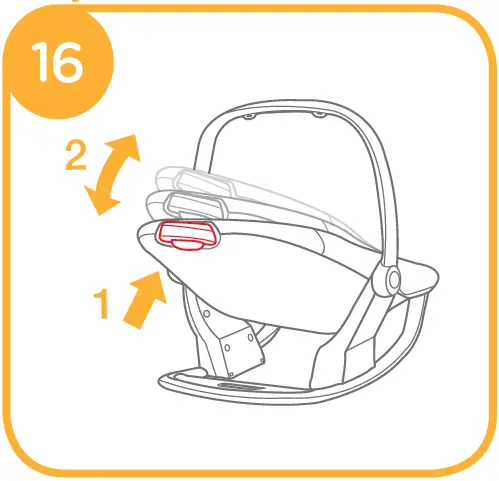
Adjust Recline:
see images 16
There are 3 recline positions.
Squeeze button on the back of seat and push down or pull up to adjust the seat back to a desired recline position.
Make sure the recline is set properly for use.
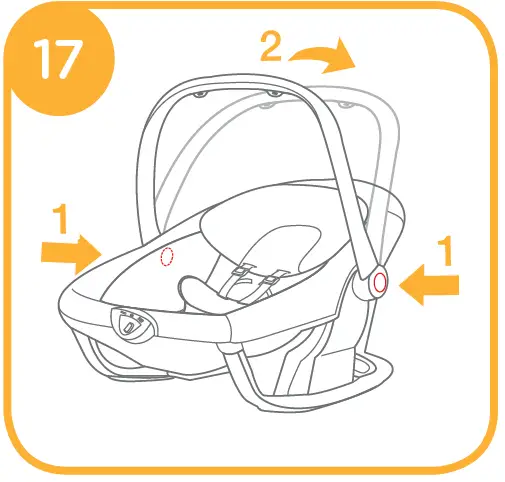
Handle Adjustment:
see images 17
Handle can be adjusted to 2 positions.
To adjust the handle, press the left and right handle adjustment buttons at the same time, and rotate the handle to a desirable position.
Please keep the handle in upright status for use.
Use Electronic Module:
see images 18 – 19
Recommended type batteries-alkaline disposables, size D (4X1.5V). NEVER mix battery types. 19

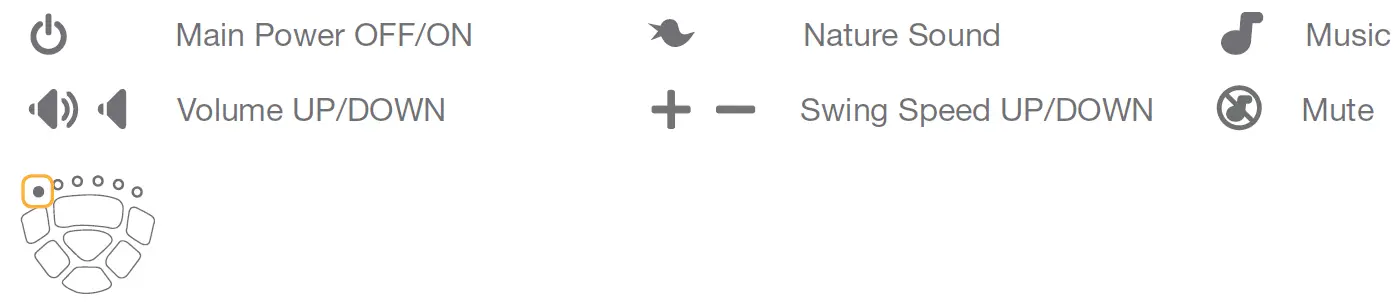
If the top left light on the motor is flashing blue, please check to ensure that you are using the correct adaptor (adaptor supplied or approved by the manufacturer).
Use Vibration:
see images 20 – 21
Recommended type batteries-alkaline disposables, size D (1.5V). 21
- Vibration Speed
- Down Vibration Off
- Vibration Speed Up
Batteries not included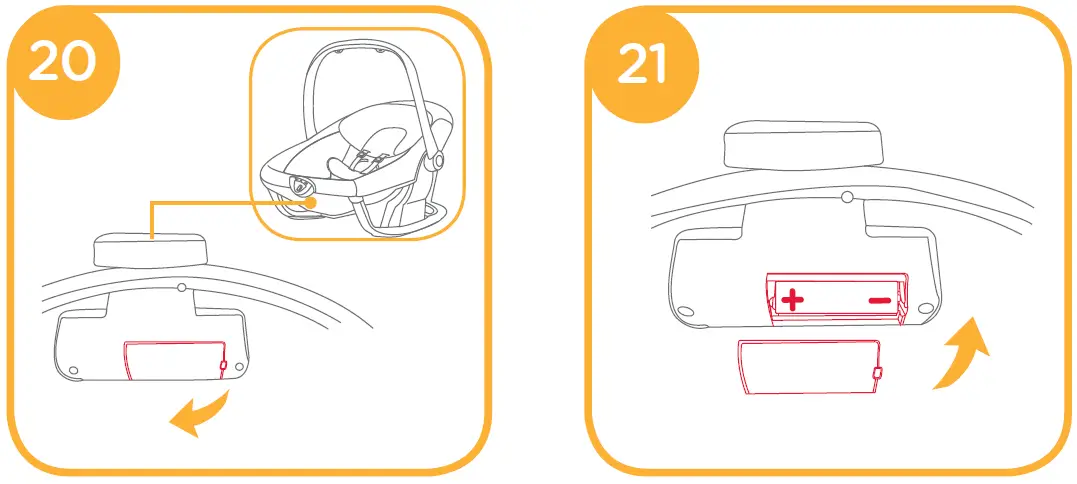
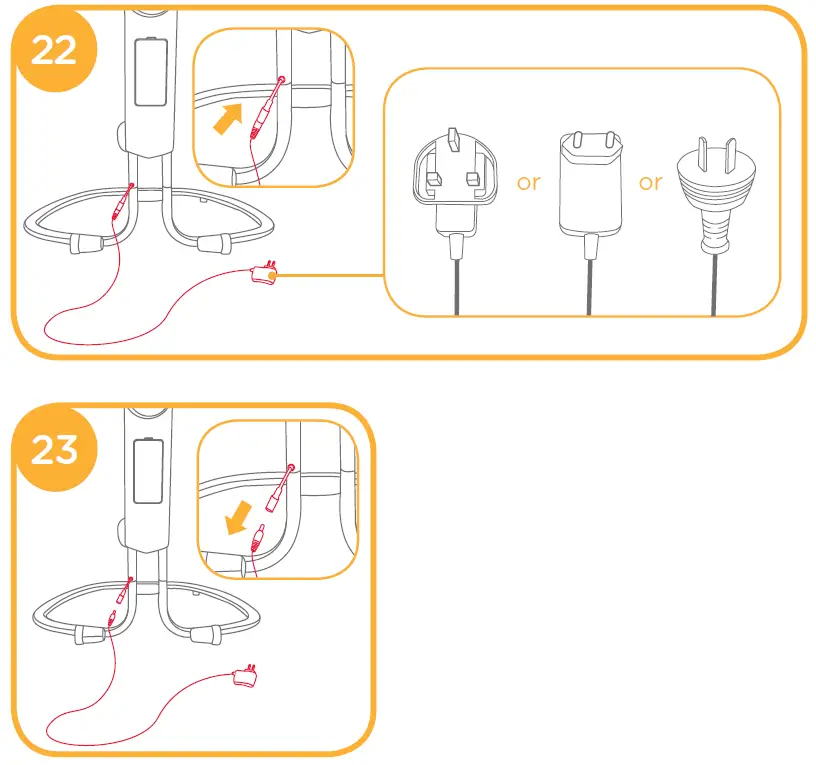
Use Wall Plug:
see images 22 – 23
 Product does not recharge batteries. When AC adapter is in use, batteries will automatically shut off.
- DO NOT place product near water and moisture. Do not use the product near possible wet areas, such as a bathtub, shower, wash basin, sink, laundry tub, swimming pool, wet basement, etc.
- DO NOT use the AC adaptor if it has been exposed to liquids, has been dropped, or is damaged.
- Protect the power cord. Place it so it is not walked on or pinched by furniture or other items.
- Keep this cord out of the reach of children. DO NOT use with an extension cord.
- Use only power cord provided.
 Product does not recharge batteries. When AC adapter is in use, batteries will automatically shut off.
Accessories (May not be included):
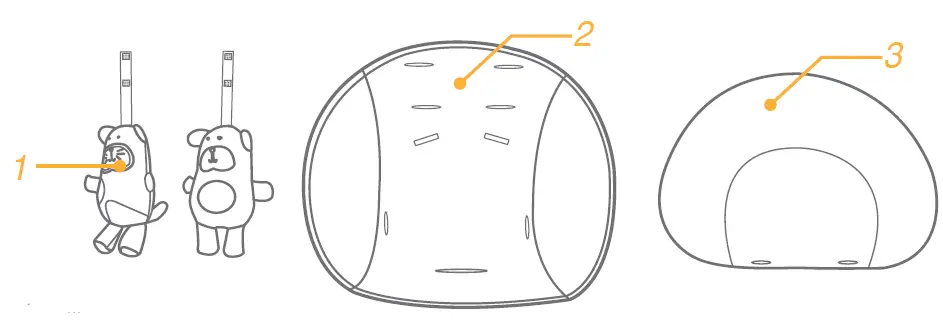
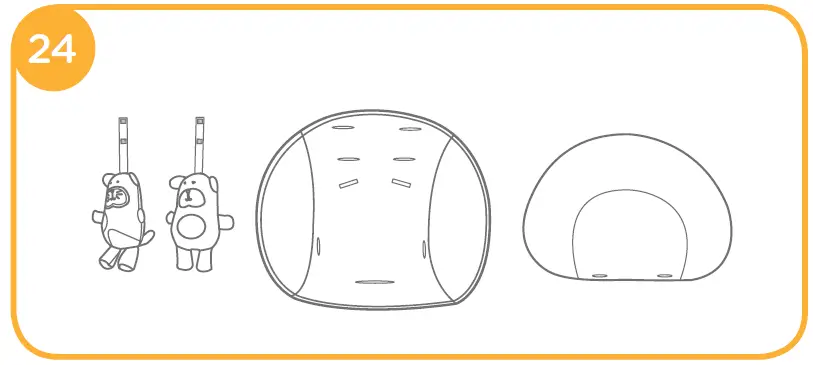
- Toy
- Infant Insert
- Head Support
Accessories may be sold separately or may not be available depending on region.
see images 24 – 27
Use Toy:
see images 25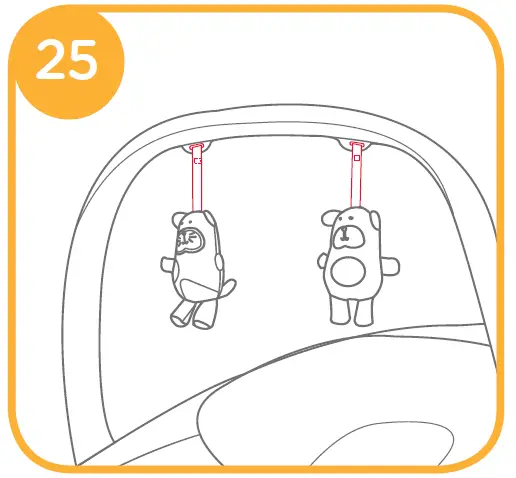
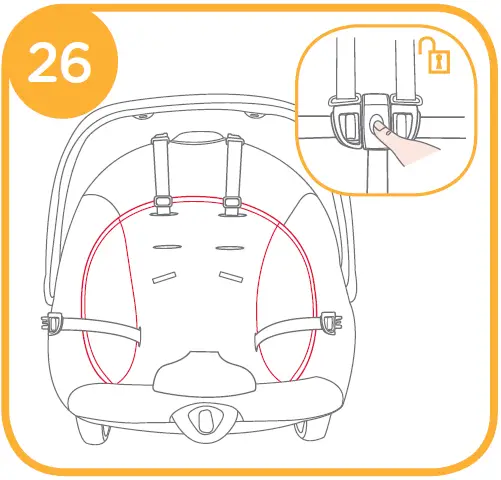
Use Infant Insert:
see images 26
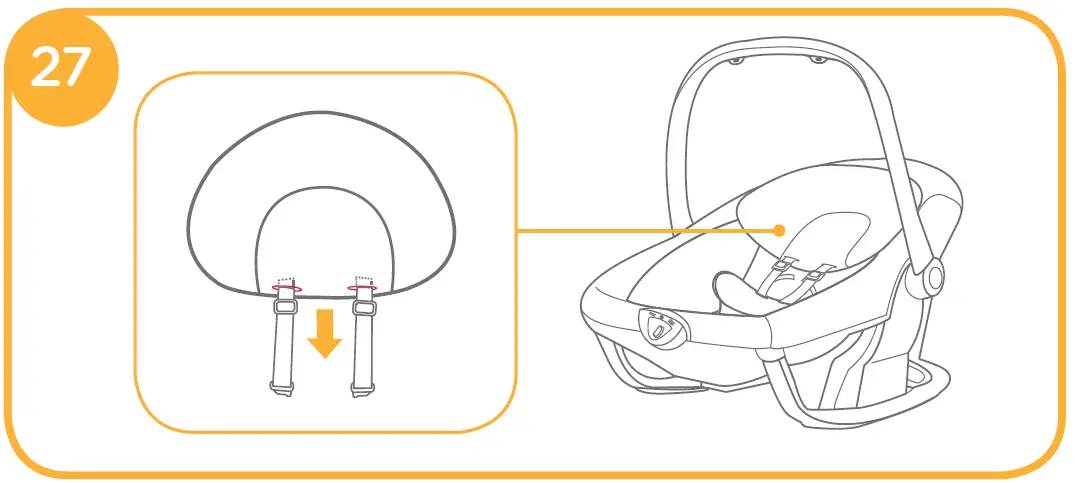
Use Head Support:
see images 27
Remove Soft Goods:
see images 28 – 32
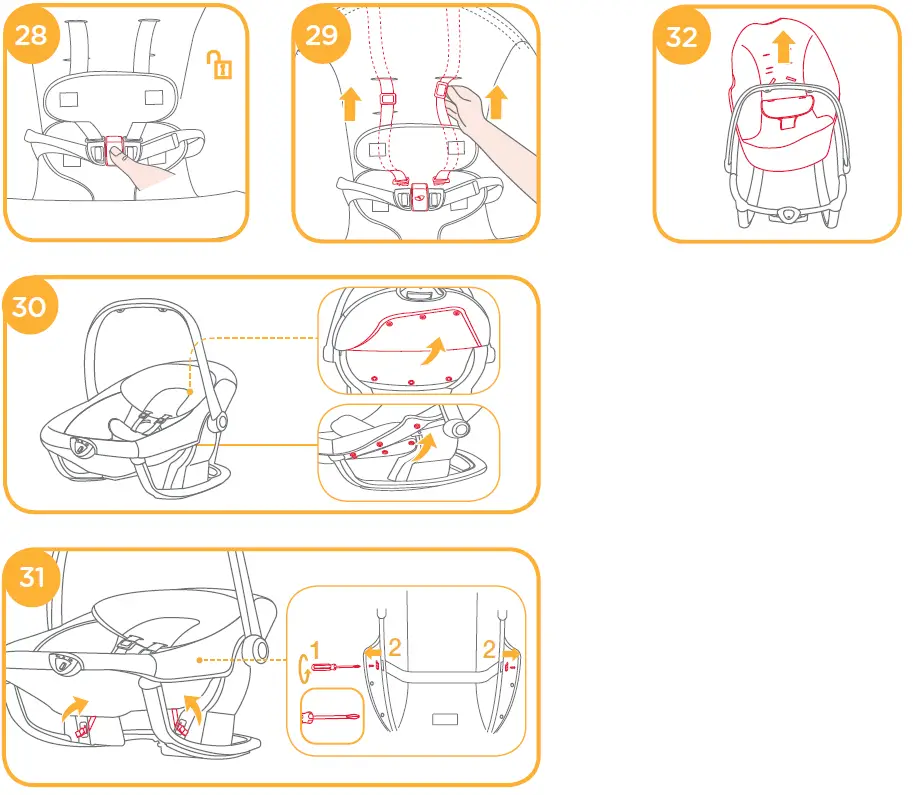
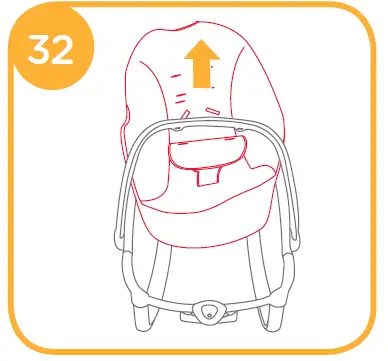
Open the buckle, and remove the head support and infant insert from the webbing.
To reattach the soft goods please repeat the above steps in the reverse order.
![]()


