 EVO 2 RTK Series Rugged Drone Bundle
User Guide
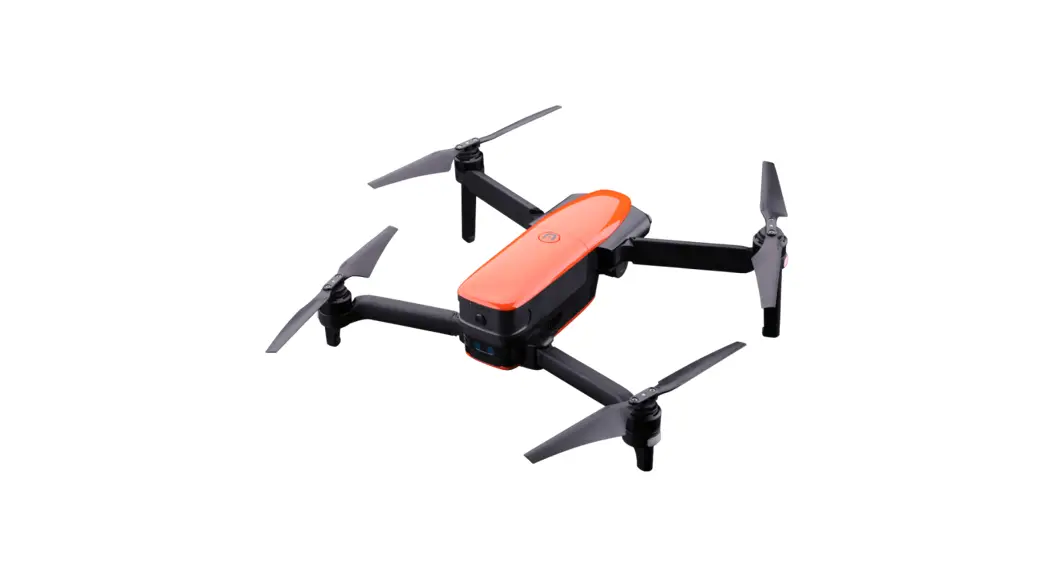
GETTING TO KNOW THE EVO II RTK SERIES
The EVO Il RTK provides high-precision, centimeter-level positioning accuracy. It embodies all the elements of the original EVO II series, making it compact, portable and ready to deploy in minutes. Not only does it provide advanced functions such as obstacle avoidance and intelligent flight modes, but it also utilizes the latest high-tech technology, achieving a maximum speed of 45mph (72km/h), up to 36 minutes of flight time, and is capable of image transmission at distances of up to 5.6miles (9km, FCC). It comes with a 3-axis stabilized gimbal camera that enables viewing of real-time imagery at a resolution of up to 1080p on mobile devices, or 720p on the built-in OLED display of the remote control.
MPORTANT:
- Please check all the documentation before your first flight.
- Improper operation of the drone may result in injury or loss, and loss of all applicable warranty services.
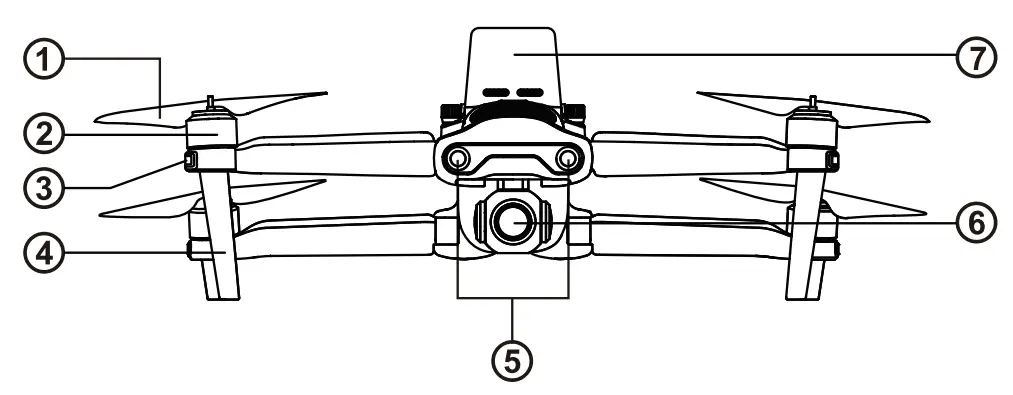 Front Side
- Propellers
- Motors
- Front LED Indicator
- Landing Gear
- Forward Vision System
- Camera Gimbal
- RTK Module
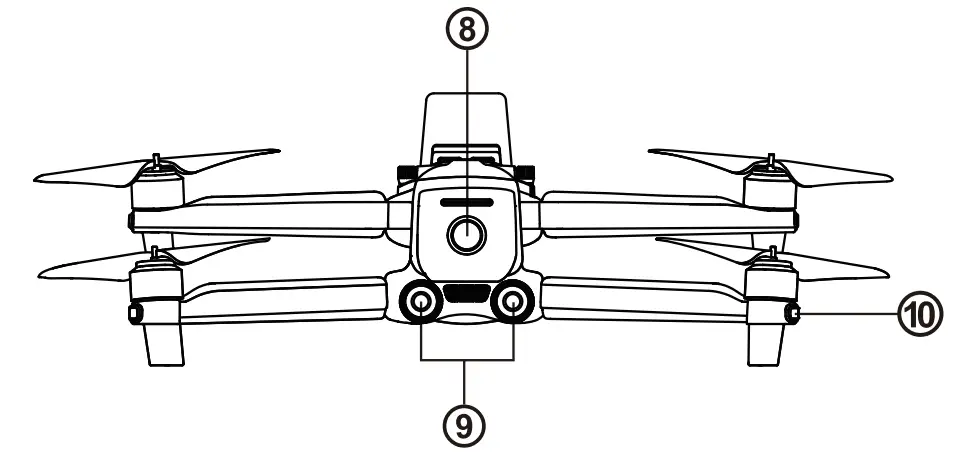
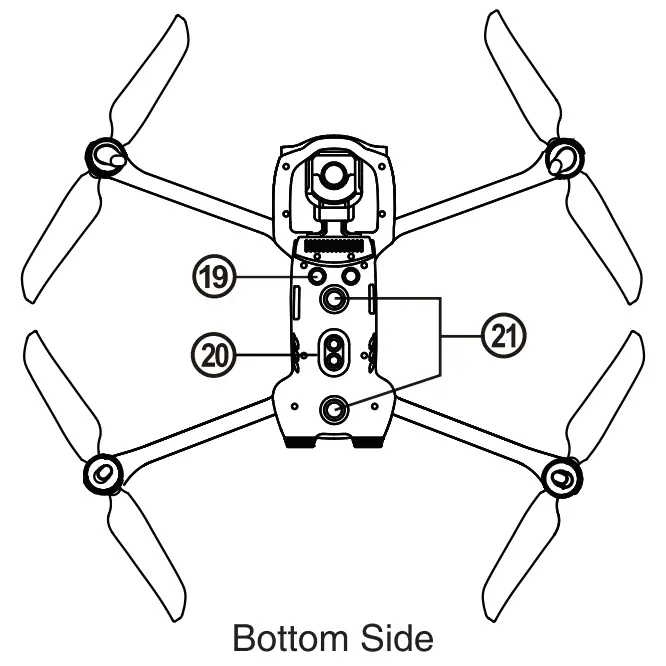
 Rear Side
 - Power Button
- Rear LED Indicator
- Rear Vision System

- Left Vision System
- SD Card Port

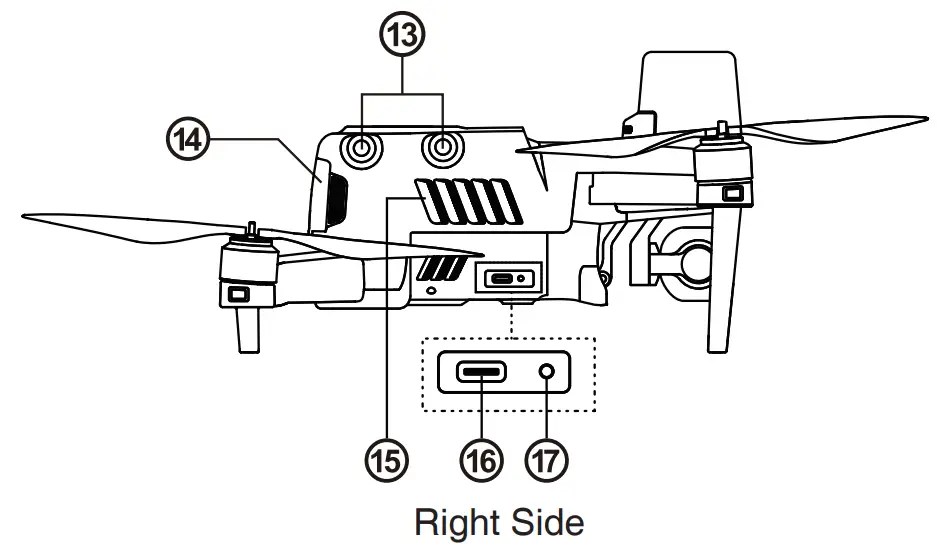
- Right Vision System
- Fan Exhaust
- Aircraft Battery
- USB Port
- Remote Control Pairing Button/Pairing Indicator

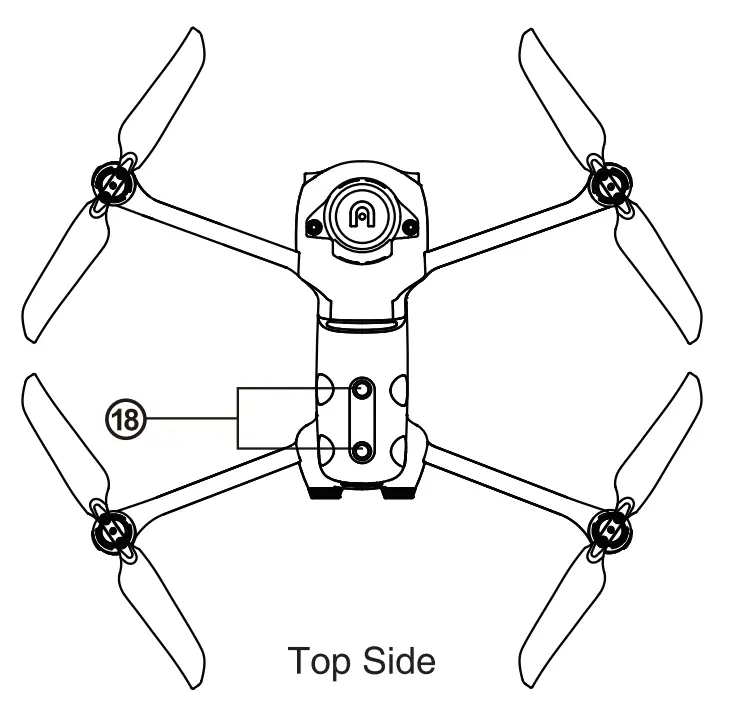
- Top Vision System

- Ultrasonic Sensor
- Downward Vision Lighting LED
- Downward Vision System
 Rear Side
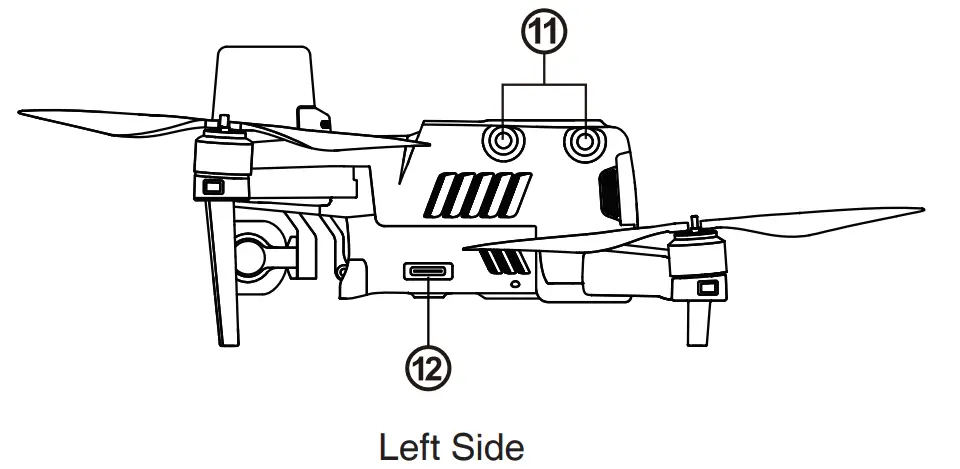
FLIGHT LED INDICATIONS
The aircraft nose LED status indicator is used to indicate the aircraft nose direction. After the aircraft is powered on, the red light will be displayed. The aircraft status indicator on the tail indicates the current status of the flight control system.
Please refer to the table below to get a better understanding of the status of he flight control system indicated by different flashing modes.
| Status indicator | Color |
| Slow flashing: flashing once every 2 seconds | R – Red |
| Fast flashing: flashes twice per second | G – Green |
| Flash twice: flash twice, then pause, then repeat the process | Y – Yellow |
| Flashing alternately: Flashing alternately in different colors | / |
Flight LED indicator status
| Normal status | |
| RGY- Flashing alternately | System self-check |
| YG- Flashing alternately | Warming up |
| G- Flashing slowly | The aircraft is in GPS mode |
| Warnings | |
| Y- Flashes slowly | The aircraft is in ATTI mode |
| Y-Flashing quickly | There is no connection between the aircraft and the remote controller |
| R- Flashing slowly | Low battery warning |
| R- Flashing quickly | Critical low battery alert |
| R- Always on | Serious problem or abnormal IMU |
| RY- Flashing alternately | Compass is abnormal, need calibration/magnetometer interference |
| Compass calibration | |
| Y- Flashes quickly | Ready to calibrate the compass/aircraft is calibrating |
| G- Always bright | Calibration successful |
| R- Steady red | Calibration failed |
| Gesture command | |
| R- Fast flashing | Gesture command received |
INTRODUCTION TO THE REMOTE CONTROLLER
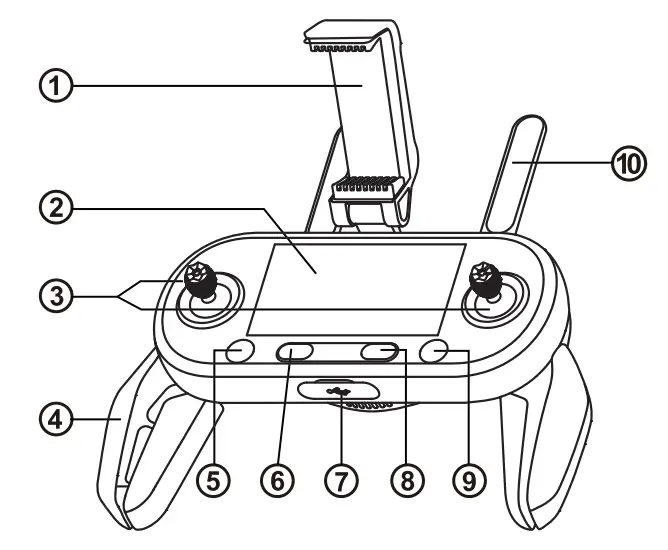
| Mobile device stand | Adjustable 180° viewing angle to provide the best viewing effect. |
| Flight Information Panel | Displays flight status, warning messages and real-time video. |
| Joystick | Controls the direction and movement of the aircraft |
| Handle | Foldable to reduce storage space |
| Takeoff/Landing Button | Determines take off or landing of the aircraft |
| Power Button | Press and hold the button for 3 seconds to turn on/off the remote controller |
| USB Ports | Used for charging or connecting to mobile devices. |
| Pause Button | Used to instruct the aircraft to halt when flying autonomously and hover over the current position – or resume autonomous flight |
| Home Button | Command the aircraft to return to the home point |
| Antennas | The communication frequency with the aircraft is 2.4 GHz / 5.8GHz |
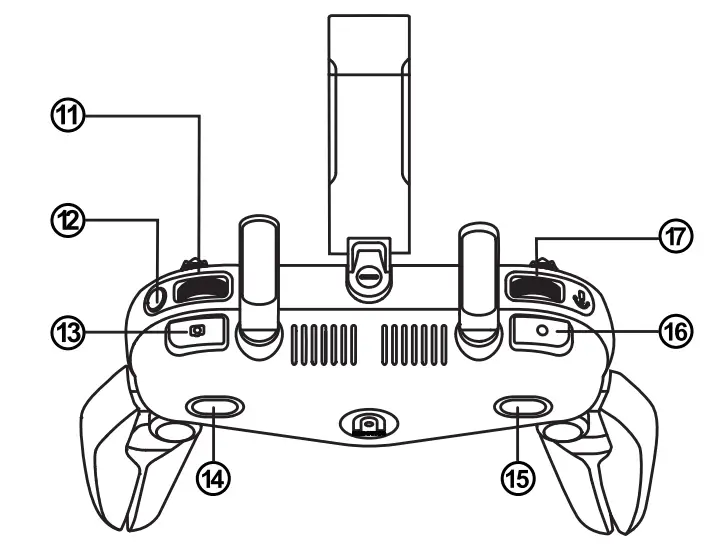
| Screen navigation knob | Used for scrolling through the OLED display screen |
| Screen Navigation Button | After disconnecting the mobile device, press this button for 1 second to enter/exit the image transfer screen on the remote controller |
| Camera Button | Used for taking photos. After using the continuous shooting mode, click this button to take multiple pictures. For detailed instructions, Please refer to the App manual. |
| Button A | Use Autel ExplorerTM App to set functions |
| Button B | Use Autel ExplorerTM App to set functions |
| Video Button | Start or stop video recording |
| Gimbal pitch angle dial | Control the pitch angle of the camera gimbal |
AIRCRAFT & REMOTE CONTROLLER CHARGING
The charger contains two ports, which can charge the aircraft battery and remote controller at the same time. 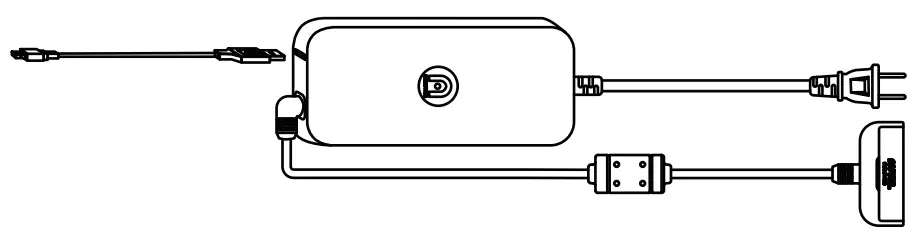
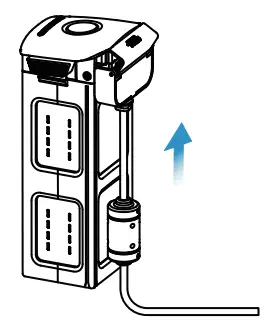
- Aircraft battery: Insert the charging cable into the charging slot.
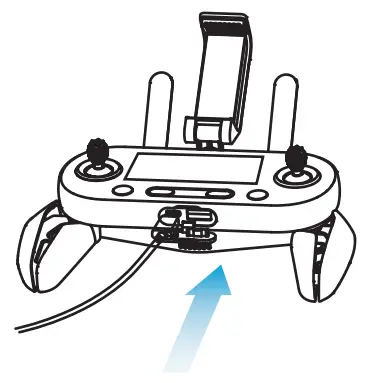
- Remote controller: Open the USB port protection cover at the bottom of the remote control, plug the USB charging cable into the charging port.
NOTE
- Always use the aircraft and remote control batteries before flying.
- It takes about 90 minutes to fully charge the aircraft battery.
DOWNLOAD THE AUTEL EXPLORER™ APP
Although the aircraft can be controlled only with the remote controller, advanced flight and image capturing and video functions still require the use of the App.
Refer to the following steps to connect to the application.
- Enter keywords “Autel Explorer” in the App Store/Google Play/Android/360 App Market/Official Website, to search and download the Autel Explorer™ app.
- Launch the application on your mobile device.
- Follow the on-screen instructions to connect the mobile device and the remote controller.

NOTE: Autel Explorer supports iOS 9.0 or later and Android 4.4 or later.
PREPARING THE AIRCRAFT
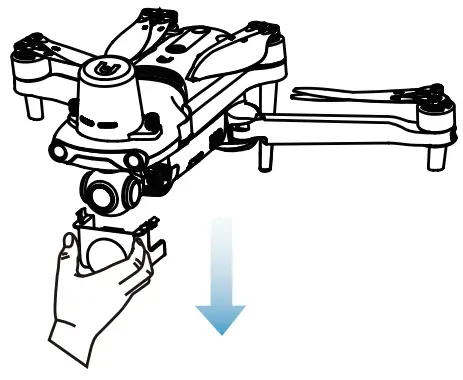
- Please remove the gimbal protective cover before turning 2) Unfold the arm and propeller.

- Unfold the arm and propeller.
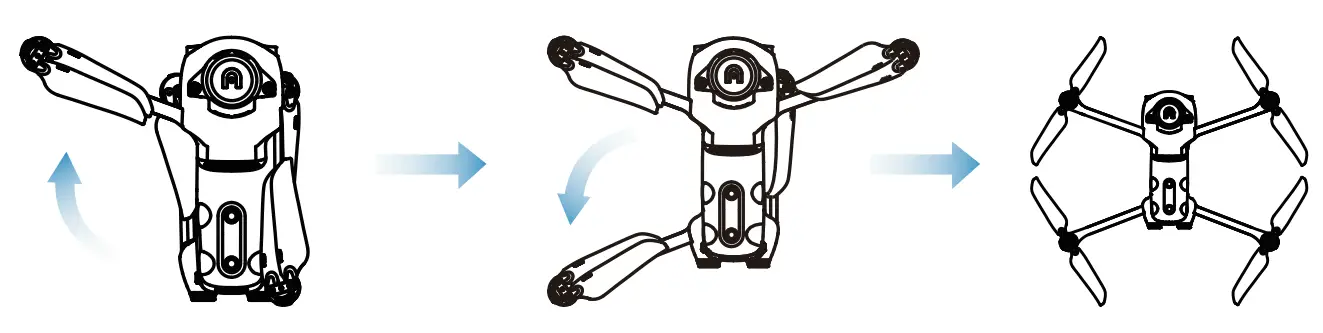
IMPORTANT
Before folding the arms, turn off the power switch of the aircraft.
Fold the rear arm and screw
INSTALLING THE PROPELLER
By default, the propeller is already installed on the aircraft. If you need to reinstall it, please refer to the following instructions.
NOTE:
The propeller must be intact and firmly installed on the aircraft, and the screw marked with a white circle.
Install the propeller on the motor propeller seat with a white circle mark, and install the propeller without the white circle mark.
Install the propeller on the motor propeller base without the white circle mark.
Installing the propeller
- Confirm that the aircraft is turned off.
- Select the propeller that matches each motor.
- Press down the propeller firmly, and then turn it in the locking direction to make the propeller securely installed.
Removing the propeller
- Turn off the aircraft.
- Press down the propeller firmly, and then turn it in the unlocking direction to remove the propeller.on the power switch of the aircraft, as shown in the figure below.
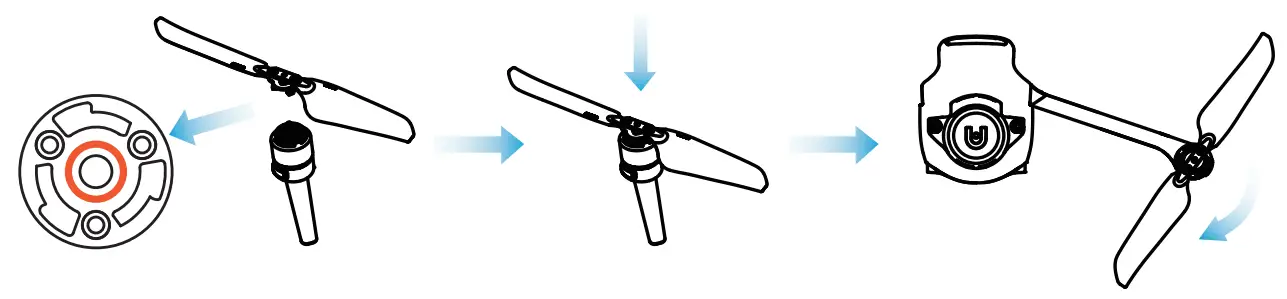
Description![]() Lock direction: Rotate in the indicated direction to fix the propeller.
Lock direction: Rotate in the indicated direction to fix the propeller.
Unlocking direction: Rotate the propeller as instructed to loosen it.![]() Propeller without white ring mark>Pairing>Motor propeller seat without white ring mark.
Propeller without white ring mark>Pairing>Motor propeller seat without white ring mark.![]() White circle marks the propeller>Pairing>White circle marks the motor propeller seat
White circle marks the propeller>Pairing>White circle marks the motor propeller seat
CAUTION
Before installing or removing the propeller, turn off the power switch of the aircraft.
MPORTANT
Wear protective gloves when installing or removing the propeller.
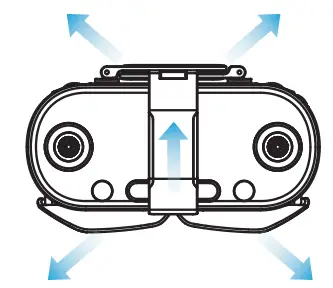
PREPARING THE REMOTE CONTROLLER
- Unfold the mobile device bracket, antenna and handle in sequence.

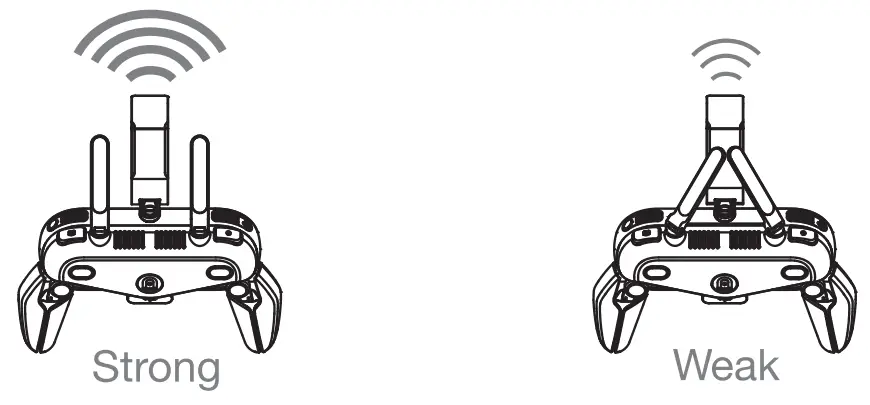
- Place the antenna vertically to get the strongest signal.
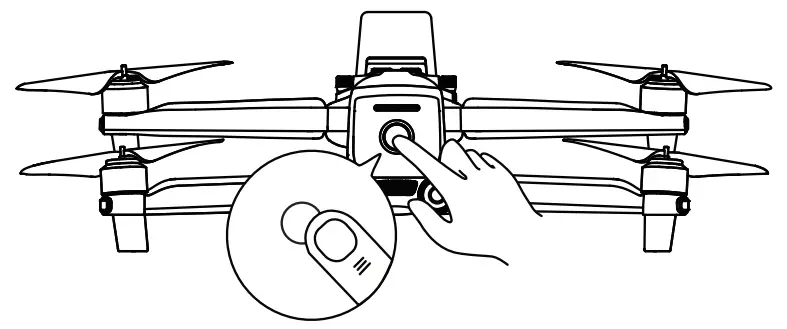
POWERING UP
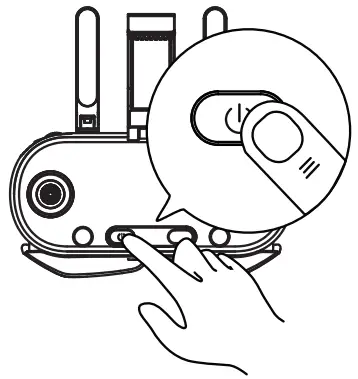
- Long press the power switch for 3 seconds to turn on the remote controller.

- Long press the power button for 3 seconds to turn on the aircraft. The battery indicatorwill light up to display the current battery level of the aircraft.
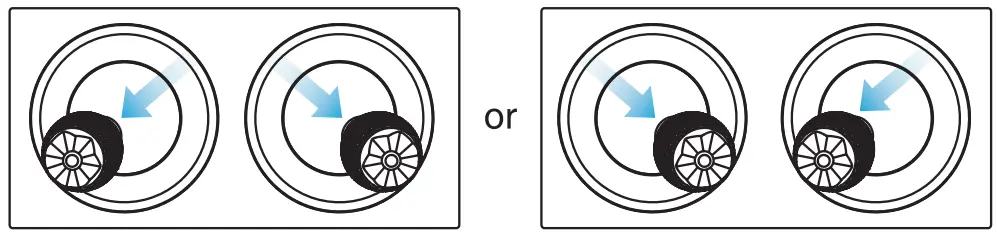
TAKING OFF
- Before takeoff, please place the aircraft on a flat ground with the tail facing towards you.
- Simultaneously move the joystick in the inwards or outwards and hold for 2 seconds:

- After the motors have been started, you can choose any of the following methods to command the aircraft to take off:
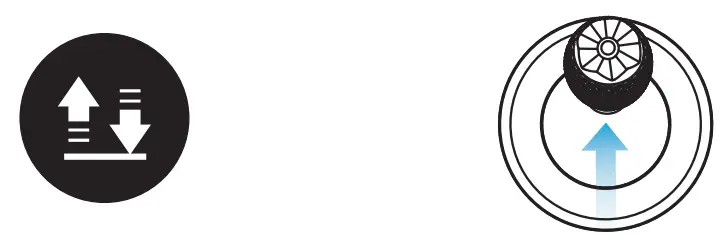 | |
| Hold the Takeoff/Landing Button for 3s | Push the Left Command Stick slowly upward (Mode 2) |
NOTE: Before taking off, place the airplane on a flat level surface with the tail of the airplane facing towards you.
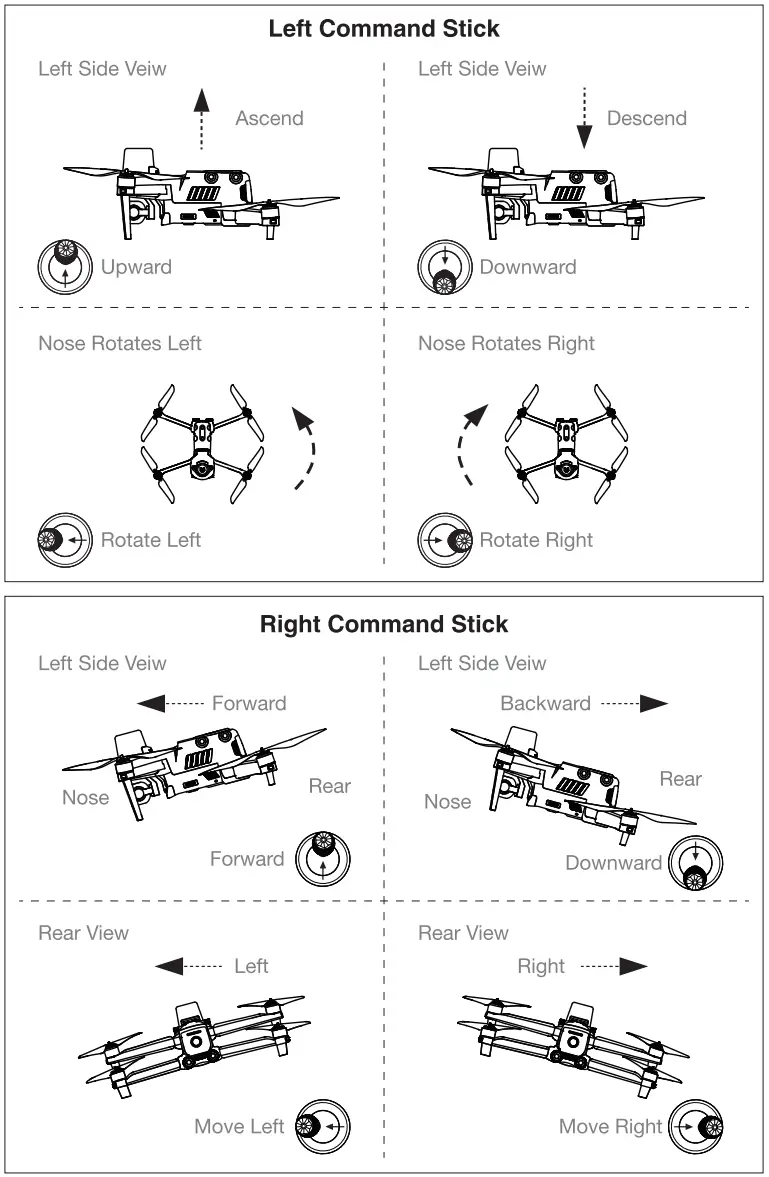
COMMAND STICK CONTROLS(MODE 2)
WWW.AUTELROBOTICS.COM
© 2020-2021 Autel Robotics Co., Ltd. All Rights Reserved


