![]() User manual
User manual
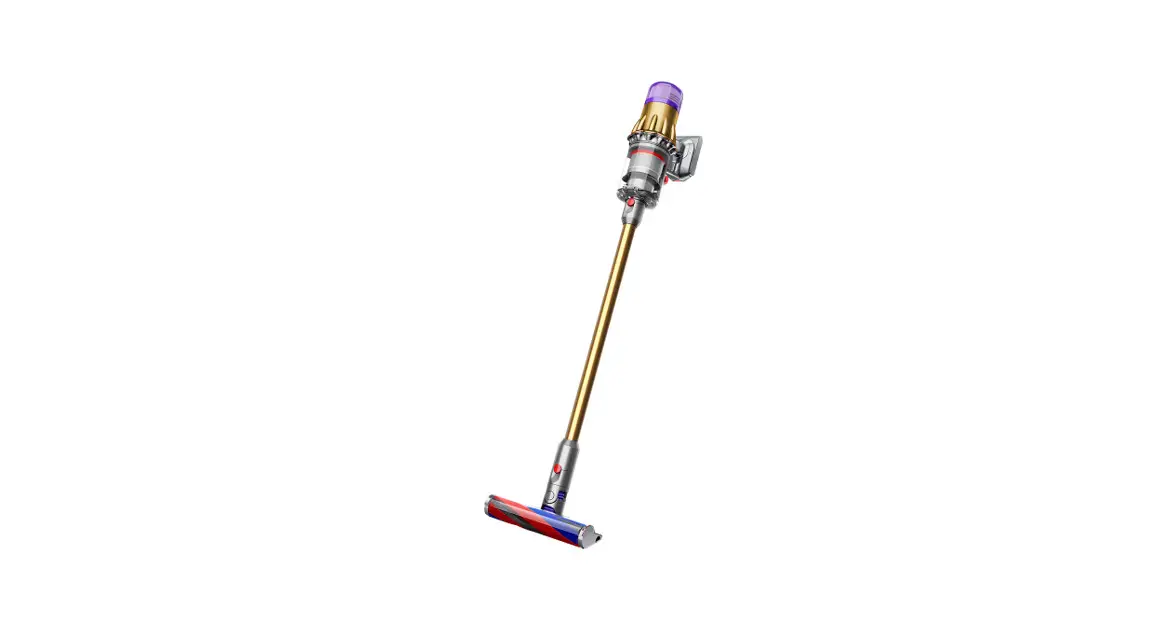
Dyson Digital slim
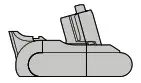
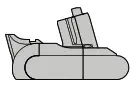
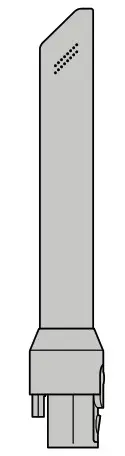
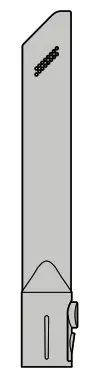
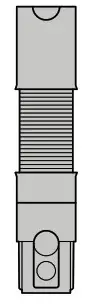
The Dyson cordless vacuum cleaner in a horizontal position with the wand and cleaner head attached.
In the box
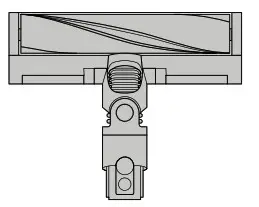
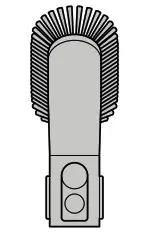
| Main body showing the handle and bin attached. | A soft fluffy brush bar is housed within the cleaner head. There is an electrical connecter end that can attach to the end of the wand or directly to the machine. |
 |  |
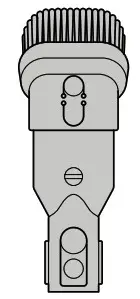
| Vacuum cleaner | Slim Fluffy™ cleaner head Engineered for hard floors. Sucks up fine dust and large debris simultaneously. |
 |  |  |
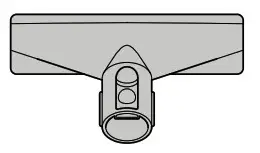
| Click-in battery Remove and replace at the press of a button to double your run time. | Additional click-in battery | Wand |
A charger is a one-piece unit with the plug, connector end, and cable.
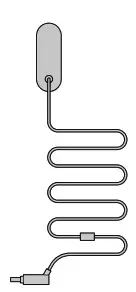 Charger
Charges your vacuum with or without a dock.
Some tools may not be included.
You can buy additional tools at www.dyson.my.
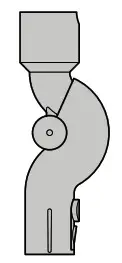
| This tool has a combination of the brush head and crevice tool together in one unit. The brush head slides down the crevice tool when needed. | A long tool with an angled end | A small cleaner head with a body housing the motor and an electrical connector to attach to the wand or directly to the machine. | A jointed connector that creates a flexible joint between the machine and the tool. It must be used in conjunction with a tool or cleaner head. | A long tool with an angled end with the addition of an extendible flexible section, extended using the button located at the brush end of the tool. | A long tool with an angled end and electrical connector end that powers LED lights when connected to the machine. |
 |  | 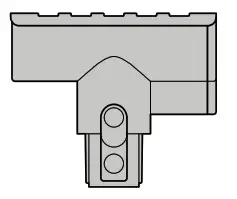 |  |  |  |
| Combination tool Two tools in one – wide nozzle and brush, for quick switching between cleaning and dusting tasks around your home or car. | Crevice tool Engineered for precise cleaning around tricky edges and into hard-to-reach narrow spaces. | Mini motorized tool Motorized brush bar, concentrated in a smaller head to remove stubborn dirt from mattresses, upholstery, and stairs. | Low-reach adaptor Bends to comfortably reach down low. Engineered to clean further under low furniture by adjusting the wand angle up to 90°. | Flexi crevice tool Extends and bends. For hard-to-reach places around your home and car. | Light pipe crevice tool Crevice tool with LED lights lets you reach into dark, narrow spaces and see where you’re cleaning. |
| Pliable bristles and felt bumper the strip on a narrow, tapered tool. | Stiff bristles on a wide head. | A wide-mouth tool with a lint edge. | A flexible joint between the machine and the tool. It must be used in conjunction with a tool or cleaner head. | A flexible hose engineered from tough wire and durable plastic. | |
 |  |  |  |  |  |
| Soft dusting brush Enclosed in a skirt of soft nylon bristles for a gentle, vacuum-assisted dusting of delicate objects and surfaces. | Stubborn dirt brush Stiff nylon bristles dislodge ground-in dirt from coarse carpets, high traffic areas and car interiors. | Mattress tool Removes dust, dirt and allergens from mattresses and upholstery. | Up-top adapter Twists into different positions and angle for easy high-reach cleaning. | Extension hose Adds up to 61cm of flexible reach to any tool attachment, to clean up high or down low in your home or car. | Wand clip |
Getting started
Fully charge your machine before using it for the first time.
| Location of the Selection button on the screen on the filter end of the machine. |  |
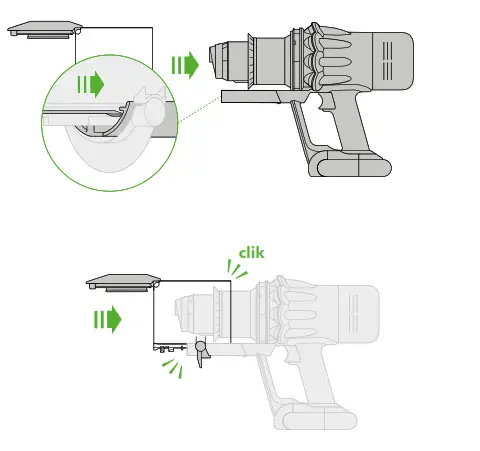
| Diagram showing the connection of the wand onto the main body, with the wand release button aligned with the top of the main body. |  |
| Arrow showing the end of the wand connecting to the cleaner head. |
Power modes
Your machine has three power modes for different tasks. Change power modes quickly using a single button.
The screen showing the machine set to Eco mode with a full battery in green to show that this will give the longest battery life of the three modes.
Eco-mode
Maximum run time for longer cleans all-around your home.
The screen shows the machine set to Med mode with a blue battery showing that this will give a medium length of battery life.

Med mode
The optimum balance of power and run time.
The screen showing the machine set to Boost mode with a red battery to show that this will give the shortest battery life of the three modes.

Boost mode
Designed for intensive spot cleaning of ground-in dirt.
Slim Fluffy™ cleaner head
Engineered for hard floors. Sucks up fine dust and large debris simultaneously.
Charging your machine
It’s important to fully charge your new machine before using it for the first time and after every clean. This is because the battery and monitoring system’s algorithm ‘learns’ over time, and fully charging your machine helps it to more accurately calculate and display the remaining run time.
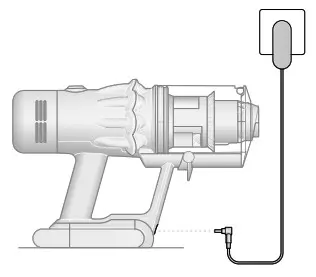
Connect to the charger either directly or in the dock.
The blue LEDs on either side of the battery will flash during charging.
When the battery is fully charged, both LEDs will light for 5 seconds.
Your battery is fully charged when the display shows 100%.
Your machine won’t operate or charge if the ambient temperature is below 5°C(41°F). This is designed to protect both the motor and battery.
You can help prolong the battery life by leaving your machine to cool down before recharging.
The charger is connected to the power supply using the wall dock.
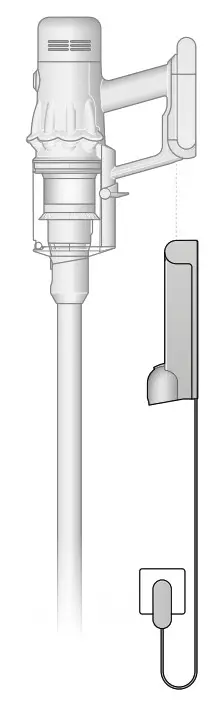
The charger is connected from the power supply directly into the front of the battery.
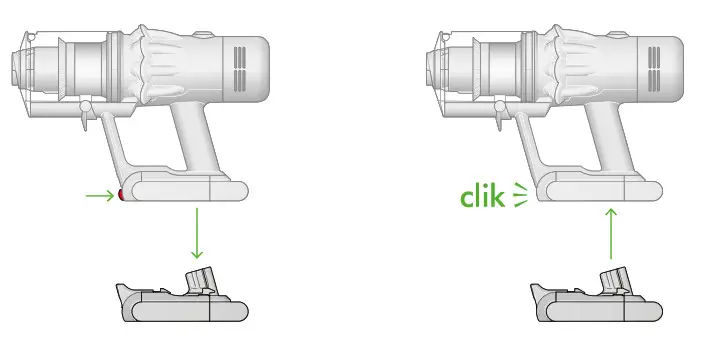
Changing your click-in battery
If you have additional click-in batteries, we recommend that you alternate the batteries to maintain even performance.
Removing your battery
Push the battery release button on the handle and slide the battery off your machine.
Charge the battery.
Refitting your battery
Align your battery with the handle and slide it in. Push firmly until it clicks into place.
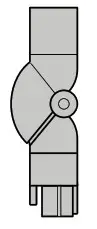
Arrows showing the location of the battery release button and the battery coming off the handle when the button is pressed. The battery is then shown being replaced on the base of the handle, clicking into place.
Caring for your floors
Check that the underside of the cleaner head or tool is clean and free from any objects that may cause damage.
Before vacuuming your flooring, rugs, and carpets, check the manufacturer’s recommended cleaning instructions.
The brush bar on your machine can damage certain carpet types and floors.
Some carpets will fuzz if a rotating brush bar is used when vacuuming. If this happens, we recommend vacuuming without the motorized floor tool and consulting with your flooring manufacturer.
The LCD screen
The LCD screen shows current performance, including selected cleaning mode, remaining run time, filter maintenance, and blockage reports.
Settings menu
Control the settings on your machine using the button.
To enter the settings menu, press and hold the button until the menu screen appears. Tap to scroll through the options available.
For more information and support for your machine go online: https://support.dyson.my/SupportHome.

Change language
To change the language on your screen, press the button and hold until the language list appears. Release the button.
Tap the button to scroll through the language list to your preferred language.
Press and hold the button until the countdown ends.
A green tick will appear on the screen to show your language selection is complete.
To cancel your selection, release the button during the countdown.
Two screens, the first with the language list and then the tick screen to show that the language has been successfully changed.

Change alert settings
You can turn the alert motor pulse off. Your motor will no longer pulse but run time alert information will continue to be displayed on the LCD screen when your machine needs your attention. Turning off alerts will not turn off the blockage alert pulsing. This is to ensure you clear any blockages, preventing damage to your machine. Tap to scroll through the settings menu. Select the ‘Alerts’ option. Scroll to select on or off. Hold the button until the countdown ends and a tick appears on the screen. To cancel your selection, release the button during the countdown.
The screen with an amber warning triangle to demonstrates an alert.

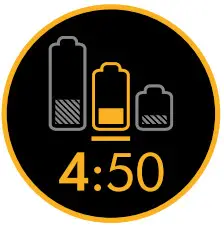
Run time countdown
When the battery needs charging, your machine will pulse three times and a low run time icon will appear on the screen.
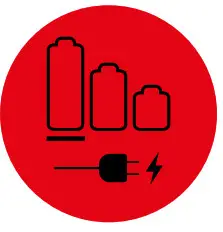
When your battery is empty, a red warning icon will appear on the screen.
The screen with a battery time remaining is shown as a number and as a half-filled battery.
A red screen with an icon with a plug being connected to the power supply. This demonstrates the battery is empty and needs charging.
Battery health
To get the best performance and life from your battery, use Eco or Med mode.
The battery health is shown on the batteries on the screen.

Alerts
The alerts you might see are:
Filter – the filter isn’t fitted correctly or needs cleaning.
Blockage – your machine has a blockage that needs removing.
| Alert icon with Fully charge before first use wording. | Alert icon with Airways blocked wording. | |
| Alert icon with Filter not sealed wording. | Alert icon with Filter needs cleaning wording. |
Exit settings menu
To exit the settings menu. Tap to scroll through the selection menu.
Select ‘Exit menu’.
Screen with Exit menu wording and return icon.

Emptying your bin
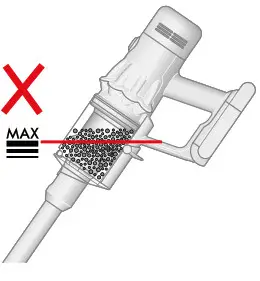
Empty as soon as the dirt reaches the MAX level – don’t overfill. Using your machine, when the dirt is above the MAX line, may affect the performance and require more frequent filter washing.
The MAX mark on the bin of the machine, showing that the dirt should not be filled over the Max mark when the machine is at the angle of normal use.
Remove your wand
Press the red wand release button, on the top of the wand, and pull the wand away from the bin.
Illustration of the bin being emptied into a bag with images demonstrating to take care not to press the trigger when emptying the bin. 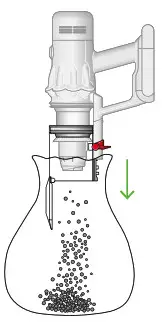
Release the dirt
Hold the machine over the bin, pointing downwards.
Firmly push the red bin release button. The bin will slide down, cleaning the shroud as it goes, and the bin base will open.
The bin base won’t open if the red bin release button isn’t pushed down all the way.
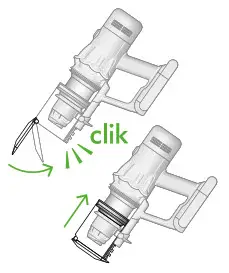
The bin lid closing with an audible click and the bin being pushed upwards with another click once it is fully in place.
Minimize dust contact
Cover your bin tightly in a dust-proof bag while you empty. Remove the bin carefully, seal the bag tightly and dispose of.
Close your bin
Push the bin base upwards until the bin and bin base click into place.
Two images of the bin with arrows showing the bin lid closing and a clicked symbol and the bin being pushed upwards with another click symbol.
Cleaning your bin
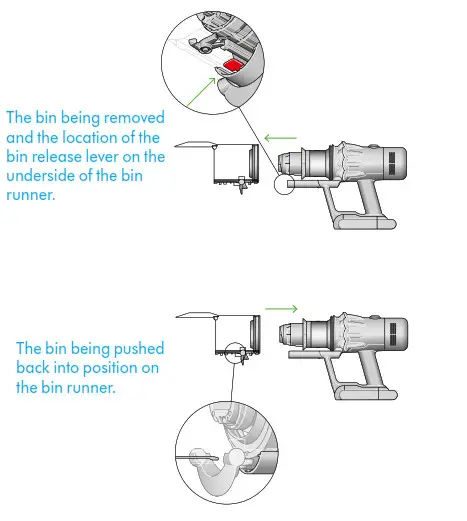
Remove your bin
If it is necessary to clean your bin, empty it as shown in the ‘Emptying your bin’ section.
Press the red button located on the bin runner to release the bin and slide your bin off the runner.
Only clean your bin with a damp cloth.
Make sure that the bin and seals are completely dry before replacing.
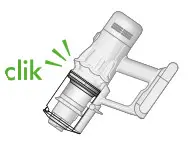
Refit your bin
Insert the spine onto the bin runner.
Close your bin by pushing the bin base upwards until the bin and bin base click into place.
Your bin isn’t dishwasher safe and the use of detergents, polishes or air fresheners to clean your bin isn’t recommended, as it may damage your machine.
Washing your filter
For more information and support for your machine go online: https://support.dyson.my/SupportHome.
Wash your filter at least once a month to maintain optimum suction power.
Twist off your filter
Twist your filter anti-clockwise and pull it away from your machine.
Tap your filter
Before washing your filter, tap it gently over a bin to remove any loose dust and debris.
Wash your filter
Wash with warm, running tap water – gently rubbing your filter with your fingers to remove the dirt. 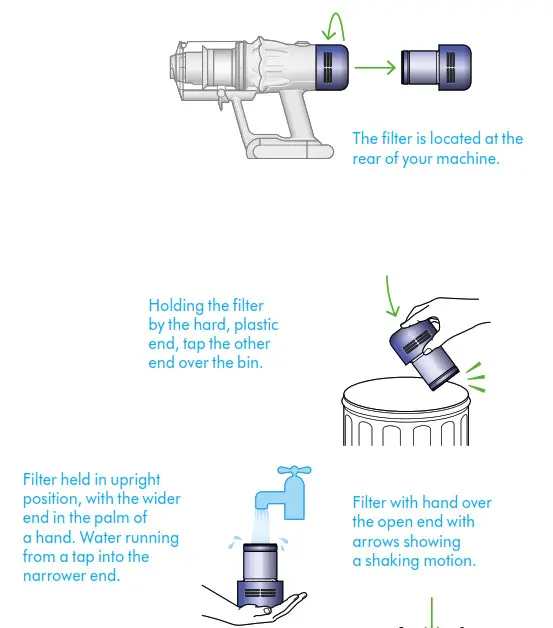
Fill and shake
Place your hand over one end of your filter.
Fill the filter with warm tap water.
Place your hand over the open end of the filter and shake it firmly to remove trapped dirt and debris.
Repeat these steps until the water runs clear.
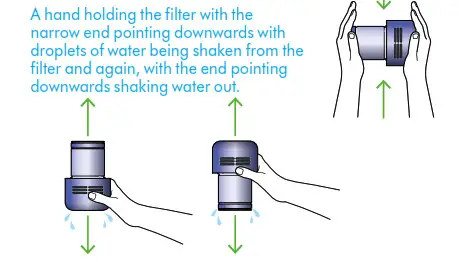
Shake out the water
Empty the filter and shake firmly to remove excess water.
Shake with the filter in both an upward and downward position.
Keep shaking until there’s no water coming from the filter.
Dry your filter
Leave your filter to dry for at least 24 hours in a well-ventilated, warm place.
Don’t dry your filter in a tumble dryer, microwave, or near a naked flame.
Important: your filter must be completely dry before you put it back into the machine. Your machine could be damaged if used with a damp filter.

Clearing blockages
Disconnect your machine from the charger before looking for blockages. Be careful not to touch the trigger and be aware of sharp objects.
Leave your machine to cool down before looking for blockages. Don’t use your machine when looking for blockages as this could cause injury.
If your machine detects a blockage, the motor will pulse six times. You won’t be able to use your machine until the blockage has been cleared.
If you try to use your machine when the motor is pulsing, it will automatically cut out. Leave your machine to cool down before looking for blockages and, for your safety, take care not to touch the trigger.
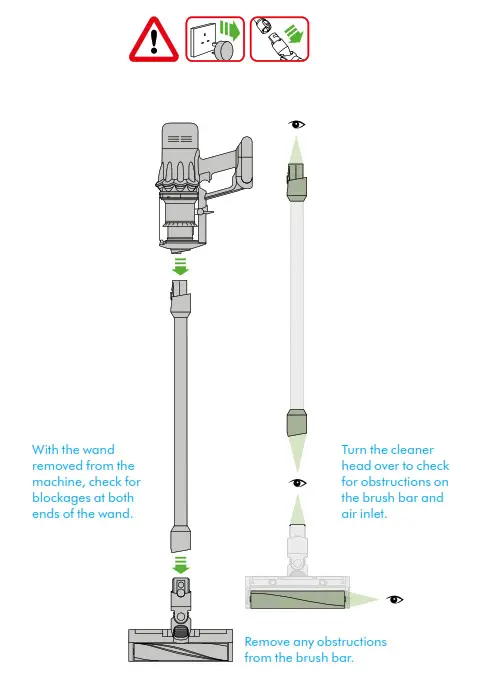
The bin being removed and the location of the bin release lever on the underside of the bin runner.
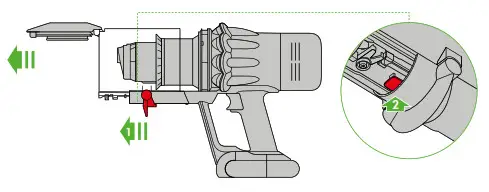
With the bin removed, check for blockages, paying particular attention to the air inlet, located at on the right–hand side of the machine just below the point where the bin joins the main body of the machine.
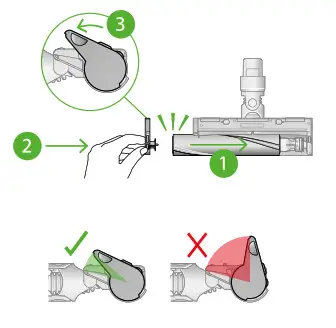
Washing your brush bar
To maintain optimum performance, check and wash the brush bar regularly.
Remove brush bar
Don’t put any part of your machine in a dishwasher or use detergents, polishes or air fresheners.
Press the cleaner head release button to remove it from the wand.
Pull the brush bar off the end cap and put the end cap to one side, don’t wash it.
The end cap is located at the side of the cleaner head. Push this upwards to unlock the brush bar. Don’t wash the end cap.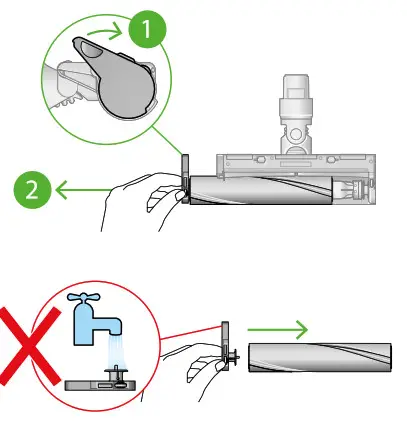
Wash and dry brush bar
Hold your brush bar under cold tap water and gently rub to remove any lint or dirt. Keep washing until the water runs clear.
Stand the brush bar upright and leave for at least 24 hours to dry.
The brush bar has an open end and a closed-end. Stand upright, with the closed end facing upwards, to dry.  Replace your brush bars
Make sure your brush bar is completely dry before refitting.
Reattach the end cap to the brush bar and slide it back into the cleaner head.
Rotate the end cap until it clips securely back into position.
The cleaner head housing is not washable and should only be wiped over with a damp lint-free cloth.
The brush bar was reinserted into the cleaner head and the end cap rotated to the locked position.
The end cap should be attached to the cleaner head at an angle less than 90°, any angle greater than this will not allow the end cap to close.
| This tool has a combination of the brush head and crevice too together in one unit. The brush the head slides down the crevice tool when needed. | A long tool with an angled end. | A flexible hose engineered from tough wire and durable plastic. |
| | |
| Combination tool | Crevice tool | Extension hose |
| A long tool with an angled end and electrical connector end that powers LED lights when connected to the machine. | A jointed connector that creates a flexible joint between the machine and the tool. It must be used in conjunction with a tool or cleaner head. | Pliable bristles and felt bumper the strip on a narrow, tapered tool. |
| | |
| Light pipe crevice tool | Low-reach adaptor | Soft dusting brush |
| Stiff bristles on a wide head. | A flexible joint between the machine and the tool. It must be used in conjunction with a tool or cleaner head. | A wide-mouth tool with a lint edge. |
| | |
| Stubborn dirt brush | Up-top adapter | Mattress tool |
Looking after your machine
To always get the best performance from your machine, it’s important to clean it regularly and check for blockages.
Look after your machine
If your machine is dusty, wipe with a damp lint-free cloth.
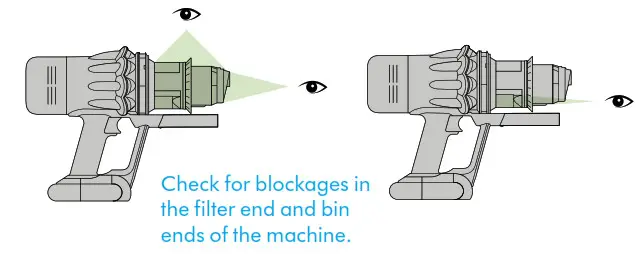
Check for blockages in the cleaner head, tools and main body of your machine.
Wash your filter regularly and leave to dry completely.
Don’t use detergents or polishes to clean your machine.
Look after your battery
To get the best performance and life from your battery, use Eco or Med mode.
Your machine won’t operate or charge if the ambient temperature is below 5°C(41°F).
This is designed to protect both the motor and battery.
Your serial numbers
You can find your serial numbers on your machine, battery and charger.
Use your serial number to register.
You can register your machine using the serial number found on the bottom of your machine.


