 Waterpik Water Flosser clean User Manual
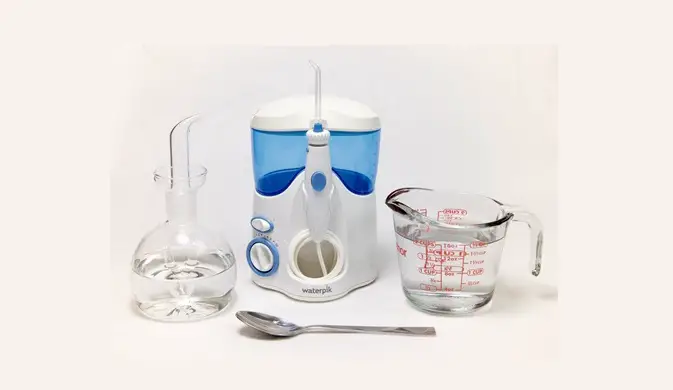
How to Clean a Waterpik Water Flosser
Mineral deposits and other materials can collect in your Water Flosser, causing it to lose pressure and effectiveness. Here are 5 steps for simple cleaning with water, vinegar, and your dishwasher to keep your Water Flosser performing at its best. Complete this process every 1-3 months to ensure optimal performance.
- Clean the outside of the unit
- Clean the water reservoir
- Clean the internal parts
- Clean the handle (countertop models)
- Clean the flosser tip
Step 1: Clean the Outside of the Unit
Clean the outside of the product when necessary by using a soft cloth and mild non-abrasive cleanser.
Step 2: Clean the Water Reservoir
- Remove the water reservoir from the unit. (Refer to your product manual if you need assistance).
- If using a countertop model that contains a small black reservoir valve, remove the valve by pushing on it from the bottom. Clean the valve by massaging it under warm water for
30- 45 seconds and set aside. - Place the reservoir in the top rack of your dishwasher for cleaning. We recommend air drying instead of a heated dry cycle.
- If you removed a valve, place it back in the reservoir before use. (Dome side up, push in place so the four prongs are visible on the bottom of the reservoir.)
- Reservoirs can also be hand washed with warm soapy water.


The reservoir is top-rack dishwasher safe.
Step 3: Clean the Internal Parts
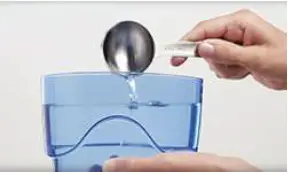
- Based on your model, mix 1-2 tablespoons of white vinegar with 16 ounces of warm water.
- Run this solution through the unit until the reservoir is empty.
- Rinse by repeating with a full reservoir of clean warm water.

Step 4: Clean the Handle (Countertop Models)
- remove the tip from the unit using the eject button.
- Soak the Water Flosser handle in a mixture of 2 parts water, 1 part white vinegar for 5-7 minutes.
- Rinse the handle under warm water.
- Clean the Water Flosser tip separately using step #5.

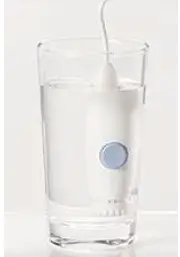
Soak the handle of countertop units in vinegar/water mixture for 5-7 minutes.
Step 5: Clean the Flosser Tip
- Remove the tip from the unit using the eject button.
- Soak the Water Flosser tip in a container of 2 parts water, 1 part hydrogen peroxide or white vinegar for 5 minutes.
- Rinse the tip under warm water.
- For maximum effectiveness over time, we recommend replacing Water Flosser tips every 3- 6 months. The tips can become clogged and/or affected by mineral deposits.

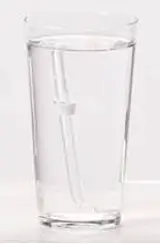
Soak the flosser tip in vinegar/water mixture for 5 minutes. It’s easy to keep your Waterpik Water Flosser clean so you continue to get the maximum benefit for your oral health.
For first-time use, prime the unit:
- If your unit has a black rubber valve in the water reservoir, ensure that the black valve is installed with the dome side facing up and the four-pronged side facing down to connect with the base of the unit.
- Fill the reservoir at least half-full of water. Ensure the reservoir is firmly seated onto the base of the unit. Press down firmly to engage the reservoir to the base of the unit.
- Confirm the unit is plugged into an active electrical outlet.
- Set the Water Flosser to the highest pressure setting, and if the handle has an on/off slide switch, make sure it is in the ON position. Then point the handle downward toward the sink and turn the unit on; this generally starts the flow of water within 30 seconds.
- If this process fails to start the flow of water, insert a jet tip and gently draw on the tip as you would a drinking straw.
Drop in pressure or flow
- It is recommended that when applicable, you replace tips every 3-6 months. (Consult the instruction manual for specific replacement information for each tip.)
- Add 2 tablespoons of white vinegar to a full reservoir of warm water.’
- If your tip is removable, remove the tip, set the pressure control dial to high, and place the handle in the sink.
- With the unit in the OFF position, allow gravity to drain the vinegar solution through the Water Flosser.
- Rinse by repeating with a full reservoir of clean warm water.
- Water Flosser products are not intended to store liquid between uses – ensure your product is emptied after each use.
- If your unit has a black rubber valve, remove the black rubber valve from the water tank by pushing it out from the bottom.
- Run the valve under warm water and massage with your fingers.
- Return the black valve to the tank. Ensure the dome side is facing up and the four-prong side is showing on the bottom.
- The most common reason for little or no water flow is a clogged jet tip. You can troubleshoot this condition by removing the jet tip and observing if water bubbles up from the top when the device is powered on.
- To remove the tip, refer to your owner’s manual.
- To clean the tip, soak in a container of hydrogen peroxide or white vinegar for 5-7 minutes. Rinse the tip under warm water.
If additives (such as mouthwash) are used, rinse the system with a reservoir full of clean water after each use. Failure to rinse the unit may result in loss of product performance and/or function. Growth of bacteria could also be enhanced.
Safe for Waterpik® Water Flossers
Standard Mouthwash
Standard or cosmetic mouthwash neutralizes odors and freshens your breath.To use standard mouthwash:
- Add a small amount of mouthwash to a reservoir filled with warm water. (To prevent damage to the unit, do not exceed a 1:1 ratio of mouthwash to water).
- Water floss as described in the product instructions
- Rinse the unit by partially filling the reservoir with plain warm water and running it with the tip pointed into the sink.
Antiseptic Mouthwash
Antiseptic mouthwashes such as Listerine® contain alcohol and agents that prevent the growth of microorganisms in the mouth. They are formulated to help prevent gingivitis and gum disease.
To use antiseptic mouthwash:
- . To prevent damage to the unit, add no more than a 1:1 ratio of antiseptic mouthwash to warm water to the reservoir.
- Water floss as described in the product instructions
- Rinse the unit by partially filling the reservoir with plain warm water and running it with the tip pointed into the sink.
Water Flosser Additives
YES – Safe to Use
Standard mouthwash
Antiseptic mouthwash
Antimicrobial solution
NO – Do Not Use
Essential oils
Iodine
The saline (salt) solution in cordless units
Therapeutic Mouth Rinse
Dental professionals prescribe therapeutic mouth rinses to help treat gum disease. These prescription-only solutions typically contain the antimicrobial drug chlorhexidine gluconate (CHX) and include brands such as PeridexTM and Periogard.®If you have gum disease with periodontal pockets, your dental professional may recommend cleaning them using a Classic Professional Water Flosser and the Pik Pocket™ tip. The Classic Professional Water Flosser includes a specialty reservoir designed for low-pressure delivery of antimicrobial rinses.
To use therapeutic mouth rinses
- Follow your dental professional’s instructions for adding water or the proper solution to the Water Flosser reservoir.
- To clean periodontal pockets using the Pik Pocket™ tip:
- Set the Water Flosser to the lowest pressure
- Place the soft tip against the tooth at a 45-degree angle
- Gently place the tip under the gum line, into the pocket
- Turn the unit on and trace along the gum line
- Rinse the Water Flosser by partially filling the reservoir with plain warm water and running it with the tip pointed into the sink.
Caution
Not for Use With Waterpik® Water Flossers Adding any of these items to your Water Flosser reservoir can reduce performance or shorten the life of the product.
- Pure essential oils (such as tea tree oil)
- Baking soda
- Iodine
- Cordless units: Do not use saline solution (okay for countertop units)
Enhance Your Water Flossing
Adding mouthwash to freshen your breath and using solutions that prevent and treat gum disease give you more ways to benefit from using your Water Flosser. When it comes to your oral health, you should always consult your dental professional for guidance. Using a standard mouthwash or antiseptic at a 1:1 ratio or less with water provides a pleasant experience, but it is not clinically evaluated to determine any benefits beyond using water alone. There are studies for adding chlorhexidine to a Water Flosser, and your dental professional will provide instructions for prescription use. If you’re experiencing low pressure in your Water Flosser, try following these steps to improve performance.
Clean Your Jet Tips
How to clean your Water Flosser Jet Tips:
- 1. Remove the Water Flosser tip from the unit using the eject button.
- Soak the tip in a container of hydrogen peroxide or white vinegar for 5-7 minutes.
- Rinse the tip under warm water
Note: For maximum effectiveness, replace Water Flosser tips every 3-6 months as the tips can become clogged and/or affected by mineral deposits.
Clean Your Water Flosser
How to clean your Water Flosser:
Clean your Water Flosser every 1 to 3 months to ensure optimal performance.
For Countertop models:
- Mix 2-4 tablespoons (1-2 ounces) of white vinegar with 16 ounces of warm water.
- Fill the reservoir with the solution, and then run 1/2 of it through the Water Flosser.
- With the unit off, place the Water Flosser handle in the sink and allow the solution to gradually drain out of the handle.
- Run any remaining solution through the unit and then rinse with a full reservoir of warm water.
For Cordless models
- Add 1 tablespoon of white vinegar to a full reservoir of warm water.
- Point the handle and tip into the sink.
- Turn the unit ON and run until the reservoir is empty.
- Rinse by repeating with a full reservoir of clean warm water.
Charge the Unit (Rechargeable Cordless Models) or Replace the Batteries (AA Battery Models)
To replace the batteries in the Cordless Express WF-02 or Cordless Freedom WF-03 Water Flosser:
- Replace batteries when there is a noticeable change in performance.
- The type and quality of AA battery used impact the performance of the product.
- Use 3 AA Batteries (Alkaline Or NiMH Only)
- Replace all batteries at the same time with new batteries of the same type and brand.
To charge the Cordless Advanced Water Flosser WP-560/562/563/565:
- Charge the unit prior to first use by plugging the power cord into the wall and place the magnetic charger on the front of the unit for approximately 4 hours.
- The charge indicator on the handle flashes when charging and stays on continuously when the unit is fully charged. A full charge lasts for approximately 1 week of typical use.
- When there is approximately 30% charge left, the charge indicator light blinks 8 times quickly after use to indicate that you should recharge the unit. A complete recharge takes
- 4 hours.
To charge the Cordless Water Flosser WP-360 or Cordless Plus Water Flosser WP-450:
- Ensure the power switch is in the OFF position when charging.
- If you use your Water Flosser once a day or less, charge it overnight, once a week. If you use it twice a day or more, charge the unit more frequently.
- Do not run the battery down completely. This may shorten the battery lifespan and requires charging the unit for 24 hours to obtain a full charge.
- If the Water Flosser is to be stored for an extended period of time (six months or more), be sure to fully charge it prior to storage. The unit contains a Nickel Metal Hydride battery.


