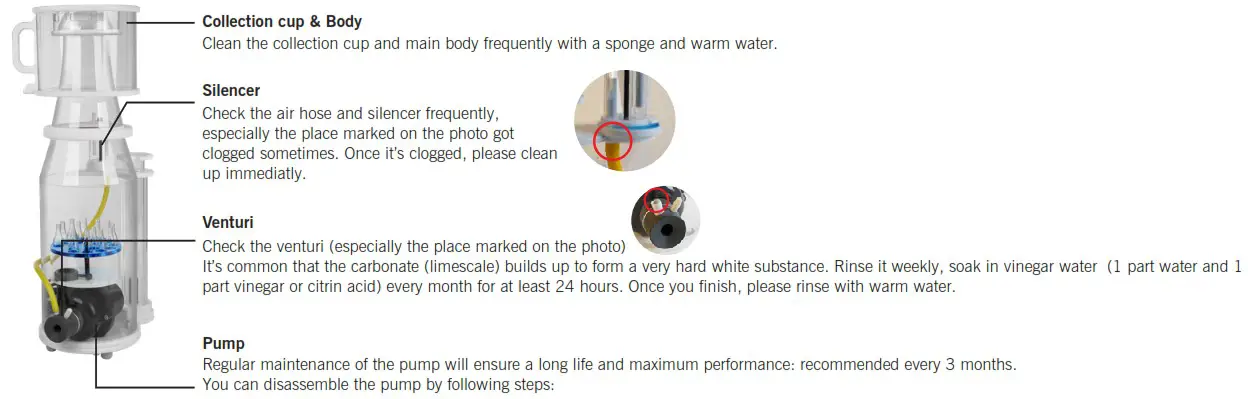
![]()
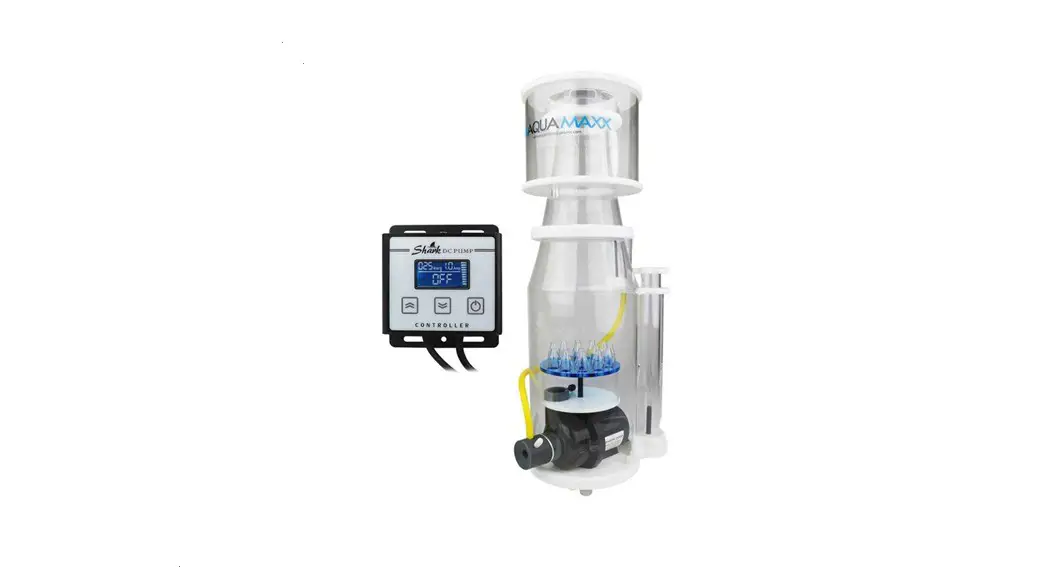
ConeS DCQ Series Protein Skimmer
DCQ-2 / DCQ-3
Before installation and operation
Please open the package carefully and check for damaged or lost parts.
PARTS INCLUDED:
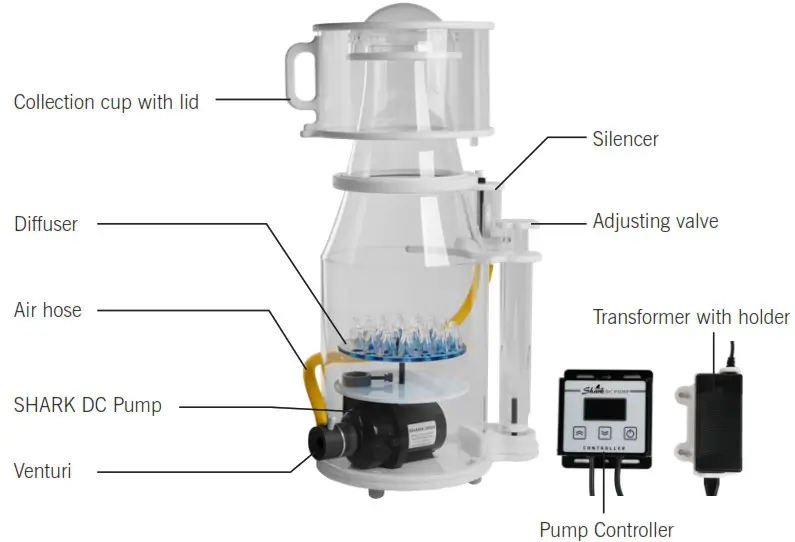
Recommendations
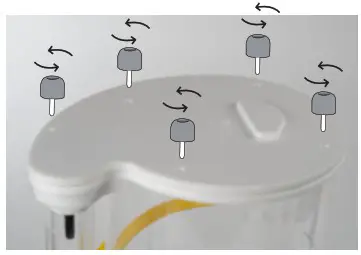
- For best performance, please clean the collection cup frequently. Use a sponge and warm water to clean it. (DO NOT USE ANY SOAP OR CHEMICALS TO CLEAN THE COLLECTION CUP).
- While we take great care to keep any contaminants away from our products during assembly, please take a moment to clean with warm water ONLY. Never clean Acrylic with alcohol-based products. Use caution when handling acrylic scratches easily.
- It may require 2 – 4 weeks for the skimmer to reach maximum performance due to tiny amounts of oil or remnants left from manufacturing. Skimmer performance may be erratic during this time and be sure to allow ample time for the skimmer to break-in before making adjustments.
Assembling the main unit
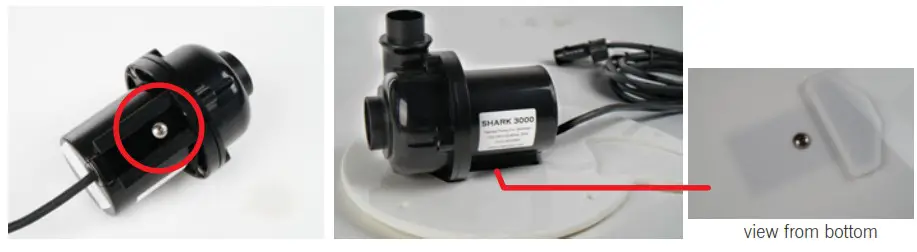
- Loosen the screws in the bottom of the skimmer to separate the base and the skimmer body.

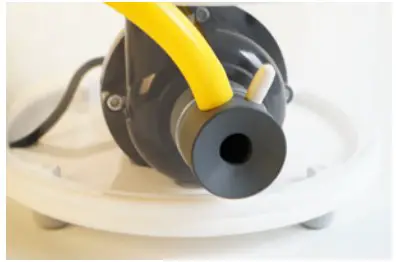
- Take the screw under the pump and put the pump on the base then screw back to combine the pump to the base.

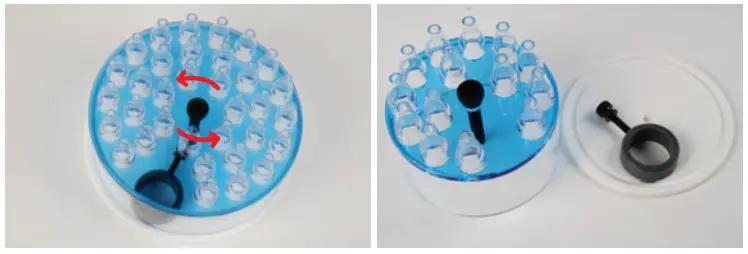
- Loosen the center screw on the diffuser to separate the diffuser plate.

- Loosen the screw beside the cap and put the plate on the pump then screw back.
Make sure to put the plate in the center of the base or the main body cannot be installed.
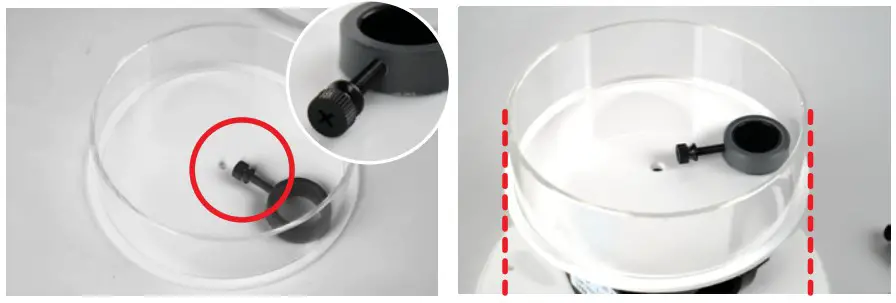
- Put back the diffuser plate and tighten the center screw, do not overtighten.
 the diffuser plate should only be installed in this position
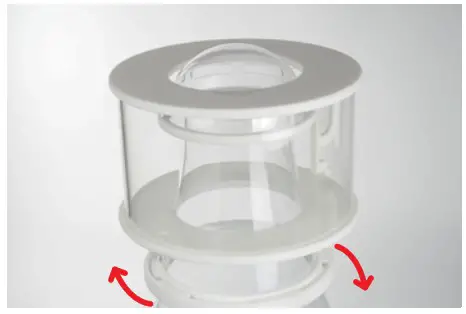
 - Screw the skimmer body back. Make sure the wire is in the right place.

- Install the venturi and connect the venturi and the silencer by the air hose.

- Install the collection cup and lid. (DO NOT OVER TIGHTEN SKIMMER CUP AS DAMAGE MAY RESULT)

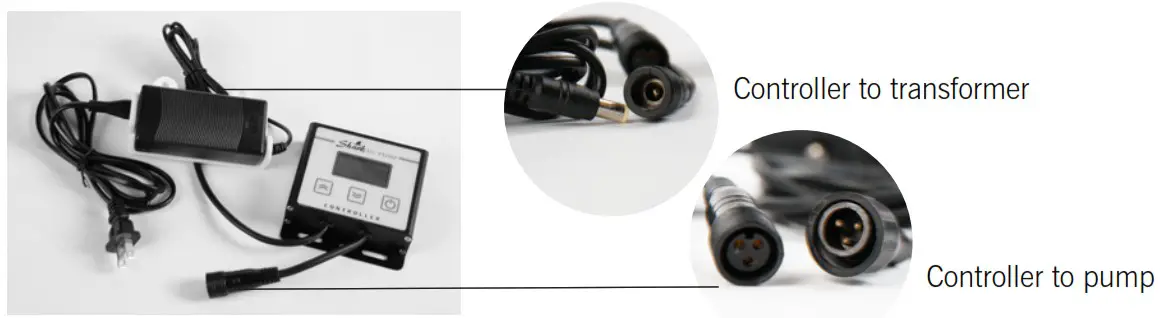
- Connect the pump to the controller and the transformer.

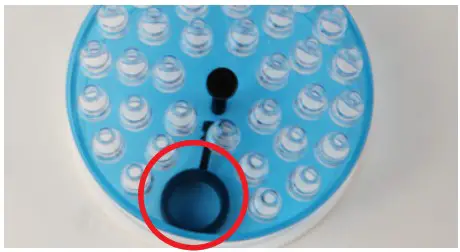 the diffuser plate should only be installed in this position
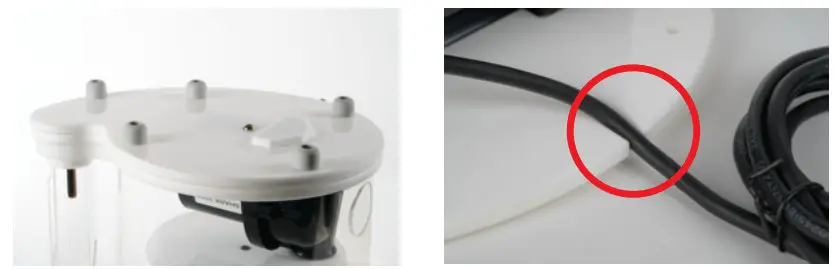
Select a suitable place to set your protein skimmer
- For best results place the skimmer in 7 to 8 inches of water. Please make sure that the skimmer is in no more than 8 inches of water. Otherwise, the adjusting valve will not function properly.
- The pump must be completely submerged underwater when in use
To Start
- Plug in the pump.
- The main chamber will fill with bubbles. Carefully adjust the adjusting valve (clockwise to close, the water level in the chamber will go up; counter-clockwise to open, the water level will go down). Adjust the water level within the skimmer to where the cup meets the neck.
- Once the bubbles reached the bottom of collection cup, you can start to adjust the water level according to your preference. If you prefer wet wastewater, you need the high water level; Conversely, if you want dry wastewater, just let your water level goes down.
| where the cup meets the neck. | 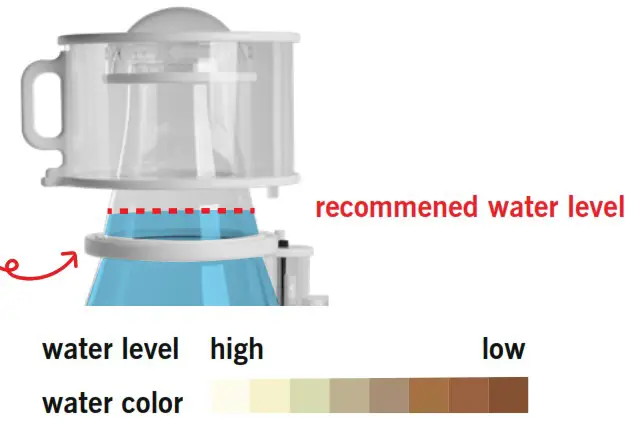 |
Maintenance
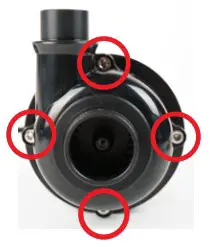 | 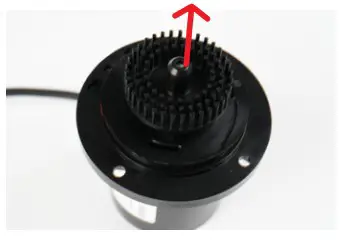 | 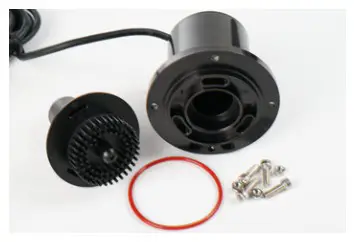 |
| Unscrew the 4 screws outside the pump, to take off the cover. | Pull out the rotor. | Soak in a mixture of 1 part water and 1 part vinegar (citrin acid also available) for at least 24 hours. Once you finish, please rinse with warm water. |
Warranty
AquaMaxx warrants all AquaMaxx products to be free from manufacturing defects for one year from the original purchase date when purchased through an authorized AquaMaxx retailer. This warranty does not cover any damages caused by misuse, neglect, alterations, or improper handling/transport/maintenance/installation. Physical damages are not covered by warranty. AquaMaxx does not cover personal injury, personal loss, or other damages associated with the use of our products. In order to request warranty service, please email us at [email protected]. A purchase receipt is required for any warranty service. Products requiring warranty service must be returned to AquaMaxx. You are responsible for the cost of shipping a warranty claim to AquaMaxx and any damages that may occur during transit. Once a returned product has been inspected, it will be repaired or exchanged at our discretion and returned to you. International and/or expedited shipping are not covered under your AquaMaxx warranty.


