NASTA KS-86PR001FK Passive Air Register with Pollen Filter
Please read carefully before the installation
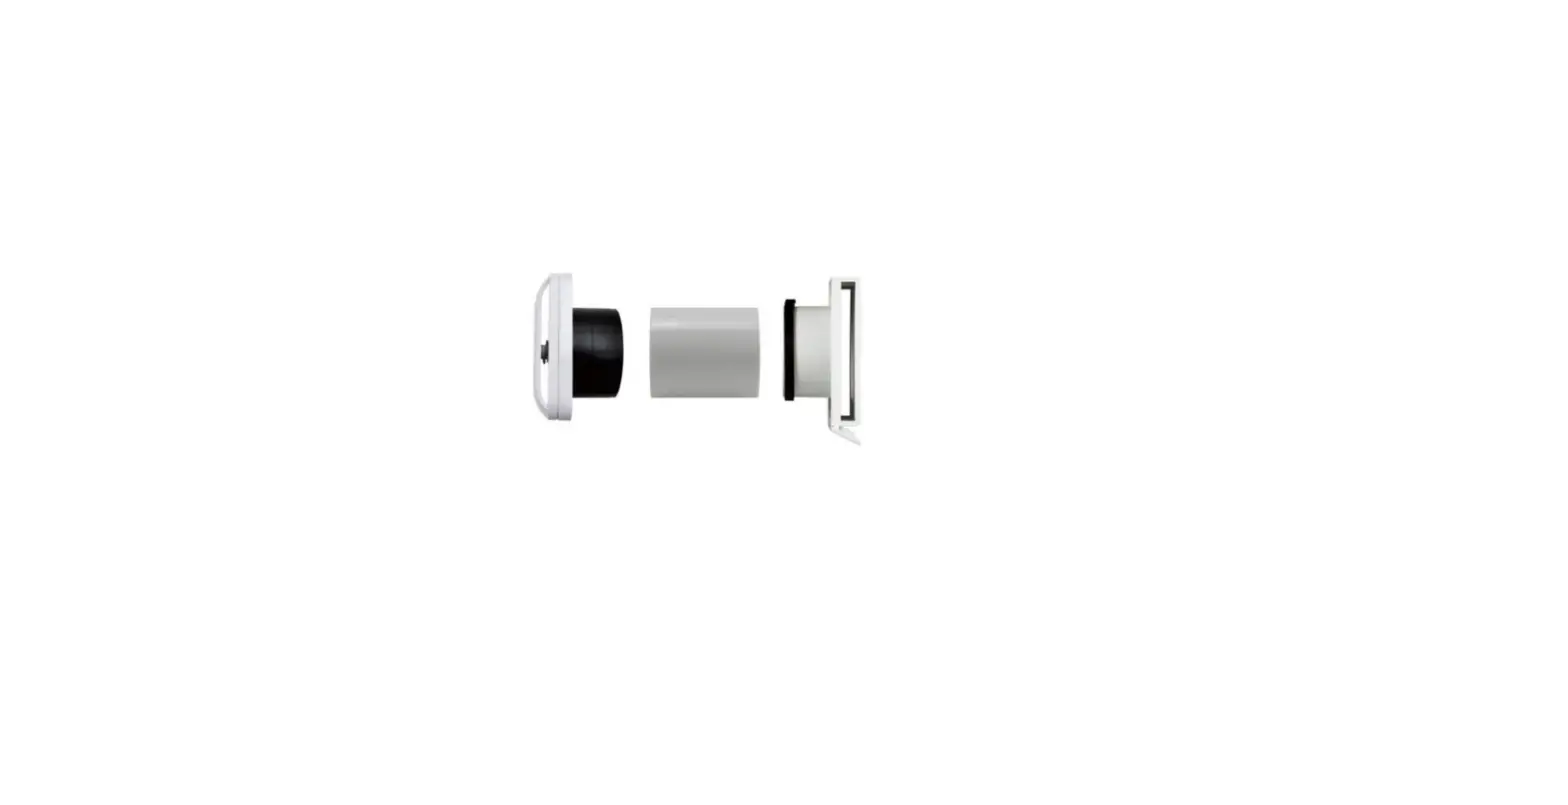
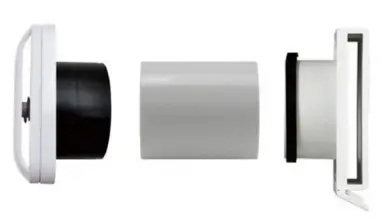
Nasta KS-86PR001FK
- Body dimensions: 200mm square Compatible with 150mm duct
Before installation
- Confirm duct is installed, and is the appropriate size for the vent
- Ensure duct is straight, without bends, steps, or deformation
- Check that the inside of the duct is clean and free of debris
Installation
- To prevent air and moisture leaking between the duct and the duct connector, attach the foam tape to the edge of the connector (before the step). Press firmly, without pulling
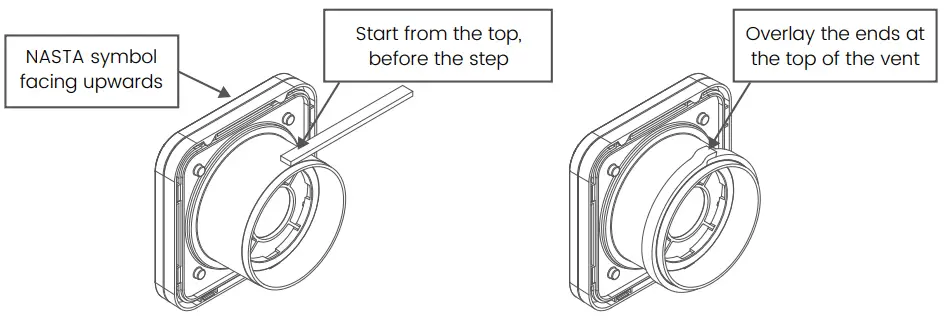
Precautions for attaching the tape
- Wipe any dust or dirt from the duct connector before attaching the foam tape
- When attaching, do not pull or stretch the tape
- This will reduce the quality of the seal, leading to water or air leaking through
- Ensure the ends of the tape overlap at the top of the duct connector
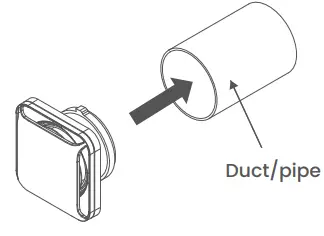
- Insert the duct connector into the duct or pipe
- Sealant or adhesive may be used if required
Caulking
Remove the cover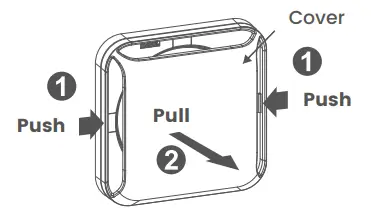
- Push the two opposite open sides of the cover in
- Pull lightly away from the body
Remove the body cover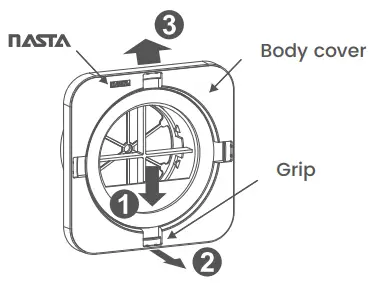
- With the Nasta mark engraved on the body facing up, place your finger on the lowest grip.
- Push down, and pull the body cover away from the body
- Lift the body cover up and off the body
Perform caulking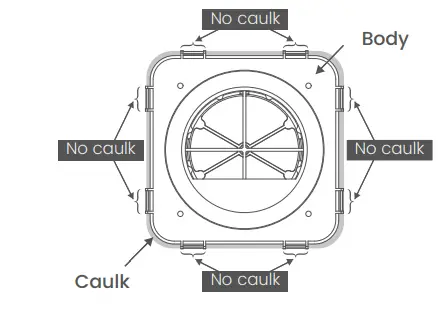
- Wipe away any dust or moisture
- Ensure the body is not tilted before caulking as per the diagram
Precautions for caulking/sealing
- See the figure on the right for the range of caulk
- Do not caulk the clips, as this will prevent the body cover from being attached
- Caulk should be thickness of 2mm or less
- Once solidified, reattach the main body cover
Reattach the cover and body cover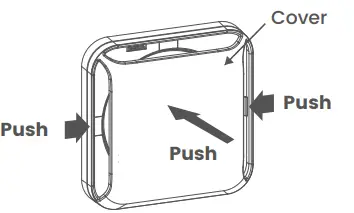
- Attach the body cover, by performing the reverse of part 2 above. Ensure the Nasta mark is upright on the upper side
- Align the cover with the body
- Press the sides in, whilst pushing the cover lightly onto the body. This should clip into the grips on the body cover
Cleaning and maintenance
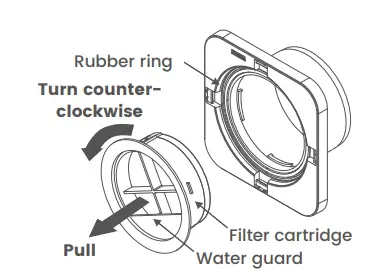
- Remove the cover
- Remove the filter cartridge by pinching the arms of the cartridge, rotating counter-clockwise, and pulling gently
- To replace, reverse the process ensuring the water guard is at the bottom
WARNING
If the rubber ring is removed, reattach it with firm side facing out Please note that the product design and specifications are subject to change without notice
www.universalfans.com.au


