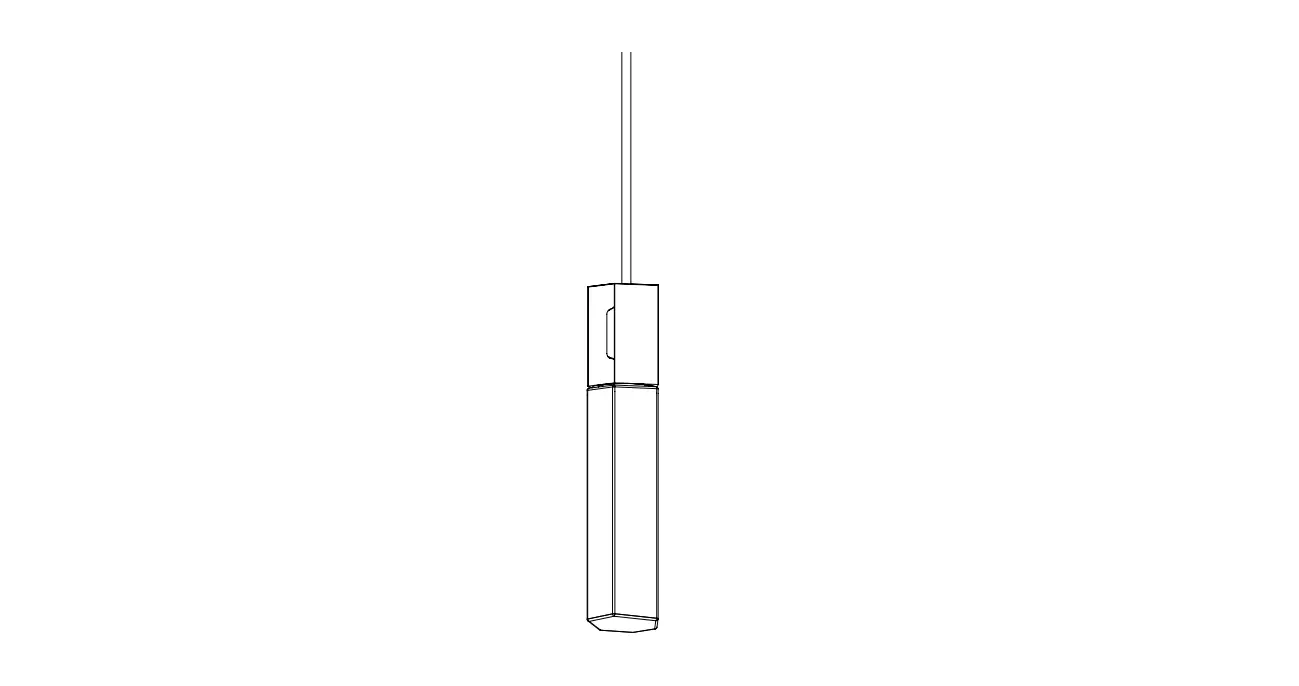
tala Basalt Single Pendant in Brass

BEFORE STARTING
We advise the fitting of our ceiling rose and pendant to be performed by a qualified electrician. Please read through these instructions before commencing work, and keep them for future reference. Please take extreme care when carrying out these instructions.
Important! This light fitting must be connected to the supply earth. If your lighting circuit does not have an earth, ask a qualified electrician to provide an earth facility. This light fitting is suitable for indoor use only. This fitting operates on 120V mains voltage. Please visit our website to see our reccomended dimmers
Warning! Always switch off electricity supply at the mains during installation and maintenance. We recommend that the fuse is withdrawn or the circuit breaker is switched off whilst work is in progress. Do not just turn off at the wall switch. All fittings must be installed in accordance with current NFPA 70, National Electrical Code (NEC)
RECOMMENDED EQUIPMENT
- Small flat head screwdriver
- Wire strippers
- Insulation tape
- M10 (17mm) (5/8IN) spanner or Adjustable spanner
Further equipment may be required for fixing to your ceiling.
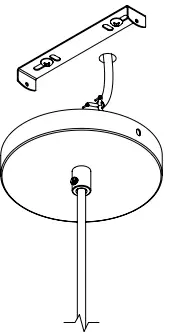
BASALT TRIPLE – PROVIDED COMPONENTS
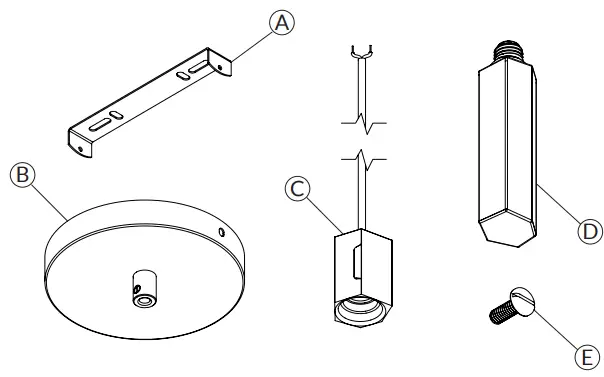
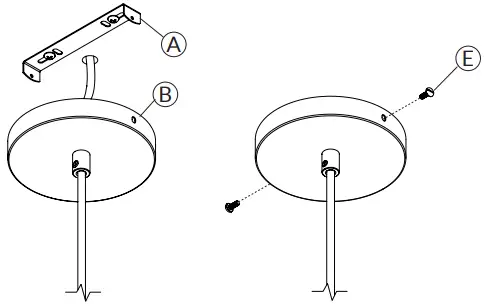
- A x1 Ceiling Bracket
- B x1 Ceiling Plate
- C x1 Tala Basalt pendants
- D x1 Tala Basalt bulbs
- E x2 flat head bolts
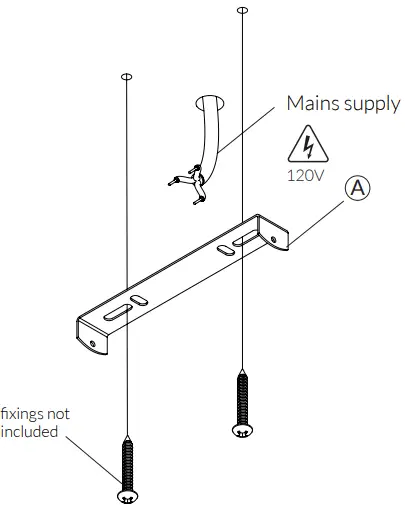
- STEP 1
Attach A to the ceiling using screws and plug. Always choose screws and plugs that are appropriate for the ceiling.
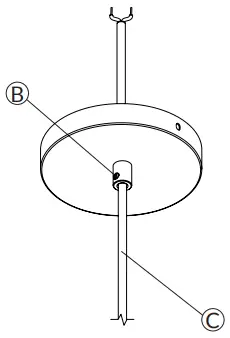
- STEP 2
Adjust the cord C to your desired length. Using a flat head screw driver, tighten ‘grub/set screw’ B This will secure the cable in place. Maintain all double insulation
- STEP 3
Cut off excess cable and strip wires to expose the copper core. Maintain all double insulation.
- STEP 4
First identify your household wiring using current Building Regulations and IEE Wiring Regulations. Attach the pendant wiring to your household supply as shown. Use an appropriate junction box.
- STEP 6
Fasten part A to part B using the bolts E provided.
- STEP 6
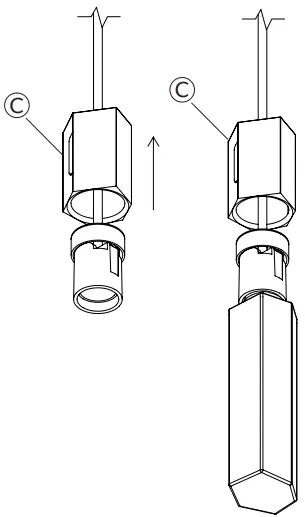
Lift metal sleeve C and screw in the bulb firmly. Take care not to let the metal sleeve fall onto the bulb
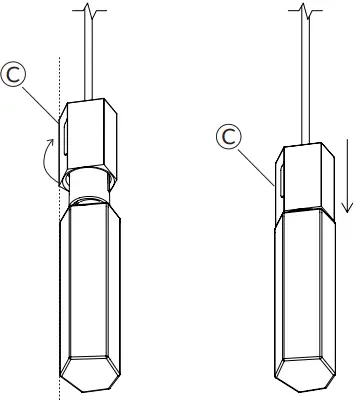
- STEP 7
Rotate metal steeve C To align with the bulb
Carefully lower metal sleeve onto the bulb. you can now make and final tweeks to the alignment of the bulb and sleeve.

CARE AND CLEANING
We recommend cleaning with a soft dry cloth. Do not use abrasive materials as these will damage the finish of the product.
WARRANTY AND AFTER-CARE
This product has a three-year warranty. Within this time we will replace any parts that have functional defects. Please report any faults by emailing:
[email protected]
Pendant Layouts
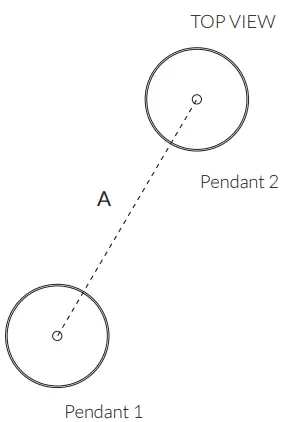
DISTANCE BETWEEN PENDANTS
When arranging pendant drops, plan the location of each pendant on the ceiling. Recommended minimum distance between the centre of each ceiling rose is 180mm (7in).
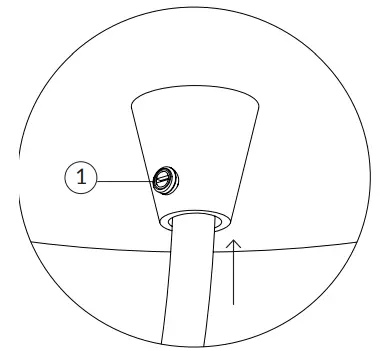
ADJUSTING THE CORD
To adjust the cord to your desired length, using a flat head screw driver, loosen the grub/set screw 1 and push the cable up into the ceiling plate.
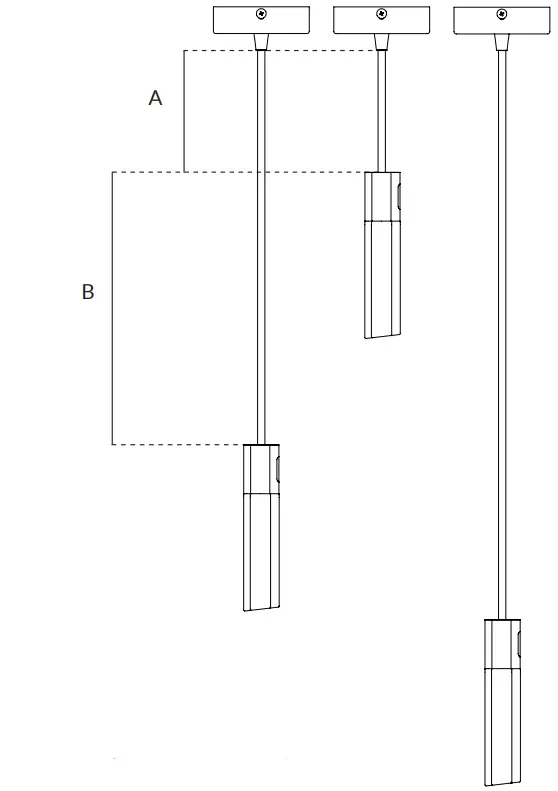
MINIMUM CORD LENGTH A
For all bulbs shortest recomended cord length is 350mm (14in)
DISTANCE BETWEEN PENDANTS B
Recommended minimum distance between pendant is 100mm (4in)
PENDANTS – RECOMMENDED CABLE LENGTHS
SCENARIO 1 – OVER COFFEE OR DINING TABLES
Where height is required for seated tasks
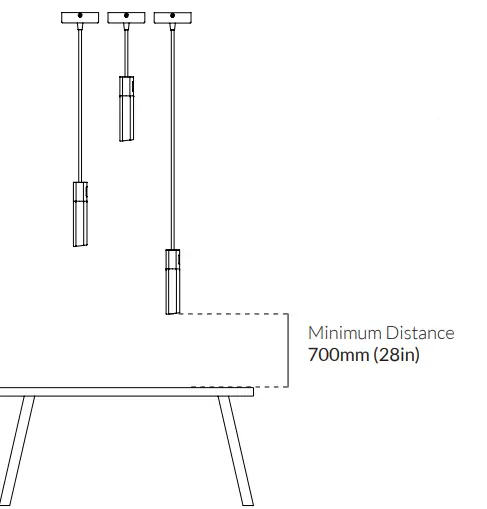
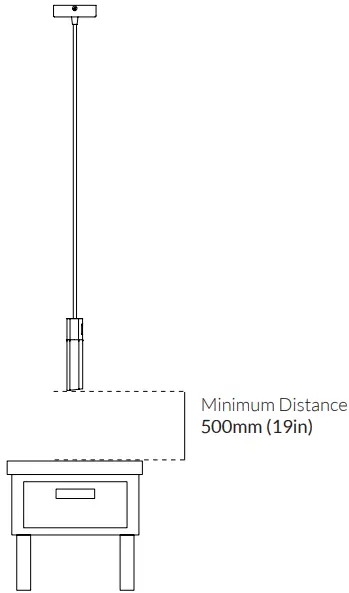
SCENARIO 2- OVER SIDE OR BEDSIDE TABLE
Where height is only required for storage.
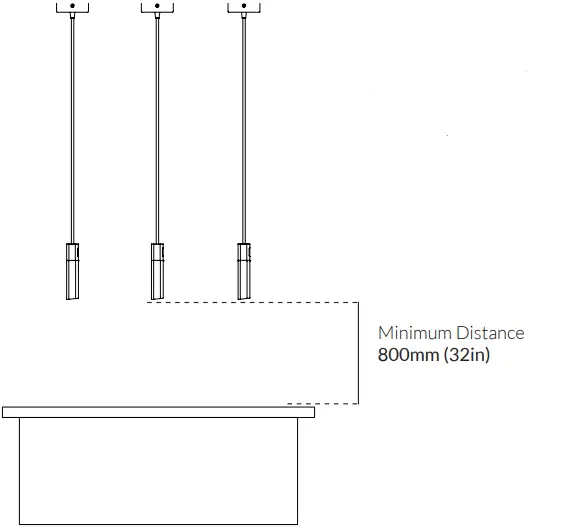
SCENARIO 3 – OVER KITCHEN ISLAND OR BAR
Where height is required for standing tasks.
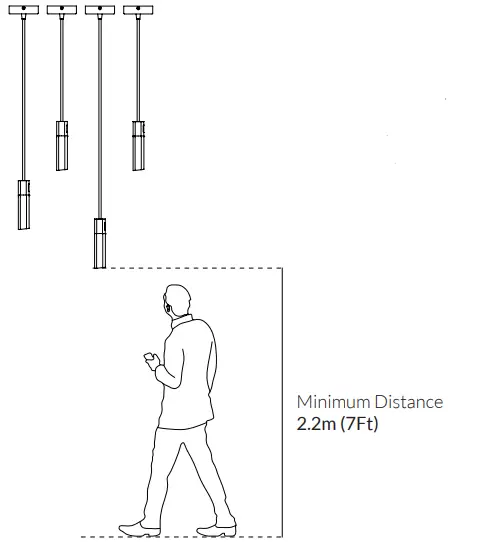
SCENARIO 4 – OVER A STAIRWELL OR WALKWAY
Where height is required for walking underneath.
Join the Community
Instagram: @tala | Facebook: talaHQ | Pinterest: TalaLED | Tag: lighttoliveby
Tala Studios, 25B Vyner Street, London E2 9DG | +44 20 3026 3246 | [email protected]


