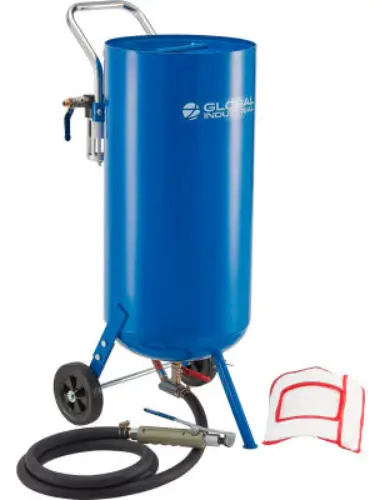
GLOBAL INDUSTRIAL 320777 20 Gallons Portable Sandblaster
DANGER
- CHEMICALS SUCH AS LEAD ARE FOUND IN CORD AND SAND BLASTER. BE SURE TO WASH HANDS AFTER USE.
- ALWAYS WEAR PROTECTION AND RATED GEARS SUCH AS GLOVES, GOGGLES, AND MASK WHILE OPERATING SAND BLASTER.
- DO NOT OPERATE SAND BLASTER NEAR OR AROUND COMBUSTIBLE AND/OR FLAMMIBLE LIQUIDS, GASES, OILY RAGS, OR COMBUSTIVE MATERIAL. SPARKING CAN OCCUR WHILE SAND BLASTING, WHICH COULD RESULT IN FIRE OR EXPLOSIONS.
- ENSURE OPERATOR IS GROUNDED AND WEARS PROPER ANTI-STATIC GEAR.
NOTE
- INSPECT ITEM CAREFULLY FOR MISSING PARTS OR DAMAGE.
- DO NOT USE SANDBLASTER IF ANY PARTS ARE MISSING,BROKEN, OR DAMAGED
- INSPECT FITTINGS AND CONNECTIONS BEFORE OPERATING.
- ENSURE OPERATOR READS AND UNDERSTANDS MANUAL PRIOR TO OPERATION.
- CONDUCT NECESSARY MAINTANANCE TO SANDBLASTER WHEN REQUIRED.
- FOR OPTIMAL PERFORMACE, AVOID USING SANDBLASTER IN DAMP AND WET AREAS.
- KEEP CHILDREN AWAY FROM SANDBLASTER.
- DISCONNECT AIR COMPRESSOR WHEN SANDBLASTER IS NOT IN USE.
Part List
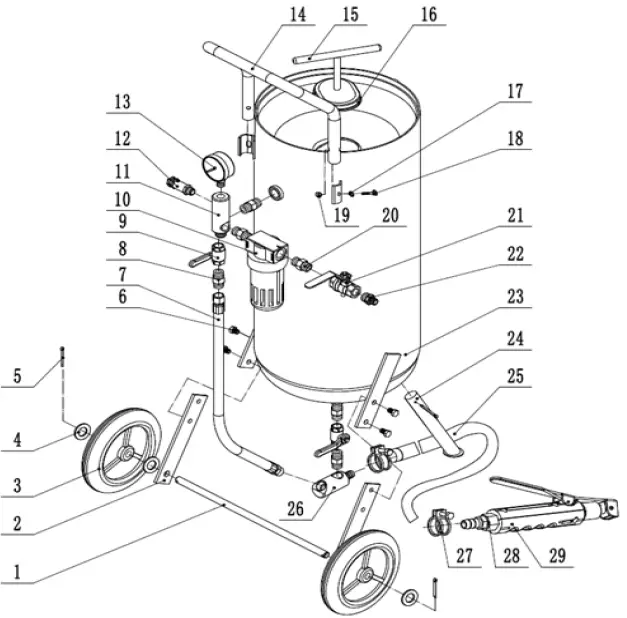
| Ref | Description | QTY. |
| 1 | D 12 mm x L 400 mm Axle | 1 |
| 2 | Axle Support Bracket | 2 |
| 3 | 5″ x 1.5″ Inch Plastic Wheels ID 13 mm | 2 |
| 4 | M12 flat washer | 4 |
| 5 | 4 x 36 mm Cotter Pin | 3 |
| 6 | M8 x 12 hex bolt | 4 |
| 7 | L 580 mm Air Hose | 1 |
| 8 | G3/8″-M14 x 1.5 Brass Nipple Pipe Joint | 1 |
| 9 | G3/8″ Ball Valve | 2 |
| 10 | Pressure Reducing Filter Valve | 1 |
| 11 | Air Manifold | 1 |
| 12 | 125psi (ASME-NPT1/4″) Safety Valve | 1 |
| 13 | Barometer Pressure Gauge Y60 (0-230 PSI) | 1 |
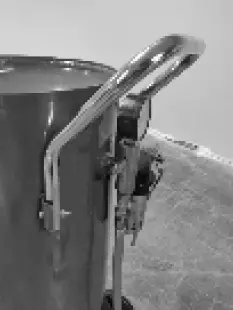
| 14 | Tank Handle | 1 |
| 15 | Tee Handle | 1 |
| 16 | Rubber Seal | 1 |
| 17 | M6 Flat Washer | 2 |
| 18 | M6 x 35 mm bolt | 2 |
| 19 | M6 Hex Nut | 2 |
| 20 | G3/8″ Brass Nipple | 1 |
| 21 | G3/8″ Three Way Bal Valve | 1 |
| 22 | G1/4″ – 3/8″ Intake Connector | 1 |
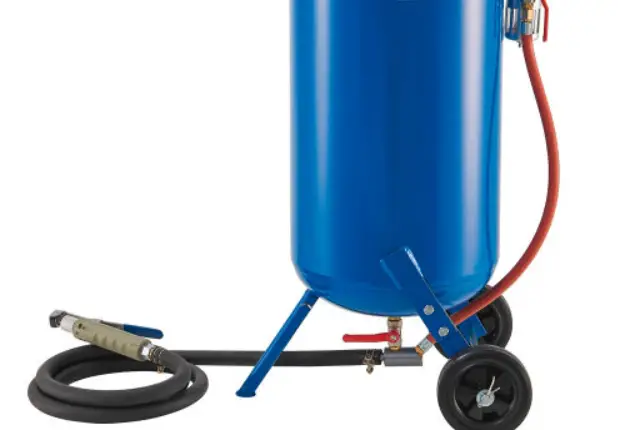
| 23 | Tank | 1 |
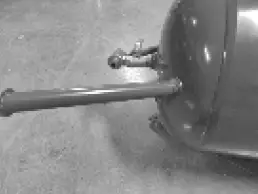
| 24 | Tank Foot | 1 |
| 25 | 8ft Abrasive Hose D 12 mm x L 2.5m, 1.6 MPa | 1 |
| 26 | Tee Joint Manifold | 1 |
| Ref | Description | QTY. |
| 27 | Hose Clamp ID 25mm | 2 |
| 28 | G3/8″ Connector | 1 |
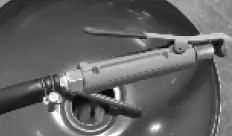
| 29 | Blast Gun 3.5mm Nozzle | 1 |
| 30 | Hood | 1 |
Assembly Instructions
- Connect tank foot (Ref 24) to tank (Ref 23) using cotter pin (Ref 5).

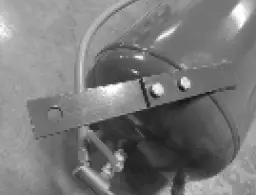
- Connect axle support bracket (Ref 2) to tank (Ref 23) using hex bolt (Ref 6).

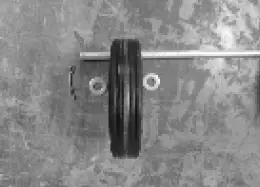
- Assemble one side of the wheel axle assembly by inserting the washer (Ref 4), wheel (Ref 3), washer, and cotter pin (Ref 5)in the order shown above.

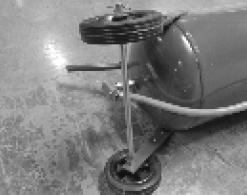
- Insert axle (Ref 1) through the support brackets and assemble the other wheel assembly..

- Attach hose clamp (Ref 27) and abrasive hose (Ref 25) to tee joint manifold (Ref 26) .

- Attach tank handle (Ref 14) to tank using M6 bolt (Ref 18), washer (Ref 17), and nut (Ref 19).

- Place rubber seal (Ref 16) on top of tee handle (Ref 15) and insert into tank.

- Connect blast gun (Ref 29) to abrasive hose.


Loading abrasive into tank
- Ensure abrasive is dry.
- Turn off air supply and read gauge until is reaches to zero pressure.
- Insert funnel and pour abrasive into the tank. Never fill tank to full capacity. For multiple usages refill and keep tank to 3/4 full.
- Close gasket and open air supply valve.
- As you begin to pressure the tank, ensure that there are no air leaks throughout the assembly.
Operation
- Keep operating air pressure between 60~125 PSI.
DO NOT EXCEED 125 PSI. - Ensure that the abrasive material being used is compliant and operational with this item’s capabilities.
- As tank begins to pressurize, ensure that teen handle is centered in the middle of the tank hole.
Maintenance
- While operating, ensure sandblaster tank is not located in spray reach of spray nozzle.
- Do not operate sandblaster if there are any air leaks in the air supply.
- Regularly inspect sandblaster hose. During maintenance check, run compressor without any abrasive material. Running your hand down the hose, you should feel any air leaks and blisters. If you spot any sign of ware, replace hose immediately.
Troubleshooting Chart
| Problem | Cause | Solution |
| Low air pressure |
|
|
| Material not blasting from gun |
|
|
| Low vacuum |
|
|
| Air/Abrasive leaks in jet/nozzle area |
|
|
| Vacuum Leak |
|
|
| Particle Clogging |
|
|


