STREAMLINE CCTV-POLE-KIT0003-051 Wireless Bullet Camera
INTRODUCTION
- Do not use or store the camera or monitor in high temperature or high humidity or damp environment.
- Avoid direct sunlight for long periods.
- Do not use a SD card larger than 64GB
- Insert and remove the SD card only once the power of the monitor is switched off.
- When inserting the SD card, please make sure that the in sertion direction is correct. Failure to do so will damage the card slot. (See icon on the rear of the monitor)
- Do not attempt to remove the battery of either the camera or monitor.
- The possible reason for the Monitor not powering up, is that the battery is depleted. Plug the charging wire into the USB port on the monitor and connect it to a mains voltage supply.
- The battery charger supplied is for the Monitor use only. Do not leave the charger in a humid place. Unplug the charger after use.
- Before using the Monitor for the first time, charge it for between 6 – 10 hours.
- The new battery will reach best performance after charging and discharging several times, If the camera is not used for long periods, it is recommended to charge the monitor every 2-3 months.
Bullet Camera
Ensure that the camera battery is fully charged prior to operation. Once fully charged the battery will have a 1.5 hour working time.
Charging
Charge the camera battery, for approximately 1½ hours, using the mains charger supplied with the kit. Whilst charging, the red indicator LED, in the front of the camera, will illuminate. When fully charged, the red indicator LED will switch off. Do not leave the camera on charge for a long period of time after the red LED has switched off.
Operation
Press and hold the button, on the rear of the camera, to turn the camera on. The reason for the camera possibly not switching on, is that the battery is depleted.
Enhanced brightness
When switched on, press the button once to give enhanced brightness, and again to turn the LED lights off. The camera will continue to function in this mode and the battery charge will be extended. Press and hold the button to switch the camera off.
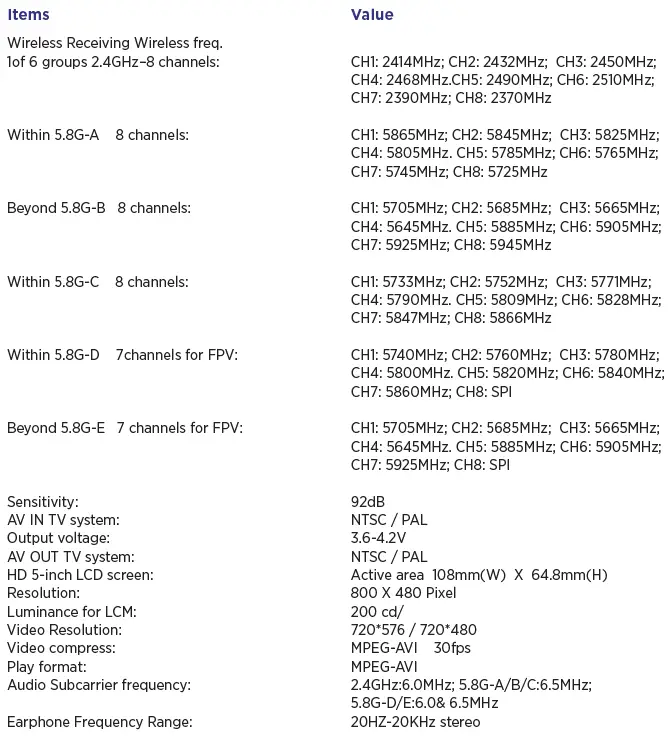
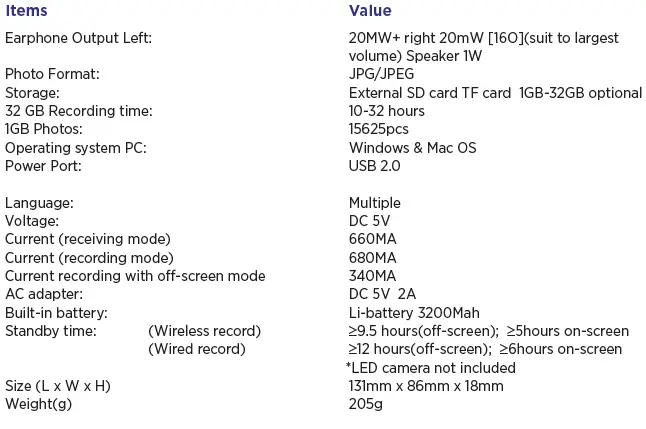
Camera Specification
- Frequency 2414Mhz (CH1)
- RF Output Power 50mW (300 feet in line of sight)
- Total Pixels PAL 720 x 576 NTSC: 720 x 480
- Minimum Illumination 0.01Lux / F1.2
- Lens Focus 1-100cm (adjustable)
- View Angel 900
- Light Source LED 2200mcd x 6 (Range of LED lamp: 5 metres)
- IR/940nm 70mW x 6 (Range of IR940 lamp: 5 metres)
- IR/850nm 70mW x 6 (Range of IR850 lamp: 8 metres)
- Li-Battery Capacity 380MAH
- Working Time 1.5 hours
- Charge Time 1.5 hours
- Voltage DC 5V
- Current Lamp off: 160mA Lamp on: 260mA Lamp highlight: 300mA
- Weight 35g
- Size (DXL) 20mm x 84mm
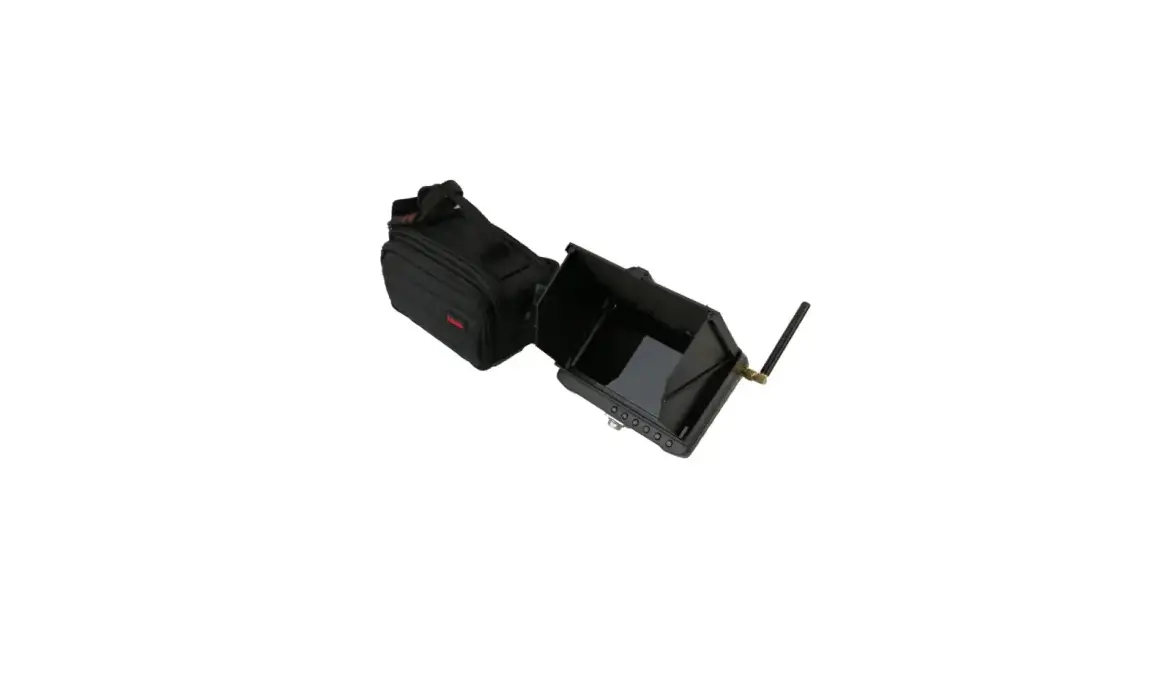
Monitor Specification
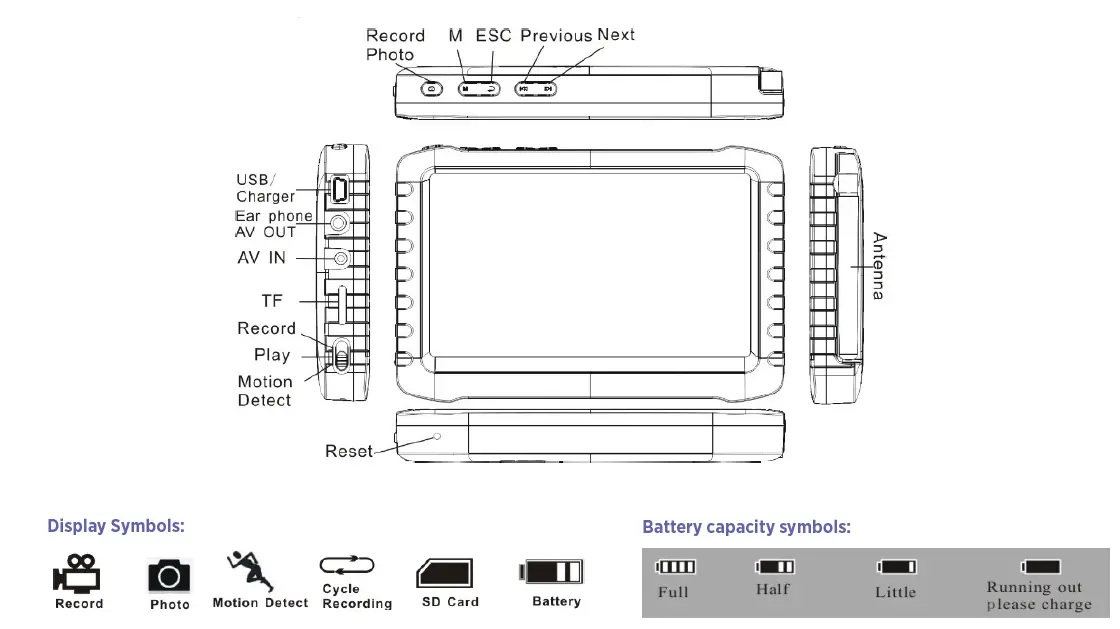
Basic Monitor Operation
- Power On/Off:
Press and hold to switch the power on – press and hold to switch the power off.
 - Working mode switch
(switch located on the side of the camera – see rear for icons) When switched to Monitor will take photos and record videos When switched to
 Monitor will display recorded photos and videos When switched to
 Monitor is in the state of motion detection.
 - Raise the monitor antennae to improve wireless connection with the bullet camera.
- SD card
If you wish to use the video function, insert an SD card prior to switching the monitor on. If no SD card is inserted, the monitor can be used for viewing only. The screen will show a symbol of an SD card when inserted. - Viewing the SD card on the computer
Switch the power off prior to removing the SD card from the monitor. Remove and insert the SD card directly into a computer to view your videos or images.
Taking a photo and video
Switch the Monitor on, and select working mode![]() . Switch the bullet came on and wait for them to connect.
. Switch the bullet came on and wait for them to connect.
- Taking a Photo
When is displayed, press  once, symbol
 will display on the screen, and a still image will be captured
 - Video Recording
When is displayed, press and holdfor 3 seconds and the monitor will begin recording, (screen will display “REC”). Press once to pause the video,(screen will display ), press again to continue recording. Press to end the recording, It will save automatically and exit. - Mute
When is displayed, press to mute the sound. Screen displays “MUTE”. Press again to recover sound.
Viewing Photos and Videos
Select central position ![]() of the switch on the side of the monitor to view photos and videos. Press
of the switch on the side of the monitor to view photos and videos. Press ![]() to select either “Photo” or “Video”.
to select either “Photo” or “Video”.
Viewing Videos:
- When “Video” is selected, press to display the list of videos that have been recorded
- Press
 to scroll through the list and press
  to play the selected video.
 - Whilst the video is being viewed, press and hold“ ” to fast forward; press and hold
 to rewind. (Press to adjust volume)
 - Press to pause; press again to release pause.
- Press and to exit the video and return to the video list.
- Press again to return to photo and video option.
Viewing Photos
- When “photo” is selected, press to view the list of photos which have been recorded.
- Press to scroll through the list and press to display the selected photo.
- Press to return to the photo list.
Deleting Photos & Videos
- Press to select the desired video/photo.
- Press to open the options dialogue.
- Press to select the desired option
- Press to confirm.
Additional Information & Motion Detection
Switch the monitor on, and select the , mode on the side switch. Press and hold![]() for 3 seconds to enter the motion detect recording. When moving objects are detected, the monitor will automatically begin to record, and the screen will show “REC”. After 10 second, if n movement is detected, the monitor will automatically pause recording, until further movement is detected, when it will continue to record the video. To end motion detect recording, press
for 3 seconds to enter the motion detect recording. When moving objects are detected, the monitor will automatically begin to record, and the screen will show “REC”. After 10 second, if n movement is detected, the monitor will automatically pause recording, until further movement is detected, when it will continue to record the video. To end motion detect recording, press![]() , it will automatically save the video.
, it will automatically save the video.
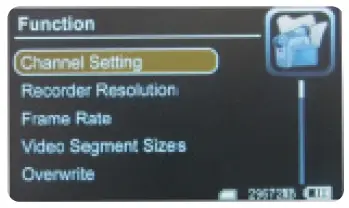
- Function Settings
Switch the monitor on, with the modeor displaying, press to enter the function mode. Press to select “Function”, then press to enter into function menu.
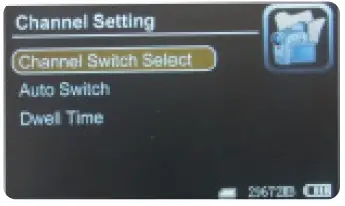
Channel Setting: Press/to select “Channel Setting”, and then press to enter.
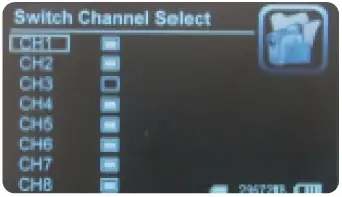
- Auto Switch Press to select “Auto Switch”, and press to enter. Press to select channel and press to turn it off/on. Press to exit.

- Auto Switch Press to select “Auto Switch”, and press to enter. Press to select “Off” “On”, then press to confirm and exit.

- Dwell Time Press to select “Dwell Time” and press to enter Press to adjust dwell time. Then press to confirm and exit.

- Auto Switch Press
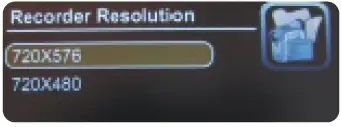
- Recorder Resolution:
Pressto select “Recorder Resolution” and press to enter. Press to select “720X576” /“720X480”. Press to confirm and exit.
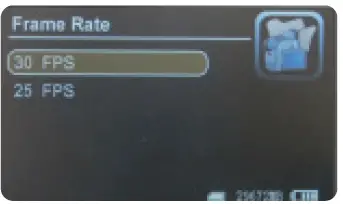
- Frame Rate
Pressto select “Frame Rate” and press to enter. Press to select “30 FPS”/“25 FPS”, and press to confirm & exit.
- Video Segment Sizes
Pressto select “Video Segment Sizes”, then press to enter. Press to select “10 MIN”/“30MIN”/“60 MIN”. Press to confirm & exit.
- Overwrite
Pressto select “Overwrite”, and press to enter. Press to select “Off”/ “On”, and press to confirm & exit. If “Overwrite” is on, DVR will cycle record, and save the latest video.
- Time Stamp
Pressto select “Time Stamp”, and press to enter. Press to select “Off”/ “On”, and press to confirm & exit. If it’s on, video will be saved wit synchronous time.
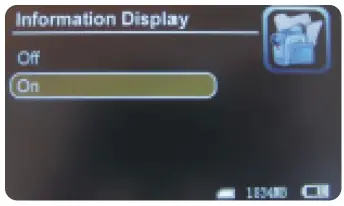
- Information Display
Pressto select “Information Display”, and press to enter. Press to select “Off” “On”, and press to confirm & exit. If it’s on, screen will display information of working frequency, channel, audio state, date & time, etc. If select “Off”, all the information will not be displayed.
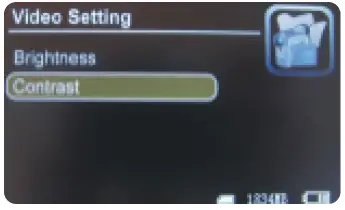
- Video Setting
Pressto select “Video Setting”, and press to enter. Press to select “Brightness” or “Contrast”; then press to enter; then press to adjust brightness or contrast. Press to exit.


Power DVR on, working mode switched to![]() /
/![]() press
press ![]() to enter into function & system setting Press
to enter into function & system setting Press ![]() to select “System”; then press
to select “System”; then press![]() to enter into system menu.
to enter into system menu.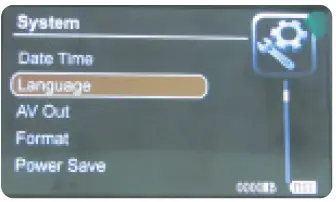
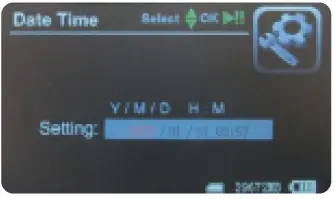
- Date & Time
Pressto select “Date Time”, and press to enter. Press again to move the cursor, and press to adjust date & time. Press to exit.
- Language
Pressto select “Language”, and press to enter. Press to choose your language. And press to confirm and exit.
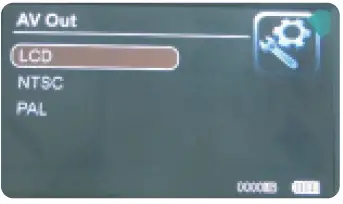
- AV Out
Pressto choose “AV Out”, and press to enter. Press to choose “PAL/NTSC” Press to confirm video displayed on TV screen. Pull out AV cable, video will back to DVR screen. - Format
Pressto select “Format”, and press to enter. Press to choose “Yes”. Press to confirm & exit.
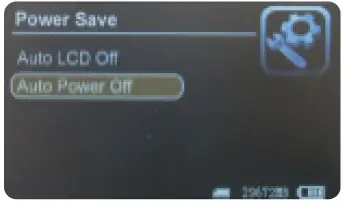
- Power Save
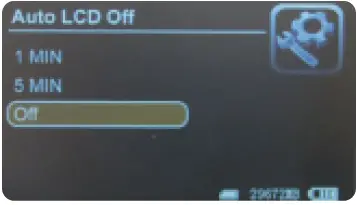
Pressto select “Power Save”, and press to enter: - Auto LCD Off
Pressto select “Auto LCD Off”, and press to enter. Press to select “1 MIN”/ “5 MIN”/ “Off”, and press to confirm & exit. If turn on “Auto LCD Off”, LCD screen will automatically shut off when the set time is due. Press any key to recover screen display.
- Auto Power Off
Pressto select “Auto Power Off”,and press to enter. Press to select “5 MIN” / “10 MIN” / “Off”, and press to confirm & exit. If turn on “Auto Power Off”, DVR will automatically shut off when the set time is due.
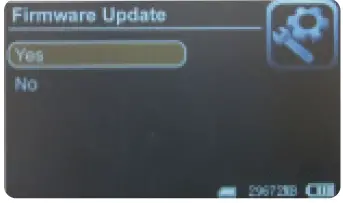
- Firmware Update:
Pressto select “Firmware Update”, and press to enter. Press to select “Yes” and press to start update. Please remember to save update file “zburnT_C11.run.elf” at root directory of SD card.
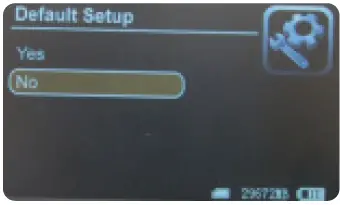
- Default Setup
Pressto select “Default Setup” and press to enter. Press to select “Yes” and press to confirm. Press to exit.
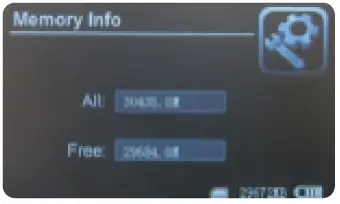
- Memory Info
Pressto select “Memory Info”, and press to view capacity of SD card. Press to exit.
- Version
Pressto select “Version” and press to view version information. Press to exit.
- Display Mode
Pressto choose “Display Mode”. Press to choose “16:9/4:3”. Then press to confirm. Press to exit.


STREAMLINE® Warranty
The warranty on all Machines and Equipment is for 1 year (12-months) from RECORDED DATE OF PURCHASE. THIS WARRANTY EXCLUDES NORMAL MAINTENANCE ITEMS, including but not limited to HOSES, FILTERS, O-RINGS, DIAPHRAGMS, VALVES, GASKETS, CARBON BRUSHES and damage to motors and other components as a result of failure to replace normal maintenance items. THIS LIST IS NOT EXHAUSTIVE. If STREAMLINE® receives notice of such defects during the warranty period, STREAMLINE® will either, at its opinion, repair or replace components which prove to be defective. Replacement parts will only be supplied under warranty, upon the inspection and approval of the defective parts by STREAMLINE®. Should it be necessary to supply replacement parts before the opportunity to inspect, these will be charged at current prices and credit will only be issued upon subsequent inspection and warranty approval by STREAMLINE®. The customer is responsible for the cost o return of the defective part. If warranty is approved, STREAMLINE® will pay for the cost of the repaired or replacement part. This warranty excludes the following conditions and circumstances which are at the discretion of STREAMLINE®:
Wear and tear, misuse, abuse improper maintenance, frost damage, the use of chemicals other than those supplied or approved by STREAMLINE®, improper installation or repair, unauthorised modification, incidental or consequential costs, loss or damage, service, labour or third party charges, the cost of returning defective parts to STREAMLINE®. This warranty constitutes the exclusive remedy of any purchaser of a STREAMLINE® unit and is in lieu of all other warranties, express or implied, including without limitation any implied warranty of merchantability or fitness for use, to the fullest extent permitted by law. In no event shall any implied warranty of merchantability or fitness for use exceed the term of the applicable warranty stated above and STREAMLINE® shall have no other obligation or liability.
Important Unfortunately these rights cannot be transferred to a third party.
Why STEAMLINE®
Flexibility
- STREAMLINE® systems can be built according to customers’ exact requirements
- For non-standard systems, the user’s needs or specifications are listened to and turned into reality.
Quality
- Whilst price is important, quality is remembered long after price is forgotten
- We insist on sourcing brand name products from around the world, only of a reputable quality, and bring them together under the STREAMLINE® name
- All STREAMLINE® products carry a full one year’s warranty, according to the manufacturers’ standard terms and conditions of sale.
Service
- We have an in-house technical helpline able to answer most of your questions relating to the capabilities and functionalities of all STREAMLINE® products
- If we get it wrong, we will put it right. If you are sent a wrong item, we will immediately attend to sending you the correct item and arrange a collection of the wrong item without any quibbles
- STREAMLINE® is backed by a comprehensive range with massive stocks providing you with a ‘one stop shop’ for all your requirements.
Hamilton House, 8 Fairfax Road, Heathfield Industrial Estate,
Newton Abbot
Devon, TQ12 6UD
United Kingdom
Telephone: +44 (0) 1626 830 830
Email: [email protected]
Visit www.streamline.systems


