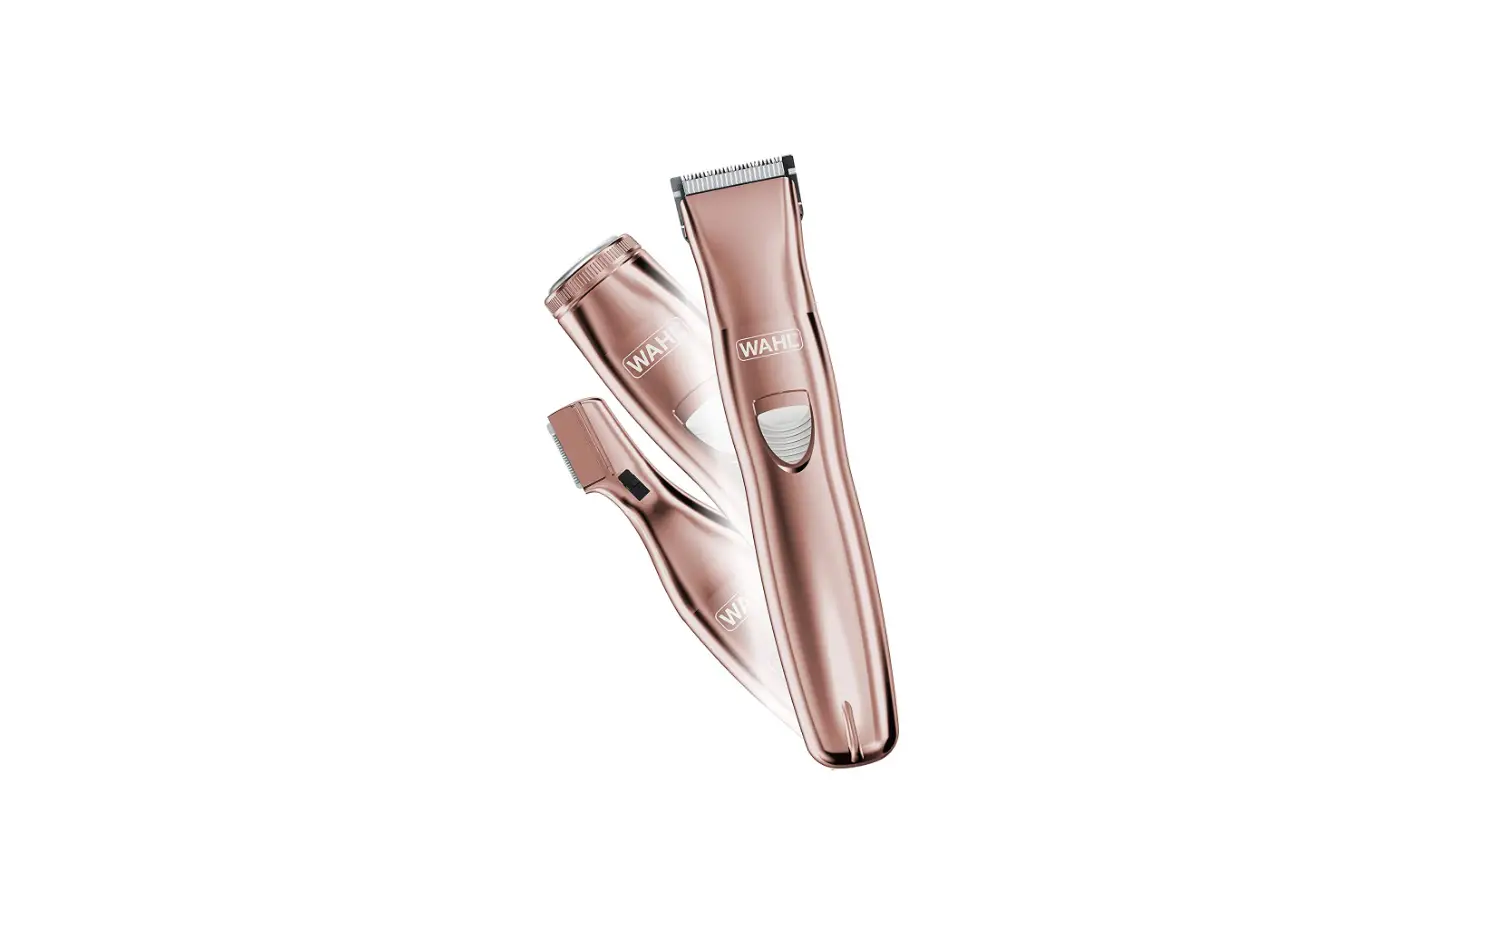
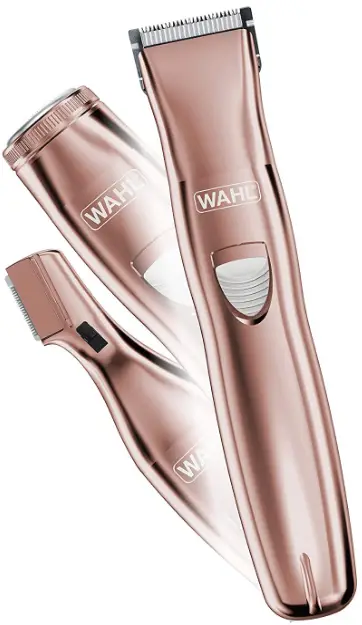
Wahl 9865-2901V Rechargeable Electric Razor
RECHARGING
- This trimmer is conveniently designed for household use. It should be allowed to charge overnight before first use.
- Remove the trimmer, recharging transformer, and accessories from the packing material.
- Connect the transformer to the trimmer. BE SURE THE TRIMMER IS IN THE “OFF – 0” POSITION WHEN CHARGING.
- Plug the recharging transformer into any convenient electrical outlet at the correct voltage.
- When the trimmer is low in power, it should be connected to the transformer and plugged into an outlet to assure maximum power is available when it is next used. This transformer
is designed to continuously charge the battery without overcharging. - Ni-Cad battery life may be extended with the following procedure: Once every month, let the trimmer run until the motor stops. Move the switch to the “OFF – 0” position and recharge fully overnight.
TROUBLESHOOTING
If your trimmer does not seem to take a charge, check the following before returning it for repair:
- Check outlet current by plugging in another appliance.
- Make sure the outlet simply is not connected to a light switch that turns the power at the outlet off when lights are turned off.
- Be sure the trimmer is properly connected to the recharging transformer, all connections are secure and the switch on the trimmer is turned “OFF – 0.”
- If your electricity is connected to a master power switch, we suggest the trimmer be disconnected from the charger anytime the master switch is off. Leaving the unit plugged into a dead outlet or an unplugged charger will drain the battery.
- If the trimmer does not run and it is completely charged, turn the unit “ON – I” and pinch or push the blades manually. (Oil may have dried out between the blades, so they may be temporarily stuck together.)
RECYCLE/REPLACE OF NI-CAD BATTERY
CONTAINS A SEALED, RECHARGEABLE NICKEL-CADMIUM BATTERY. MUST BE RECYCLED OR DISPOSED OF PROPERLY.
The RBRC Battery Recycling Seal on the nickel-cadmium (Ni-Cd) battery contained in this product indicates Wahl is voluntarily participating in an industry program to collect and recycle these batteries at the end of their useful life when taken out of service in the United States or Canada. The RBRC program provides a convenient alternative to placing used Ni-Cd batteries into the trash or the municipal waste stream, which is illegal in some areas. Please call 1-800-8-BATTERY for information on Ni-Cd battery recycling in your area. Wahl’s involvement in this program is part of our commitment to preserving our environment and conserving our natural resources.
Do not mix old and new batteries. Do not mix alkaline, standard (carbon-zinc), or rechargeable (Ni-Cad, Ni-MH, etc.) batteries. Under normal use, the rechargeable nickel-cadmium batteries in your trimmer may last up to five years. At the end of their life, when they will no longer take a full charge, the nickel-cadmium batteries must be removed and recycled or disposed of properly. Do not attempt to replace the batteries. All servicing or battery replacement should be performed by an Authorized WAHL Service Location.
To remove the batteries for recycling or disposal, follow these steps:
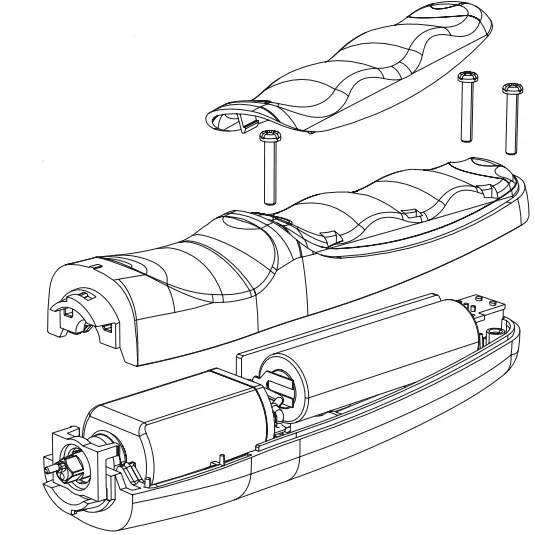
- Unplug the transformer from the outlet, disconnect the cord from the trimmer and allow the batteries to completely run down before disassembly.
- Remove any attached trimming heads.
- Pry open grip pad.
- Remove all 3 screws from the top cover plate.
- Pry the trimmer housing apart.
CARING FOR YOUR TRIMMER
OILING BLADES
For best results, use Wahl Clipper Oil on the blades only when necessary, or approximately once a month. Motor bearings are permanently lubricated—do not attempt to oil. When oiling your trimmer, turn the trimmer “ON – I,” hold the unit with the blades facing DOWN, and squeeze three drops across the front of the blade and one drop on each side on the heel of the blade. Wipe off excess oil with a soft cloth.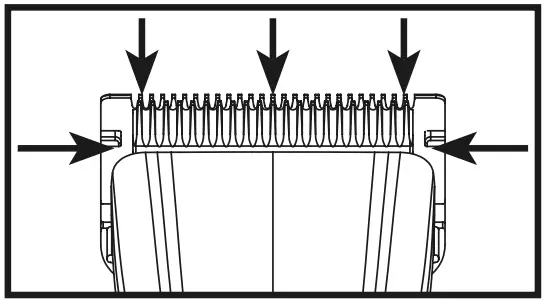
NOTICE—DO NOT OVER-OIL!
Excessive oiling or application of liquids will cause damage if allowed to seep back into the motor.
BLADE CARE
Trimmer blades have precision-hardened, ground, and lapped cutting teeth. Blades should be handled carefully and never bumped or used to cut dirty or abrasive material. Never rinse the blades with water, or the blades may rust. Clean with the included brush.
CLEANING/STORAGE
Before storing your trimmer, use the cleaning brush to whisk any loose hairs from the unit and the blades. For units with a soft-touch grip, use a damp cloth to wipe down the body of the trimmer, taking care not to get the blades wet. Store the unit in such a manner that the blades are protected from damage. When the trimmer is not in use, the trimmer blade guard attachment should be in place to protect the blades. This appliance should be stored in a manner where it is not subjected to crushing, heating above 100°C (212°F), or incineration.
SPECIAL FEATURES
Your trimmer has been designed with several advanced features to help you get perfect results every time you trim. Your trimmer may be used to neatly trim the bikini area, toes, arms, and eyebrows, or anywhere you may need grooming.
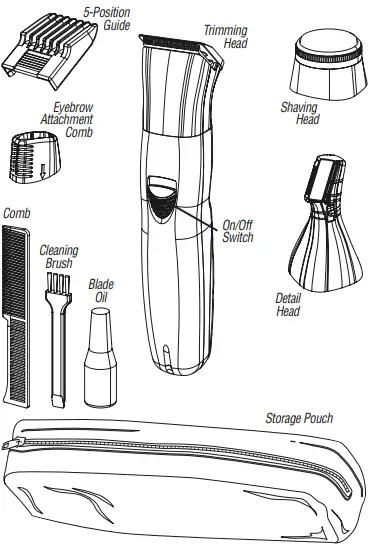
INSTALLATION/ REMOVAL OF TRIMMING HEADS
Make sure the trimmer unit is turned “OFF”.
- Turn the trimmer head counterclockwise 1/4 turn and lift off.
- Place the trimmer head on the trimmer and turn the trimmer head clockwise 1/4 turn to lock it on.
- TRIMMING BIKINI AREA
For detailing the bikini area, slowly move the detailing attachment on the outside of the bikini area to trim and shape until the desired look is accomplished. - TRIMMING TOES
For trimming hair on the toes, slowly move the defining trimmer with the grain of the hair. - TRIMMING ARM HAIR
Simply glide the defining trimmer over the arm until desired “look” is achieved. - TRIMMING EYEBROWS
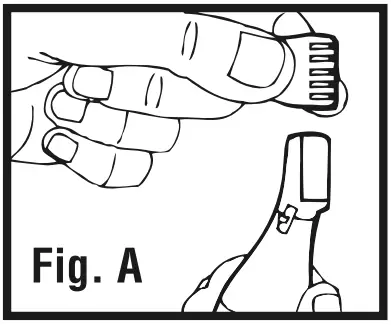
Trimming with detailing head, place eyebrow attachment comb over it. (See Fig. A) The attachment comb allows you to trim and shape eyebrows. Trim by following in the direction of hair growth.
NOTE
Only use on eyebrows. Be cautious around the eye area. Dots molded on the detailing head attachment and on the eyebrow attachment may not always line up straight with dots. The eyebrow attachment comb has two settings; approximately 2mm (S) and 4mm (L). (See Fig. B) The settings will create very short lengths to create a thin brow.
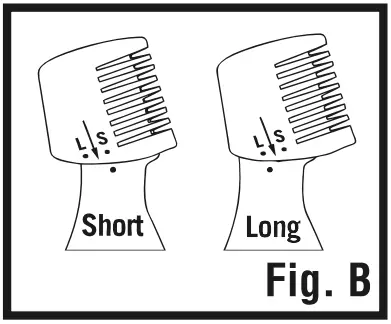
- Choose the desired length. The shortest is nearest to the comb and the longest is the furthest. NOTE: Be advised that you must align the dots for the settings with the dot on the detailing trimmer head. The first time using the eyebrow attachment comb, it is better to start with the longest setting to see what length works best.
- Slide the track of the blade into the chosen slot on the eyebrow attachment comb by following the direction of the arrow. The eyebrow attachment comb should slide in easily, otherwise, it may be misaligned.
- Slide the eyebrow attachment comb until you feel it fasten. The entire length of the blade should be covered.
CAUTION: Do not insert the vertical blade or any other foreign object into the inner ear. For hair growing on the outside of the ear, simply move the vertical blade slowly along the edges of the ear.
CLEANING YOUR TRIMMER
Periodically after use, turn the trimmer “OFF” and rinse both cutting heads under warm, running water. For more thorough cleaning, remove the attached cutting head by turning it slightly counterclockwise. Then rinse the entire head under running water. After cleaning, replace desired cutting head by turning slightly clockwise and wipe the entire trimmer dry with a soft cloth. Always replace the protective cap before storing.
NOTE
Do not submerge detailing head blades under water. Press the release button downwards (See Fig. C) to remove the top plastic housing and brush it out thoroughly.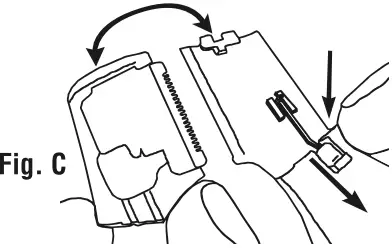
USING THE CONTOUR TRIMMER/SHAVER
A 5-position trimming guide makes achieving a consistent trim easy, every time. The guide can be removed (providing a sixth-cutting position). To attach the guide, simply slide it on. To remove the guide, slide the assembly away from the trimmer. Adjust the trimming length by moving the comb forward or backward to the desired setting.
- Comb bikini hair. Combing your bikini hair in the direction that it grows will help reveal stray hairs and achieve an even, balanced bikini trim.
- Volume reduction. Attach the 5-position guide comb and select a long trimming length. Begin trimming your bikini area, starting with the top and working down. Use a closer setting to get the “look” and length you desire.
- Defining. As a finishing step, use the trimmer without the attachment to make a definitive line around the bikini area. For a more definitive bikini outline, use the detailed head.
For the closest look, simply attach the shaver head. The shaver makes for the perfect tool to groom the total body. Using the same technique, as mentioned prior, you can groom wherever you feel a need. Shave against hair growth while stretching the skin. After every use, remove the shaver foil by pulling the shaver head up and carefully using the cleaning brush provided.
SERVICE AND REPAIR
If you have problems with your trimmer, send it prepaid with a note explaining the problem to:
- Wahl Clipper Corporation
- Attn: Repair Department
- 3001 Locust Street
- Sterling, IL 61081
- Telephone (800) 767-9245
For products purchased outside the United States, contact your distributor.
60-Day Money Back Guarantee
If for any reason within 60 days of purchase of your Wahl trimmer, you are not satisfied with your trimmer and would like a refund, just return your trimmer, together with the sales receipt, to the retailer from whom you purchased it. Wahl will reimburse all retailers who accept trimmers within 60 days of purchase. If you have any questions regarding this money-back guarantee, please call 1-800-767-9245 in the United States.
FAQ’s
The trimmer will run for about 10 minutes on a full charge. If it is not used for a long period of time, recharge it before use.
Make sure the recharging transformer is plugged into an outlet that is working. Check the outlet by plugging in another appliance. Make sure the outlet simply is not connected to a light switch that turns the power at the outlet off when lights are turned off. Be sure the trimmer is properly connected to the recharging transformer, all connections are clean and tight. If this does not solve your problem, contact Wahl Consumer Services at 1-800-243-9895.
It may be necessary to replace the battery if your electric Wahl Razor won’t turn on. The back needs to be removed and unclipped in order to achieve this. After that, the battery is fastened between two prongs. Following the removal of the battery, a Battery Set, 2 “AA” Ni-Cad 2.4 is installed in its place.
Energize it! To charge, turn the clipper off, attach the charger, and plug it into an outlet (see instruction sheets and charger for warnings and electrical specifications). Once power is connected, the clipper’s power indicator light will turn on. The charging process for the clipper will take three to five hours.
The lithium-ion battery in Wahl’s LifeProof Shaver allows it to be recharged. Because it is waterproof, you can use it both wet and dry.
The charge indicator is illuminated while charging. When almost fully charged, the charge indicator will start to flash, and when fully charged, it can turn off. The device can run continuously for up to 120 minutes when the battery is fully charged.
Wahl will, at our discretion, repair or replace your product and send it back to you FREE OF CHARGE if it stops working properly within the stated number of years (see packaging for the duration of warranty) following the date of initial purchase or reception as a gift. For support, dial 1-800-767-9245 instead.
A shaver’s performance can be significantly impacted by hair clippings, grime, dead skin, or lather buildups. You may need to thoroughly clean your shaver more frequently depending on whether you use it dry or wet.
Batteries eventually become incapable of being recharged. Your razor will begin to retain less and less electric energy as that occurs. Over time, that will cause the motor to gradually slow down. Even while your razor will turn on just fine when the battery is sufficiently worn out, it won’t cut as well.
You can leave your shaver plugged in and charging in between uses because it cannot overcharge.
The charging process will take the battery about 60 minutes. The lithium-ion trimmer also has a quick charge feature; it can be charged in 1 minute and used for more than 3 minutes.
Described as an all-in one trimmer, shaver, detailer, and groomer, the Wahl Lithium Ion Aqua Blade Deluxe Wet/Dry Trimmer. For optimal convenience and simple cleanup, this trimmer boasts a washable shower-proof construction.


