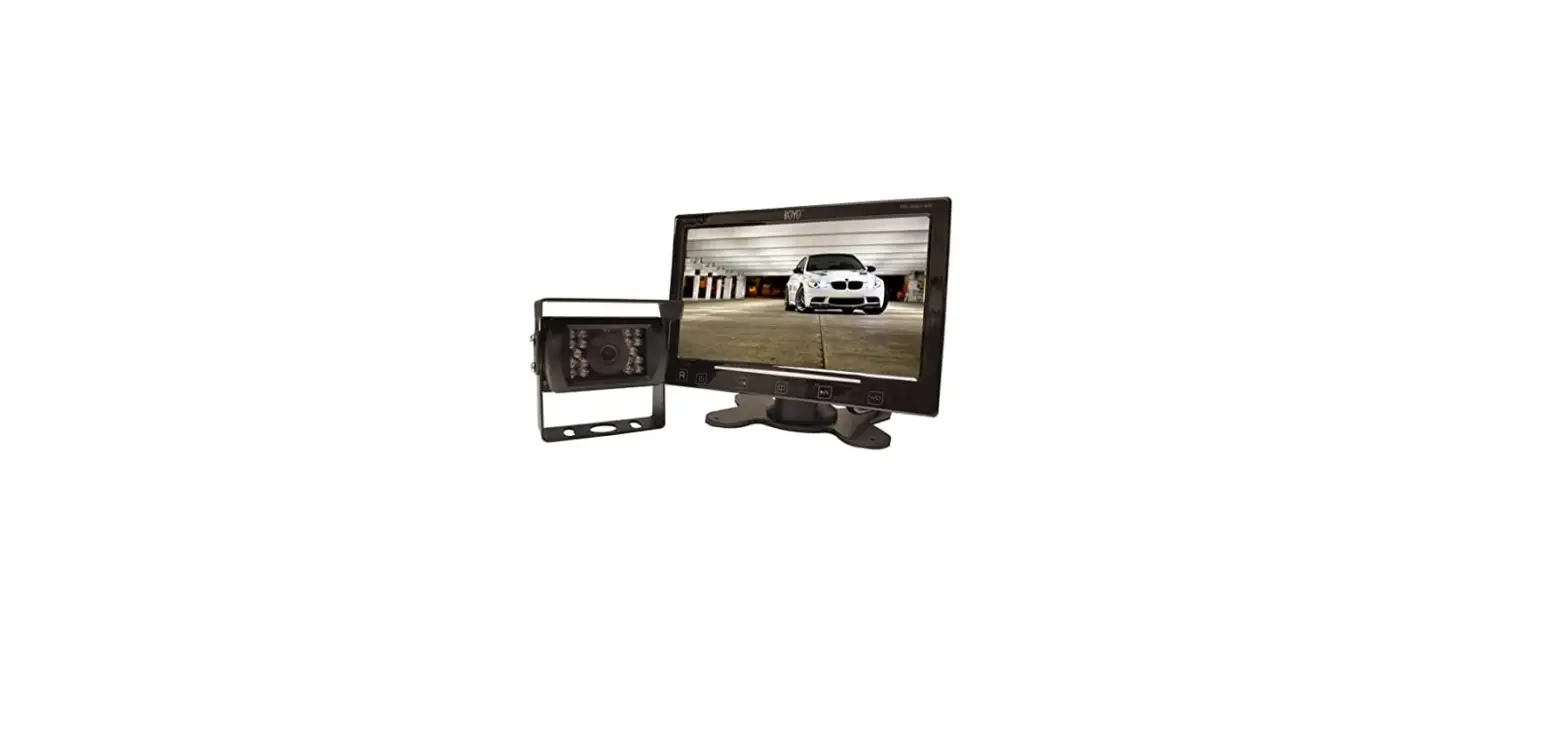
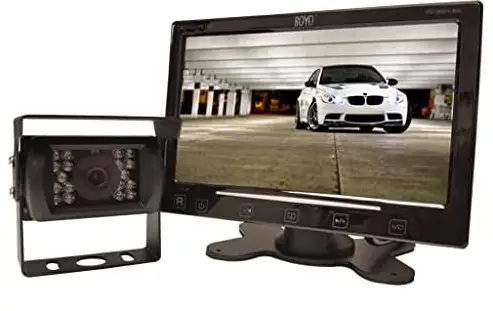
 BOYO VISION VTC307M Vehicle Backup Camera
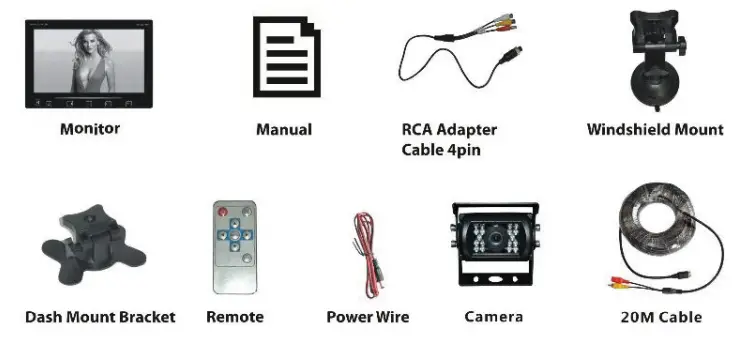
BILL OF MATERIAL
SPECIFICATION
Monitor
- Screen Type: 7″ Digital TFT LCD
- 2 Video Input and 1 camera input
- Built-in Speaker
- Display Format: 16:9
- Power: SW+
- Power supply: 12VDC – 15V
- Reverse trigger wire
- PA.L/ NTSC auto switch
- Pixel: 800×480
- Slim and Sleek Design
- Contrast: 3S0:1
- Dimension: 7″ 0/’J) x 4.75″ (H) x 0.5″ (D)
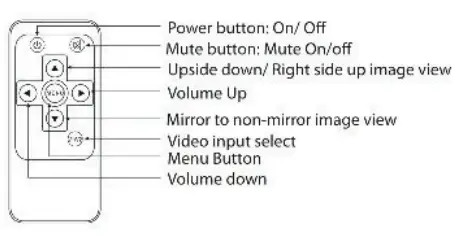
- Power button: Open/ sleeping mode
Volume-Adjust – - Menu: param eter-adjust
- Menu
- Volume adjust+
Menu: parameter-adjust - Short Press for video input select
- Long Press for up, down, right, left image view modes
Camera
- Weatherproof and water resistant
- Mirror/ Non-Mirror image selectable switch
- Wide-angle lens 170< 360-degree adjustable mounting angle
- Auto-iris lens that automatically adjusts to light conditions
- Infrared light for improved image quality in low-light situations
- Nightvision distance of approx 8M
- 20M Extension Cable Included
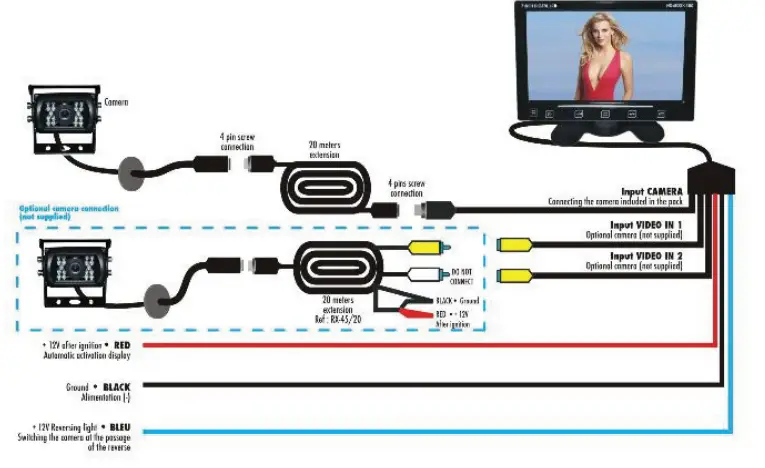
WIRING
INSTALLATION
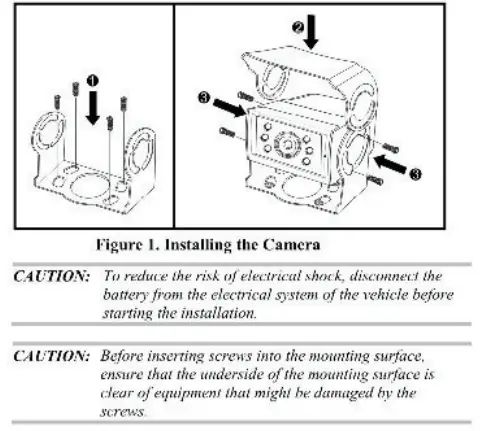
Install theVTB301 C as follows:
- Install the VTB301 c camera in the desired location, as follows:
- Fasten the camera mounting bracket. using the 4 self-tapping
- Philips screws. to the desired mounting surface. as shown in the Step 1 arrows of Figure 1.
- Position the camera in the camera mounting bracket.
Adjust the camera to the proper angle, and then attach the camera and sun visor to the camera mounting bracket using the 4 supplied hex-head machine screws (with washers}, as shown in Step 2 and Step 3 arrows of Figure 1.
- Route the extension cable from the camera location to the location of the output device (not supplied), such as a monitor or switcher.
- Insert the male connector of the extension cable into the appropriate female audio/video port of the output device (not supplied), such as a monitor or switcher.
0THERS
Normal/Mirror Selector
The camera default setting is in reverse viewing. To change to non-mirror viewing, unplug the jumper plug with the white wires and re-power the camera for the changes to take effect.
Grid Line Selector
The camera default setting is grid line on. To turn off the grid lines. unplug the jumper plug with the blue wires and re-power the camera for the changes to take effect.
For technical support contact 888-941-3060 or email [email protected]
WWW.VISIONTECHAMERICA.COM
FAQS
Blue lines outside the white lines indicate that your car is heading in the right direction. A dotted black line is the center line guide that helps you line up your vehicle in front of a trailer or camper. Green lines represent objects farthest from your vehicle. Red lines represent objects nearest your vehicle.
If a driver does not get a rearview camera feed while in reverse, there is likely some issue with the electrical system. Most likely, the camera itself behind your vehicle is not the problem. The very first step to troubleshooting this issue is to check the manual provided by the manufacturer.
Not every backup camera has an adjustable lens or enclosure. This means adjusting the angle of the camera includes adjusting the entire mount. Simply remove the mount from the vehicle and place washers, bolts, or grommets between the mount and the surface of the vehicle and refasten the screws or bolts.
The best place to put a reversing camera is in the middle of the vehicle. Being fitted in a lower position will give it a better field of view – or high up looking downwards. For example, the rear bumper is ideal – but on some vehicles above the rear doors can also be suitable.
In order to wire a backup camera to be on all of the time, you would have to wire it into the running light circuit instead of the reverse light circuit. This way, when you wanted it on, you would just turn the running lights on
Description. The red wire at the end of video cable are extra power wires runs inside the video cable, It’s purpose is-if you power easily in the rear from the reverse lights, you can get your power fro the rear and use this to bring it to the front.
If the reverse camera is misbehaving and showing the message, “No Signal” instead of an image on the dashboard monitor, then the connection between the reverse camera and the monitor has been interrupted. This is likely caused by a connection point fully dislodging or the wiring circuit being completely cut through
Most rear view backup cameras today come with a 120-degree viewable angle, it is the minimum you should have and if the option to upgrade to 170 degrees is available we suggest you take it. This will allow you to see approximately 3 lanes behind you.
A rear view mirror system (also known as a Reverse camera mirror) is the most popular type of reversing camera system. It replaces the existing rear view mirror in your vehicle, with one that has a LCD screen integrated. When you select the reverse gear, the screen appears. This type of mirror needs power.
Step 1: Long-tap on the Camera app icon and open the app info menu. Step 2: Go to Storage & cache menu. Step 3: Tap on Clear cache and you are all set to use a working Camera app on Android.
No you don’t have to drill a hole in your car. you can feed the wire for the back up cam through the tag, light, or even through the grommet.
Although many high-end reversing cameras in the market are designed to work in a wide variety of lighting conditions, these can provide a clear image in near or total darkness. This is where the infrared night vision illumination or light emission diode (LED) helps.
If the camera is installed and connected to the ignition circuit for main power, the dash camera will never drain your battery.
Backup camera – a camera that turns on when you put your vehicle in reverse. Rear-view camera – a camera that you can turn on at any time to see what’s behind your vehicle.


