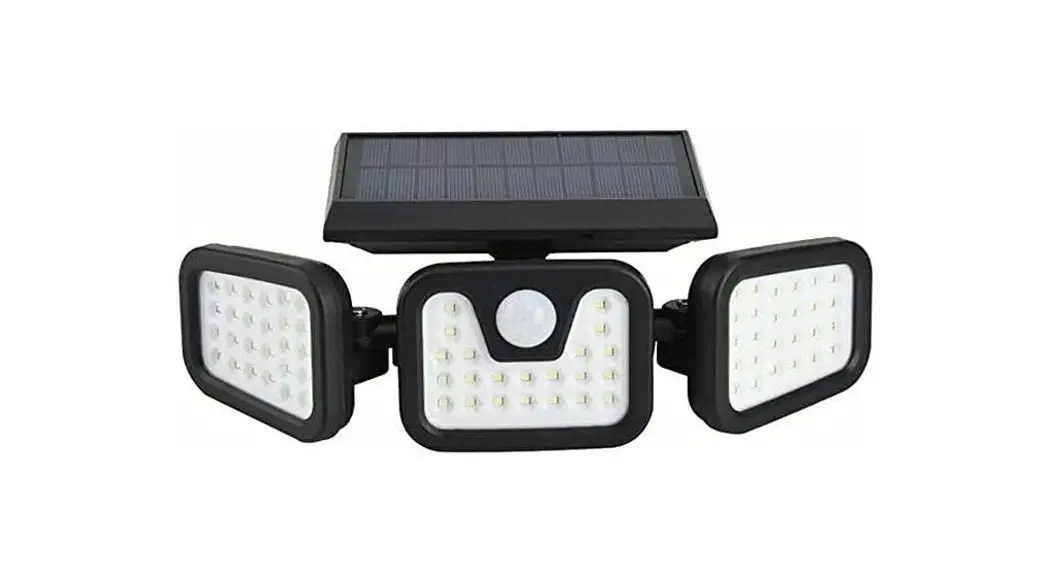
![]() NBBR3HOSMSL 3 Headed Outdoor Solar Motion Sensor Light
NBBR3HOSMSL 3 Headed Outdoor Solar Motion Sensor Light
User Guide
SAFETY & WARNINGS
Ensure to read all instructions and warnings in this user guide prior to first use. Retain this user guide for future reference.
- Do not install this light near flames or flammable gases.
- Do not install this light near other light sources.
- Keep the light away from children.
- Do not install on an unstable surface or position.
- Do not stare directly at the light while it is on.
- To prevent the unit from falling, ensure the screws and wall plugs used are fully secured.
- This light is not a crime-prevention measure. Always take reasonable precautions in securing your home and protecting yourself.
- If the light is damaged, stop use and contact help.Kogan.com for assistance.
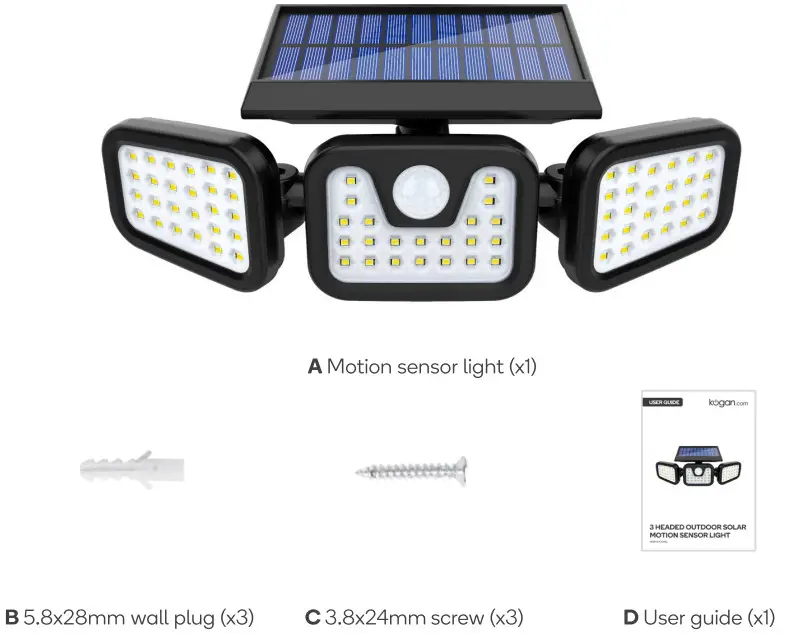
COMPONENTS
OVERVIEW
Front view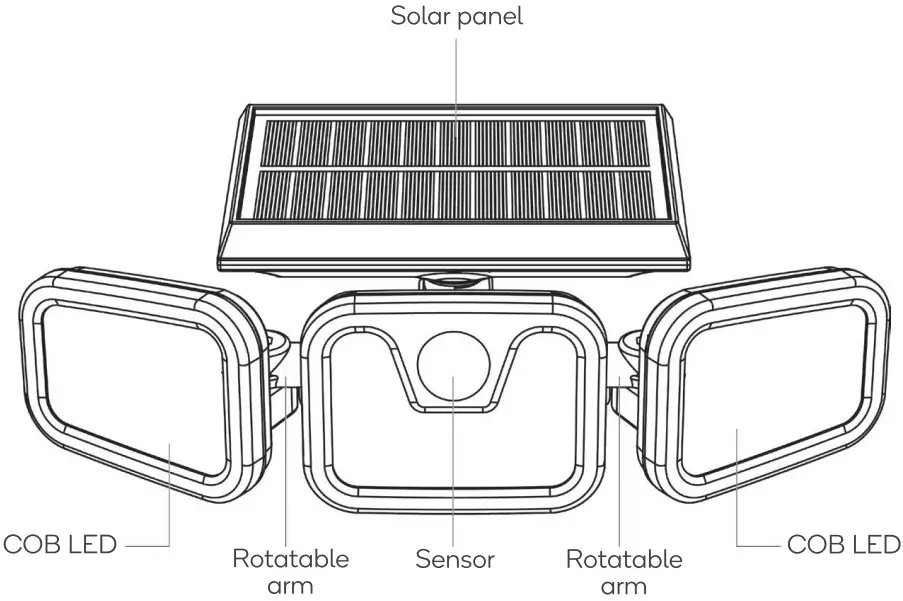
Back view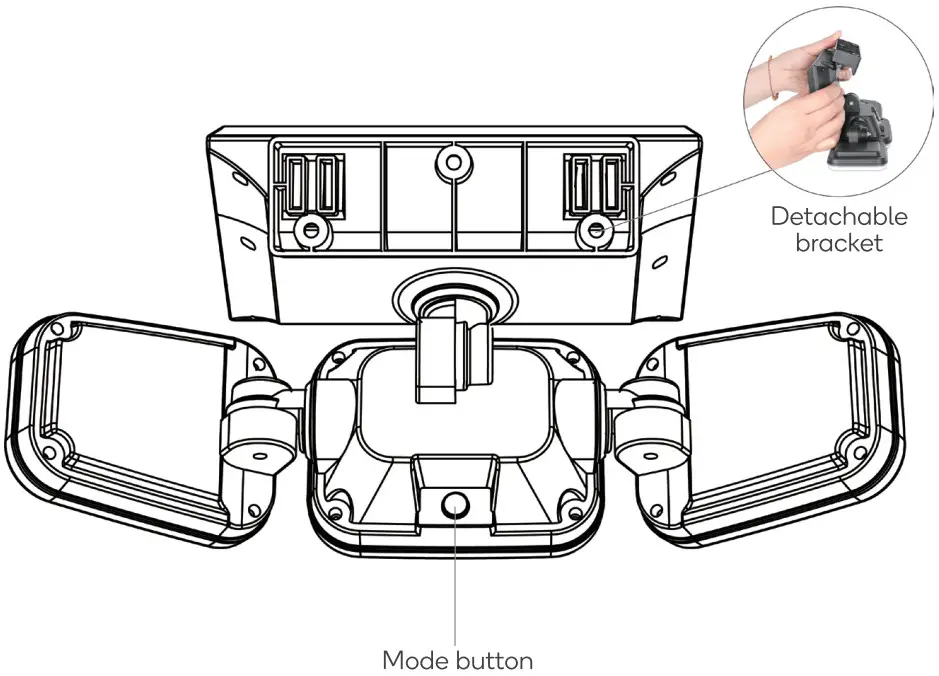
BEFORE INSTALLATION
Expose the solar panel to sunlight for eight hours to ensure a sufficient charge.
Press the mode button to switch on the light prior to installation.
INSTALLATION
Ensure the light is installed at a height between three and five metres above the ground.
Installing onto a masonry wall
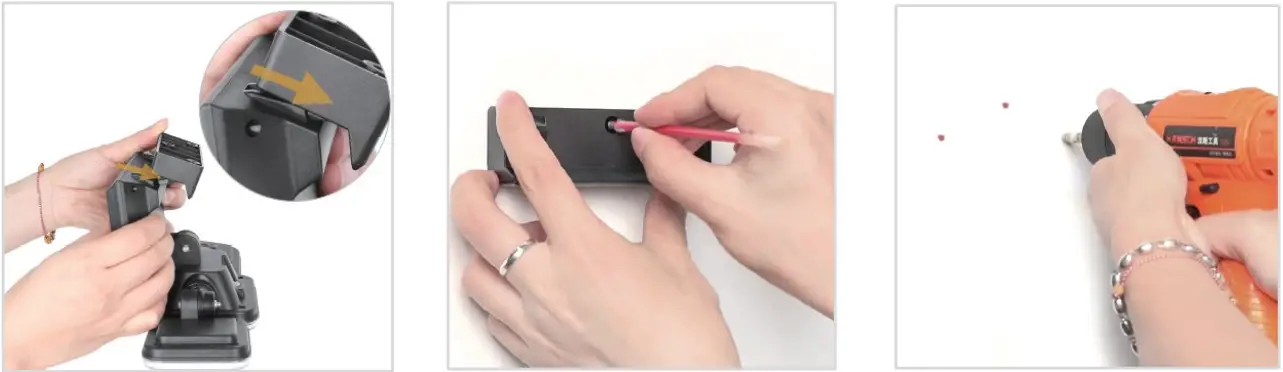 | ||
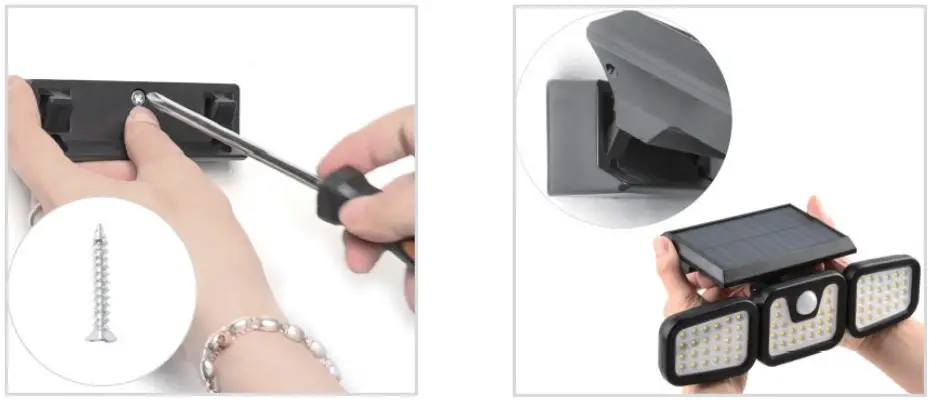
| 1. Detach the bracket from the light. | 2. Place the bracket on the wall where you would like to install the light. Using a pen (not supplied), mark the positions of the three holes of the bracket. | 3.Using a drill and 5.8mm drill bit (not supplied), drill holes 28mm deep through the three marked positions. |
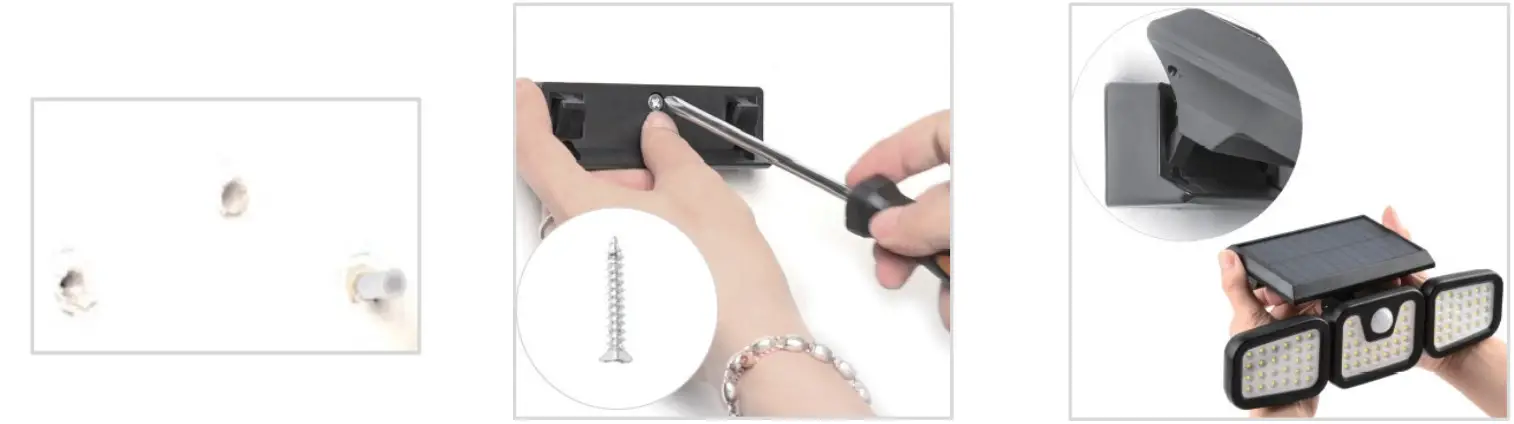 | ||
| 4.lnsert the wall plugs into the drilled holes. | 5.Align the bracket with the holes. Using a Phillips screwdriver (not supplied), secure the bracket with the screws. | 6.Attach the light onto the bracket. |
Installing onto a non-masonry wall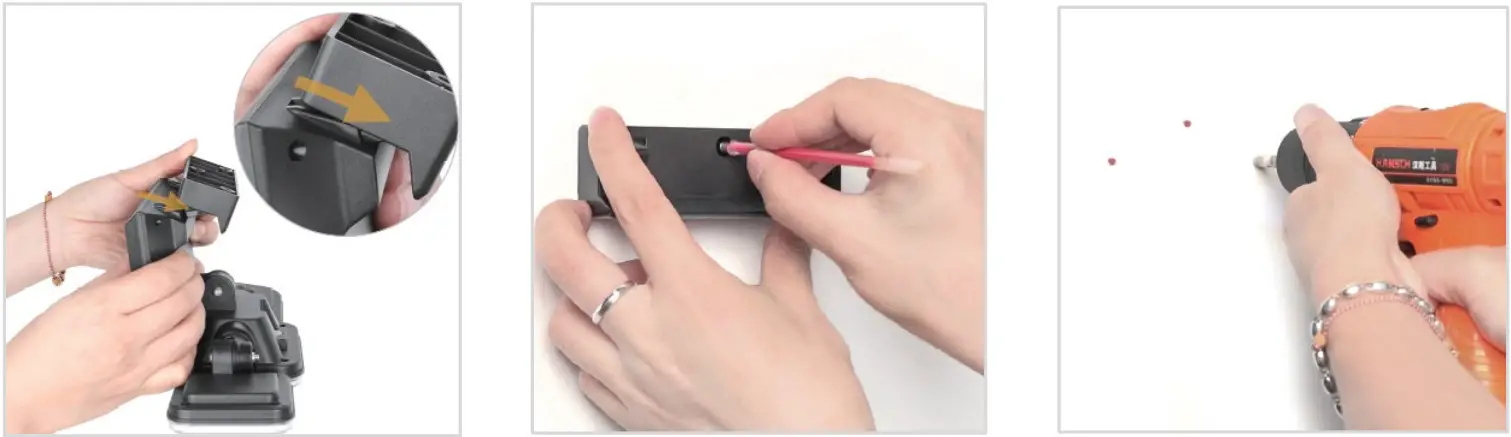 | ||
| 1. Detach the bracket from the light. | 2. Place the bracket on the wall where you would like to install the light. Using a pen (not supplied), mark the positions of the three holes of the bracket. | 3. Using a drill (not supplied), drill pilot holes through the three marked positions. |
 | ||
| 4.Align the bracket with the holes. Using a Phillips screwdriver (not supplied), secure the bracket with the screws. | 5.Attach the light onto the bracket. | |
OPERATION
Modes
This light features three ight modes. Dress the mode button to cycle through the three modes
In mode I, the bght will illuminate at 100% brightness when people are detected. The light will then turn off 20 seconds after people leave its vicinity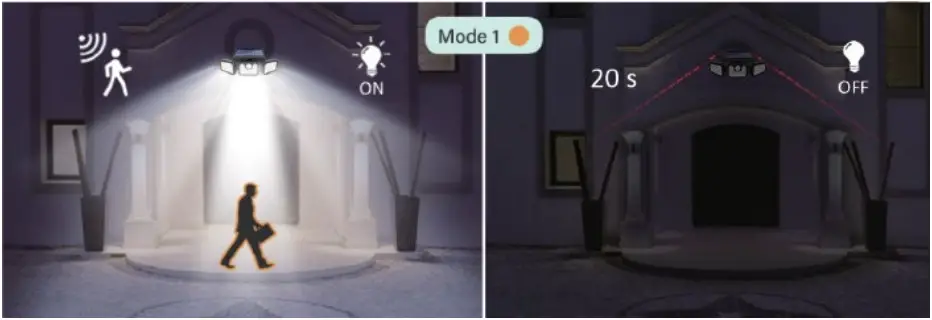 In mode ,the light will illuminate constantly ot 10% brightness. It will then illuminate at 100% brightness when people are detected
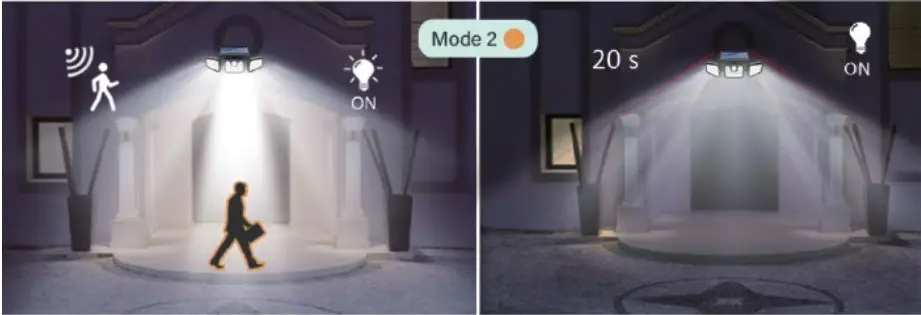 In mode 3, the light will illuminate at a constant 30% brightness at might regardless of whether people are withir its vicinity.
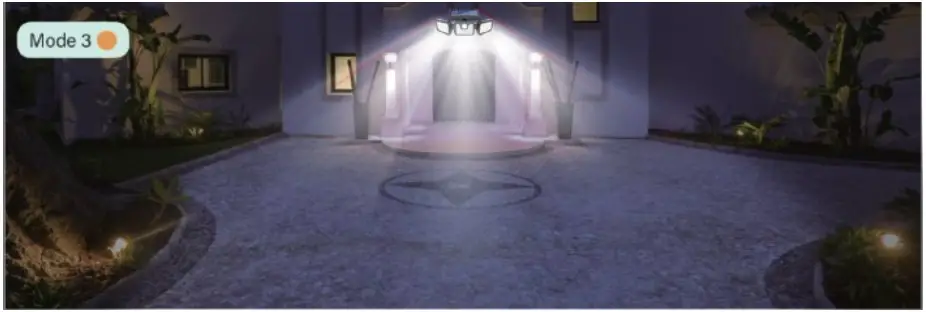
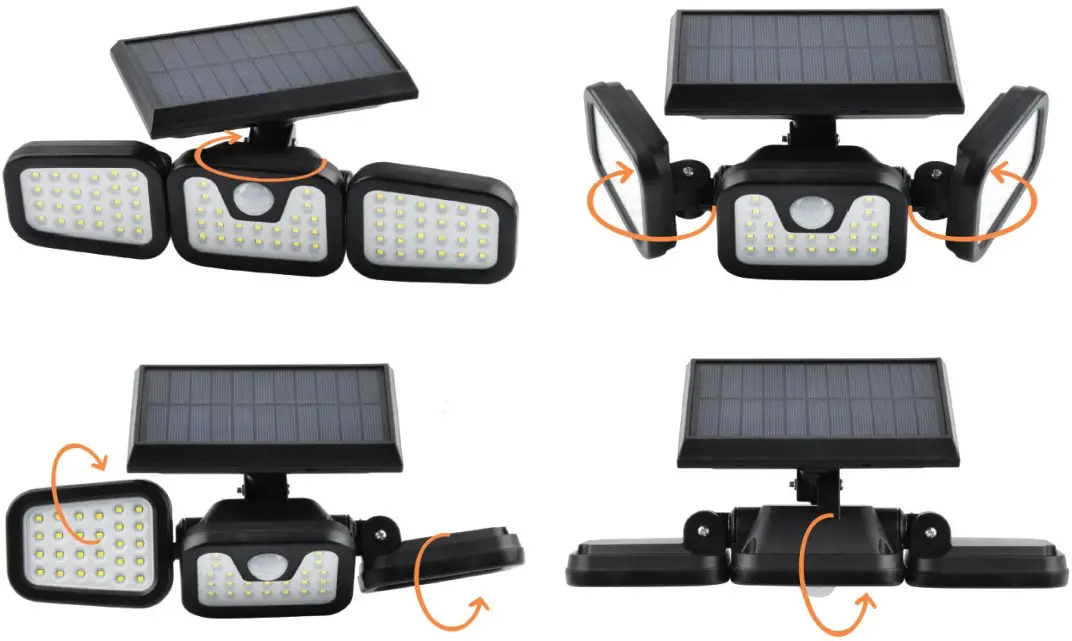
Angle adjustment
The angle of the LED and solar panels can be adjusted by turning them as seen below.
TROUBLESHOOTING
If the light is not illuminating, try the following solutions below:
- Ensure the light is not installed under the shade during the day.
- The solar panel/battery may need to be charged. Ensure the solar panel is located under direct sunlight, then allow it to charge.
SPECIFICATIONS
| Solar panel power | 5.5V, 1.8W |
| Material | ABS |
| Light source | COB LED |
| Battery | Built-in 2pcs DC3.7V 1200mAh lithium battery |
| IP rating | IP44 |
| Delay time | 20-25 seconds |
| Number of modes available | 3 |
| Detection range | 3-7 metres |
| Brightness | 550lm |
| Colour temperature | 6000-6500K |
| Consumption | 10W |
| Induction angle | 120° |
NOTES: ————————–
![]() Need more information?
Need more information?
We hope that this user guide has given you the assistance needed for a simple set-up.
For the most up-to-date guide for your product, as well as any additional assistance you may require, head online to help.kogan.com
kgan.com


 User Guide")


