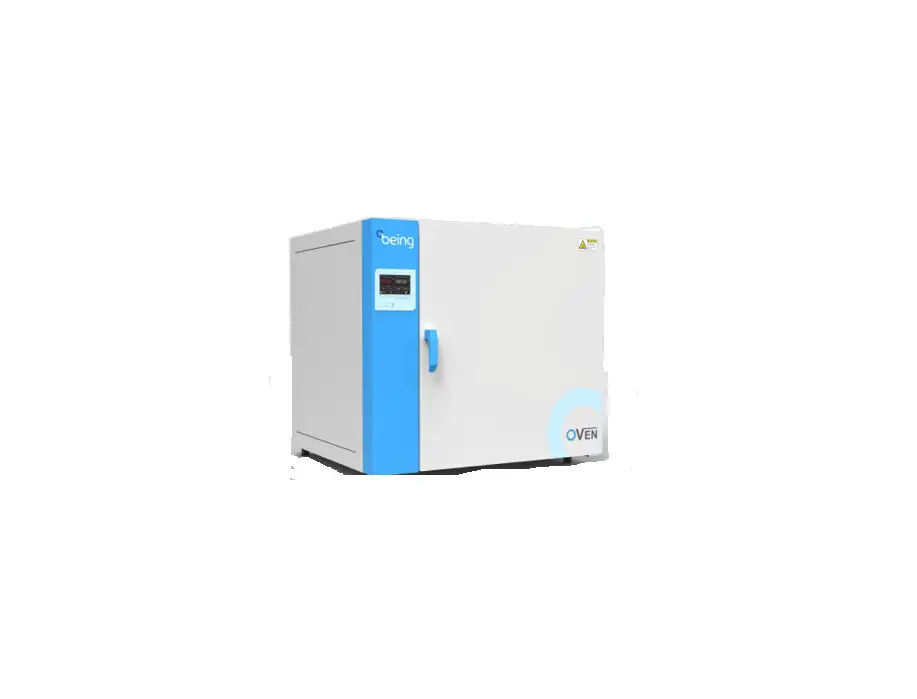
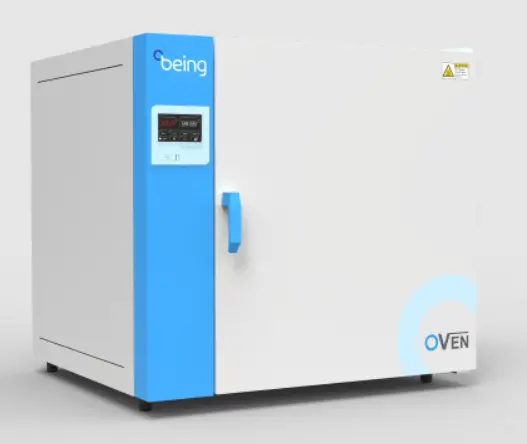
being BOF-30T Drying Ovens User Guide

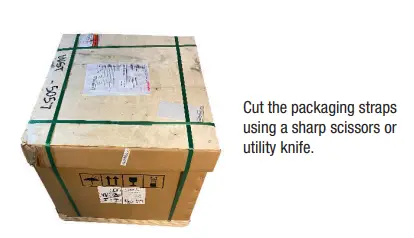
STEP 1: Cut and remove straps
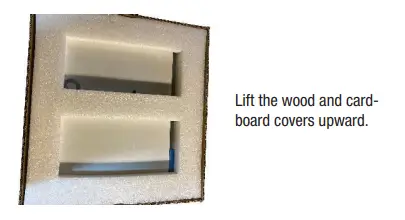
STEP 2: Remove the wood and cardboard covers.
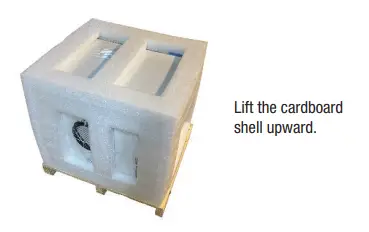
STEP 3: Remove the cardboard shell.
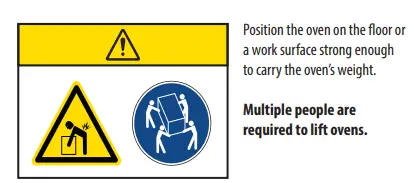
STEP 4: Place oven on fl oor or work surface
| Model | Weight (lbs / Kg) | Model | Weight (lbs / Kg) |
| BOF-30T | 94.8 / 43 | BON-30T | 94.8 / 43 |
| BOF-50T | 112.4 / 51 | BON-50T | 99.2 / 45 |
| BOF-120T | 183.0 / 83 | BON-115T | 163.1 / 74 |
| BOF-200T | 246.9 / 112 | BON-200T | 227.1 / 103 |
| BOF-400T | 463.0 / 210 | ||
Registration Instructions
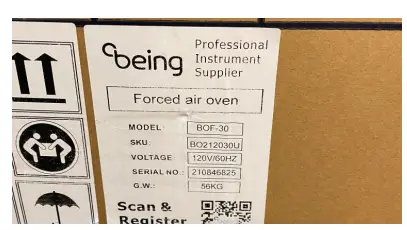
STEP 1: Find the product identifi cation label.

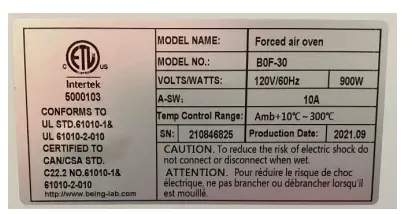
Back of the oven above the power cord.
STEP 5: Remove the foam padding.
STEP 6: Remove the plastic cover
STEP 6: Remove the plastic cover
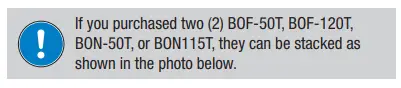
STEP 7: Place the second oven on the fi rst oven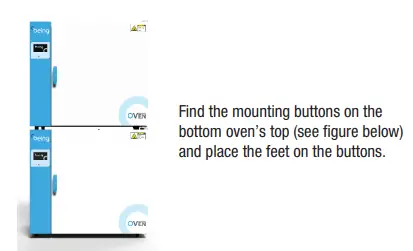
Outside of the cardboard shell
STEP 2: Scan the QR code or visit to
https://www.beinglab-usa.com/product-registration
Setup Instructions
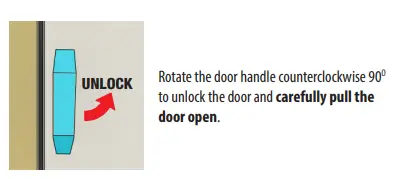
STEP 1: Unlock and open door.
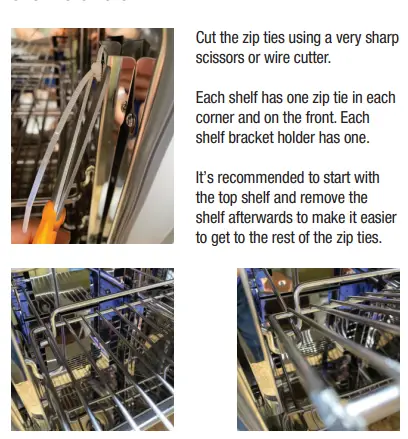
STEP 2: Remove the zip ties, shelving, and shelf hardware.
Pull shelf out to the stop. Raise shelf until stop clears the shelf bracket and continue pulling it out.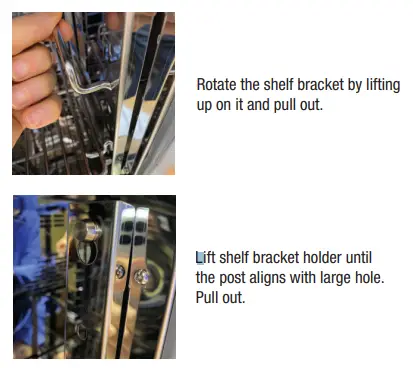
STEP 3: Clean oven interior, shelving, and shelving hardware.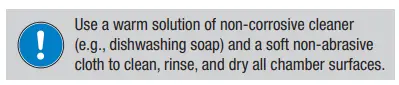
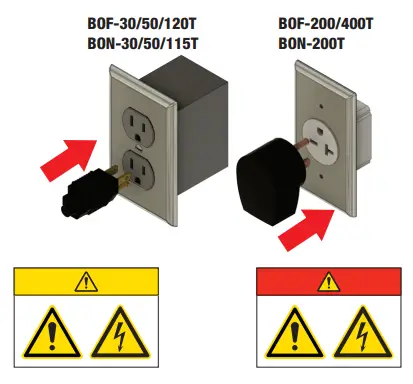
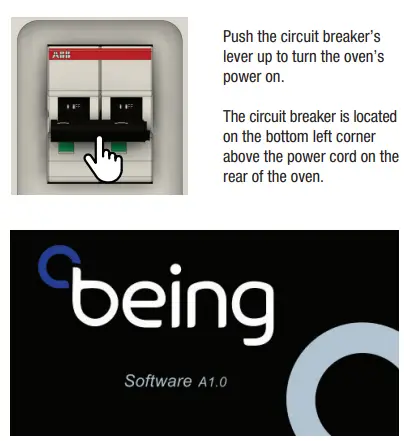
STEP 7: Plug the oven’s electrical cord into appropriate outlet.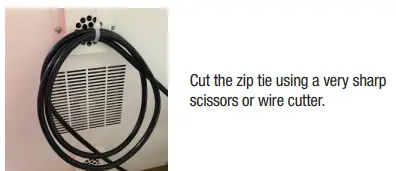
STEP 8: Turn on unit power.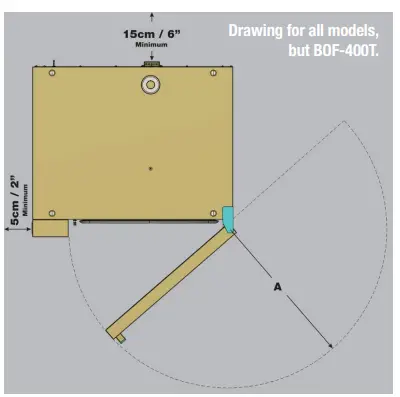
| Model | A (mm / in) | Model | A (mm / in) |
| BOF-30T | 470 / 18.5 | BON-30T | 470 / 18.5 |
| BOF-50T | 550 / 21.7 | BON-50T | 550 / 21.7 |
| BOF-120T | 670 / 26.4 | BON-115T | 670 / 26.4 |
| BOF-200T | 800 / 31.5 | BON-200T | 800 / 31.5 |
| BOF-400T | 430 / 16.9* | *Each door. Has two doors. | |
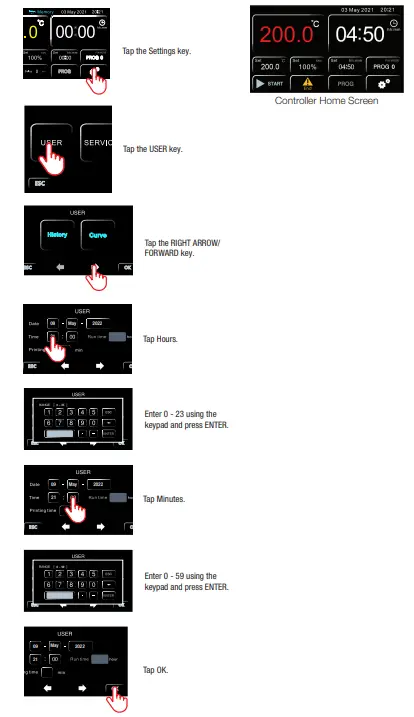
This screen will appear upon powering up the oven.
STEP 8: Turn on unit powe
Touchscreen Overview
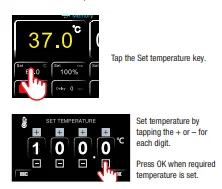
STEP 9: Review date and time.

STEP 10: Change time
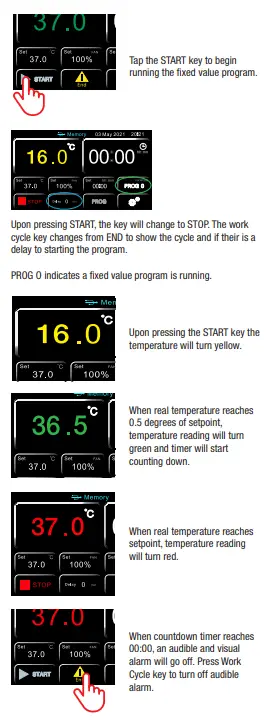
Setting Fixed Value Program Instructions
STEP 1: Set temperat
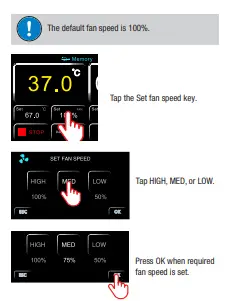
STEP 2: Set fan speed BOF SERIES ONLY
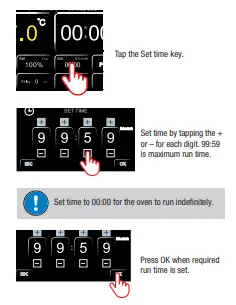
STEP 3: Set run time
STEP 4: Press START